Table of Contents
Advertisement
Quick Links
Advertisement
Table of Contents

Related Manuals for JB Systems EZ-CON 192


Summary of Contents for JB Systems EZ-CON 192
-
Page 3: Before Use
ENGLISH USER MANUAL OPERATION MANUAL ® Thank you for buying this JB Systems product. To take full advantage of all possibilities and for your own safety, please read these operating instructions very carefully before you start using this unit. FEATURES •... -
Page 4: Safety Instructions
• Due to safety reasons it is prohibited to make unauthorized modifications to the unit. Important: Never look directly into the light source! Don’t use the effect in the presence of persons suffering from epilepsy. JB SYSTEMS® 2/12 EZ-CON 192... - Page 5 • SCENE: A scene is a set of different fader values that describes a certain condition at a given moment. Example: You have set the faders on the EZ-CON 192 to put a fixture in a certain direction, with a certain gobo and a certain color. The combination of these different fader values is called “SCENE”...
- Page 6 29. [PAGE A] INDICATOR: Lit when page A (channels 1 -> 8) is active 30. [AUDIO input]: receives audio from any line or record output on audio equipment. If this input is not used, the internal microphone of the EZ-CON 192 takes over. 31. [MIDI] INPUT: Can be used to receive MIDI data.
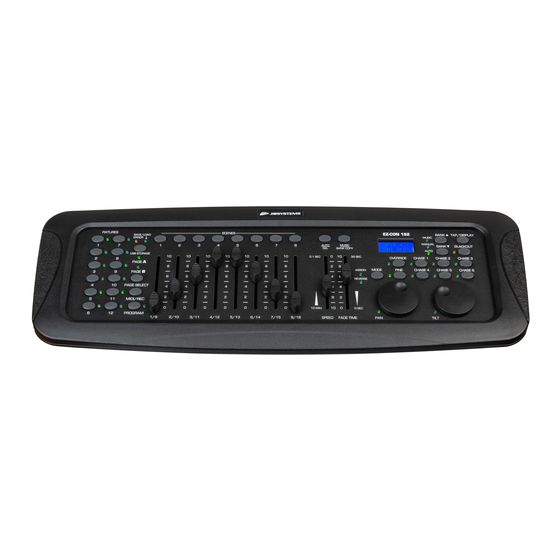
- Page 7 SET UP buttons”. Each fixture button 1. [FIXTURE SETUP]: The EZ-CON 192 has 12 [FIXTURES] (1) represents 16 DMX channels. (8 faders on page A and 8 faders on page B) The following chart helps you to set up the DMX-start address on your fixtures:...
- Page 8 • Use the [BANK ▲/▼] (14) buttons to select the MIDI channel 1 to 16 you would like the EZ-CON 192 to be activated from. • Press and hold down the [MIDI/REC] (26) button again for three seconds: the MIDI operation is now on. JB SYSTEMS® 6/12 EZ-CON 192...
- Page 9 120 TO 125 1 to 6 Chases BLACK OUT BLACKOUT The EZ-CON 192 only receives MIDI notes and you may have to transpose your keyboard to find the proper notes SCENES PROGRAMMING A SCENE: Enter program mode (Press and hold the PROGRAM (25) button until its LED blinks) Check the BLACKOUT (17) button and verify that the LED is not blinking.
- Page 10 Before programming chases for the first time it is recommended you delete all chases in the controller. See Delete All Chases for instructions on how to do so. DELETE ALL CHASES: JB SYSTEMS® 8/12 EZ-CON 192...
- Page 11 Verify that the [BLACKOUT] LED (17) is not blinking. If it is, press the [BLACKOUT] (17) button once to exit blackout mode. Press the button (15) of the chase you wish to edit. Use the [BANK ▲/▼] (14) button to select the bank of scenes you wish to add. JB SYSTEMS® 9/12 EZ-CON 192...
- Page 12 Use the [BANK ▲/▼] (14) buttons to manually show the different steps of the chase. Eventually select another chase and repeat steps e and f. (pressing the same chase a second time unselects it) JB SYSTEMS® 10/12 EZ-CON 192...
-
Page 13: Override Function
SAVE/LOAD DATA ON/FROM USB MEMORY STICK The EZ-CON 192 allows you to save or load your shows on or from a USB memory stick. SAVE DATA : Turn off the power. -
Page 14: Maintenance
During loading the data, the green LED [SAVE/LOAD] (4) will light up. Once the data is loaded, the EZ-CON 192 will return to its normal working mode. Note : When the yellow LED [ERROR] (3) lights up, the message [usberror] will appear on the display (12) indicating there has an error occurred during the loading procedure.
Need help?
Do you have a question about the EZ-CON 192 and is the answer not in the manual?
Questions and answers