TSC Printronix MB240 Series User Manual
Industrial barcode printers
Hide thumbs
Also See for Printronix MB240 Series:
- User manual (91 pages) ,
- Service manual (59 pages) ,
- Programming manual (434 pages)

Related Manuals for TSC Printronix MB240 Series


Summary of Contents for TSC Printronix MB240 Series
- Page 1 MB240 Series Thermal Transfer Direct Thermal Industrial Barcode Printers Series Lists: User Manual MB240/MB340 MB240T/MB340T...
- Page 2 All other trademarks are the property of their respective owners. Information in this document is subject to change without notice and does not represent a commitment on the part of TSC Auto ID Technology Co. No part of this manual may be reproduced or transmitted in any form or by any means, for any purpose other than the purchaser’s personal use, without the...
-
Page 3: Table Of Contents
Table of Contents 1. Introduction ........................................1 1.1 Product Specification .......................................2 1.1.1 Product standard feature ..................................2 1.1.2 Printer Optional Features ..................................4 1.1.3 Label Print Module Features (Optional) ..............................5 1.2 Printer Specifications ....................................6 1.3 Print Specifications ......................................7 1.4 Ribbon Specifications ....................................8 1.5 Media Specifications ....................................8 2. - Page 4 5. TSC Console ........................................32 5.1 Start TSC Console ..................................... 32 5.2 Setup Ethernet Interface .................................... 34 5.3 Set WiFi and Add to TSC Console Interface .............................. 36 5.4 Initialize the Printer WiFi Setting ................................39 5.5 Printer Function ......................................40 5.6 Setting Post-Print Action ....................................
- Page 5 6.3 Setting ........................................44 6.3.1 TSPL ........................................45 6.3.2 ZPL2 ........................................47 6.4 Sensor ........................................50 6.5 Interface ........................................51 6.5.1 Serial Comm......................................52 6.5.2 Ehernet ........................................ 53 6.5.3 Wi-Fi ........................................54 6.5.4 Bluetooth ......................................55 6.6 Advanced ........................................56 6.7 File Manager ......................................
-
Page 6: Introduction
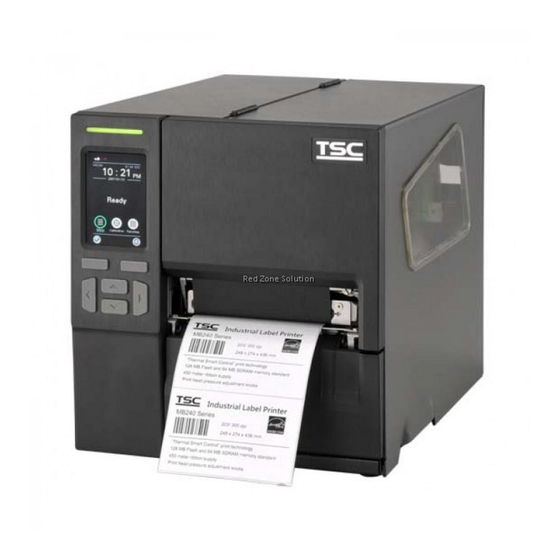
1. Introduction TSC MB240 series of industrial thermal label printers is the new value leader for 4” wide light industrial label printing. The MB240 features a small footprint, easily understandable operator interface and a full set of options to meet nearly every printing application. -
Page 7: Product Specification
1.1 Product Specification 1.1.1 Product standard feature Model MB240 MB340 MB240T MB340T 203 dots/inch 300 dots/inch 203 dots/inch 300 dots/inch Resolution (8 dots/mm) (12 dots/mm) (8 dots/mm) (12 dots/mm) Printing method Thermal transfer & direct thermal Mechanism Die-cast base and frame/ Metal cover with two hinges & large clear media view window ... - Page 8 Head open sensor 8 alpha-numeric bitmap fonts Internal font One Monotype Imaging® CG Triumvirate Bold Condensed scalable font Built-in Monotype True Type Font engine Command set TSPL-EZD Font & bar code 0, 90, 180, 270 degree rotation ...
-
Page 9: Printer Optional Features
Media type: receipt, tag, and label liner w/o glue 5” O.D Full internal rewinding module KP-200 Plus keyboard display unit Print engine module (203 dpi/ 300 dpi) Note: Except for the linerless cutter, all TSC regular/heavy duty/care label cutters DO NOT cut on media with glue. -
Page 10: Label Print Module Features (Optional)
1.1.3 Label Print Module Features (Optional) The label print module offers the following features. MB240 Series MB340 Series Resolution 8 dots/mm (203 dpi) 12 dots/mm (300 dpi) 177 mm (7”)/second Max. print speed 254 mm (10")/second 108 mm (4.25”) 105.7mm (4.16”) Max. -
Page 11: Printer Specifications
1.2 Printer Specifications Model MB240 MB340 MB240T MB340T Physical dimensions 248 (W) x 274 (H) x 436 (D) mm Weight 9.0 kg 9.2 kg Auto sensing power supply (20% print ratio) Power Input: AC 100-240V, ~2.0A, 50-60Hz Output: DC 24V, 3.75A; 90W ... -
Page 12: Print Specifications
1.3 Print Specifications Print Specifications 203 DPI Models 300 DPI Models Print head resolution 203 dots/inch 300 dots/inch (dots per inch/mm) (8 dots/mm) (12 dots/mm) Printing method Thermal transfer and direct thermal 0.125 x 0.125 mm 0.084 x 0.084 mm Dot size (width x length) (1 mm = 8 dots) (1 mm = 12 dots) -
Page 13: Ribbon Specifications
1.4 Ribbon Specifications Ribbon outside diameter Max. 81.3 mm O.D. Ribbon capacity 450 meter 1” (25.4 mm) Ribbon core 40 mm ~ 110 mm (0.157” ~ 4.33”) Ribbon width Ink coated outside wound, ink coated inside wound Ribbon wound type 1.5 Media Specifications Max. -
Page 14: Operation Overview
2. Operation Overview 2.1 Unpacking and Inspection This printer has been specially packaged to withstand damage during shipping. Please carefully inspect the packaging and printer. Please retain the packaging materials in case you need to reship the printer. Unpacking the printer, the following items are included in the carton. 1 printer unit ... -
Page 15: Printer Overview
2.2 Printer Overview 2.2.1 Front View MB240/MB240T Series LED indicator LED indicator Icons and LED indicators LCD touch display Pause button Front panel buttons Feed button Media view window Media view window Paper exit chute Paper exit chute Media cover handle Media cover handle... -
Page 16: Interior View
2.2.2 Interior View Ribbon rewind spindle Print head pressure adjustment knob Print head release lever Ribbon supply spindle Label roll guard Label supply spindle External label entrance chute 3” core adapter Liner securing clip (Optional kit of Peel-off module ass’y) Liner rewind spindle (Optional kit of Peel-off module ass’y) Media guide bar (Optional kit of Peel-off module ass’y) Damper... -
Page 17: Interior View
2.2.3 Interior View External label entrance chute Power switch USB interface (High speed mode) Slot-in Wi-Fi or GPIO interface (Option) USB host RS-232C interface Ethernet interface Power cord socket Note: The interface picture here is for reference only. Please refer to the product specification for the interfaces availability. -
Page 18: Operator Control
2.3 Operator Control LED indicator Printer status LED indicator Firmware version Printer model Time & Date Icons & LED indicators Ethernet / Wi-Fi IP Icons Pause button Feed button Keys... -
Page 19: Led Indication And Keypads
2.3.1 LED Indication and Keypads LED color indication: Color Meaning Solid: Power is on and ready to be used. (Green) Flash :System is downloading data or printer is paused. System is clearing data. (Amber) Solid - Printer head open, cutter error. (Red) Flash - Printing error, such as paper empty, paper jam, ribbon empty, or memory error etc. - Page 20 LCD/LED Icon Indication: icon Function On: Print head open. On: Out of ribbon. Blicking: Ribbon near end. On: Out of paper. Blicking: Paper jam. On: RF connected. Blicking: RF communication. Main Page Icon (MB240T) Icon Indication icon Function Wi-Fi device is ready (option). Enter the menu.
-
Page 21: Touch Screen Manipulation
2.3.2 Touch Screen Manipulation Tap an item to open/use it. Be selected (Green) Scroll up Scroll down Return Return Enter... -
Page 22: Power-On Utilities
2.3.3 Power-on Utilities Power-on Utilities provides the basic functions and can be activated by below procedures: Turn off the power > Hold the button > Open the power > Release the button depending on the the color of the LED. MB240/ MB340 Series: Power down and hold the PAUSE button to restart the printer. -
Page 23: Setup
3. Setup 3.1 Setting up the printer Place the printer on flat surface. Make sure the printer is power off. Connect the printer to the computer with the provided USB cable. Plug in the power cord. Note: Please switch OFF the printer before plugging in the power cord to printer power jack. -
Page 24: Loading The Ribbon
3.2 Loading the Ribbon Install ribbon on the ribbon Open the media cover. supply spindle and paper core on the ribbon rewind spindle. Wind the ribbon rewind spindle counterclockwisely until the Release the lever. ribbon is srinkle-free and properly stretched. - Page 25 Ribbon Loading Path Wind the ribbon rewind spindle counterclockwise roughly 3~5 circles until the ribbon is smooth, properly stretched and wrinkle-free. Close the print head mechanism.
-
Page 26: Loading The Media
3.3 Loading the Media Move the label roll guard to the end of the spindle then Open the meida flip it down. cover. Release lever and thread the Place the label label through the damper, and use label roll media sensor, and label guard to be guide stabilized... - Page 27 Adjust the position of the media Adjust the label guide to fix the media Close the Printhead sensor. position.
-
Page 28: Loading The Fanfold/External Media
3.4 Loading the Fanfold/External Media Open the printer right side cover. Insert the fanfold media through the rear external label entrance chute. Refer 3.3 to load the media. Loading path for fan-fold labels... -
Page 29: Loading Media In Peel-Off Mode (Option)
3.5 Loading Media in Peel-off Mode (Option) Open the media Install the label as indicated cover and load the and set printer mode to Peeler Mode. meida. Release lever, pull the label off about Feed the leading edge of 650mm and liner through the peel-off remove the label. - Page 30 The media rewind spindle can also Close the print head and press FEED Pull out the media rewind spindle install paper core to wind the media. Button securing clip. Wind the media on the spindle until the liner stretched properly.
-
Page 31: Loading Media In Cutter Mode (Option)
3.6 Loading Media in Cutter Mode (Option) Open the media cover, and use the Install the media and make it unfer Close the printhead and the cutter kit, control panel to select to Cutter go through the cutter paper entrance. then press FEED. -
Page 32: Knob Adjustment
4. Knob Adjustment Print head Pressure Adjustment Knob has 6 levels’ adjustment for 1~2” and 3~4” width media. Different number means different pressure to the media . Due to printer’s paper alignment is on left side of the mechanism, different media width requires the different pressure. -
Page 33: Ribbon Tension Adjustment Knob
4.1 Ribbon Tension Adjustment Knob Ribbon Tension Adjustment Knob has 5 positions for adjustment. Due to the ribbon is aligned to the inbound of print mechanism, different width of ribbon may need to adjust the tension adjustment knob to avoid the ribbon wrinkle and get the best print quality. -
Page 34: Mechanism Fine Adjustment To Avoid Ribbon Wrinkles
4.2 Mechanism Fine Adjustment to Avoid Ribbon Wrinkles Ribbon wrinkle is related to the media width, thickness, print head pressure balance, ribbon film characteristics, print darkness setting…etc. In case the ribbon wrinkle happens, please follow the instructions below to adjust the printer parts. Ribbon Tension Adjustment Knob has 5 indexes for adjustment. - Page 35 Wrinkle happens from label lower right to upper left direction Feed Direction Make sure the Print head Pressure Adjustment Knob is in correct position for the current media. Ex: 1~2”, 3~4” Turn the screw clockwise per level and print to see if the winkle has gone. ...
- Page 36 Wrinkle happens from label lower left to upper right direction Feed Direction Make sure the Print head Pressure Adjustment Knob is in correct position for the current media. Ex: 1~2”, 3~4” Turn the screw counterclockwise per level and print to see if the winkle has gone. ...
-
Page 37: Tsc Console
5. TSC Console TSC Console is a management tool combining the Printer Management, Diagnostic Tool, CommTool and Printer Webpage settings, which enables you to adjust printer’s settings/status; change printers’ settings; download graphics, deploy fonts, graphics, label templates or upgrade the firmware to the group of printers, and send additional commands to printers at the same time ※... - Page 38 Select the current interface of the printer. The printer will be added to TSC Console’s interface. Select the printer and set the settings. For more information, please refer to TSC Console User Manual.
-
Page 39: Setup Ethernet Interface
5.2 Setup Ethernet Interface Use USB or COM to establish the interface on TSC Console. Double click to enter the Printer Configuration Page > Click Ethernet tab > Check the IP Address. - Page 40 Choose Network > Key in the IP Address > Click Discover to establish the Ehternet interface. The notification will pop up > Click OK to close the window > The Ethernert interface will be shown on TSC Console.
-
Page 41: Set Wifi And Add To Tsc Console Interface
5.3 Set WiFi and Add to TSC Console Interface Use USB or COM Port to set up the interface. (refer to chp.5.1) Double click to enter the printer configuration page. Click Get to receive printer’s information. ... - Page 42 For WPA-Personal Fill-in the SSID. Select the Encryption option to WPA-Personal. III. Fill-in the Key. Select DHCP to ON. (For OFF option, please fill-in the IP Address, Subnet Mask and Gateway) After setting, click the Set button. Note: Before setting, the entered field will be shown in yellow for reminding.
- Page 43 After clicking Set button, it'll pop-up the window tip as below shown. IP address will be shown in the “IP address” field and the Wi-Fi logo and IP address will be displayed on the LCD control panel. Note: IP address should be shown within about 5~15 seconds after printer turn on.
-
Page 44: Initialize The Printer Wifi Setting
5.4 Initialize the Printer WiFi Setting Return to the main page of TSC Console. Click Functions to expand the page. Click Wi-Fi Default to initialize the printer Wi-Fi module setting to factory default setting. -
Page 45: Printer Function
5.5 Printer Function Printer Function could be found in Printer Configuration. “Printer Function” will be shown on the left side of the window. Functions Description Calibrate Sensor Detect media types and the size of the label RTC Setup Synchronize printer with Real Time Clock on PC Factory Default Initialize the printer to default settings Reset Printer... -
Page 46: Setting Post-Print Action
When the printer is equipped with other opton kits, ex: cutter, peeler, rewinder, please select the mode after finishing the calibration. Follow below procedure to set the post action for the printing: Refer Chp 5.1 to Connect the printer with TSC Console > Double click the printer >... -
Page 47: Lcd Menu Function
6. LCD Menu Function 6.1 Enter the Menu By touch display: Tap the (Menu) icon on LCD main page to enter the menu. By Keys: Use navigational keys to select the (Menu) icon (be marked in green) and press the left soft key button (means ) to enter the menu. -
Page 48: Menu Overview
6.2 Menu Overview There are 6 categories on the menu. Users can easily set the settings of the printer without connecting the computer. Please refer to following sections for more details. Advanced : To set LCD, initialization, cutter Setting : To set up the printer settings for TSPL & type,…etc. -
Page 49: Setting
6.3 Setting Tap the Command Set on LCD to switch between TSPL and ZPL2. Command Set can also be activated by Navigational Keys. -
Page 50: Tspl
6.3.1 TSPL TSPL category can set up the printer settings for TSPL. Speed None Density Batch Mode Direction Peeler Mode Print mode Cutter Mode Offset Cutter Batch TSPL Shift X Rewinder Mode Shift Y Reference X Reference Y Code Page Country... - Page 51 Item Description Default 203 dpi: 5 Speed Set the print speed. Setting range: 1~10 for 203dpi; 1~7 for 300dpi. 300 dpi: 3 Density Set printing darkness. Setting range: 0 to 15, and the step is 1. Set the printout direction. Setting Value: 0 and 1. Direction Direction 0: Direction 1:...
-
Page 52: Zpl2
6.3.2 ZPL2 Darkness This “ZPL2” category can set up the printer settings for ZPL2. Print Speed Tear Off Tear Off Peeler Off Print Mode Cutter Print Width Rewind List Fonts List Images List Formats List Setup Control Prefix Format Prefix Feed Menu ZPL2... - Page 53 Item Description Default Density Set the printing darkness. Available setting range: 0 to 30. 203 dpi: 4 Print Speed Set the print speed. Available setting range is 1~10 for 203dpi and 1~7 for 300dpi. 300 dpi: 3 Tear Off Adjust media stop location. Available setting value range: -120~120 dots. 0 dot Set the print mode.
- Page 54 Set the action of the media when turning on the printer. Feed: Printer will advance one label. Media Power Up Calibration: Printer will make calibration. No Motion Length: Printer determine length and feed label. No Motion: Printer will not move media. Set the action of the media when closing the print head.
-
Page 55: Sensor
6.4 Sensor This option is used to calibrate the selected sensor. We recommend calibrate the sensor before printing when changing the me Black Mark Auto Calibration Continuous Preprint Manual Calibration Standard Black Mark Menu Sensor Auto Continuous Threshold Detect Fixed Maximum Length Min. -
Page 56: Interface
6.5 Interface Interface can set the printer interface settings. Serial Ethernet Menu Interface Wi-Fi Bluetooth... -
Page 57: Serial Comm
6.5.1 Serial Comm Serial comm can set the printer RS-232 settings. 1200 bps 2400 bps 4800 bps 9600 bps Baud Rate 19200 bps 38400 bps 57600 bps 115200 bps None Menu Interface Serial Parity Even Data Bits Stop Bit(s) Item Description Default Baud Rate... -
Page 58: Ehernet
6.5.2 Ehernet Ethernet configures internal Ethernet configuration and checks the printer’s Ethernet module status, and reset the Ethernet module. Status Menu Interface Ethernet Config Item Description Default Status Check the Ethernet IP address and MAC setting status. DHCP: On or OFF the DHCP (Dynamic Host Configuration Protocol) network protocol. Config. -
Page 59: Wi-Fi
6.5.3 Wi-Fi Wi-Fi can set the printer Wi-Fi settings. Status Config Menu Interface Wi-Fi SSID Security Password Item Description Default Status Check the Wi-Fi IP address, MAC setting status,…etc. DHCP: ON/OFF the DHCP (Dynamic Host Configuration Protocol) networkprotocol. Config. DHCP Static IP:Set the printer’s IP address, subnet mask and gateway. -
Page 60: Bluetooth
6.5.4 Bluetooth Bluetooth can set the printer Bluetooth settings. Status Local Name Menu Interface Bluetooth Ping Code Item Description Default Status Check the Bluetooth status. Local Name Set the local name for Bluetooth. RF-BHS Ping Code Set the local ping code for Bluetooth. 0000... -
Page 61: Advanced
Language 6.6 Advanced Printer Information Initialization Display Brightness Date Format Touchscreen Calibration Date Date & Time Time Format Time Menu Advanced Menu Lock Menu Password Security MyMenu Lock Cutter Type MyMenu Password Media Low Warning Ribbon Low Warning Warning Printer Head Care Reset Counter Interval Contact Us... - Page 62 Date & Time Setup the date and time on display. Security Set the password for locking the menu or favorites. The default password is 8888. Disable Cutter Type Set the cutter type. Guillotine Set the warning for ribbon low. For example, if setting value is 30m, when ribbon Ribbon Low Warning capacity was lower than 30m, the will be shown in red.
-
Page 63: File Manager
6.7 File Manager File Manager is used to check the printer available memory, show the files list, delete the files or run the files that saved in the printer DRAM/Flash/Card memory. DRAM Menu File Manager FLASH CARD... -
Page 64: Diagnostic
6.8 Diagnostic Print Config. Dump Mode Menu Diagnostic Print Head Diag Gap Display Diag Black Mark Sensor Diag Ribbon End Diag Media Item Description Print current printer configuration to the label. The configuration printout contains print head test pattern, which is useful Print Config. -
Page 65: Favorites
6.9 Favorites Favorites helps users build a commomly used list. Arrange the commonly used setting options by Favorites Add items: Touch and hold the item > window of Join Favorites will pop up > tap Yes to add the item to Favorites. Delete items: Touch and hold the item >... -
Page 66: Troubleshooting
7. TroubleShooting Problem Possible Cause Recovery Procedure Plug the power cord in printer and outlet. The power cord is not properly connected. Power indicator does not illuminate The power switch is closed. Switch the printer on. ... - Page 67 mechanism. If peeler module is installed, please remove the label. If there is no peeler module in front of the printer, please Peel function is enabled. Take Label switch off the printer and install it. Check if the connector is plugging correctly. Can’t downloading the file to ...
- Page 68 Sensor sensitivity is not set properly. Calibrate the sensor by Auto Gap or Manual Gap options. The media sensor is covered with dust. Clear the GAP/Black mark sensor by blower. Printhead pressure is incorrect. Please refer to the chapter 4.
-
Page 69: Maintenance
8. Maintenance This session presents the clean tools and methods to maintain the printer. For Cleaning Depending on the media used, the printer may accumulate residues (media dust, adhesives, etc.) as a by-product of normal printing. To maintain the best printing quality, you should remove these residues by cleaning the printer periodically. Regularly clean the print head and supply sensors once change a new media to keep the printer at the optimized performance and extend printer life. - Page 70 Cleaning Tools Cotton swab Lint-free cloth Brush with soft non-metallic bristles Vacuum cleaner 75% Ethanol (for disinfecting) 99% Isopropyl alcohol (for printhead and platen roller cleaning) Genuine printhead cleaning pen Mild detergent (without chlorine) Cleaning Process: Printer Part Method...
-
Page 71: Angency Complicance And Approvals
9. Angency Complicance and Approvals EN 55032, Class A EN 55024 EN 60950-1 This is a class A product. In a domestic environment this product may cause radio interference in which case the user may be required to take adequate measures. FCC part 15B, Class A ICES-003, Class A This equipment has been tested and found to comply with the limits for a Class A digital device, pursuant to... - Page 72 UL 62368-1 CSA C22.2 No. 62368-1 EN 62368-1 KN 32 / KN 35 / K 60950-1 이 기기는 업무용(A 급) 전자파적합기기로서 판매자 또는 사용자는 이 점을 주의하시기 바라며, 가정외의 지역에서 사용하는 것을 목적으로 합니다. GB 4943.1 GB 9254, Class A GB 17625.1 此为...
- Page 73 Note: There may have certification differences in the series models, please refer to product label for accuracy. Important safety instructions: 1. Read all of these instructions and keep them for later use. 2. Follow all warnings and instructions on the product. 3.
- Page 74 repair. After completing the steps, please close the media cover first and then turn on the power to start printing. CAUTION: Any changes or modifications not expressly approved by the grantee of this device could void the user's authority to operate the equipment.
- Page 75 30mW 5470-5725MHz Hereby, TSC Auto ID Technology Co., Ltd. declares that the radio equipment type [Wi-Fi] IEEE 802.11 a/b/g/n is in compliance with Directive 2014/53/EU The full text of the EU declaration of conformity is available at the following internet address: http://www.tscprinters.com/cms/theme/index-39.html...
- Page 76 specific host products operated in portable exposure conditions. (For Wi-Fi) This device has also been evaluated and shown compliant with the IC RF Exposure limits under portable exposure conditions. (Antennas are less than 20 cm of a person's body). (For Bluetooth) Canada, avis de l'Industry Canada (IC) Cet appareil numérique de classe B est conforme aux normes canadiennes ICES-003 et RSS-210.
- Page 77 前項合法通信,指依電信法規定作業之無線電通信。低功率射頻電機須忍受合法通信或工業、科學及醫療用電波輻射性電機設備之干 擾。(即低功率電波輻射性電機管理辦法第十四條) BSMI Class A 警語: 這是甲類的資訊產品,在居住的環境使用中時,可能會造成射頻 干擾,在這種情況下,使用者會被要求採取某些適當的對策。 MFi for Bluetooth Use of the Made for Apple badge means that an accessory has been designed to connect specifically to the Apple product(s) identified in the badge, and has been certified by the developer to meet Apple performance standards. Apple is not responsible for the operation of this device or its compliance with safety and regulatory standards.
- Page 78 For JP Model Made for iPhone XS Max, iPhone XS, iPhone XR, iPhone X, iPhone 8, iPhone 8 Plus, iPhone 7, iPhone 7 Plus, iPhone SE, iPhone 6s, iPhone 6s Plus, iPhone 6, iPhone 6 Plus, iPhone 5s, iPad Pro 12.9-inch (2nd generation), iPad Pro 10.5-inch, iPad (6th generation), iPad (5th generation), iPad Pro 9.7-inch, iPad Pro 12.9-inch (1st generation), iPad Air 2, iPad mini 4, iPad mini 3, iPad Air, iPad mini 2, iPod touch (6th generation) iPad, iPad Air, iPad Pro, iPhone are trademarks of Apple Inc., registered in the U.S.
-
Page 79: Revise History
10. Revise History Date Content Editor...
Need help?
Do you have a question about the Printronix MB240 Series and is the answer not in the manual?
Questions and answers