Table of Contents
Advertisement
Quick Links
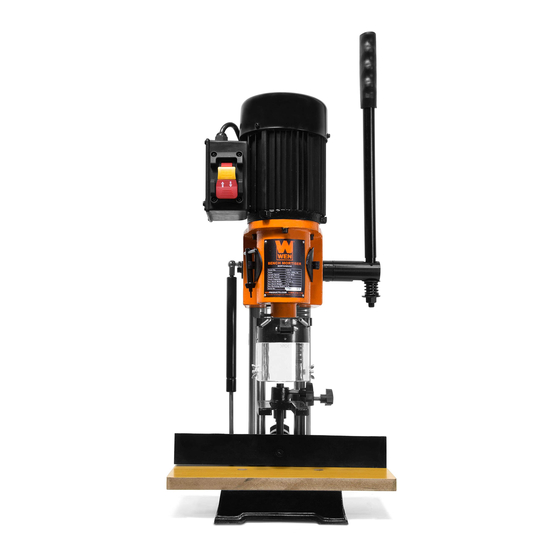
MODEL 43012
BENCH
MORTISER
Instruction Manual
NEED HELP? CONTACT US!
Have product questions? Need technical support? Please feel free to contact us:
1-800-232-1195 (M-F 8AM-5PM CST)
TECHSUPPORT@WENPRODUCTS.COM
IMPORTANT: Your new tool has been engineered and manufactured to WEN's highest standards for dependability,
ease of operation, and operator safety. When properly cared for, this product will supply you years of rugged,
trouble-free performance. Pay close attention to the rules for safe operation, warnings, and cautions. If you use
your tool properly and for its intended purpose, you will enjoy years of safe, reliable service.
WENPRODUCTS.COM
For replacement parts and the most up-to-date instruction manuals, visit
Advertisement
Table of Contents

Subscribe to Our Youtube Channel
Related Manuals for Wen 43012


Summary of Contents for Wen 43012
- Page 1 1-800-232-1195 (M-F 8AM-5PM CST) TECHSUPPORT@WENPRODUCTS.COM IMPORTANT: Your new tool has been engineered and manufactured to WEN’s highest standards for dependability, ease of operation, and operator safety. When properly cared for, this product will supply you years of rugged, trouble-free performance. Pay close attention to the rules for safe operation, warnings, and cautions. If you use your tool properly and for its intended purpose, you will enjoy years of safe, reliable service.
-
Page 2: Table Of Contents
CONTENTS WELCOME Introduction ..................... 3 Specifications ....................3 SAFETY General Safety Rules ..................4 Bench Mortiser Safety Warnings ..............6 Electrical Information ..................7 BEFORE OPERATING Know Your Bench Mortiser ................8 Assembly ......................9 Preparation & Adjustments ................12 OPERATION & MAINTENANCE Operation ....................... -
Page 3: Welcome
INTRODUCTION Thanks for purchasing the WEN Bench Mortiser. We know you are excited to put your tool to work, but first, please take a moment to read through the manual. Safe operation of this tool requires that you read and understand this operator’s manual and all the labels affixed to the tool. -
Page 4: Safety
GENERAL SAFETY RULES WARNING! Read all safety warnings and all instructions. Failure to follow the warnings and instructions may result in electric shock, fire and/or serious injury. Safety is a combination of common sense, staying alert and knowing how your item works. The term “power tool” in the warnings refers to your mains-operated (corded) power tool or battery-operated (cordless) power tool. - Page 5 GENERAL SAFETY RULES WARNING! Read all safety warnings and all instructions. Failure to follow the warnings and instructions may result in electric shock, fire and/or serious injury. Safety is a combination of common sense, staying alert and knowing how your item works. The term “power tool” in the warnings refers to your mains-operated (corded) power tool or battery-operated (cordless) power tool.
-
Page 6: Bench Mortiser Safety Warnings
BENCH MORTISER SAFETY WARNINGS WARNING! Do not operate the power tool until you have read and understood the following instructions and the warning labels. BENCH MORTISER SAFETY 8. Properly secure the workpiece using the fence and 1. Do not operate this machine until it has been fully as- hold-down clamp to prevent it from lifting or shifting sembled and adjusted according to the instructions. -
Page 7: Electrical Information
ELECTRICAL INFORMATION GROUNDING INSTRUCTIONS In the event of a malfunction or breakdown, grounding provides the path of least resistance for an electric current and reduces the risk of electric shock. This tool is equipped with an electric cord that has an equipment grounding conductor and a grounding plug. -
Page 8: Before Operating
KNOW YOUR BENCH MORTISER UNPACKING Carefully remove the tool and all contents from the packaging. Check all components and compare against the dia- gram below. If any part is damaged or missing, please contact our customer service at 1-(800) 232-1195, M-F 8-5 CST or email us at techsupport@wenproducts.com. -
Page 9: Assembly
ASSEMBLY WARNING! To prevent injury from accidental operation, make sure the tool is switched OFF and unplugged from the power source before assembling the tool or making any adjustments. CLEAN THE SURFACE 1. Your tool comes protected with a layer of heavy-duty anti-rust coating. Remove the protective coating from sur- faces using a soft cloth, moistened with kerosene (do not use acetone, gasoline or lacquer thinner). - Page 10 ASSEMBLY ASSEMBLE THE TABLE Fig. 4 1. Assemble the table (Fig. 4 - 1) to the base using two screws. Thread the screws (Fig. 4 - 2) into the holes of the table and through the threaded holes on the base. ASSEMBLE THE FENCE 1.
- Page 11 ASSEMBLY INSTALL THE TOOL & CHISEL HOLDER Fig. 7 Assemble the tool holder (Fig. 7 - 1) onto the back of the mor- tiser using two screws and two flat washers (Fig. 7 - 2). Tight- en using the included hex wrench. You can store your wrenches and chisels in the slots of the tool holder (Fig.
-
Page 12: Preparation & Adjustments
ASSEMBLY INSTALL THE CHIP GUARD (OPTIONAL) Fig. 10 1. The chip guard can be mounted (optional) to to block fly- ing chips during operation. Remove the rear screw and nut of the guard and press it over the quill above the black set screw (Fig. - Page 13 PREPARATION & ADJUSTMENTS ADJUSTING THE FENCE Fig. 12 1. Loosen the fence lock handle (Fig. 12 - 1). NOTE: The handle is spring-loaded, and can be pulled upwards to be repositioned. 2. The fence is spring-loaded and may require some force to move back.
- Page 14 PREPARATION & ADJUSTMENTS WARNING! To prevent injury from accidental operation, make sure the tool is switched OFF and unplugged from the power source before assembling the tool or making any adjustments. INSTALLING THE MORTISER BIT A mortiser bit consists of a hollow chisel sharpened on four sides to cut the edges of the square, and an auger bit inside the chisel that spins to clear materials.
- Page 15 PREPARATION & ADJUSTMENTS INSTALLING THE MORTISER BIT (CONT.) Fig. 15 You should now have the proper clearance space be- tween the bit and chisel, with the auger bit protruding Chuck about 1/16 inch beyond the bottom of the chisel (Fig. Chuck 15).
-
Page 16: Operation & Maintenance
OPERATION WARNING! To prevent serious injury, make sure all the warnings and instructions have been read and un- derstood before operating this tool. WARNING! Make sure all bit are sharp and free of damage before using them. Do not use dull or damaged tools. -
Page 17: Maintenance
Replacement mortiser bits can be purchased from wen- procucts.com by searching the part number (see page 18 & 19): 43012-081 for 1/2” bit, 43012-082 for 3/8” bit and 43012-083 for 1/4” bit. Sharpening the bits is not recommended unless you have Chisel prior experience and the suitable sharpening tools. -
Page 18: Exploded View & Parts List
EXPLODED VIEW & PARTS LIST 29-1 29 -2 29 -3 29 -4 29 -5 29 -6 29 -7 63-1 49-1 NOTE: Not all parts may be available for purchase. Parts and accessories that wear down over the course of normal use are not covered under the warranty. - Page 19 EXPLODED VIEW & PARTS LIST Part No. Description Qty. Part No. Description Qty. 43012-001 Flat Washer 10mm Shoulder Screw 43012-039 M10-1.5 40, 26 X 40 43012-002 Hex Bolt M10-1.5 X 30 43012-040 Handle Clutch 43012-003 Base 43012-041 Gear Column 43012-004...
-
Page 20: Warranty Statement
WARRANTY STATEMENT WEN Products is committed to building tools that are dependable for years. Our warranties are consistent with this commitment and our dedication to quality. LIMITED WARRANTY OF WEN PRODUCTS FOR HOME USE GREAT LAKES TECHNOLOGIES, LLC (“Seller”) warrants to the original purchaser only, that all WEN consumer power tools will be free from defects in material or workmanship during personal use for a period of two (2) years used for professional or commercial use.
Need help?
Do you have a question about the 43012 and is the answer not in the manual?
Questions and answers