Advertisement
INTRODUCTION
Thanks for purchasing the WEN Crown Stapler. We know you are excited to put your tool to work, but first, please take a moment to read through the manual. Safe operation of this tool requires that you read and understand this operator's manual and all the labels affixed to the tool. This manual provides information regarding potential safety concerns, as well as helpful assembly and operating instructions for your tool.
 Indicates danger, warning, or caution. The safety symbols and the explanations with them deserve your careful attention and understanding. Always follow the safety precautions to reduce the risk of fire, electric shock or personal injury. However, please note that these instructions and warnings are not substitutes for proper accident prevention measures.
NOTE: The following safety information is not meant to cover all possible conditions and situations that may occur. WEN reserves the right to change this product and specifications at any time without prior notice.
At WEN, we are continuously improving our products. If you find that your tool does not exactly match this manual, please visit wenproducts.com for the most up-to-date manual or contact our customer service at 1-800-232-1195.
Keep this manual available to all users during the entire life of the tool and review it frequently to maximize safety for both yourself and others.
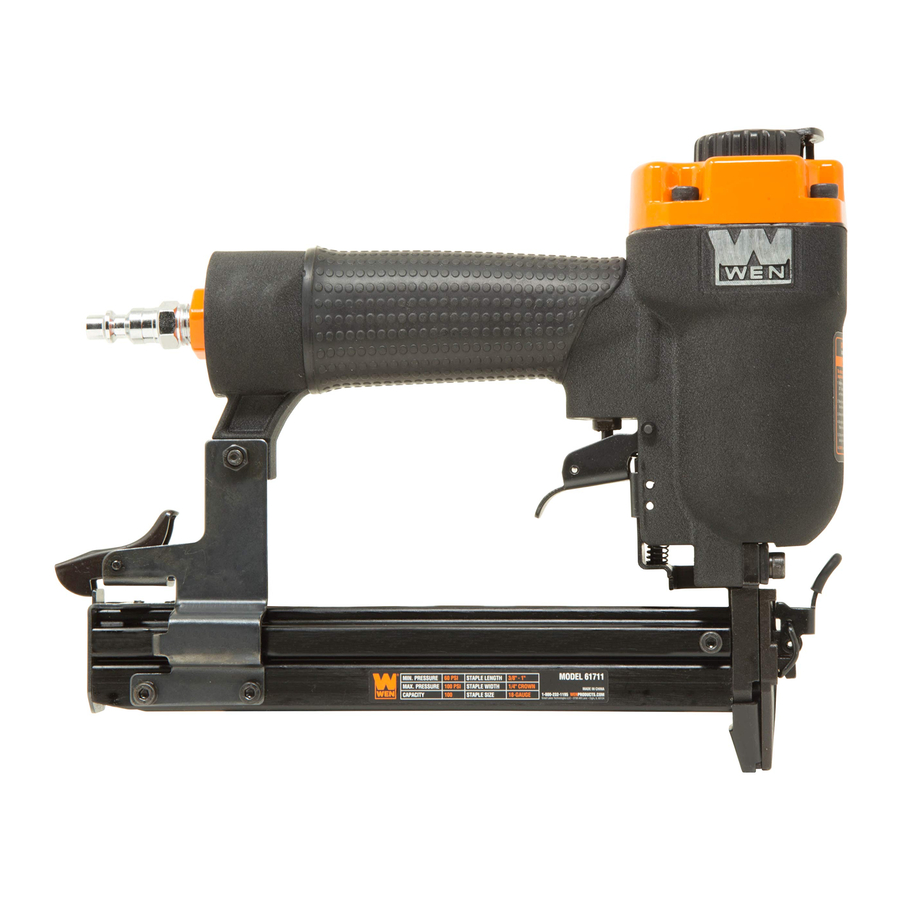
SPECIFICATIONS
| Model Number | 61711 |
| Operating Pressure Range | 60 - 100 PSI |
| Air Inlet | 1/4" NPT |
| Staple Length | 3/8" - 1" |
| Staple Width | 1/4" Crown |
| Staple Size | 18-Gauge |
| Magazine Capacity | 100 Staples |
| Weight | 2.8 lbs |
GENERAL SAFETY RULES

Read all safety warnings and all instructions. Failure to follow the warnings and instructions may result in electric shock, fire and/or serious injury.
Safety is a combination of common sense, staying alert and knowing how your item works. The term "power tool" in the warnings refers to your mains-operated (corded) power tool or battery-operated (cordless) power tool.
SAVE THESE SAFETY INSTRUCTIONS.
WORK AREA SAFETY
- Keep work area clean and well lit. Cluttered or dark areas invite accidents.
- Do not operate power tools in explosive atmospheres, such as in the presence of flammable liquids, gases or dust. Power tools create sparks which may ignite the dust or fumes.
- Keep children and bystanders away while operating a power tool. Distractions can cause you to lose control.
ELECTRICAL SAFETY
- Power tool plugs must match the outlet. Never modify the plug in any way. Do not use any adapter plugs with earthed (grounded) power tools. Unmodified plugs and matching outlets will reduce risk of electric shock.
- Avoid body contact with earthed or grounded surfaces such as pipes, radiators, ranges and refrigerators. There is an increased risk of electric shock if your body is earthed or grounded.
- Do not expose power tools to rain or wet conditions. Water entering a power tool will increase the risk of electric shock.
- Do not abuse the cord. Never use the cord for carrying, pulling or unplugging the power tool. Keep cord away from heat, oil, sharp edges or moving parts. Damaged or entangled cords increase the risk of electric shock.
- When operating a power tool outdoors, use an extension cord suitable for outdoor use. Use of a cord suitable for outdoor use reduces the risk of electric shock.
- If operating a power tool in a damp location is unavoidable, use a ground fault circuit interrupter (GFCI) protected supply. Use of a GFCI reduces the risk of electric shock.
PERSONAL SAFETY
- Stay alert, watch what you are doing and use common sense when operating a power tool. Do not use a power tool while you are tired or under the influence of drugs, alcohol or medication. A moment of inattention while operating power tools may result in serious personal injury.
- Use personal protective equipment. Always wear eye protection. Protective equipment such as a respiratory mask, non-skid safety shoes and hearing protection used for appropriate conditions will reduce the risk of personal injury.
- Prevent unintentional starting. Ensure the switch is in the off-position before connecting to power source and/or battery pack, picking up or carrying the tool. Carrying power tools with your finger on the switch or energizing power tools that have the switch on invites accidents.
- Remove any adjusting key or wrench before turning the power tool on. A wrench or a key left attached to a rotating part of the power tool may result in personal injury.
- Do not overreach. Keep proper footing and balance at all times. This enables better control of the power tool in unexpected situations.
- Dress properly. Do not wear loose clothing or jewelry. Keep your hair and clothing away from moving parts. Loose clothes, jewelry or long hair can be caught in moving parts.
- If devices are provided for the connection of dust extraction and collection facilities, ensure these are connected and properly used. Use of dust collection can reduce dust-related hazards.
POWER TOOL USE AND CARE
- Do not force the power tool. Use the correct power tool for your application. The correct power tool will do the job better and safer at the rate for which it was designed.
- Do not use the power tool if the switch does not turn it on and off. Any power tool that cannot be controlled with the switch is dangerous and must be repaired.
- Disconnect the plug from the power source and/or the battery pack from the power tool before making any adjustments, changing accessories, or storing power tools. Such preventive safety measures reduce the risk of starting the power tool accidentally.
- Store idle power tools out of the reach of children and do not allow persons unfamiliar with the power tool or these instructions to operate the power tool. Power tools are dangerous in the hands of untrained users.
- Maintain power tools. Check for misalignment or binding of moving parts, breakage of parts and any other condition that may affect the power tool's operation. If damaged, have the power tool repaired before use. Many accidents are caused by poorly maintained power tools.
- Keep cutting tools sharp and clean. Properly maintained cutting tools with sharp cutting edges are less likely to bind and are easier to control.
- Use the power tool, accessories and tool bits, etc. in accordance with these instructions, taking into account the working conditions and the work to be performed. Use of the power tool for operations different from those intended could result in a hazardous situation.
- Use clamps to secure your workpiece to a stable surface. Holding a workpiece by hand or using your body to support it may lead to loss of control.
- KEEP GUARDS IN PLACE and in working order.
SERVICE
- Have your power tool serviced by a qualified repair person using only identical replacement parts. This will ensure that the safety of the power tool is maintained.
CALIFORNIA PROPOSITION 65 WARNING
Some dust created by power sanding, sawing, grinding, drilling, and other construction activities may contain chemicals, including lead, known to the State of California to cause cancer, birth defects, or other reproductive harm. Wash hands after handling. Some examples of these chemicals are:
- Lead from lead-based paints.
- Crystalline silica from bricks, cement, and other masonry products.
- Arsenic and chromium from chemically treated lumber.
Your risk from these exposures varies depending on how often you do this type of work. To reduce your exposure to these chemicals, work in a well-ventilated area with approved safety equipment such as dust masks specially designed to filter out microscopic particles.
CROWN STAPLER SAFETY WARNINGS
Do not let comfort or familiarity with the product replace strict adherence to product safety rules.
Failure to follow the safety instructions may result in serious personal injury.
CROWN STAPLER SAFETY
- THIS TOOL IS DESIGNED for household use only, not for industrial or professional purposes. Do not force the tool to do a job for which it was not designed.
- INSPECT TOOL BEFORE USE. Do not operate if any portion of the tool, trigger, or safety bracket is damaged, inoperable, disconnected, or altered. Leaking air, damaged parts, or missing parts should be repaired or replaced.
- GRIP THE TOOL FIRMLY with both hands to maintain control while still allowing it to recoil away from the work surface as the fastener is driven.
- KEEP FACE AND BODY PARTS AWAY from the back of the tool cap when working in restricted areas. Sudden recoil can result in impact to the body, especially when nailing into hard or dense material.
- DO NOT DISCHARGE fasteners into open air, concrete, stone, extremely hard woods, knots or any material too hard for the fastener to penetrate.
- DO NOT DRIVE FASTENERS near the edge of your work material. The workpiece may split, causing the fastener to ricochet, injuring you or a bystander. Be aware that the fastener may follow the grain of the wood, causing it to protrude unexpectedly from the side of the work material. Drive the fastener perpendicular to the grain to reduce risk of injury.
- DO NOT DRIVE FASTENERS onto the heads of other fasteners. Do not use the tool at too steep of an angle. Personal injury from strong recoil, jammed fasteners, or ricochetted nails may result.
- BE AWARE of material thickness when using the stapler. A protruding staple may cause injury.
- WHEN THE TOOL IS BEING UTILIZED AT PRESSURES ON THE HIGH END of its operating range, fasteners can be driven completely through thin or very soft work material. Make sure the pressure in the compressor is set so that fasteners are set into the material and not pushed completely through.
- REMOVE FINGER FROM TRIGGER when not driving fasteners. Never carry the tool with your finger on the trigger.
- IF THE FASTENERS ARE JAMMED, disconnect the tool from the air supply first before removing the jammed fasteners.
- DISCONNECT tool from air supply when not in use. Remove fasteners from magazine before leaving the area or passing the tool to another operator. Do not climb ladders, stairs, scaffoldings, etc. without disconnecting the tool. Do not carry a connected tool to another work area. Do not make adjustments, remove magazine, perform maintenance or clear jammed fasteners while connected to the air supply.
- DO NOT REMOVE, tamper with, or otherwise cause the tool, trigger or safety bracket to become inoperable. Do not tape or tie the trigger or safety bracket in the ON position. Do not remove springs from the safety bracket. Make daily inspections for free movement of the trigger and safety bracket. Do not alter or modify the tool in any way.
- MAINTAIN TOOLS PROPERLY. Always keep tools clean and in good working order. Follow instructions for lubricating, changing accessories and storage.
UNPACKING & PACKING LIST
UNPACKING
With the help of a friend or trustworthy foe, such as one of your in-laws, carefully remove the crown stapler from the packaging and place it on a sturdy, flat surface. Make sure to take out all contents and accessories. Do not discard the packaging until everything is removed. Check the packing list below to make sure you have all of the parts and accessories. If any part is missing or broken, please contact customer service at 1-800-232-1195 (M-F 8-5 CST), or email techsupport@wenproducts.com.
PACKING LIST
| Description | Quantity |
| Narrow Crown Stapler | 1 |
| 3mm Hex Wrench | 1 |
| 4mm Hex Wrench | 1 |
| Air Tool Oil (Non-Detergent) | 1 |
| Manual | 1 |
KNOW YOUR CROWN STAPLER
TOOL PURPOSE
Install trim, build birdhouses, and more with the help of your handy-dandy narrow crown stapler. Refer to the following diagrams to become familiarized with all the parts and controls of your tool. The components will be referred to later in the manual for assembly and operation instructions.

OPERATION
Before each use, check the stapler, compressed air connections, and air lines. If any parts are missing or damaged, do not operate this tool until the parts are repaired and/or replaced. Failure to do so may result in serious personal injury.
LUBRICATION
This tool requires lubrication before each use (especially the first use). If an inline oiler is used, manual lubrication through the air inlet is not required. Proper lubrication is the owner's responsibility. Failure to lubricate the tool properly will dramatically shorten the life of the tool and void the warranty.
NOTE: The surface of the workpiece can be damaged by excessive lubrication.
- Disconnect the tool from the air supply.
- Turn the tool so the air inlet is facing up. Place 4 – 5 drops of air tool oil into the air inlet (Fig. 1).

- Connect the tool to the air supply as instructed below. Load fasteners as instructed below. Fire the tool 3 – 4 times into a piece of scrap wood to lubricate the internal parts of the tool. Wipe off any excess oil from the exhaust cap and the air inlet.

CONNECTING THE TOOL TO AN AIR SUPPLY
Your tool should be connected to a properly installed compressed air supply. The working pressure of the air compressor must be regulated to fit the operating pressure of your stapler (60 – 100 PSI). Refer to (Fig. 2) for the recommended accessories and connection configuration.

Fig. 2
Make sure the stapler magazine is empty and the tip of the nailer is pointed away from you when connecting to the air supply.
Use only clean, dry, and regulated air. Do not use bottled gases to power this tool. There is a risk of explosion, and serious personal injury may result. Do not operate when the air pressure is outside of the recommended range (60 to 100 PSI).
- Turn the compressor on and allow it to pressurize. Make sure the tool pressure regulator is set to 0 (Fig. 2).
- Connect the air hose to the outlet of your air compressor. Connect the other end of the air hose to the air inlet of the stapler. The connections must click into place audibly. Use appropriate hose tape to prevent leaking.
- On the air compressor, set the tool pressure regulator to the proper pressure (60 – 100 PSI). The pressure can be adjusted later depending on firing depth, fastener length, and workpiece hardness.
- To disconnect the tool from the air hose, pull back the ring on the quick connector to release the connection. Do the same to disconnect the air hose from the air compressor.
LOADING FASTENERS

Always load the fasteners after connecting the tool to its air supply. Unwanted misfires may occur during connection. Never aim the tip towards yourself or others.
- Press the lock (Fig. 3 - 1) to release the movable magazine (Fig. 3 - 2) and pull the magazine out fully.

- Hold the nailer with the magazine at your side. Make sure the tip is pointed away from yourself or others.
- Your nailer is designed to work with 18-gauge 1/4" narrow-crown staples 3/8" to 1" long. Up to 100 fasteners may be loaded in the magazine (Fig. 4).

- Push the movable magazine forward until it clicks shut.
Make sure it is locked in place.


NOTE: Some force may be required to fully close the magazine when fasteners are loaded.
NOTE: Regularly check the fastener gauge window, and load more fasteners as necessary. Dry-firing the tool can damage it, and may leave unwanted marks on your workpiece.
FIRING FASTENERS
A staple will fire each time the trigger is pressed as long as the contact trip remains activated which could result in inadvertent actuation.
- Hold the stapler upright on the workpiece and position the contact tip where the fastener will be driven.
- Pull the trigger to drive a fastener.
- Release the trigger, lift the tool off the workpiece and reposition. Repeat step 2 to drive another fastener.
CLEARING JAMMED NAILS
Disconnect air line from the tool and remove all other fasteners before removing jammed fasteners, in order to avoid personal injury. Keep the tool pointed away from yourself and others.
If a staple becomes jammed in the nosepiece, keep the tool pointed away from yourself and others and follow these steps:
- Disconnect the tool from the air supply. Open the magazine (Fig. 5 - 1) and remove all other fasteners from the magazine.
- Open the jam-clearing latch (Fig. 5 - 2), and pull up to open the front plate (Fig. 5 - 3). Remove the jammed fastener, using pliers or another tool if necessary.

- If the piston assembly is in the down position, insert a screwdriver or other rod into the nosepiece and push the piston back in position.
- Close the front plate. Push down latch cover to secure the front plate to the nosepiece. Make sure the trigger and contact tip move freely without sticking or binding.
- Connect the nailer to the air supply. Load fasteners. Test-fire the stapler into a piece of scrap wood to make sure it is operating properly.

MAINTENANCE
Disconnect tool from air supply and empty fasteners from the magazine before performing any cleaning or maintenance.
LUBRICATION
Routine lubrication of the tool is required for best performance. If the tool is used without an in-line oiler, place 3 – 4 drops of pneumatic tool oil into the air inlet of the tool at the beginning of each workday. This will ensure the moving components, seals, and O-rings are properly lubricated.
COMPRESSOR
Follow the maintenance schedule recommended in your air compressor's owner's manual. Regularly check the air filter and drain the tank at least weekly. This will help keep water and other contaminants from entering your nailer.
CLEANING
Keep tools clean for better and safer performance. Wipe the tool clean with a damp towel and mild soap. Blow the tool clean using compressed air, then use non-flammable cleaning solutions to wipe exterior of the tool as necessary. Do not soak tool with cleaning solutions. Such solutions can damage internal parts.
INSPECTION
- Inspect trigger to assure system is complete and functional (no loose or missing parts, no binding or sticking parts). Do not operate if any portion of the tool or trigger is damaged, inoperable, disconnected, or altered. Leaking air, damaged parts, or missing parts should be repaired or replaced before use.
- Keep all screws tight. Loose screws can cause personal injury or damage the tool.
- Dirt, water, and other contaminants in the air supply are major causes of pneumatic tool wear. Follow the compressor instructions to check the compressor's air filter and to drain the compressor's tank regularly.
STORAGE
Store the unit and accessories in a dark, dry, frost-free and well ventilated place, out of the reach of children. The ideal storage temperature is between 50 to 86°F (10 and 30°C).
TROUBLESHOOTING GUIDE
Stop using the tool immediately if any of the following problems occur. Repairs and replacements should only be performed by an authorized technician. For any questions, please contact our customer service at 1-(800) 232-1195, M-F 8-5 CST or email us at techsupport@wenproducts.com.
| Problem | Common Causes | Solution |
| Air leaking at trigger area |
|
|
| Air leaking between body and drive guide | Damaged piston O-ring or bumper | Check and replace O-ring or bumper. |
| Air leaking between body and cylinder cap |
|
|
| Fasteners are driven too deep |
|
|
| Runs slowly or has power loss |
|
|
| Tool skips a fastener |
|
|
| Fasteners repeatedly jam |
|
|
| Tool will not drive down tight |
|
|
Have product questions? Need technical support? Please feel free to contact us:
1-800-232-1195 (M-F 8AM-5PM CST)
TECHSUPPORT@WENPRODUCTS.COM
For replacement parts visit WENPRODUCTS.COM

Documents / Resources
References
![wenproducts.com]() WEN - Shop Generators, Woodworking Tools, and Power Tools — WEN Products
WEN - Shop Generators, Woodworking Tools, and Power Tools — WEN Products![wenproducts.com]() WEN - Shop Generators, Woodworking Tools, and Power Tools — WEN Products
WEN - Shop Generators, Woodworking Tools, and Power Tools — WEN Products
Download manual
Here you can download full pdf version of manual, it may contain additional safety instructions, warranty information, FCC rules, etc.
Download WEN 61711 - 18-Gauge 3/8-Inch to 1-Inch Air-Powered 1/4-Inch Pneumatic Stapler Manual
Advertisement


Need help?
Do you have a question about the 61711 and is the answer not in the manual?
Questions and answers