Garmin Tread Owner's Manual
Hide thumbs
Also See for Tread:
- Owner's manual (176 pages) ,
- Installation instructions manual (14 pages) ,
- Owner's manual (76 pages)
Table of Contents
Advertisement
Quick Links
Advertisement
Table of Contents

Related Manuals for Garmin Tread


Summary of Contents for Garmin Tread
- Page 1 TREAD ™ Owner’s manual...
- Page 2 © 2020 Garmin Ltd. or its subsidiaries All rights reserved. Under the copyright laws, this manual may not be copied, in whole or in part, without the written consent of Garmin. Garmin reserves the right to change or improve its products and to make changes in the content of this manual without obligation to notify any person or organisation of such changes or improvements. Go to www.garmin.com...
-
Page 3: Table Of Contents
Table of contents Viewing the Altimeter, Barometer and Compass..........12 Calibrating the compass....13 Getting started......... 1 Group Ride..........13 Device Overview........1 Starting a Group Ride......13 Turning the device on or off....1 Joining a Group Ride......13 Acquiring GPS signals......2 Rejoining a Recent Group Ride.. - Page 4 Viewing Previous Routes and Changing Your Active Route....38 Destinations.......... 26 Adding a location to your route..38 Garmin PowerSwitch™ App....27 Shaping Your Route......38 Activating a Power Switch....27 Avoiding Delays, Tolls and Areas..39 Turning Off All Switches....27 Avoiding traffic delays on your Customising a Button.......
- Page 5 Finding a location by category..... 44 Deleting a favourite location..... 51 Navigating to points of interest within a venue..........44 Rider Awareness Features and Viewing Your Garmin Explore Points of Alerts..........51 Interest........... 44 Synchronising Garmin Explore Enabling or Disabling Rider Alerts..51 Account Data........
- Page 6 My device does not appear as either a portable device or a removable drive or volume on my computer....... 61 Appendix........62 Mounting Your Tread in a Vehicle..62 Mounting Your Tread Base Edition in a Vehicle........... 63 Garmin PowerSwitch......63 Mounting Considerations....
-
Page 7: Getting Started
Getting started WARNING See the Important safety and product information guide in the product box for product warnings and other important information. 1 Connect to a Wi‑Fi network (Connecting to a Wi‑Fi Network, page 58)(optional). ® 2 Pair your Bluetooth phone and headset (Pairing Your Phone and Headset, page 32) (optional). -
Page 8: Acquiring Gps Signals
Active vehicle profile. Select to view the vehicle profile settings. Current time. Select to set the time (Setting the Time, page 55). Battery charge level. Tread app connection status (Pairing Your Phone and Headset, page 32). Temperature. Select to view the weather forecast (Viewing the Weather Forecast, page 25). -
Page 9: Adjusting The Volume
Adjusting the volume 1 Select 2 Select an option: • Use the slider bar to adjust the volume. • Select to mute the device. • Select a tick box to enable or disable additional sound options. Using the audio mixer You can use the audio mixer to set the volume levels for different audio types, such as navigation prompts or phone calls. -
Page 10: Adding A Vehicle Profile
WARNING See the Important safety and product information guide in the product box for product warnings and other important information. Garmin ® strongly recommends having an experienced installer with the proper knowledge of electrical systems install the device. Incorrectly wiring the power cable can result in damage to the vehicle or the battery and can cause bodily injury. -
Page 11: Mounting The Device On A Roll Bar
5 Tighten the knob slightly. 6 If necessary, rotate the Group Ride mount so that the Garmin logo faces up and adjust the mount for better viewing and operation. 7 Tighten the knob to secure the mount. -
Page 12: Mounting The Antenna
Mounting the Antenna NOTE: the mounted antenna must be at least 4 cm (1.57 in.) away from the nearest roll bar or metal surface to avoid radio interference. You can use the external antenna mount to mount your antenna in a more suitable location for your vehicle, such as a roll bar at the rear of your vehicle, to receive better radio reception. -
Page 13: Installing The Antenna On The Group Ride Mount
6 Screw down and tighten the antenna onto the external antenna mount plate. 7 Route the antenna cable along a suitable path in your vehicle and secure it using the included zip ties. Installing the Antenna on the Group Ride Mount NOTE: the mounted antenna must be at least 4 cm (1.57 in.) away from the nearest roll bar or metal surface to avoid radio interference. -
Page 14: Installing The Fist Microphone And Mount
Avoid wires, gauges, air bags, air bag covers, heating, ventilation, and air conditioning and other items when drilling pilot holes and attaching the mount to the vehicle. Garmin is not responsible for any damages or consequences arising from the installation. -
Page 15: Removing Your Device From The Mount
Removing Your Device from the Mount 1 Press the release button on the top of the mount. 2 Lift out the device. Replacing the Trim Ring You can replace the trim ring on your device with one of the included, coloured trim rings. 1 Remove the device from the mount. -
Page 16: Off-Road Navigation Features
Off-Road Navigation Features Routes A route is a path from your current location to one or more destinations. • For off-road use, you can set the device to calculate point-to-point routes in a straight line (Straight Line Routes, page 11). •... -
Page 17: Straight Line Routes
1 From the main screen, select Track Recorder. 2 Select Start. Navigating a Track You can navigate a saved track using the Garmin Explore app on your device. 1 Select Explore > Tracks. 2 Select a track. 3 Select Go!. -
Page 18: Viewing Your Collections On The Map
Viewing Your Collections on the Map Before you can view the Collections map layer, you must pair your device with the Tread app and sync your device with your Garmin Explore account. You can view your Garmin Explore collections directly on the map. You must enable the collections map layer to use this feature. -
Page 19: Calibrating The Compass
• To start a group ride with riders that have a Group Ride mount, select Create a Radio Group Ride. • To start a group ride with riders using the Tread app, select Create a Mobile Group Ride. 3 If necessary, select the radio channel and select Next. -
Page 20: Adding Riders To A Group Ride
Adding Riders to a Group Ride You can add riders to a group ride that is already in progress. 1 From the main menu, select Group Ride. 2 If necessary, select 3 Select Add. As new riders join the group ride, they appear on the list. 4 Select Continue. -
Page 21: Group Ride Settings
You can use the radio app to create radio presets, select a radio channel and select squelch codes. To use this feature, you must connect the device and the antenna to the Group Ride mount. The Tread device configures radio settings automatically when you join or create a group ride. -
Page 22: Turning The Radio Off
4 Select Transmitting Your Voice Before you can transmit your voice, you must pair your Tread device with a compatible Bluetooth headset or connect the fist microphone. You can transmit your voice over the radio using the connected fist microphone or a compatible Bluetooth headset. -
Page 23: Sending An Inreach Message
Sending an inReach Message Before you can send an inReach message using your Tread device, you must pair it with a compatible inReach device (Connecting an inReach Device, page 16). You can use your device to send inReach messages to your contacts. -
Page 24: Using The Map
Report Camera: allows you to report a speed or red light camera. This tool is available only when you have speed or red light camera data on your device and you have an active connection to the Tread app (Pairing Your Phone and Headset, page 32). -
Page 25: Up Ahead
Up ahead The Up Ahead tool provides information about upcoming locations along your route or the road on which you are travelling. You can view upcoming points of interest by category, such as restaurants, fuel stations or roadside services. You can customise the categories that show in the Up Ahead tool. Viewing upcoming locations 1 From the map, select >... -
Page 26: Viewing The Trip Information Page
• Select the arrows to scroll the chart. Viewing upcoming traffic NOTICE Garmin is not responsible for the accuracy or timeliness of the traffic information. Before you can use this feature, your device must be receiving traffic data (Traffic, page 42). -
Page 27: Searching For Traffic Incidents
Searching for traffic incidents 1 From the main menu, select > Traffic. 2 Select > Incidents. 3 Select an item in the list. 4 If there is more than one incident, use the arrows to view additional incidents. Customising the map Customising the map layers You can customise which data appears on the map, such as topographic maps and BirdsEye imagery. -
Page 28: Using The Apps
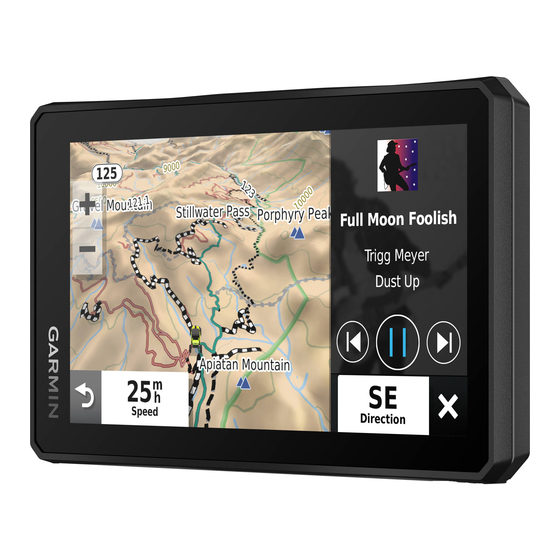
(optional). Music Player The music player can play music or audio from these sources. • Music files stored on your Tread device. • Bluetooth audio from a paired phone. Adding the Music Player Tool to the Map The music player map tool enables you to control the music player from your map. -
Page 29: Downloading Birdseye Imagery
Downloading BirdsEye Imagery Before you can download BirdsEye imagery directly to your device, you must connect to a wireless network (Connecting to a Wi‑Fi Network, page 58). 1 Select > BirdsEye Direct. 2 Select 3 Select an option: • To download BirdsEye imagery files for a specific location or area, select Location and select a category. NOTE: the location defaults to your current location. -
Page 30: Changing Routing Options For A Route
• To share a route using a Bluetooth connection, select Bluetooth. • To copy the route to a microSD card, select Memory Card. 3 Select a route. 4 Select Done. 5 Follow the on-screen instructions on your Tread device to complete the sharing process. TracBack ® Following your recent track The TracBack feature records the most recent segment of your movement. -
Page 31: Saving Your Recent Track As A Trip
• To add a favourite town, select Add Town, and enter a town name. Viewing the weather radar Before you can use this feature, your device must be connected to a supported phone running the Tread app (Pairing Your Phone and Headset, page 32). -
Page 32: Creating A Round-Trip Route
Creating a Round-Trip Route The device can create a round-trip route using a specified starting location and a distance, duration or destination. 1 From the main menu, select > Round Trip. 2 Select Start Location. 3 Select a location, and select Select. 4 Select Trip Attributes. -
Page 33: Garmin Powerswitch™ App
Displays Garmin PowerSwitch device tabs and custom layout tabs Activating a Power Switch Before you can use the Garmin PowerSwitch app to activate a switch, you must install your Garmin PowerSwitch device in your vehicle and pair it with the Garmin PowerSwitch app. -
Page 34: Customising A Button
Before you can use control input functions, you must connect a control input to your Garmin PowerSwitch device (Connecting a Control Input, page 67). You can assign one or more switches to turn on when the Garmin PowerSwitch device receives a signal from a control input. 1 Select 2 Select your Garmin PowerSwitch device. -
Page 35: Routines
Routines Routines automate your Garmin PowerSwitch device. When you define a routine on your compatible Garmin navigation device, it turns switches on or off automatically when the conditions of the routine are met. For example, you can set a routine to turn on a switch at specific time each day or when your vehicle reaches a specific speed. -
Page 36: Dog Tracking
The dog tracking features allow you to see information transmitted from your compatible Garmin handheld dog device on your Tread device. You can navigate to your dogs, view their current status and location, and observe the distance they have travelled. -
Page 37: Viewing Your Dogs On The Map
NOTICE Garmin is not responsible for the accuracy or timeliness of the traffic information. The Tread app allows your device to receive smart notifications and live information, such as live traffic data and weather information. Live traffic data: sends live traffic data to your device, such as traffic incidents and delays, construction zones... -
Page 38: Bluetooth Feature Status Icons
Some features also require the Tread app. You can connect to the Tread app during the pairing process or later. 1 Place the Tread device and your headset or phone within 3 m (10 ft.) of each other. -
Page 39: Receiving Notifications
Do not read or reply to notifications while driving. If you do so, you could become distracted by the display, which could lead to an accident causing serious personal injury or death. Before you can use this feature, your device must be connected to a supported phone running the Tread app (Pairing Your Phone and Headset, page 32). -
Page 40: Viewing The List Of Notifications
All features may not be available for your phone. Using Bluetooth wireless technology, your device can connect to your compatible mobile phone and wireless headset or helmet to become a hands-free device. To check compatibility, go to www.garmin.com/bluetooth. Placing a call 1 Select >... -
Page 41: Setting Up Bluetooth Features For Your Apple Device
• To disable audio from streaming media, clear the Media Audio tick box. Disconnecting a Bluetooth device You can temporarily disconnect a Bluetooth device without deleting it from the paired devices list. The Bluetooth device can connect to your Tread device automatically in the future. 1 Select > Wireless Networks. -
Page 42: Street Navigation
Street Navigation Starting a route 1 Select Search, and search for a location. 2 Select a location. 3 Select an option: • To start navigating using the recommended route, select Go!. • To choose an alternative route, select and select a route. Alternative routes appear to the right of the map. -
Page 43: Your Route On The Map
Your route on the map As you travel, the device guides you to your destination using voice prompts and information on the map. Instructions for your next turn or exit, or other actions appear across the top of the map. Next action in the route. -
Page 44: Viewing Turns And Directions
Viewing turns and directions While navigating a route, you can view next turns, lane changes, or other directions for your route. 1 From the map, select an option: • To view next turns and directions as you navigate, select > Turns. The map tool displays the next several turns or directions beside the map. -
Page 45: Avoiding Delays, Tolls And Areas
Avoiding Delays, Tolls and Areas Avoiding traffic delays on your route Before you can avoid traffic delays, you must be receiving traffic information. By default, the device optimises your route to avoid traffic delays automatically. If you have disabled this option in the traffic settings (Traffic Settings, page 55), you can view and avoid traffic delays manually. -
Page 46: Arriving At Your Destination
Avoiding a road 1 Select > Navigation > Custom Avoidances. 2 If necessary, select Add Avoidance. 3 Select Add Avoid Road. 4 Select the starting point of the section of road to avoid and select Next. 5 Select the ending point of the road section and select Next. 6 Select Done. -
Page 47: Taking A Route Using Garmin Adventurous Routing
Your device can calculate adventurous routes that prefer curvy roads, hills and fewer motorways. This feature can provide a more enjoyable ride, but it may increase the time or distance to your destination. The Garmin Adventurous Routing feature is not compatible with off-road trails. -
Page 48: Traffic
To provide traffic information, your device must be receiving traffic data. • All product models can receive subscription-free traffic data using the Tread app. Traffic data is not available in all areas. For information about traffic coverage areas, go to garmin.com/traffic. Receiving traffic data using your smartphone Your device can receive subscription-free traffic data while connected to a smartphone running the Tread app. -
Page 49: Finding And Saving Locations
Finding and saving locations The maps loaded in your device contain locations, such as restaurants, hotels, vehicle services, and detailed street information. The Search menu helps you find your destination by providing several methods to browse, search, and save this information. From the main menu, select Search. -
Page 50: Finding A Location By Category
Before you can synchronise account data, you must connect to the Tread app and enable Garmin Explore. You can synchronise data, such as tracks, with your Garmin Explore account. This can be helpful to keep your data available on each of your compatible devices. Your device periodically synchronises data with your account automatically. -
Page 51: Location Search Results
Select to find parking areas near the location. Select to view alternate routes to the locations. Select to start navigating to the location using Garmin Adventurous Routing. Select to start navigating to the location using the recommended route. Select to view the search results on the map. -
Page 52: Location Search Results On The Map
Location Search Results on the Map You can view the results of a location search on the map instead of in a list. From the location search results, select . The nearest location appears at the centre of the map, and basic information about the selected location appears at the bottom of the map. -
Page 53: Search Tools
• To start a route to the coordinates, select Go!. Finding petrol stations and prices Before you can use this feature, your device must be connected to a supported phone running the Tread app (Pairing Your Phone and Headset, page 32). -
Page 54: Finding National Parks
Finding National Parks Device models that include maps for North America or the United States also include detailed information for national parks in the United States. You can navigate to a national park or to a location within a national park. NOTICE You are responsible for understanding and complying with any applicable rules, laws or regulations associated with national parks. -
Page 55: Tripadvisor
Tripadvisor NOTICE Garmin is not responsible for the accuracy or timeliness of the Tripadvisor information. You are responsible for understanding and complying with any applicable rules, laws or regulations associated with points of interest. Your device includes Tripadvisor traveller ratings. Tripadvisor ratings appear automatically in the search results list for restaurants, hotels and attractions. -
Page 56: Adding A Shortcut
Adding a shortcut You can add shortcuts to the Where To? menu. A shortcut can point to a location, a category, or a search tool. The Where To? menu can contain up to 36 shortcut icons. 1 Select Search > Personalise. 2 Select an item. -
Page 57: Assigning Categories To A Saved Location
The rider alerts and speed limit features are for information only and do not replace your responsibility to abide by all posted speed limit signs and to use safe driving judgement at all times. Garmin is not responsible for any traffic fines or citations that you receive for failing to follow all applicable traffic laws and signs. -
Page 58: Red Light And Speed Cameras
Red light and speed cameras NOTICE Garmin is not responsible for the accuracy of or the consequences of using a red light or speed camera database. NOTE: this feature is not available for all regions or product models. Information about red light and speed camera locations is available in some areas for some product models. -
Page 59: Viewing Helmet Law Notifications
While you are using a motorcycle vehicle profile, helmet law and eye protection notifications may appear on your Tread device. Notifications appear the first time your device acquires satellites and when your device approaches a location with motorcycle safety rules. -
Page 60: Navigation Settings
Navigation settings Select > Navigation. Calculation Mode: sets the route calculation method. Off-Route Recalculation: sets recalculation preferences when navigating away from an active route. Avoidances: sets road features to avoid on a route. Custom Avoidances: allows you to avoid specific roads or areas. Toll Roads: sets preferences for avoiding toll roads. -
Page 61: Driver Assistance Settings
Driver Assistance Settings Select > Driver Assistance. Rider Alerts: allows you to enable or disable alerts for upcoming zones or road conditions (Rider Awareness Features and Alerts, page 51). Speeding Alert: alerts you when you are exceeding the speed limit. Reduced Speed Tone: alerts you when the speed limit decreases. -
Page 62: Language And Keyboard Settings
Battery voltage range From 3.5 to 4.1 V Wireless frequencies/protocols 2.4 GHz @ 18 dBm maximum The device withstands incidental exposure to water of up to 1 m for up to 30 min. For more information, go to www.garmin.com/waterrating. Device information... -
Page 63: Group Ride Specifications
• You can connect the device to a computer and update it using the Garmin Express application (garmin.com /express). The device withstands incidental exposure to water of up to 1 m for up to 30 min. For more information, go to www.garmin.com/waterrating. Device maintenance... -
Page 64: Connecting To A Wi-Fi Network
TIP: if a map update is interrupted or cancelled before it completes, your device may be missing map data. To repair missing map data, you must update the maps again using either Wi‑Fi or Garmin Express. Product updates On your computer, install Garmin Express (www.garmin.com/express). - Page 65 Updating Maps and Software with Garmin Express You can use the Garmin Express application to download and install the latest map and software updates for your device. 1 If you do not have the Garmin Express application installed on your computer, go to garmin.com/express...
-
Page 66: Device Care
• Remove the residue left on the windscreen by the suction cup. • Do not keep your unit in the glove compartment. • Register your device using the Garmin Express software (garmin.com/express). Restarting the Device You can restart your device if it stops functioning. -
Page 67: My Battery Does Not Stay Charged For Very Long
NOTE: if you have several network drives mapped on your computer, Windows may have trouble assigning drive letters to your Garmin drives. For information about assigning drive letters, see the help file for your operating system. -
Page 68: Appendix
Appendix Mounting Your Tread in a Vehicle NOTICE Before mounting the device, check the local laws pertaining to windscreen mounting. WARNING Do not use the suction cup mount on a motorcycle. See the Important safety and product information guide in the product box for product warnings and other important information. -
Page 69: Mounting Your Tread Base Edition In A Vehicle
Incorrectly wiring the power cable can result in damage to the vehicle or the battery and can cause bodily injury. You can use a connected Garmin PowerSwitch device to control lights, fans and more from your Tread device. Mounting Considerations •... -
Page 70: Mounting The Device
Avoid wires, gauges, air bags, air bag covers, heating, ventilation, and air conditioning and other items when drilling pilot holes and attaching the mount to the vehicle. Garmin is not responsible for any damages or consequences arising from the installation. -
Page 71: Opening The Front Cover
Opening the Front Cover You must open the front cover to make electrical connections. 1 Lift the front cover latch and rotate it anticlockwise. 2 Pull the front cover off of the device. Appendix... -
Page 72: Connecting Accessories
Connecting Accessories NOTICE Do not use the device to control or power a winch. Failure to follow this notice could cause damage to your vehicle or your device. Do not connect a power source to an accessory output terminal. Failure to follow this notice could cause damage to your vehicle or your device. -
Page 73: Connecting A Control Input
3 Verify that all electrical connections are tight and will not come loose during use. Connecting a Control Input You can connect to the control terminals to enable the Garmin PowerSwitch device to turn on customisable outputs. For example, you can connect your vehicle ignition switch to a control input terminal to turn on accessories automatically each time you start your vehicle. -
Page 74: Connecting The Device To Vehicle Power
Connecting the Device to Vehicle Power Before you can connect the device to vehicle power, you must remove the warning tag from the +12V terminal on the device. You should always confirm all electrical connections are secure and will not come loose while operating the device. -
Page 75: Pairing With A Garmin Navigation Device
Wireless Cameras Your device can display the video feed from one or more connected wireless cameras. The device withstands incidental exposure to water of up to 1 m for up to 30 min. For more information, go to www.garmin.com/waterrating. Appendix... -
Page 76: Pairing The Camera With A Garmin Navigation Device
The camera remains in pairing mode for two minutes. If pairing mode expires, you can remove and reinstall the batteries. 3 Bring the compatible Garmin navigation device outside your vehicle and within 1.5 m (5 ft.) of the camera and turn on the navigation device. - Page 77 TIP: it can be helpful to position the vehicle in the centre of a parking stall and then pull forward into the next stall. This allows you to use the parking stall lines at the rear of the vehicle as reference points for alignment. 2 From the paired Garmin navigation device, select > Wireless Cameras.
-
Page 78: Installing A Memory Card For Maps And Data
Garmin mapping software. The device supports microSD memory cards from 4 to 256 GB. 1 Locate the map and data memory card slot on your device (Device Overview, page 2 Pull up the weather cap from the microSD card slot. -
Page 79: Transferring Gpx Files From Your Computer
Adding BaseCamp Data to Garmin Explore ™ You can export your BaseCamp data files and import them to Garmin Explore for use with your Tread device. 1 Export your data from BaseCamp: • If you are using an Apple computer, see Exporting Data from BaseCamp with an Apple Computer, page •... -
Page 80: Viewing Gps Signal Status
2 Select the Map tab. 3 Select 4 Follow the on-screen instructions. Viewing GPS signal status Hold for three seconds. Purchasing additional maps 1 Go to your device product page at garmin.com. 2 Click on the Map tab. 3 Follow the on-screen instructions. Appendix... -
Page 81: Index
63 backup camera. See cameras music 22 barometer 12 battery Garmin Connect 31 charging 57 Garmin Explore 44 national parks 48 maximising 61 Garmin Express, updating software 58, 59 navigation 10, 11, 37, 40, 44 problems 61 going home 41 settings 54 Bluetooth 54 GPS 2, 74 next turn 37 Bluetooth technology 31, 32, 34, 61 group ride 13–15... - Page 82 TracBack 24, 25 tracks 11 Tracks 11 traffic 20, 42, 55 alternative route 39 incidents 21, 42 map 20, 42 searching for delays 21, 42 transportation modes 4 travel history 56 Tread, connecting 32 trim ring 9 trip information 19 resetting 20 view 20 Tripadvisor 49 troubleshooting 60, 61, 69 unit ID 56 ahead 19 customising 19 updating maps 57–59 software 57–59...
- Page 84 January 2022 GUID-16B1D74D-857B-4FFB-8DE2-A0960FE0D090 v5...