
Related Manuals for Unico S-1100


Summary of Contents for Unico S-1100
- Page 1 SPECTROPHOTOMETER MODEL S-1100 Operation Manual United Products & Instruments, Inc. Dayton, NJ USA www.unicosci.com 732-274-1155...
- Page 2 Interference For compliance with the EMC standards referred to in the EC Declaration of Conformity, it is necessary that only shielded cables supplied by UNICO are used when connecting the instrument to computers and accessories.
- Page 3 Featuring a digital display of photometric result, easy operation, and wavelength range of 335 to 1000 nm, UNICO 1100 series are ideal for measurements in the visible wavelength region of the electromagnetic spectrum.
- Page 4 Remove any obstructions or materials that could hinder the flow of air under and around the instrument. Turn on your spectrophotometer and allow it to warm up for 15 minutes. S-1100 Spectrophotometer...
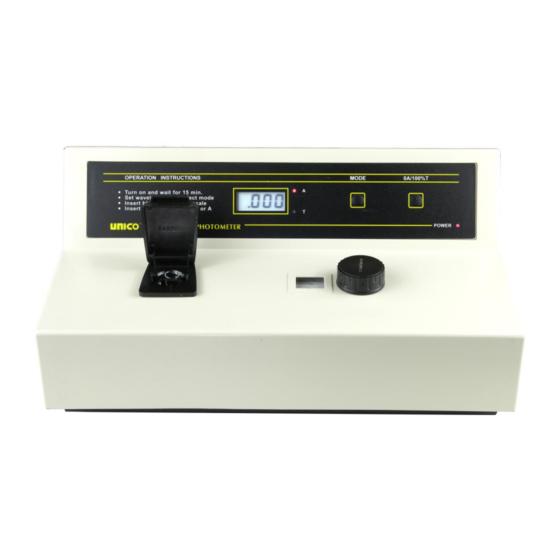
- Page 5 1100 Spectrophotometer Operation Panel Mode Indicator: Show the current measurement mode (T--%Transmittance, A--Absorbance) MODE Button: Switch between T and A measurement modes. 0A/100%T Button: Adjust Digital Display reading to 100%T or 0.000A when blank reference solution is in Sample Compartment. Sample Compartment: Accepts 10 mm test tube or 10 mm square cuvette (the square cuvette adapter is required).
- Page 6 USB Data Port Model 1100 has a USB port which will allow you to interface with a Windows® based computer for use with optional software, contact UNICO for details. The Spectrophotometer Application Software is Windows-based software designed to operate ®...
- Page 7 Maintenance Bulb Replacement 1. Turn off and unplug the instrument. Carefully turn the instrument upside down, making sure no cuvette or chemicals are in the Sample Holder. 2. Remove the grill plate on bottom of the instrument by removing the screw. 3.
- Page 8 Compartment again and close the lid. 7. Record the Absorbance reading on the Digital Display window. 8. Advance the wavelength setting by 1 nm and repeat steps 4 to 7. 9. Repeat step 8 until the wavelength setting reaches 370 nm. 10.
- Page 9 A good indication as to whether the stray light level is within specification may be obtained as follows: Set the wavelength to 340 nm. Set the MODE button to T. With the square cuvette adapter in the Sample Compartment without a cuvette close the lid and press the 0A/100%T (∧) button to set the display to 100.0%.
- Page 10 Transmittance to and analytical procedure. Absorbance Defective electronic component. Call an authorized service correlation engineer. Digital Display Wrong wavelength setting. Check sample procedure and does not change wavelength setting. Insufficient sample volume. Fill cuvette with more sample. Stray sample preparation vapors. Prepare the sample away from the instrument.
Need help?
Do you have a question about the S-1100 and is the answer not in the manual?
Questions and answers