
Related Manuals for Unico S-2150 Series


Summary of Contents for Unico S-2150 Series
- Page 1 S-2150 SERIES SPECTROPHOTOMETER USER’S MANUAL V 2.0 United Products & Instruments, Inc. 182-E Ridge Road Dayton, NJ 08810 732-274-1155 FAX 732-274-1151 www.unicosci.com Rev. S2150-5.0...
-
Page 2: Table Of Contents
TABLE OF CONTENTS General information……………………………………………………………… Safety…………………………............……… Electrical………………………………………………………………..Warning…………………………………………………………………….. Performance………………………………………………………………… Radio Interference………………………………………………………….. Introduction…................……………… Working Principle...............…………… Unpacking Instructions.............………………….. Specifications…....................Installation................……....Operational Panel..............……....Description of Keys..............…….... Operation Instruction ............……………....Spectrophotometer Initialization ................. BASIC MODE-%T/Abs Measure..........……………. Quantitative Test...............……………… Define/Establish Test Method……………………………………….. By Standards………………………………………………… By Known Factors…………………………………………… Run Tests ……………………………………………………………. -
Page 3: General Information
1. General information The apparatus described in this manual is designed to be used by properly trained personnel in a suitable equipped laboratory. For the correct and safe use of this apparatus it is essential that laboratory personnel follow generally accepted safe procedures in addition to the safety precautions called for in this manual. -
Page 4: Performance
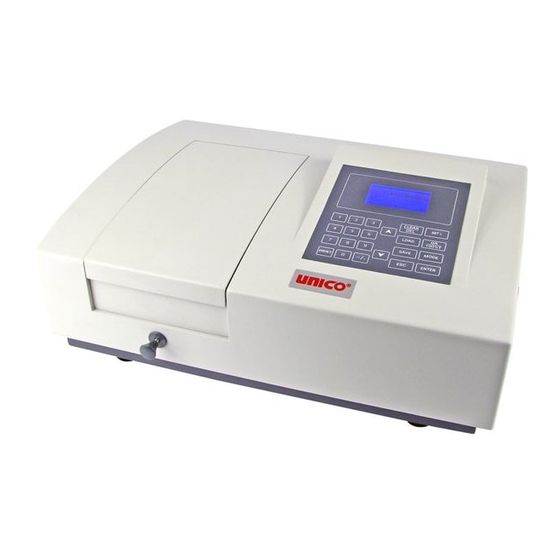
Introduction The UNICO S-2150 series are single beam, general purpose instruments designed to meet the needs of the Conventional Laboratory, They are ideal for various applications, such as: Clinical Chemistry, Biochemistry, Petro-chemistry, Environmental Protection, Food and Beverage Labs, Water and Waste Water Labs and other fields of quality control and research. -
Page 5: Unpacking Instructions
S-2150 Series incorporate an USB bi-directional port for connecting to a PC for using the UNICO Application Software. -
Page 6: Installation
Data output For RS232 printer and firmware For RS232 printer and firmware upgrade upgrade Power Requirements 90-240Vac, 50-60 Hz 90-240Vac, 50-60 Hz Dimensions 550W x 400D x 270H (mm) 550W x 400D x 270H (mm) Light Source Tungsten Halogen Tungsten Halogen/Deuterium Weight 46 lbs. -
Page 7: Operational Panel
Operational Panel Description of Key Functions 【CLEAR/DEL】 Clear or delete 【SET λ】 Set wavelength 【0Abs/100%T】 Blank ( Set 0Abs and 100%T) or establish baseline; LOAD 【 】 Load saved curve; 【MODE】 Select type of measurement; 【ESC】 Escape or back to previous screen; 【ENTER】... -
Page 8: Operation Instruction
Turn on the spectrophotometer by pressing the Power Switch (IO) on the back of the instrument. The instrument will automatically run a self-initialization check. The screen displays sequentially the checking status. Initializing Booting System: Check clock ..UNICO Instrument Ltd. (You may press EXIT to skip 15 minutes warm up which is not recommended). - Page 9 (Note: If previously saved data is lost the instrument will automatically run system calibration) Dark current Booting System: Warm up 15 min..√ System calibration. UNICO Instrument Ltd. Goto end... Booting System: Warm up 15 min..√ System calibration. UNICO Instrument Ltd.
- Page 10 Search end... Booting System: Warm up 15 min..√ System calibration. UNICO Instrument Ltd. Goto 546nm Booting System: Warm up 15 min..√ System calibration. UNICO Instrument Ltd. The instrument is ready for use. Below is the Main Menu. 2.2 BASIC MODE ━ %T/Abs or Energy Measurement Use arrow button to highlight BASIC MODE and then press ENTER to select 2.2.1...
-
Page 11: Basic Mode-%T/Abs Measure
If Energy type is selected the display will show the energy counts as shown below. 2.2.3 To reset wavelength press【SETλ】button. The display first shows the current wavelength. Enter the desired wavelength as shown below. - Page 12 Press【ENTER】 button to confirm.The instrument will go from previous wavelength (546nm) to the desired wavelength (500nm) and automatically blank. Note: You must blank your reference before measure any sample. Follow your lab procedures for preparing the reference liquid and the steps below to set the blank: 2.2.4 Make a blank reference solution by filling a clean cuvette with distilled or de- ionized water or other specified solvent.
- Page 13 2.2.7 Now it is ready to measure your samples: 2.2.8 Remove the blank cuvette if you are testing more than 3 samples. Set it aside in the case that you may need to reset 0A/100%T later (i.e. change wavelength). 2.2.9 Rinse a second cuvette (or more) with a small amount of sample solution to be tested.
-
Page 14: Quantitative Test
Note: • If you are reading more than one cuvette, be sure to carefully move the cuvette holder to the next position by pulling on the sample holder rod until the holder “click” into place. • If you are reading 3 or less samples, then place the reference cuvette in the position nearest you, and the samples in the next available position. -
Page 15: Define/Establish Test Method
This instrument allows user to: • Create New Curve • Edit pre-defined and saved curve • Delete pre-defined and saved curve • Load pre-defined and saved curve • Add pre-defined and saved curve to your favorite test folder for easy and fast access “Quantitative mode”at the main menu. - Page 16 【∨】to scroll the unit list (ppm,ppb,ng/ul,ng/ml,g/l,mg/l,%). Press【 ENTER】to confirm the unit selection. Next is to select the wavelength, use 【0】~【9】numerical keys to enter the desired wavelength(i.e. 500nm. Press【ENTER】to confirm the wavelength selection. Then the type of curve needs to be selected. There are two kinds of curves; “Linear” or “Linear through zero.
- Page 17 the selection. Standard ②WL 500nm ③Curve Linear ④No of Stds Enter number(2-8):2_ Up to 3 standard solutions of the same concentration standard can be measured. The average will be used for final calculation. Use the numerical key to enter the desired times of measurement for each standard concentration.
- Page 18 2.3.2.4 Measure the standards After the parameters are setup and the reference is blanked it will automatically move to measure the standards. In this case we have chosen: Two standards Three standard sample solutions for each standard concentration. Follow the step by step instruction on the LCD screen to measure all the standard samples. •...
- Page 19 • Press ENTER to measure it. The measured the absorbance value is displayed. • Then enter the concentration value of the second sample solution of the No. Standard. Insert that solution into the cuvette holder in the optical path. Press 【ENTER】to measure it. •...
- Page 21 After the last standard sample solution has been measured the screen display will you if you want to continue to processing the data. Select “Y” to continue. Then you need to decide if you want to save the curve in the memory for future use. If “Confirm to Save?No”is selected and confirmed,the curve will not be saved and the curve will be displayed on the screen.
- Page 22 to replace certain standard curve, or to the previously-deleted-curve-slot that is open. When “Yes” is selected the slot after the last saved curve will be highlighted. You may press ENTER to save in that slot. (Take note of the sequence number of the saved curve). If you decide to save the in any other open slot or want to replace an existing saved curve, use the 【∧】and【∨】to highlight that open slot or saved curve, press ENTER to save.
-
Page 23: By Known Factors
2.3.2.6 Replace previously saved curve If you decide to save the in any other open slot or want to replace an existing previously saved curve, use the 【∧】and【∨】to highlight that open slot or saved curve, press ENTER to save. 2.3.2.7 Display Curve and Equation The standard curve will be displayed regardless of your choice to save or not save the curve. - Page 24 Set the Parameters At Standard screen,①Unit is highlighted with“Select Unit:ppm”at the bottom,use 【∧】,【∨】to scroll the unit list (ppm,ppb,ng/ul,ng/ml,g/l,mg/l,%). Press【 ENTER】to confirm the unit selection. Next is to select the wavelength, use 【0】~【9】numerical keys to enter the desired wavelength(i.e. 500nm. Press【ENTER】to confirm the wavelength selection. Then enter the slope K value of the standard curve.
- Page 25 The next step is to enter the intercept B value Then you need to decide to save the curve or not. Please refer to “Save Curve” and “Replace previously saved Curve” described in “By Standards” 2.3.4 Edit Curve At “Quantitative” use【∧】,【∨】to highlight“②Edit Curve”. Press【ENTER】to confirm the selection.
- Page 26 Edit Unit, Wavelength and any other parameter setting. Then run the standards measurement with the new standards solutions to re-establish the curve. The newly established curve will replace the previously saved curve. Note: You may press【ESC】to cancel editing before measuring the new standards. 2.3.5 Delete Curve At “Quantitative”...
- Page 27 To avoid possible accidental delete you will be asked one more time to confirm. “Are you sure: NO” is displayed. Press 【ESC】to stop deleting process. If you are absolutely sure you want to delete the curve switch “Yes” using【∧】or【∨】button. Press【ENTER】and the curve will be permanently removed from the memory. Now the sequence slot is kept and open.
-
Page 28: Run Tests
2.3.6 Load Curve to Run At “Quantitative” use【∧】,【∨】to highlight“④Load Curve”. Press【ENTER】to get into “Load Curve” screen. Press【ENTER】to load the highlighted curve and run test. 2.3.7 Load Curve to “Favorite Tests” At “Quantitative” use【∧】,【∨】to select“④Load Curve”. Press【ENTER】to get into “Load Curve” screen. Use【∧】,【∨】to highlight the curve . - Page 29 Note: The same curve is still kept in the general saved curve list. 2.3.8 Favorite Tests “Favorite Tests” is designed for easy access to the most frequently used curves. At “Quantitative” use【∧】,【∨】to select“⑤Favorite Tests”. Press【ENTER】to confirm your selection. 【ENTER】 Select the desired curve in the favorite tests list and press to run test.
- Page 30 2.3.9 Run Test using Standard Curve Follow the instruction described in the previous section in this manual to load the standard curve. 1) Insert blank reference into the cuvette holder in the optical path. Press 【0A/100%T】to blank. +0.562*A-0.341 500nm Blanking... Insert sample into the cuvette holder in the optical path and press 【ENTER】to measure.
-
Page 31: System Setup
Repeat the above procedure to measure the other samples. You may delete certain test result in the table. Move * to highlight the test result and press to 【CLEAR/DEL】it. Press【PRINT】to print the test results. DNA/Protein There are three methods to choose for DNA Ratio, RNA ratio and concentrations of RNA, dsDNA, ssDNA and olig.. - Page 32 At the main menu select“System Setup”. Choose “Clock Setup” and press【ENTER】to confirm. 3.1.1 Set Time Highlight “Set Time”. Enter time in the order of hour, minute and second. Enter time in the order of hour, minute and second. For example 19:30:00 stands for 7:30pm. 3.1.2 Set Date The date is enter in the order of date (DD), month (MM) and year (YY).
-
Page 33: Dark Current
3.1.3 Dark Current At “System Setup” select “Dark Current” to check and refresh the system dark current. The marked“1”is the live dark current value at 0-gain which should not be zero or negative. Press【ENTER】will refresh the dark current;Press【PRINT】to view the energy counts at different gain-setting (from 0 to 7). -
Page 34: Wl Calibration
3.1.4 WL Calibration (Wavelength Calibration) At “System Setup” choose “WL Calibration” to recalibrate the system and the wavelength. 【ESC】to return back to (If you decide not to recalibrate the wavelength press “System Setup”.) a) Recheck Dark Current Dark current 546nm Calibration λ... -
Page 35: Wl Correction
Goto end... 546nm Calibration λ... c) Search the “0” order light for re-positioning d) Finish wavelength calibration and move to 546nm 3.1.5 WL Correction (Wavelength Correction) The wavelength is pre-calibrated and can be recalibrated using WL Calibration function. If for any reason the wavelength accuracy is off it can be fine adjusted by reset it using the wavelength correction function in the system setup. -
Page 36: Language
3.1.6 Language At “System Setup” select “Language”. Then choose the preferred language for operation. 3.1.7 Firmware Version You can check the firmware version from the “System Setup” 3.1.8 Lamp Service – S2150UV ONLY. This option is not available on S2150 Visible model At “System Setup”... -
Page 37: Pc Link
Controlled by PC... Press ESC to return.. When the communication between the instrument and the computer is established via USB port the computer is in control. For details of the PC software please refer to UNICO application software manual. 5. Accuracy Check 5.1 Wavelength Calibration:... -
Page 38: Didymium Filter Method
5.1.1 Holmium Oxide Filter Method: 1. Turn instrument on and allow it to warm up for 15 minutes. 2. Select the BASIC MODE. 1. Set the wavelength to 350nm. 2. Make sure the cuvette holder is empty in the sample compartment. Close the sample compartment lid. -
Page 39: Absorbance Accuracy Checks
The absorbance accuracy should be checked against a set of neutral density filters accurately calibrated to the NIST standards. Contact your UNICO representative for more information (800-588-9776). An alternative method using potassium dichromate is described below. Due to the many factors that might affect the results (i.e. - Page 40 Select BASIC MODE With the sample compartment empty, close the lid and press the 0A/100%T key to set the LCD display to 100.0%. Prepare a solution containing 50gm/L of sodium nitrite (NaNO ) in distilled water and fill a square cuvette with this solution.
-
Page 41: Trouble Shooting
Trouble Shooting PROBLEM Possible Solution Instrument Inoperative Power cord not connected to Plug instrument in. outlet Dead Power outlet Change to a different outlet Internal fuse blown or defective Call an authorized service engineer. electronic component Improper power input Check the power supply (100v-230v) Instrument cannot set Light beam blocked Check sample holder. -
Page 42: Error Code Definitions
Error Messages... - Page 43 Error Message Description Solution Locating Instrument unable to If D2/halogen change-over motor does not work lamp...X locate the lamp 1) J3 connector on CPU and motor cable maybe change-over switch loose 2) D2/halogen motor is malfunctioning 3) U3 Chips (TD62083) on is defective. If D2/halogen change-over motor works 1) J9 connector on CPU and micro-switch cable maybe loose...
- Page 44 4) Lamp is off/dead 5) Detector PCB malfunctioning (dark current either negative or too high) WL Sensor 2...X Wavelength bar 1. WL driving motor is malfunctioning and running reversely reaches the back end and triggers the back- WL bar protection micro-switch is defective end protection sensor System Unable to complete...
Need help?
Do you have a question about the S-2150 Series and is the answer not in the manual?
Questions and answers