Proxim ORiNOCO AP-700 User Manual
Hide thumbs
Also See for ORiNOCO AP-700:
- User manual (258 pages) ,
- User giude (222 pages) ,
- Specifications (2 pages)
Table of Contents
Advertisement
Quick Links
Advertisement
Table of Contents

Related Manuals for Proxim ORiNOCO AP-700


Summary of Contents for Proxim ORiNOCO AP-700
- Page 1 ORiNOCO AP-700 User Guide...
- Page 2 Proxim Corporation. Trademarks ORiNOCO is a registered trademark, and Proxim, and the Proxim logo are trademarks of Proxim Corporation. All other trademarks mentioned herein are the property of their respective owners. OpenSSL License Note This product contains software developed by the OpenSSL Project for use in the OpenSSL Toolkit (http:// www.openssl.org/) and that is subject to the following copyright and conditions:...
- Page 3 ORiNOCO AP-600 User Guide Contents Introduction ........... .13 Document Conventions .
- Page 4 Contents Setup Wizard Instructions..........27 Download the Latest Software .
- Page 5 Contents Services ..............57 Secure Management .
- Page 6 Contents RADIUS Authentication with 802.1x ..........82 RADIUS Accounting .
- Page 7 Contents IP/ARP Table ............113 Learn Table .
- Page 8 Contents HTML Help Files Do Not Appear ......... . . 134 Telnet CLI Does Not Work .
- Page 9 Contents download ............. 148 help .
- Page 10 Contents Set RADIUS Parameters ..........162 Set Rogue Scan Parameters .
- Page 11 Spanning Tree Parameters..........184 Storm Threshold Parameters .
- Page 12 802.11g Channel Frequencies..........198 Wireless Communication Range .
-
Page 13: Document Conventions
As wireless clients move from one coverage cell to another, they maintain network connectivity. To determine the best location for an Access Point, Proxim recommends conducting a Site Survey before placing the device in its final location. For information about how to conduct a Site Survey, contact your local reseller. -
Page 14: Guidelines For Roaming
Introduction Once initialized, the network administrator can configure each unit according to the network’s requirements. The AP functions as a wireless network access point to data networks. An AP network provides: • Seamless client roaming (not available with 802.1x security) •... -
Page 15: Ieee 802.11 Specifications
Introduction IEEE 802.11 Specifications In 1997, the Institute of Electrical and Electronics Engineers (IEEE) adopted the 802.11 standard for wireless devices operating in the 2.4 GHz frequency band. This standard includes provisions for three radio technologies: direct sequence spread spectrum, frequency hopping spread spectrum, and infrared. Devices that comply with the 802.11 standard operate at a data rate of either 1 or 2 Megabits per second (Mbits/sec). -
Page 16: Snmp Management
ORiNOCO Enterprise MIB Proxim provides these MIB files on the CD included with each Access Point. You need to compile one or more of the above MIBs into your SNMP program’s database before you can manage an Access Point using SNMP. Refer to the documentation that came with your SNMP manager for instructions on how to compile MIBs. -
Page 17: Getting Started
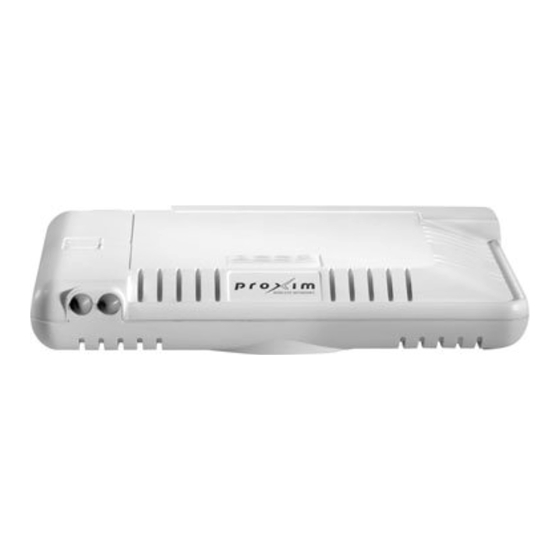
ORiNOCO AP-600 User Guide Getting Started • AP-700 Hardware Description • Dual Band Range Extender Antenna Description • Prerequisites • Product Package • System Requirements • Hardware Installation • Initialization • Download the Latest Software • Additional Hardware Features AP-700 Hardware Description The AP-700 is a tri-mode AP that supports 802.11b, 802.11g, and 802.11a clients. -
Page 18: Dual Band Range Extender Antenna Description
Getting Started The AP-700 has been designed to rest horizontally on a flat surface, but can be wall or ceiling mounted with the long axis vertical. The bottom of the unit includes screw slots in the bottom plastic for mounting to a flat wall or ceiling. Dual Band Range Extender Antenna Description The AP-700 can use internal or external antennas. -
Page 19: Product Package
Getting Started Product Package Each AP-700 comes with the following: • AP-700 unit (with integrated 802.11a/b/g radio, and Active Ethernet) • Power adapter • One ceiling or wall mounting plate • Security cover • One Installation CD-ROM that contains the following: –... -
Page 20: Hardware Installation
Getting Started Hardware Installation Unpack the Access Point and accessories from the shipping box. Verify the contents as follows: • AP-700 unit • Mounting bracket with screws • Power adapter • Security cover • Quick Installation Flyer • Software CD Perform the following procedures to install the AP-700 hardware: •... -
Page 21: Installing The Security Cover
Getting Started 5. Verify LED Status 6. When the AP-700 boots, it performs a series of self-tests. 7. Wait for the power LED to turn green before proceeding. Installing the Security Cover You can optionally install a security cover to deter unauthorized access to the AP-700. The security cover is a plastic cover that prevents access to the cabling and to the Reset and Reload buttons. -
Page 22: Installing Range Extender Antennas
Getting Started Mounting the AP-700 to a Wall 1. Put the mounting plate up to the wall. 2. Screw through the mounting plate. 3. Place the AP up against the mounting plate. Orient the AP with the long access vertical, with the connectors facing to the left. - Page 23 Getting Started T-Bar Ceiling Installation Perform the following steps to mount the Dual Band REA to a T-bar ceiling: 1. Detach the Antenna Body from the Main Base. 2. Remove the Metal Plate. 3. Turn over the Bottom Plate and reinstall it on the Main Base. 4.
- Page 24 Getting Started 2. When connecting the first REA cable to a radio, attach the cable to the outer connector in the compartment (connector 1). NOTE There are two antenna connectors in the AP-700 labeled 1 through 2. When connecting one REA to the radio, use connector 1.
-
Page 25: Scantool Instructions
Getting Started Initialization Proxim provides two tools to simplify the initialization and configuration of an AP: • ScanTool • Setup Wizard ScanTool is included on the Installation CD; the Setup Wizard launches automatically the first time you access the HTTP interface. - Page 26 Getting Started NOTE If your computer has more than one network adapter installed, you will be prompted to select the adapter that you want ScanTool to use before the Scan List appears. If prompted, select an adapter and click OK. You can change your adapter setting at any time by clicking the Select Adapter button on the Scan List screen.
-
Page 27: Setup Wizard Instructions
Getting Started Figure 2-8 Scan Tool Change Screen Set IP Address Type to Static. Enter a static IP Address for the AP in the field provided. You must assign the unit a unique address that is valid on your IP subnet. Contact your network administrator if you need assistance selecting an IP address for the unit. - Page 28 Getting Started Figure 2-9 Enter Network Password Figure 2-10 Setup Wizard 5. Click Setup Wizard to begin. If you want to configure the AP without using the Setup Wizard, click Exit and see Advanced Configuration. The Setup Wizard supports the following navigation options: •...
- Page 29 Getting Started 8. Assign the AP new passwords to prevent unauthorized access and click Save & Next. Each management interface has its own password: — SNMP Read Password — SNMP Read-Write Password — CLI Password — HTTP (Web) Password By default, each of these passwords is set to “public”. See Passwords for more information.
-
Page 30: Download The Latest Software
11. When finished, click Reboot on the Summary screen to restart the AP and apply your changes. Download the Latest Software Proxim periodically releases updated software for the AP on its Web site at http://www.proxim.com. Proxim recommends that you check the Web site for the latest updates after you have installed and initialized the unit. -
Page 31: Download Updates From Your Tftp Server Using The Cli Interface
9. The Access Point will reboot automatically when the download is complete. Download Updates from your TFTP Server using the CLI Interface 1. Download the latest software from http://www.proxim.com. 2. Copy the latest software updates to your TFTP server. 3. Open the CLI interface via Telnet or a serial connection. -
Page 32: Active Ethernet
Getting Started Active Ethernet The AP-700 is equipped with an 802.3af-compliant Active Ethernet module. Active Ethernet (AE) delivers both data and power to the access point over a single Ethernet cable. If you choose to use Active Ethernet, there is no difference in operation;... - Page 33 Getting Started Blinking The AP is reloading. Amber Solid Red Power On Self Test (POST) running. Blinking Red Rebooting.
-
Page 34: Related Topics
Getting Started Related Topics The Setup Wizard helps you configure the basic AP settings required to get the unit up and running. The AP supports many other configuration and management options. The remainder of this user guide describes these options in detail. –... -
Page 35: Status Information
ORiNOCO AP-600 User Guide Status Information • Logging into the HTTP Interface • System Status Logging into the HTTP Interface Once the AP has a valid IP Address and an Ethernet connection, you may use your web browser to monitor the system status. -
Page 36: System Status
Status Information System Status System Status is the first screen to appear each time you connect to the HTTP interface. You can also return to this screen by clicking the Status button. Figure 3-2 System Status Screen Each section of the System Status screen provides the following information: –... -
Page 37: Advanced Configuration
ORiNOCO AP-600 User Guide Advanced Configuration • Configuring the AP Using the HTTP/HTTPS Interface • System: Configure specific system information such as system name and contact information. • Network: Configure IP settings, DNS client, DHCP server, DHCP Relay Agent, DHCP Relay Servers, and Link Integrity.
Need help?
Do you have a question about the ORiNOCO AP-700 and is the answer not in the manual?
Questions and answers