Table of Contents
Advertisement
Advertisement
Table of Contents

Related Manuals for Chuango LTE-400


Summary of Contents for Chuango LTE-400
- Page 1 LTE-400 WiFi & Cellular Smart Home Alarm System User Manual...
- Page 2 Foreword Thank you for purchasing the alarm system. Please unpack the product, familiarize yourself with the component parts, and carefully read through the instruction guide before installation. The installation must be completed in the order shown in the guide to ensure a successful installation.
-
Page 3: Table Of Contents
Contents Packing List -------------------------------------------------------------------------------------------- 1 Getting Know Your System -------------------------------------------------------------------------- 2~3 Hub ------------------------------------------------------------------------------------------------- 2 Description of Indicator Lights ---------------------------------------------------------------------- 3 How to identify if the system is working through WiFi or Cellular? ---------------------------------- 3 Remote Control ---------------------------------------------------------------------------------------- 4 Door/Window Contact --------------------------------------------------------------------------------- 5 Tamper Switch --------------------------------------------------------------------------------------- 5 Low Battery Indication ------------------------------------------------------------------------------- 5 Pet-Immune PIR Motion Detector ------------------------------------------------------------------- 6~7... -
Page 4: Packing List
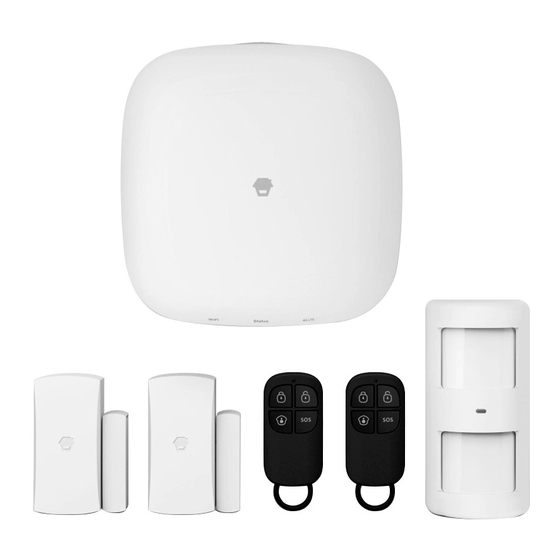
Packing List Smart Hub x1 PIR-910 Pet-immune PIR DWC-102 Door/ Motion Detector x1 Window Contact x2 Hub Bracket x1 Power Adapter x1 RC-80 Remote Control x2 Quick Guide PIR Motion Detector Double-sided Tape for Door/Window Bracket x1 Sensor x4... -
Page 5: Getting Know Your System
Getting to Know Your System WiFi SOS Button Cellular Indicator Light Indicator Light Status Indicator Light Top Side Front Side Tamper Switch SIM Card Slot AC Adapter Port Power Switch Configuration Button Back Side... -
Page 6: Description Of Indicator Lights
Description of Indicator Lights Indicator Light Status Meaning Blinking Searching for Wi-Fi network Wi-Fi Indicator Booting up after power on or Cellular network is Light Solid Yellow connected, but the system is using the WiFi network. White Powered on Hub is in low battery condition. Please connect with AC Blinking White power. -
Page 7: Remote Control
Remote Control The remote control can be used to Arm, Home Arm and Disarm the system. It can also be used to trigger an emergency alarm (SOS) manually. LED Indicator Disarm Button Arm Button Home Arm Button SOS Button Button System Status All sensors will be Armed. -
Page 8: Door/Window Contact
Door/Window Contact Door/window contacts are set to ‘ A rmed’ zone by default and are ideal for protecting entry/exit points such as front doors, back doors, and windows. When the system is Armed (Away Mode) and the door/window contact is triggered (magnet separated from the transmitter), the hub internal siren will sound immediately and send a push notification with the sensor name to its registered users. -
Page 9: Pet-Immune Pir Motion Detector
Pet-Immune PIR Motion Detector Triggers Triggers when > 2cm when > 2cm LED blinks once LED blinks once The motion detector is designed for use on interior walls and is set to Home Mode by default. Whenever the sensor detects movement (only while the alarm is armed), a push notification including the sensor name will automatically be sent to the registered users, and the hub’s internal siren will sound immediately. -
Page 10: Pet-Immune Function
Pet-Immune Function This sensor adopts dual detection window design to improve detection accuracy. It was only when both detection windows detect body movement will it trigger an alarm. While only one window will not cause an alarm. Based on this principle, pets less than 25 kg will not be detected by the sensor. -
Page 11: Getting Started
Getting Started Step One: Download the App Download the app from the App Store or Google Play by searching the keywords “DreamCatcher Life”. DreamCatcher Life Step Two: Sign Up/ In Press the “Sign up” button on the page and follow the instructions to create your account first. -
Page 12: Step Three: Add The Smart Hub To The App
Press the configuration button for 5 times and you will hear one beep, then enter the Wi-Fi password and tap “Confirm”. Next, connect your mobile phone to the device’s hotspot. In your phone’s Wi-Fi list, connect to “LTE-400 Alarm” and then return to the app, wait for the connecting process to complete. - Page 13 Press the configuration button for 5 times and you will hear one beep, and then connect your mobile phone to the device’s hotspot. In your phone’s Wi-Fi list, connect to “LTE-400 Alarm” and then return to the app, wait for the connecting process to complete.
-
Page 14: Device Control And Settings
If you intend to use Cellular as a backup in case of Wi-Fi disconnection, please insert the SIM card and go to LTE-400 Settings --Advanced Settings -- first enable Cellular Network and input required information for cellular data in APN Settings. Set up SMS & Phone calls notification can be found here as well, input the number which you’... -
Page 15: System Status
System Status All sensors will detect for anomalies during this mode. The hub internal siren will sound immediately when a sensor is triggered. You and other pre-authorized users will receive push notifications on your phones. This mode is suitable when the property is unoccupied. It can be set from the remote control or app. -
Page 16: Zone Mode
Entry Delay Time: you can set this delay time on LTE-400[Settings]-[Delay Settings]-[Entry Delay]. Note: Optional Smoke, Gas Leakage or Water Flood Sensors are automatically registered as 24- Hour Zone sensors and cannot be changed to other Zones. -
Page 17: Add New Accessories To The Hub
Add New Accessories to the Hub Remote control, Door sensor and other accessories. Enter the LTE-400 Smart Hub home page and tap “+”beside accessory, then trigger the accessory to add it to the hub. Pair with Remote Control Press any button on the... -
Page 18: Settings
Settings Tap [ ] button to enter into hub setting page. Device Name This setting enables you to rename your hub, and the new name will be shown on the Home Page. Device Information Check detailed information of the hub and update firmware if needed. - Page 19 Wireless Outdoor Siren When connecting an Outdoor Siren (optional accessory) to the Hub, you can enable the arm/disarm alert sound of the siren on the app. Auto Arm/Disarm The system can be programmed to automatically Arm and Disarm the system at predefined times by following the steps below: 1.
- Page 20 Delay Settings Exit Delay Time Set a time delay for you to leave your property without triggering an alarm. You can choose to switch on the delay alert sound. Entry Delay Time (Available only for Delay Zone Sensor) Set a time delay for you to enter your property without triggering an alarm. You can choose to switch on the delay alert sound.
- Page 21 Advanced Settings Here you can find general settings of the hub, like enabling arm/disarm notification/ sounds, adjusting internal siren’s volume level, alarm duration, switching on interference detection and changing Wi-Fi network of the hub. Delete Device Click to delete the device, and the sharing settings that have been set will also be deleted.
- Page 22 History Operations and alerts can be reviewed from this history page. Tap on the [ ] to access the history page. You can tap on the [ ] at the top left corner and select a specific day to search for an alert. Only the most recent 300 alerts will be shown.
-
Page 23: App Operation
App Operation Main Page Devices There are four shortcut actions right below the hub online status: Home Arm, Disarm, Arm and SOS. Rooms If you have created rooms for your home, rooms will be listed here. Check for more information on [Me]-[Home Management]-[My Home]-[Room Management]. You can assign the hub to the room you’... - Page 24 Account Management Tap the portrait on the main page to enter the account management, where you can change your profile photo, add nickname and check your account and security related items like changing sign-in password and delete your account. Home Management Tap [Me] on the main page and tap [Home Management] to add home name, home location, add room(s) to your home and add member to your home.
- Page 25 SMS & Phone Call Notification If there is a SIM card inserted into the hub. The stored phone numbers (up to 5 numbers) will receive SMS and phone calls in case of triggered alarms. The Hub will make phone calls to the stored phone numbers successively (up to 3 rounds in turn).
- Page 26 Message Center Alerts Here you can check hub’s arm/disarm and triggered events. Bulletins Here you can check all system notifications, like firmware update, device sharing invitation etc. FAQ & Feedback Tap to find questions and answers to the products and application. Feel free to send us feedback on the product or the service.
-
Page 27: Remote Phone Operation
Remote Phone Operation User can store phone number in App [Setting]-[Advance Settings]-[SMS/Phone Call notification]. The hub sends SMS message and calls the stored numbers in case of alarm, the system is in a 1-minute-monitoring state, when the phone call is answered, then the user is able to press the number keys on the smart phone to control the system remotely. -
Page 28: Installation
Installation For the best signal, we recommend that you place the hub in an open, centrally located area. Avoid placing the hub on the ground, a load-bearing wall or beside electrical appliances. -
Page 29: Door/Window Sensor
Door/ Window Contact : Step 1: To power up the contact, remove the battery tab. Step 2: Attach the adhesive pads to the back of the transmitter and magnet. Step 3: Place the contact on the door/window frame and the magnet on the door/ window ensuring that the distance between them is not greater than 1cm when the door/window is shut. -
Page 30: Pir Motion Detector
PIR Motion Detector Avoid installing the motion detector facing windows, near air conditioning, heating, kitchen appliances, direct sunlight, in another motion detectors detection range, or areas with major temperature fluctuations. Step 1: Choose a suitable location. It is recommended to install the detector between 2-2.2m (roughly 6 1/2 to 7 1/2 ft.) high from the ground. - Page 31 Step 3: To test the detector press the test button on the back. It will enter and remain in testing mode (detect once every 10 seconds) for 3 minutes. Walk into the view of the detector and look for a red light. The LED indicator will blink when movement is detected.
-
Page 32: Replacing Accessory Batteries
Replacing Accessory Batteries Remote Control Remove the screw Open the casing Door/Window Contact Press down the back cover to slide it open and replace the battery Pet-Immune PIR Motion Detector Press down the snap joint Open the case and replace the battery <1cm <1cm <1cm... -
Page 33: Specifications
Specifications Power Supply 5-12Vdc 6W Battery 3.7V 2200mAh 18650 Rechargeable Lithium Battery WiFi IEEE 802.11b/g/n Cellular LTE Bands: B1/B3/B5/B7/B8/B20 GSM: B3/B8 Standby Current < 350 mA Alarm Current < 650 mA Internal Siren 93 dB Optional Accessories 10 Remote Controls, 50 Sensors Radio Frequency 315MHz or 433.92MHz *Europe and Australia: 433.92MHz... - Page 34 Door/ Window Contact Power Supply DC 1.5V (1.5V AA LR6 battery x 1pc) Static Current <35 uA Alarm Current <40 mA Transmitting Distance <80 m (open area/no interference) Radio Frequency 315MHz or 433.92 MHz *Europe and Australia: 433.92MHz Housing Material ABS Plastic Operating Condition Temperature 0°C~+50°C...
Need help?
Do you have a question about the LTE-400 and is the answer not in the manual?
Questions and answers