Advertisement
Quick Links
Advertisement

Subscribe to Our Youtube Channel
Related Manuals for Chuango OV-300


Summary of Contents for Chuango OV-300
- Page 1 OV-300 WiFi Alarm System User Manual...
-
Page 2: Table Of Contents
Foreword Contents Thank you for purchasing the OV-300 alarm system. Please unpack the product, Packing List ............................1 familiarize yourself with the component parts, and carefully read through the Hub ..............................2~3 instruction guide before installation. The installation must be completed in the order shown in the guide to ensure a Remote Control .............................4... -
Page 3: Hub
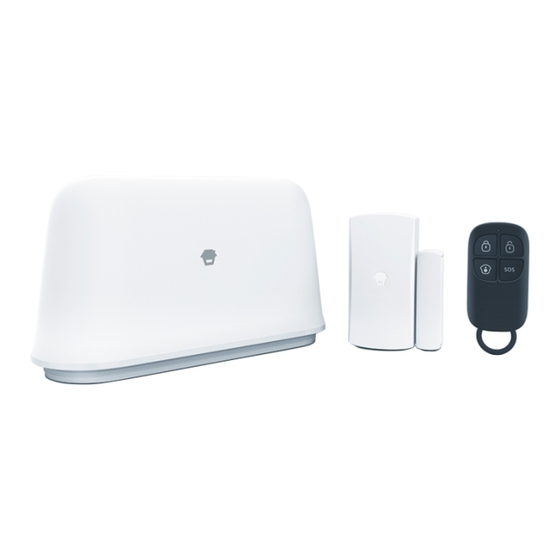
Packing List 1x Smart Hub All Sensors are wirelessly linked to the Hub. In the event of alarm activation, for example, when a Sensor is triggered, a push notification will automatically be sent to you and other pre-authorized users. The system can be controlled and monitored both on-site using the remote control supplied and remotely with the DreamCatcher Life app on the App Store and Google Play. - Page 4 Remote Control LED Indication Alternating red and blue Network configuration mode The remote control can be used to Arm (Away Mode), Home Arm, and Disarm the Alternating red, blue and green The hub is pairing with an accessory system. It can also be used to trigger an emergency alarm (SOS) manually. Searching for a network or disconnected Flashing once per second from router...
-
Page 5: Door/Window Contact
Door/ Window Contact Getting Started Door/window contacts are set to ‘Armed’ zone by default and are ideal for Step One: Download the App protecting entry/exit points such as front doors, back doors, and windows. When Download the app from the App Store or Google Play by searching the keywords the system is Armed (Away Mode) and the door/window contact is triggered “DreamCatcher Life”. - Page 6 When the red and blue indicators flash alternately, tap “Confirm” to Tap [+] in the home page, choose the device. enter the Wi-Fi password for the connected network. Then, connect to “OV-300 Alarm” on the Wi-Fi list from your mobile device. Once connected, return to the app and wait for the connecting process to complete.
-
Page 7: App Control And Settings
Main Page APP Control and Settings History & Setting System Status: Home arm / Disarm / Arm SOS Alarm Accessory Status Devices: There are four shortcut actions right below the hub online status: home System Status arm, disarm, arm and SOS. Arm (Away Mode) Rooms: If you have created rooms for your home, rooms will be listed here. - Page 8 Tap the accessory to enter its setting page where you can rename the device or set the device type and zone mode. Turn off the switch to disable the accessory. * Entry Delay Time: you can set this delay time on OV-300 [Settings]-[Delay Settings]-[Entry Delay]. Note: Optional Smoke, Gas Leakage or Water Flood Sensors are automatically registered as 24-Hour Zone Sensors and cannot be changed to other Zone.
- Page 9 Settings Wireless Outdoor Siren When connecting an Outdoor Siren (optional accessory) to the Hub, you can enable Tap [ ] button to enter into hub setting page. the arm/disarm alert sound of the siren on the app. Device Name This setting enables you to rename your hub, and the new name will be shown on the Main Page.
- Page 10 Delay Settings Advanced Settings Exit Delay Time Here you can find general settings of the hub, like enabling arm/disarm notification/ sounds, adjusting internal siren’s volume, alarm duration, switching on interference The hub will enter Arm state after the preset time. Set a time delay for you to leave detection and changing Wi-Fi network of the hub.
- Page 11 History Home Management Operations and alerts can be reviewed from this history page. Tap on the [ ] to You can check all your created home(s) and the home(s) that shared with you by access the history page. You can tap on the [ ] at the top left corner and select a other accounts.
- Page 12 Device Management You can check all your own devices in this section and share your own device(s) to others without adding them to your home. Tap the device then tap [+] to share it to other registered accounts. You can also delete the shared account if you don’t want people to have continuous access to the device you shared.
-
Page 13: Installation
Installation Step 3: Place the contact on the door/window frame and the magnet on the door/ window ensuring that the distance between them is not greater than 1cm when the door/window is shut. A weak WiFi signal can seriously affect the performance of this alarm system. Please make sure that the hub is located as close as possible to the main router for <1cm optimal connectivity. -
Page 14: Restoring To Factory Settings
Restoring to Factory Settings Remote Control Power Supply DC 3V (CR2025 lithium battery x 1pc) Press the Network Configuration button underneath the hub for 10 seconds, Transmit Current <8 mA hearing one beep at the third second then a long beep at the tenth second, which indicate the operation is complete.
Need help?
Do you have a question about the OV-300 and is the answer not in the manual?
Questions and answers