Table of Contents
Advertisement
Quick Links
Advertisement
Table of Contents

Subscribe to Our Youtube Channel
Related Manuals for KSB KWP


Summary of Contents for KSB KWP
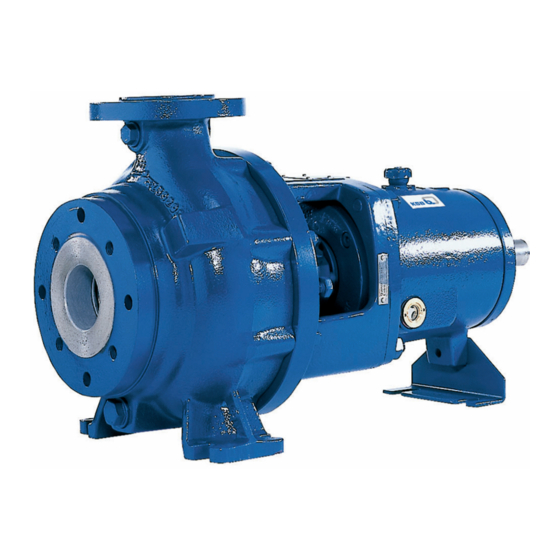
- Page 1 Dry-installed Volute Casing Pump Material variant - GN, GC2, C2 (casing variant 2) - GH, H (casing variants 2 and 3) Bearing bracket: P03ax to P12sx Installation types: 3, 4H, 3Z Installation/Operating Manual Order number: 9971599122/001900 Order item number: PU-XE-37 A/B Ident number:...
- Page 2 Original operating manual KSB Aktiengesellschaft Pegnitz All rights reserved. Contents provided herein must neither be distributed, copied, reproduced, processed for any other purpose, nor otherwise transmitted to a third party without KSB´s express written consent. Subject to technical modification without prior notice.
-
Page 3: Table Of Contents
Contents Contents Glossary ....................5 General ....................6 Principles ......................6 Installation of partly completed machinery ..........6 Target group ....................6 Other applicable documents ................6 Symbols ......................6 Safety ....................8 Key to safety symbols/markings ..............8 General ......................8 Intended use .................... - Page 4 Contents Protective equipment ................... 29 Checking the alignment of coupling/belt drive .......... 29 Aligning the pump and motor ..............32 Electrical connection ..................35 Checking the direction of rotation .............. 36 Commissioning/Start-up/Shutdown ..........38 Commissioning/start-up ................38 Operating limits .................... 43 Shutdown/storage/preservation ..............
-
Page 5: Glossary
Glossary Glossary Back pull-out design Pump The complete back pull-out unit can be pulled Machine without drive, additional components out without having to remove the pump casing or accessories from the piping. Pump set Certificate of decontamination Complete pump set consisting of pump, drive, A certificate of decontamination certifies that additional components and accessories the pump (set) has been properly drained to... -
Page 6: General
Noise characteristics (⇨ Section 4.6 Page 21) 1.2 Installation of partly completed machinery To install partly completed machinery supplied by KSB, please refer to the sub- sections under Servicing/Maintenance. (⇨ Section 7.5.6 Page 61) 1.3 Target group This manual is aimed at the target group of trained and qualified specialist technical personnel. - Page 7 1 General Symbol Description Step-by-step instructions Note Recommendations and important information on how to handle the product 7 of 78...
-
Page 8: Safety
2 Safety 2 Safety All the information contained in this section refers to hazardous situations. DANGER 2.1 Key to safety symbols/markings Table 3: Definition of safety symbols/markings Symbol Description DANGER DANGER This signal word indicates a high-risk hazard which, if not avoided, will result in death or serious injury. -
Page 9: Personnel Qualification And Training
2 Safety ▪ The pump must only be used to handle the fluids specified in the data sheet or product literature of the respective design variant. ▪ Never operate the pump without the fluid to be handled. ▪ Observe the minimum flow rates indicated in the data sheet or product literature (to prevent overheating, bearing damage, etc). -
Page 10: Consequences And Risks Caused By Non-Compliance With These Operating Instructions
2 Safety Training on the pump (set) must always be supervised by technical specialist personnel. 2.5 Consequences and risks caused by non-compliance with these operating instructions ▪ Non-compliance with these operating instructions will lead to forfeiture of warranty cover and of any and all rights to claims for damages. ▪... -
Page 11: Unauthorised Modes Of Operation
2 Safety ▪ Decontaminate pumps which handle fluids posing a health hazard. (⇨ Section 7.3 Page 50) ▪ As soon as the work is complete, re-install and/or re-activate any safety-relevant and protective devices. Before returning the product to service, observe all instructions on commissioning. - Page 12 If the pump is to be operated at a higher temperature, the data sheet is missing or if the pump is part of a pool of pumps, contact KSB for the maximum permissible operating temperature. 2.10.3 Monitoring equipment The pump (set) must only be operated within the limits specified in the data sheet and on the name plate.
-
Page 13: Transport/Temporary Storage/Disposal
3 Transport/Temporary Storage/Disposal 3 Transport/Temporary Storage/Disposal 3.1 Transport DANGER The pump (set) could slip out of the suspension arrangement Danger to life if hit by a falling part! ▷ Always transport the pump (set) in the specified position. ▷ Never attach the suspension arrangement to the free shaft end or the motor eyebolt. -
Page 14: Storage And Preservation
4. Always complete and enclose a certificate of decontamination when returning the pump (set). (⇨ Section 11 Page 76) Always indicate the safety and decontamination measures taken. NOTE If required, a blank certificate of decontamination can be downloaded from the KSB web site at: www.ksb.com/certificate_of_decontamination 14 of 78... -
Page 15: Disposal
3 Transport/Temporary Storage/Disposal 3.4 Disposal WARNING Fluids posing a health hazard Hazardous to persons and the environment! ▷ Collect and properly dispose of flushing liquid and any fluid residues. ▷ Wear safety clothing and a protective mask, if required. ▷ Observe all legal regulations on the disposal of fluids posing a health hazard. 1. -
Page 16: Description Of The Pump (Set)
For use in the chemical and process industries, paper and pulp industries, sugar industry, food and beverages industry, in flue gas desulphurisation, coal upgrading plants and in industrial waste water treatment systems. Table 6: KWP types of installation Type of Illustration... -
Page 17: Name Plate
P-No. 997141502300050002 21.00 13.0 1420 1/min Ident.-No. ZN 3804 - A 52 x 74... Fig. 5: Name plate KWP Type series, pump size and version Product number or blank Works number for customer order Flow rate Speed Year of construction... - Page 18 4 Description of the Pump (Set) D00481 D00475 D00476 Discharge cover with integrally cast Discharge cover with bolted-on stuffing box housing (casing stuffing box housing (casing variant 2), material variants: GN, variant 3), material variants: GH, H For mechanical seal: discharge cover with conical seal chamber (A- type cover), material variants: GN, , GH, H...
- Page 19 4 Description of the Pump (Set) Fig. 6: Gland packing with a) connection for barrier or flushing liquid (connections 10 A.1 and 10 E.1) ▪ Commercial single and double acting mechanical seals D00477 D00479 D00478 Fig. 7: Mechanical seals in conical seal chamber (A-type) Unbalanced, single-acting Single-acting mechanical seal with mechanical seal...
-
Page 20: Functional Description
4 Description of the Pump (Set) 4.5 Functional description Fig. 8: Sectional drawing Wear plate Casing/discharge nozzle Discharge cover Bearing bracket lantern Shaft Bearing bracket Casing/suction nozzle Impeller Shaft seal Rolling element bearing, pump end Rolling element bearing, motor Design The horizontal, non-self-priming, radially split volute casing pump in back pull-out design is designed with an axial fluid inlet and a radial outlet. -
Page 21: Noise Characteristics
4 Description of the Pump (Set) ▪ Mechanical seal (single-acting or in tandem arrangement) ▪ Gland packing with connection for barrier or flushing liquid in the cylindrical seal chamber 4.6 Noise characteristics 6) 7) Table 9: Sound pressure level measured at surfaces L Rated power Pump set Pump... -
Page 22: Installation At Site
5 Installation at Site 5 Installation at Site 5.1 Safety regulations DANGER Improper installation in potentially explosive atmospheres Explosion hazard! Damage to the pump set! ▷ Comply with the applicable local explosion protection regulations. ▷ Observe the information in the data sheet and on the name plates of pump and motor. - Page 23 Produce flowability with the help of a solvent. Perform secondary treatment of the concrete to DIN 1045. NOTE For low-noise operation contact KSB to check whether the pump set can be installed on anti-vibration mounts. NOTE Expansion joints can be fitted between pump and suction/discharge line.
-
Page 24: Piping
5 Installation at Site 4. Re-tighten the lock nuts (1, 3) at the adjusting elements (4). 5.4 Piping 5.4.1 Connecting the piping DANGER Excessive loads acting on the pump nozzles Danger to life from leakage of hot, toxic, corrosive or flammable fluids! ▷... - Page 25 The data on forces and moments apply to static pipelines only. If the limits are exceeded, they must be checked and verified. If a computerised strength analysis is required, please contact KSB! The values are only applicable if the pump is installed on a completely grouted baseplate and bolted to a rigid and level foundation.
- Page 26 5 Installation at Site M a t e r i a l v a r i a n t C : T e m p e r a t u r e - d e p e n d e n t c o r r e c t i o n c o e f f i c i e n t s For material variant C2 at temperatures >20 °C reduce the values indicated in (=>...
- Page 27 5.4.2.1 Material variant C2 (Noridur) Table 10: Material variant C (Noridur): Permissible forces and moments at the pump nozzles Pump size Nozzle Forces Moments diameter Suction nozzle Discharge nozzle Suction nozzle Discharge nozzle yTens yPress [Nm] [Nm] [Nm] [Nm] [Nm] [Nm] 40-250 3145...
- Page 28 12800 9150 6900 4500 9150 6900 4500 300-500 350-400 13350 8700 10700 13800 10700 6700 13350 8700 13800 9550 7150 4700 9550 7150 4700 350-500 350-630 Application: up to 200 degrees C (without temperature-based reduction); for other sizes: consult KSB.
-
Page 29: Protective Equipment
Risk of injury by rotating pulleys! ▷ Always operate the pump set with a belt guard. If the customer specifically requests not to include a belt guard in KSB's delivery, then the operator must supply one! ▷ Observe all relevant regulations for selecting a belt guard. - Page 30 5 Installation at Site 5.6.1 Checking the coupling alignment DANGER Inadmissible temperatures at the coupling or bearings due to misalignment of the coupling Explosion hazard! ▷ Make sure that the coupling is correctly aligned at all times. CAUTION Misalignment of pump and motor shafts Damage to pump, motor and coupling! ▷...
- Page 31 5 Installation at Site 5.6.2 Checking the belt drive S a f e t y n o t e s DANGER Electrostatic charging Explosion hazard! Damage to the pump set! ▷ Connect PE conductor to the earthing terminal provided. ▷ On belt-driven pump sets use belts made of conductive material. CAUTION Poorly checked and aligned motor connection Increased wear, insufficient power transmission, loud running noises!
-
Page 32: Aligning The Pump And Motor
5 Installation at Site 5.6.2.4 Checking the belt tension Fig. 15: Tension check for V-belts ✓ The notes and steps stated in (⇨ Section 5.6.2 Page 31) to (⇨ Section 5.6.2.3 Page 31) have been observed/carried out. 1. Check the tension of the V-belt with a belt tension measuring tool (measuring tool not included in the scope of supply). - Page 33 Risk of injury by rotating shafts! ▷ Always operate the pump set with a coupling guard. If the customer specifically requests not to include a coupling guard in KSB's delivery, then the operator must supply one! ▷ Observe all relevant regulations for selecting a coupling guard.
- Page 34 Risk of injury by rotating shafts! ▷ Always operate the pump set with a coupling guard. If the customer specifically requests not to include a coupling guard in KSB's delivery, then the operator must supply one! ▷ Observe all relevant regulations for selecting a coupling guard.
-
Page 35: Electrical Connection
Risk of injury by rotating pulleys! ▷ Always operate the pump set with a belt guard. If the customer specifically requests not to include a belt guard in KSB's delivery, then the operator must supply one! ▷ Observe all relevant regulations for selecting a belt guard. -
Page 36: Checking The Direction Of Rotation
5 Installation at Site 5.8.1 Setting the time relay CAUTION Switchover between star and delta on three-phase motors with star-delta starting takes too long. Damage to the pump (set)! ▷ Keep switch-over intervals between star and delta as short as possible (see table: Time relay settings for star-delta starting). - Page 37 5 Installation at Site CAUTION Motor and pump running in the wrong direction of rotation Damage to the pump! ▷ Refer to the arrow indicating the direction of rotation on the pump. ▷ Check the direction of rotation. If required, interchange any two phases to correct the direction of rotation.
-
Page 38: Commissioning/Start-Up/Shutdown
6 Commissioning/Start-up/Shutdown 6 Commissioning/Start-up/Shutdown 6.1 Commissioning/start-up 6.1.1 Prerequisites for commissioning/start-up Before starting up the pump set make sure that the following requirements are met: ▪ The pump set has been properly connected to the electric power supply and is equipped with all protection devices. ▪... - Page 39 6 Commissioning/Start-up/Shutdown Constant level oiler Vent plug Connection elbow of the constant Screwed plug level oiler Bearing bracket 1. Pull out the vent plug (2). 2. Hinge down the reservoir of the constant level oiler (1) from the bearing bracket (5) and hold in this position.
- Page 40 6 Commissioning/Start-up/Shutdown 2. Fully open the shut-off element in the suction line. 3. Fully open all auxiliary connections (barrier fluid, flushing liquid, etc). 6.1.5 Water cooling CAUTION Deposit forming, aggressive cooling water Damage to the pump! ▷ Observe the cooling water quality. Observe the following quality data of the cooling water: ▪...
- Page 41 6 Commissioning/Start-up/Shutdown CAUTION Abnormal noises, vibrations, temperatures or leakage Damage to the pump! ▷ Switch off the pump (set) immediately. ▷ Eliminate the causes before returning the pump set to service. ✓ The system piping has been cleaned. ✓ Pump, suction line and inlet tank, if any, have been vented and filled with the fluid handled.
- Page 42 6 Commissioning/Start-up/Shutdown Table 14: Leakage rate of pure graphite packing (rings) Quantity Leakage rate Minimum 10 cm³/min Maximum 20 cm³/min A d j u s t i n g t h e l e a k a g e Prior to commissioning 1.
-
Page 43: Operating Limits
6 Commissioning/Start-up/Shutdown barrier liquid during standstill. Only turn off the cooling liquid supply after the pump has cooled down. 3. Drain the pump. (⇨ Section 7.3 Page 50) 6.2 Operating limits DANGER Non-compliance with application limits for pressure, temperature and speed Explosion hazard! Hot or toxic fluid may escape! ▷... - Page 44 6 Commissioning/Start-up/Shutdown CAUTION Re-start while motor is still running down Damage to the pump (set)! ▷ Do not re-start the pump set before the pump rotor has come to a standstill. 6.2.3 Flow rate Unless specified otherwise in the characteristic curves or in the data sheets, the following applies: ▪...
-
Page 45: Shutdown/Storage/Preservation
6 Commissioning/Start-up/Shutdown 6.3 Shutdown/storage/preservation 6.3.1 Measures to be taken for shutdown T h e p u m p ( s e t ) r e m a i n s i n s t a l l e d ✓ Sufficient fluid is supplied for the operation check run of the pump. 1. -
Page 46: Servicing/Maintenance
(set) with a minimum of maintenance expenditure and work. NOTE All maintenance, service and installation work can be carried out by KSB Service. Find your contact in the attached "Addresses" booklet or on the Internet at www.ksb.com/ contact". - Page 47 7 Servicing/Maintenance DANGER Incorrectly serviced shaft seal Explosion hazard! Fire hazard! Leakage of hot, toxic fluids! Damage to the pump set! ▷ Regularly service the shaft seal. DANGER Excessive temperatures as a result of bearings running hot or defective bearing seals Explosion hazard! Fire hazard! Damage to the pump set!
- Page 48 7 Servicing/Maintenance CAUTION Operation outside the permissible bearing temperature Damage to the pump! ▷ The bearing temperature of the pump (set) must never exceed 90 °C (measured on the outside of the motor housing). 7.2.2 Inspection work 7.2.2.1 Checking the coupling Check the flexible elements of the coupling.
- Page 49 7 Servicing/Maintenance If the oil is contaminated, change it more frequently. 7.2.3.1.2 Oil quality ▪ SAE 20W/20HD Lubricants ▪ CLP 68 to DIN 51 517 Characteristics Table 19: Lubricant characteristics Speed Temperature Kinematic viscosity Density Flash point Solidification Lubricating at 50 ℃ [rpm] at 15 °C [°C]...
-
Page 50: Drainage/Disposal
7 Servicing/Maintenance Fig. 19: Bearing bracket with constant-level oiler Constant-level oiler Screwed plug Bearing bracket ✓ A suitable container for the used oil is on hand. 1. Place the container underneath the screwed plug. 2. Undo the screwed plug (2) at the bearing bracket (3) and drain the oil. 3. - Page 51 For dismantling and reassembly observe the exploded view and the general assembly drawing. NOTE All maintenance, service and installation work can be carried out by KSB Service. Find your contact in the attached "Addresses" booklet or on the Internet at www.ksb.com/ contact".
- Page 52 7 Servicing/Maintenance 2. Lower motor bracket 81-54.01 by turning threaded rods 904.23/904.24 and nuts 920.63/920.64 until the V-belts slacken. 3. Remove the V-belts. 4. Undo hexagon bolts 901.62 of the motor at the motor bracket and remove discs 550.62. 5. Lift the motor off the motor bracket. 6.
- Page 53 8. Remove keys 940.01 from shaft 210. 7.4.6 Dismantling the shaft seal 7.4.6.1 Dismantling the mechanical seal KSB 4K mechanical seal: ✓ The notes and steps stated in (⇨ Section 7.4.1 Page 50) to (⇨ Section 7.4.5 Page 52) have been observed/carried out.
-
Page 54: Reassembling The Pump Set
7 Servicing/Maintenance NOTE Bearing brackets P08sx/P10ax/P12sx only ▷ Remove V-ring 411.77. ▷ Undo socket head cap screws 914.01. ▷ Remove bearing cover 360.01 with gasket 400.01, disc 507.11 and O-ring 412.36. Use grub screws 904.01 (bearing brackets P08sx/P10ax/P12sx: forcing screws 901.91) to carefully drive shaft 210 with bearing carrier 382, angular contact ball bearing 320.02 and the inner ring of cylindrical roller bearing 322.01 out of bearing bracket 330 towards the drive end. - Page 55 7 Servicing/Maintenance CAUTION Contact of O-ring with graphite or similar material Fluid could escape! ▷ Do not coat O-ring with graphite or similar material. ▷ Use animal fats or lubricants based on silicone or PTFE. ▪ Assembly adhesives – For gaskets, avoid the use of assembly adhesives, if possible. –...
- Page 56 7 Servicing/Maintenance Apply a few spots of a suitable lubricant (e.g. Molykote) to the contact faces of lockwasher 931.01 and locknut 920.21. For bearing brackets P08sx/P10ax/P12sx: fit disc 507.12. Fit lockwasher 931.01. Tighten locknut 920.21. Bend back lockwasher 931.01. Pull bearing carrier 382 onto angular contact ball bearing 320.02. Remove support disc 550.23.
- Page 57 7 Servicing/Maintenance ▪ When sliding the rotating assembly onto the shaft protecting sleeve, take appropriate precautions to protect the shaft protecting sleeve's surface from damage. ▪ On pumps with double-acting mechanical seal, properly vent the mechanical seal chamber and apply the required pressure specified in the general arrangement drawing (also during standstill).
- Page 58 7 Servicing/Maintenance 14. Slip shaft sleeve 523 with seat ring 475 onto the pump shaft until it abuts against the shaft shoulder. 7.5.4.2 Packing the gland Gland packing chamber Ø d Ø d UG1258354 Fig. 20: Dimensions of the packing chamber / Number of packing rings Table 21: Gland packing chamber Bearing bracket Gland packing chamber...
- Page 59 7 Servicing/Maintenance Models 2361:124 2361:121 2542:22 2361:123 Fig. 21: Available models Packing with barrier liquid Packing without lantern ring connection (standard) Packing with flushing liquid connection Procedure For pure graphite packings see supplementary operating instructions. Always use pre-compressed packing rings. ✓...
- Page 60 7 Servicing/Maintenance 7. Insert stuffing box ring 454.01 so that the joint face is in vertical position to gland follower 452.01. 8. Fit gland follower 452.01 and lightly fasten it by hand with the two hexagon nuts 920.02; watch discs 550.01. 9.
- Page 61 5. Fasten support foot 183 to the baseplate with foundation bolts. 7.5.7 Adjusting the diagonal gap D00472 D00473 D00474 Fig. 22: KWP clearance gaps Impeller type K Impeller type O Impeller type F Table 22: Clearance gaps between impeller and casing wear ring / between back...
- Page 62 901.91 to pull the rotor back out towards the drive. 6. Re-adjust the gap between impeller and wear plate as per the corresponding table and Fig. 22 "KWP clearance gaps". 7. Bearing brackets P03ax, P04ax, P05ax, P06x Fasten the rotor by tightening socket head cap screws 914.02. The grub screws ensure the clearance.
- Page 63 7 Servicing/Maintenance M o d e l w i t h b e l t d r i v e WARNING Motor tipping over Risk of squashing hands and feet! ▷ Suspend or support the motor to prevent it from tipping over. ✓...
-
Page 64: Tightening Torques
Always quote the following data when ordering replacement or spare parts: ▪ Type series ▪ Material variant ▪ Size ▪ Seal code ▪ KSB order number ▪ Order item number ▪ Consecutive number ▪ Year of construction Refer to the name plate for all data. - Page 65 101 135.01 163 210 230 320/ 330 344 451.01 452.01 454.01 458.01 461 502.01 507 524.01 906 Bearing bracket P03ax 40-250 50-200 50-201 For KWP 250-315, 300-400 and 350-400: wear plate is replaced by casing wear ring Optional 65 of 78...
- Page 66 7 Servicing/Maintenance Description Part No. 101 135.01 163 210 230 320/ 330 344 451.01 452.01 454.01 458.01 461 502.01 507 524.01 906 65-200 65-201 80-250 80-251 Bearing bracket P04ax 40-315 50-400 65-315 65-313 65-400 80-315 80-311 100-250 100-251 100-253 100-315 Bearing bracket P05ax 80-400 80-403...
- Page 67 7 Servicing/Maintenance Description Part No. 101 135.01 163 210 230 320/ 330 344 451.01 452.01 454.01 458.01 461 502.01 507 524.01 906 300-400 300-500 300-503 350-400 350-500 350-503 350-504 350-630 350-633 400-500 400-503 Bearing bracket 10ax 200-500 200-501 200-503 250-400 250-403 250-500 250-503...
- Page 68 7 Servicing/Maintenance Description Part No. 101 135.01 163 210 230 320/ 330 344 451.01 452.01 454.01 458.01 461 502.01 507 524.01 906 Bearing bracket 12sx 200-500 200-501 200-503 250-500 250-505 250-503 250-630 250-634 300-500 300-503 350-500 350-503 350-504 350-630 350-633 400-500 400-503 400-533...
-
Page 69: Trouble-Shooting
Increase the minimum flow rate. Wear of internal pump parts Replace worn components by new ones. Density or viscosity of the fluid pumped Contact KSB. is higher than stated in the purchase order. Use of unsuitable materials. Change the material combination. - Page 70 8 Trouble-shooting A B C D E F G H Possible cause Remedy Tie bolts/gasket defective. Fit new seal between volute casing and discharge cover. Re-tighten the bolts. Worn shaft seal. Fit new shaft seal. Score marks or roughness on shaft Replace shaft protecting sleeve / shaft sleeve.
-
Page 71: Related Documents
9 Related Documents 9 Related Documents 9.1 General assembly drawing with list of components 9.1.1 Bearing brackets P03ax to P06x Fig. 23: Bearing brackets P03ax to P06x D00397 Fig. 24: a) 4K mechanical seal ; b) coolable gland packing 71 of 78... - Page 72 9 Related Documents Part No. Description Scope of supply Pump casing with joint ring 411.01 /.02 /.031 /.10, hexagon head bolt 901.01, stud 902.01, screwed plug 903.01 /.02 /.03 , hexagon nut 920.01 Wear plate with joint ring 411.13, O-ring 412.05/.75, hexagon head bolt 901.03, 135.01 socket head cap screw 914.05 Discharge cover (A-type...
- Page 73 9 Related Documents 9.1.2 Bearing brackets P08sx to P12sx Fig. 25: Bearing brackets P08sx to P12sx D00397 Fig. 26: a) 4K mechanical seal ; b) coolable gland packing 73 of 78...
- Page 74 9 Related Documents Part No. Description Scope of supply Pump casing with joint ring 411.01 /.02 /.03 /.10, hexagon head bolt 901.01, stud 902.01, screwed plug 903.01 /.02 /.03 , hexagon nut 920.01 Wear plate with joint ring 411.12/.13, O-ring 412.05/.75, hexagon head bolt 901.03, 135.01 socket head cap screw 914.05 Discharge cover (A-type...
-
Page 75: Ec Declaration Of Conformity
Johann-Klein-Straße 9 67227 Frankenthal (Germany) The manufacturer herewith declares that the pump/pump set: KWP, KWPR, KWP-Bloc KSB order number: ....................▪ is in conformity with the provisions of the following directives as applicable in their current version: – EC Machinery Directive 2006/42/EC The manufacturer also declares that ▪... -
Page 76: Certificate Of Decontamination
11 Certificate of Decontamination 11 Certificate of Decontamination Type ..........................Order number/ ..........................Order item number Delivery date ..........................Field of application: ....................................................Fluid handled Please tick where applicable ⃞ ⃞ ⃞ ⃞ radioactive explosive corrosive toxic ⃞ ⃞ ⃞... -
Page 77: Index
Index Index Abrasive fluids 44 Name plate 17 Noise characteristics 21 Bearing temperature 47 Bearings 18 Oil lubrication Intervals 48 Oil quality 49 Operating limits 8, 43 Order number 6 Certificate of decontamination 76 Ordering spare parts 64 Clearance gaps 61 Other applicable documents 6 Commissioning/start-up 38 Constant level oiler 38... - Page 78 KSB Aktiengesellschaft P.O. Box 1361 • 91253 Pegnitz • Bahnhofplatz 1, 91257 Pegnitz (Germany) Tel. +49 9241 71-0 • Fax +49 9241 71-1793 www.ksb.com...
Need help?
Do you have a question about the KWP and is the answer not in the manual?
Questions and answers