Table of Contents
Advertisement
Quick Links
Advertisement
Table of Contents

Subscribe to Our Youtube Channel
Related Manuals for KSB KWP-Bloc


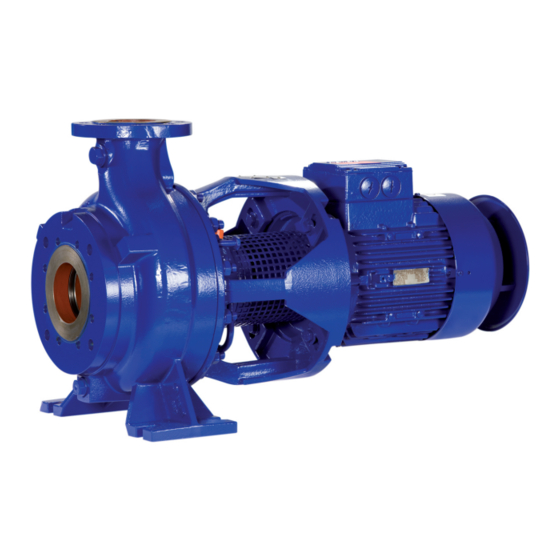
Summary of Contents for KSB KWP-Bloc
- Page 1 Dry-installed Close-Coupled Pump KWP-Bloc Installation/Operating Manual...
- Page 2 All rights reserved. The contents provided herein must neither be distributed, copied, reproduced, edited or processed for any other purpose, nor otherwise transmitted, published or made available to a third party without the manufacturer's express written consent. Subject to technical modification without prior notice. © KSB SE & Co. KGaA, Frankenthal 03/09/2018...
-
Page 3: Table Of Contents
Connecting the piping........................ 22 5.3.2 Permissible forces and moments at the pump nozzles.............. 24 Enclosure/insulation ............................ 25 Electrical connection ............................ 25 5.5.1 Setting the time relay ........................ 26 5.5.2 Connecting the motor ........................ 26 5.5.3 Earthing .............................. 26 Checking the direction of rotation........................ 26 KWP-Bloc 3 of 64... - Page 4 Related Documents .......................... 52 General assembly drawing with list of components .................. 52 9.1.1 Horizontal installation........................ 52 9.1.2 Vertical installation.......................... 54 9.1.3 Mechanical seal .......................... 56 9.1.4 List of components.......................... 57 EU Declaration of Conformity ...................... 60 Certificate of Decontamination...................... 61 Index .............................. 62 KWP-Bloc 4 of 64...
-
Page 5: Glossary
Pump Machine without drive, additional components or accessories Pump set Complete pump set consisting of pump, drive, additional components and accessories Suction lift line/suction head line The pipeline which is connected to the suction nozzle KWP-Bloc 5 of 64... -
Page 6: General
In the event of damage, immediately contact your nearest KSB Service centre to maintain the right to claim under warranty. 1.2 Installation of partly completed machinery To install partly completed machinery supplied by KSB refer to the sub-sections under Servicing/Maintenance. -
Page 7: Key To Safety Symbols/Markings
In conjunction with one of the signal words this symbol indicates a hazard involving electrical voltage and identifies information about protection against electrical voltage. Machine damage In conjunction with the signal word CAUTION this symbol indicates a hazard for the machine and its functions. KWP-Bloc 7 of 64... -
Page 8: Safety
▪ Only use the respective impeller types in combination with the fluids described below. Closed multi-channel impeller Suitable for the following fluids: (impeller type K) Contaminated, solids-laden fluids not containing stringy material and containing no or very little entrapped gas KWP-Bloc 8 of 64... -
Page 9: Personnel Qualification And Training
▪ Do not remove any protective equipment (e.g. contact guards) during operation. ▪ Provide the personnel with protective equipment and make sure it is used. KWP-Bloc 9 of 64... -
Page 10: Safety Information For Maintenance, Inspection And Installation
Never operate the pump set outside the limits stated in the data sheet and on the name plate. Prevent impermissible modes of operation at all times. 2.9.1 Marking Pump The marking on the pump refers to the pump part only. KWP-Bloc 10 of 64... -
Page 11: Temperature Limits
If the pump is to be operated at a higher temperature, if there is no data sheet or if the pump is part of a pool of pumps, contact KSB for the maximum permissible operating temperature. 2.9.3 Monitoring equipment The pump (set) must only be operated within the limits specified in the data sheet and on the name plate. -
Page 12: Operating Limits
The calculation formula in (ð Section 6.2.3.1, Page 34) can be used to check whether additional heat build-up may lead to a dangerous temperature increase at the pump surface. KWP-Bloc 12 of 64... -
Page 13: Transport/Temporary Storage/Disposal
1. On transfer of goods, check each packaging unit for damage. 2. In the event of in-transit damage, assess the exact damage, document it and notify KSB or the supplying dealer and the insurer about the damage in writing immediately. -
Page 14: Return To Supplier
Collect greases and other lubricants during dismantling. 2. Separate and sort the pump materials, e.g. by: - Metals - Plastics - Electronic waste - Greases and other lubricants 3. Dispose of materials in accordance with local regulations or in another controlled manner. KWP-Bloc 14 of 64... -
Page 15: Description Of The Pump (Set)
Grey cast iron GJL-250 22-23 Design version Version 24-25 Shaft seal operating mode Single mechanical seal in A-type cover Design Standard Non-standard (BT3D, BT3) 27-29 Installation type Pump only (Fig. 0 bare-shaft pump) Available on request only Blank KWP-Bloc 15 of 64... -
Page 16: Name Plate
ZN 3804 - E 37 X 52 Fig. 1: Name plate (example) Type series, size, material, and Customer-specific information design version (optional) KSB order number and KSB order Flow rate item number Speed Year of construction Head Pump input power (optional) - Page 17 GDNG John Crane 2100 DDDD Single, balanced KSB 4 KBL Pump sets for vertical installation are fitted with an oil reservoir. For horizontal installation, an oil reservoir can be fitted as an option. Other mechanical seal makes to EN 12756 (DIN 24960), version I1k possible...
-
Page 18: Materials
Noridur 1.4593 Intermediate lantern EN-GJL-250 EN-GJL-250 EN-GJL-250 Discharge cover Noridur 1.4593 EN-GJL-250 EN-GJL-250 Shaft 1.4462 1.4021+QT700 1.4021+QT700 Impeller Noridur 1.4593 Noridur 1.4593 Intermediate ring EN-GJL-250 524.01 Shaft protecting sleeve 1.4539 1.4539 1.4539 Impeller screw 1.4539 C35E+N C35E+N KWP-Bloc 18 of 64... -
Page 19: Configuration And Function
A shaft seal (8) provides reliable sealing towards the atmosphere. The shaft is supported by oil-lubricated rolling element bearings (9). The motor (10) is connected to the casing via an intermediate lantern (4). Sealing The pump is sealed with a shaft seal. KWP-Bloc 19 of 64... -
Page 20: Noise Characteristics
Spatial average; as per ISO 3744 and EN 12639; valid for pump operation in the Q/Qopt = 0.80 - 1.1 range and for non- cavitating operation. If noise levels are to be warranted, add +3 dB for measuring and constructional tolerance. Increase for 60 Hz operation: 3500 rpm, +3dB; 1750 rpm + 1dB; 1160 rpm + 0 dB KWP-Bloc 20 of 64... -
Page 21: Installation At Site
080-040-0315 M16×200 MU F1/18-60, Ø 18×160 080-065-0313 M16×200 MU F1/18-60, Ø 18×160 080-065-0315 M16×200 MU F1/18-60, Ø 18×160 100-080-0250 M16×200 MU F1/18-60, Ø 18×160 100-080-0251 M16×200 MU F1/18-60, Ø 18×160 100-080-0311 M16×200 MU F1/18-60, Ø 18×160 KWP-Bloc 21 of 64... -
Page 22: Piping
Incorrect earthing during welding work at the piping Destruction of rolling element bearings (pitting effect)! ▷ Never earth the electric welding equipment on the pump or baseplate. ▷ Prevent current flowing through the rolling element bearings. KWP-Bloc 22 of 64... - Page 23 4. Connect the pump nozzles to the piping. CAUTION Aggressive flushing liquid and pickling agent Damage to the pump! ▷ Match the cleaning operation mode and duration of flushing and pickling to the casing materials and seal materials used. KWP-Bloc 23 of 64...
-
Page 24: Permissible Forces And Moments At The Pump Nozzles
1975 1255 1975 990 810 540 080-040-0315 3860 2515 3055 3950 2605 1975 1345 1527 1975 1255 1975 990 810 540 065-050-0200 3145 2065 2515 3235 2065 1525 1080 1527 1975 1255 1975 1255 990 630 KWP-Bloc 24 of 64... -
Page 25: Enclosure/Insulation
▷ Observe the technical specifications of the local energy supply companies. 1. Check the available mains voltage against the data on the motor name plate. 2. Select an appropriate starting method. NOTE A motor protection device is recommended. KWP-Bloc 25 of 64... -
Page 26: Setting The Time Relay
Hands inside the pump casing Risk of injuries, damage to the pump! ▷ Always disconnect the pump set from the power supply and secure it against unintentional start-up before inserting your hands or other objects into the pump. KWP-Bloc 26 of 64... - Page 27 The motor's direction of rotation must match the arrow indicating the direction of rotation on the pump. 3. If the motor runs in the wrong direction of rotation, check the electrical connection of the motor and the control system, if applicable. KWP-Bloc 27 of 64...
-
Page 28: Commissioning/Start-Up/Shutdown
DANGER Risk of potentially explosive atmosphere by mixing of incompatible fluids in the auxiliary piping Risk of burns! Explosion hazard! ▷ Make sure that the barrier fluid or quench liquid are compatible with the fluid handled. KWP-Bloc 28 of 64... -
Page 29: Shaft Seal
2. Fill in lubricant until the lubricant level indicator lies between the minimum and maximum markings. 3. Tighten vent plug 913. 6.1.3 Shaft seal Shaft seals are fitted prior to delivery. Observe the instructions on dismantling (ð Section 7.4.5, Page 43) or assembly (ð Section 7.5.3, Page 45) . KWP-Bloc 29 of 64... -
Page 30: Priming And Venting The Pump
For design-inherent reasons some unfilled volume in the hydraulic system cannot be excluded after the pump has been primed for commissioning/start-up. However, once the motor is started up the pumping effect will immediately fill this volume with the fluid handled. KWP-Bloc 30 of 64... -
Page 31: Start-Up
▷ Make sure the motor has sufficient power reserves. ▷ Use a soft starter. ▷ Use speed control. 1. Fully open the shut-off element in the suction head/suction lift line. 2. Close or slightly open the shut-off element in the discharge line. KWP-Bloc 31 of 64... -
Page 32: Shutdown
3. Drain the pump. (ð Section 7.3, Page 42) CAUTION Risk of freezing during prolonged pump shutdown periods Damage to the pump! ▷ Drain the pump and the cooling/heating chambers (if any) or otherwise protect them against freezing. KWP-Bloc 32 of 64... -
Page 33: Operating Limits
(DOL, star-delta, moments of inertia, etc). If the starts are evenly spaced over the period indicated, the following limits serve as orientation for start-up with the discharge-side gate valve slightly open: KWP-Bloc 33 of 64... -
Page 34: Fluid Handled
6.2.3.2 Density of the fluid handled The pump input power changes in proportion to the density of the fluid handled. The values indicated must only be exceeded after consultation with the motor manufacturer or KSB. Minimum permissible flow rate Flow rate at best efficiency point... -
Page 35: Shutdown/Storage/Preservation
(set) to service. (ð Section 7, Page 37) WARNING Failure to re-install or re-activate protective devices Risk of injury from moving parts or escaping fluid! ▷ As soon as the work is completed, re-install and re-activate any safety-relevant devices and protective devices. KWP-Bloc 35 of 64... - Page 36 6 Commissioning/Start-up/Shutdown NOTE If the pump has been out of service for more than one year, replace all elastomer seals. KWP-Bloc 36 of 64...
-
Page 37: Servicing/Maintenance
Fluids handled, consumables and supplies which are hot and/or pose a health hazard Risk of injury! ▷ Observe all relevant laws. ▷ When draining the fluid take appropriate measures to protect persons and the environment. ▷ Decontaminate pumps which handle fluids posing a health hazard. KWP-Bloc 37 of 64... -
Page 38: Servicing/Inspection
NOTE All maintenance work, service work and installation work can be carried out by KSB Service or authorised workshops. For contact details please refer to the enclosed "Addresses" booklet or visit "www.ksb.com/contact" on the Internet. - Page 39 After commissioning, increased temperatures may occur at grease-lubricated rolling element bearings due to the running-in process. The final bearing temperature is only reached after a certain period of operation (up to 48 hours depending on the conditions). KWP-Bloc 39 of 64...
-
Page 40: Inspection Work
Explosion hazard! Fire hazard! Damage to the pump set! ▷ Regularly check the condition of the lubricant. 7.2.3.1 Grease lubrication Deep groove ball bearing 321.01 is packed with grease for life and does not require re-lubrication. KWP-Bloc 40 of 64... - Page 41 ▷ When draining the lubricant take appropriate measures to protect persons and the environment. ▷ Wear safety clothing and a protective mask if required. ▷ Collect and dispose of any lubricants. ▷ Observe all legal regulations on the disposal of fluids posing a health hazard. KWP-Bloc 41 of 64...
-
Page 42: Drainage/Cleaning
▷ Use suitable transport devices, lifting equipment and lifting tackle to move heavy assemblies or components. Always observe the safety instructions and information. (ð Section 7.1, Page 37) For any work on the motor, observe the instructions of the relevant motor manufacturer. KWP-Bloc 42 of 64... -
Page 43: Preparing The Pump Set
In case of damage you can always contact KSB Service. NOTE All maintenance work, service work and installation work can be carried out by KSB Service or authorised workshops. For contact details please refer to the enclosed "Addresses" booklet or visit "www.ksb.com/contact" on the Internet. -
Page 44: Removing The Shaft And Rolling Element Bearings
– Always use new O-rings, making sure that they are of the same thickness and material as the old ones. – Never use O-rings that have been made by cutting an O-ring cord to size and gluing the ends together. KWP-Bloc 44 of 64... -
Page 45: Installing The Shaft And Rolling Element Bearing
▪ The surface of the shaft protecting sleeve must be absolutely clean and smooth, and the sleeve's mounting edge must be chamfered. ▪ When sliding the rotating unit onto the shaft protecting sleeve, take appropriate steps to protect the surface of the shaft protecting sleeve from damage. KWP-Bloc 45 of 64... -
Page 46: Fitting The Impeller
ü Impeller bore, shaft and keyways are clean and free from burrs. 1. Insert keys 940.01 into the shaft keyway. 2. Fit the impeller with an impeller fitting and removal tool. 3. Insert O-ring 412.03. 4. Insert and tighten impeller screw 906. Observe the tightening torque. (ð Section 7.6.1, Page 47) KWP-Bloc 46 of 64... -
Page 47: Mounting The Motor
▪ Consecutive number ▪ Type series ▪ Size ▪ Material variant ▪ Seal code ▪ Year of construction Refer to the name plate for all data. Unstamped bolted/screwed connections shall be treated as material combination C35E+QT. KWP-Bloc 47 of 64... -
Page 48: Recommended Spare Parts Stock For 2 Years' Operation To Din 24296
6 and 7 8 and 9 10 and more 135.01 Wear plate Shaft with hardware Impeller 321.01 Deep groove ball bearing 411.77 Joint ring 433.02 Complete mechanical seal Set of sealing 150% elements Includes shaft protecting sleeve 524.01 KWP-Bloc 48 of 64... -
Page 49: Interchangeability Of Pump Components
Intermediate lantern / deep groove ball bearing: 1 = up to motor size 112; 2 = from motor size 132 to motor size 180 For the interchangeability of KSB mechanical seal 4KBL refer to the shaft protecting sleeve as the shaft protecting sleeve is part of the mechanical seal. -
Page 50: Trouble-Shooting
If problems occur that are not described in the following table, consultation with the KSB customer service is required. A Pump delivers insufficient flow rate B Motor is overloaded... - Page 51 Top up, reduce or change lubricant. lubricant or unsuitable lubricant. ✘ - Operating voltage too low Increase the voltage. Check voltage drop in the power cable. ✘ - Rotor out of balance Clean rotor. Re-balance rotor. KWP-Bloc 51 of 64...
-
Page 52: Related Documents
412.06 901.01 524.01 550.22 903.01 411.01 914.22 901.30 904.30 932.20 731.N1 950.10 902.01 411.27 920.01 412.08 639.N1 411.10 731.N4 550.44 720.N1 731.N5 731.N2 903.25 710.N1 731.N3 411.25 710.N2 Fig. 9: General assembly drawing of variants GNNG, GDNG KWP-Bloc 52 of 64... - Page 53 524.01 914.03 550.22 914.02 903.01 411.01 901.30 904.30 412.12 411.10 932.20 950.10 731.N1 411.27 412.08 903.25 914.03 731.N4 411.25 639.N1 731.N5 720.N1 902.01 710.N1 731.N2 920.01 710.N2 731.N3 550.44 Fig. 10: General assembly drawing of variant DDDD KWP-Bloc 53 of 64...
-
Page 54: Vertical Installation
731.N2 731.N6 902.15 902.01 920.15 920.01 550.45 550.44 903.02 412.08 411.02 411.10 550.22 914.22 901.30 903.03 412.05 411.03 903.01 411.01 940.01 901.01 412.75 914.05 411.13 412.03 412.06 524.01 Fig. 11: General assembly drawing of variants GNNG, GDNG KWP-Bloc 54 of 64... - Page 55 902.01 920.01 902.15 550.44 920.15 550.45 412.08 903.02 411.02 411.10 914.03 412.12 903.01 411.01 914.03 550.22 903.03 411.03 914.02 412.75 901.01 412.05 940.01 901.30 412.03 412.06 524.01 914.05 411.13 Fig. 12: General assembly drawing of variant DDDD KWP-Bloc 55 of 64...
-
Page 56: Mechanical Seal
9 Related Documents 9.1.3 Mechanical seal Mechanical seal KSB 4KBL 412.06 472.53 412.52 472.52 412.53 Fig. 13: Mechanical seal KSB 4KBL Mechanical seal, Burgmann MG1-G6 504.54 477.54 500.55 475.55 412.55 412.06 500.54 481.54 472.54 Fig. 14: Mechanical seal, Burgmann MG1-G6 KWP-Bloc 56 of 64... -
Page 57: List Of Components
Screw plug 920.04 Hexagon nut 932.01 Circlip Discharge cover 412.08 O-ring 550.45/.22 Disc 901.30 Hexagon head bolt 902.15 Stud 920.15 Hexagon nut 914.22 Hexagon socket head cap screw 500.14 Ring Depending on the design If any KWP-Bloc 57 of 64... - Page 58 Table 24: List of components for mechanical seal MG1-G6 Part No. Comprising Scope of supply 412.55 O-ring 472.54 Primary ring On pumps with standardised mechanical seal only This is part of mechanical seal 4KBL On pumps with oil reservoir only KWP-Bloc 58 of 64...
- Page 59 9 Related Documents Part No. Comprising Scope of supply 475.55 Mating ring 477.54 Spring 481.54 Bellows 500.54 Ring 500.55 Ring KWP-Bloc 59 of 64...
-
Page 60: Eu Declaration Of Conformity
10 EU Declaration of Conformity 10 EU Declaration of Conformity Manufacturer: KSB SE & Co. KGaA Johann-Klein-Straße 9 67227 Frankenthal (Germany) The manufacturer herewith declares that the product: KWP, KWPR, KWP-Bloc KSB order number: ....................▪ is in conformity with the provisions of the following Directives as amended from time to time: –... -
Page 61: Certificate Of Decontamination
We confirm that the above data and information are correct and complete and that dispatch is effected in accordance with the relevant legal provisions....................................Place, date and signature Address Company stamp Required fields KWP-Bloc 61 of 64... -
Page 62: Index
Spare part Impeller type 18 Ordering spare parts 47 Installation Start-up 31 without foundation 21 Storage 14, 35 Installation at site 21 Installation types 17 Intended use 8 Temperature limits 11 Interchangeability of pump components 49 Tightening torques 47 Transport 13 Trouble-shooting Key to safety symbols/markings 7 Causes and remedies 50 KWP-Bloc 62 of 64... - Page 63 Index Vertical installation 29 Warnings 7 Warranty claims 6 KWP-Bloc 63 of 64...
- Page 64 KSB SE & Co. KGaA Johann-Klein-Straße 9 • 67227 Frankenthal (Germany) Tel. +49 6233 86-0 www.ksb.com...
Need help?
Do you have a question about the KWP-Bloc and is the answer not in the manual?
Questions and answers