Advertisement
Quick Links
Advertisement

Related Manuals for SWF MAS-12


Summary of Contents for SWF MAS-12
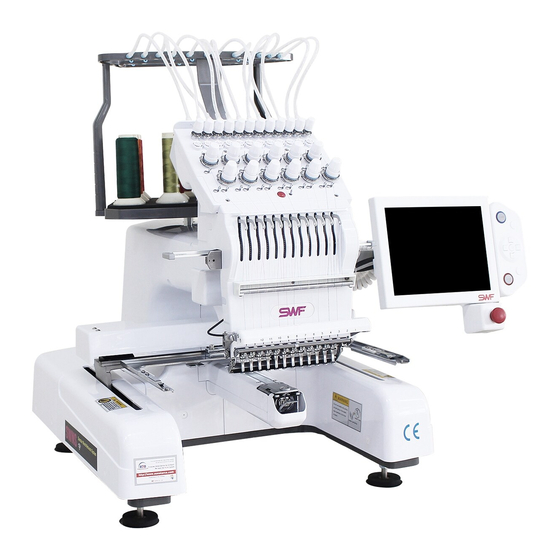
- Page 1 Stand Assembly Guide SWF MAS-12 Embroidery Machine MME-211125_VER 3.0 MOBASE SUNSTAR CO., LTD.
- Page 2 1. Parts List (Preparation) Item Q’ty Figure Upper part of the leg Stand Leg (Left / Right) Lower part of the leg Caster & Cover Stand Stud Bottom Bracket (Connecting Plate) Back Bracket (Connecting Plate)
- Page 3 1. Parts List (Preparation) Item Q’ty Figure Work Shelf Package of Nuts, Bolts, and Screws Big Bolt & Washer Small Bolt & Nut Screw (For attaching the table to the stand)
- Page 4 2. Stand Assembly 1) Stand Left Leg / Right Leg Assembly ① Insert the upper part of the leg into the lower part of the leg and assemble them as shown using 4 big bolts and washers as shown in the picture. ◇...
- Page 5 2. Stand Assembly 2) Assembling the left and right Legs with Casters, Studs, Covers ① Assemble each of 4 Casters and Studs at the bottom of the stand as shown in the picture. ② Insert the 4 stand covers at the front and back of each leg.
- Page 6 2. Stand Assembly 3) Assembling the Back Bracket ① Stand up the left and right legs together as shown in the picture to assemble the Back Bracket (Connecting Plate). ② Place the Back Bracket on the stand (left) (right) and tighten it firmly using 4 big bolts and washers each.
- Page 7 2. Stand Assembly 5) Assembling the Top and Bottom Shelves ① Align the assembly holes for the four corners of the Work Shelves as shown in the below photo. ② Assemble the top and bottom Work Shelves using 4 small bolts & nuts. The method of assembling the upper and lower work shelves is the same.
- Page 8 3. Table Assembly 6) Assembled Stand ◇ Front ◇ Back 7) Attaching the Table to the assembled Stand Place the table on the stand and fix the table using 4 table fixing screws. Caution : Turn the table and stand over to fix the screws easily, and then tighten the screws as shown in the picture below) - The end -...
Need help?
Do you have a question about the MAS-12 and is the answer not in the manual?
Questions and answers