Table of Contents
Advertisement
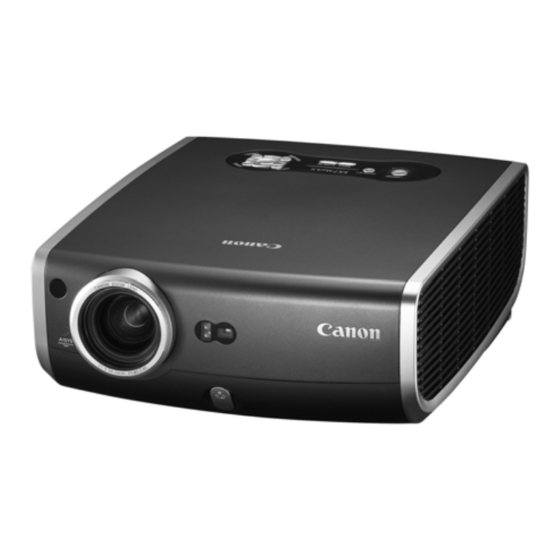
MULTIMEDIA PROJECTOR
User's Manual
Table of contents/Safety Instructions
Before Use
Setting Up the Projector
Projecting an Image from the Computer
Projecting an Image from AV Equipment
Useful Functions Available During a Presentation
Setting Up Functions from Menus
Maintenance
Troubleshooting
Appendix
Index
ENG
Advertisement
Table of Contents

Subscribe to Our Youtube Channel
Related Manuals for Canon SX7 MARKII


Summary of Contents for Canon SX7 MARKII
- Page 1 MULTIMEDIA PROJECTOR User’s Manual Table of contents/Safety Instructions Before Use Setting Up the Projector Projecting an Image from the Computer Projecting an Image from AV Equipment Useful Functions Available During a Presentation Setting Up Functions from Menus Maintenance Troubleshooting Appendix...
-
Page 2: Quick Reference - How To Start Projection
Adjust the input signal, focusing, keystone distortion, etc. automatically with the auto setup function. Press the button. Optimize the input signal with the auto PC function (Skip this step if the projector is projecting an image properly.) Select the image mode with the Select an appropriate image mode for projection. - Page 3 Specify the aspect ratio or display area in the [Aspect] menu as required (P73, 90, 91). Finishing the projection... Turn off the projector Turn off the projector and unplug the power cord. Connect the projector and the AV equipment with a HDMI/DVI cable to project a digital video image (P65). button. button. P32-33...
-
Page 4: Table Of Contents
Precautions on Handling the Batteries in the Remote Controller ... 13 Lamp Handling Precautions... 13 Carrying/Transporting the Projector ... 14 Installation Precautions ... 14 Features of the Multimedia Projector SX7 MarkII/SX60/X700 ... 16 Supplied Manuals and Symbols Used in This Manual ... 17 Supplied Manuals... 17 Before Use ... 20 Supplied Accessories ... - Page 5 Useful Functions Available During a Presentation ... 78 Blackened Out an Image Temporarily ... 78 Freezing the Picture ... 78 Muting the Sound ... 79 Adjusting the Volume ... 79 Showing the Elapsed Time... 80 Page Up or Down through the Pages ... 80 Zooming an Image ...
- Page 6 Skip the POWER Button Operation ... 112 Enabling/Disabling the Beep... 112 Selecting a Display Language ... 113 Prohibiting the Projector Operation ... 114 Enabling/Disabling the Guide Message... 114 Turning On/Off the LED Illumination... 115 Setting up the Remote Control ... 115 Setting up the Digital Video Input Signal ...
-
Page 7: Safety Instructions
Improper operation may result in not only reducing the product-life, but also malfunctions, fire hazards, or other accidents. If your projector is not operating correctly, read this manual again, check operations and cable connections, and try the solutions shown in the "Troubleshooting" section at the end of this booklet. -
Page 8: Safety Precautions
Do not put any flammable objects or spray cans near the projector, as the hot air exhausted from the ventilation holes may result in an explosion. If the projector is not to be used for an extended period of time, unplug it from the power outlet. -
Page 9: Read And Keep This Owner's Manual For Later Use
All the safety and operating instructions should be read before beginning to operate the product. Read all of the instructions given here and retain them for later use. Unplug this projector from the AC power supply before cleaning. Do not use liquid or aerosol cleaners on the projector. - Page 10 Do not overload wall outlets and extension cords as this can result in fire or electric shock. Do not allow anything to rest on the power cord. Do not locate this projector where the cord may be damaged by people walking on it.
-
Page 11: Ac Power Cord Requirement
AC Power Cord Requirement The AC Power Cord supplied with this projector meets the requirements for use in the country you purchased it. AC Power Cord for the United States and Canada: The AC Power Cord used in the United States and Canada is listed by the Underwriters Laboratories (UL) and certified by the Canadian Standard Association (CSA). -
Page 12: Federal Communication Commission Notice
Consult the dealer or an experienced radio/TV technician for help. The cable with a ferrite core provided with the projector must be used with this equipment in order to comply with Class B limits in Subpart B of Part 15 of the FCC rules. -
Page 13: Precautions On Handling The Batteries In The Remote Controller
If a lamp explodes, its shards may scatter inside the projector. Ask the Canon service representative to clean and check the inside of the projector and replace the lamp. If the projector indicates that the lamp should be replaced (i.e., the LAMP REPLACE indicator lights up twice), The chances of an explosion increase. -
Page 14: Carrying/Transporting The Projector
The carrying bag is not designed to protect the projector from external shocks. When carrying the projector with it put in the carrying bag, do not give a shock to it, drop it, or place anything on it. The projector may be damaged or malfunctioned. - Page 15 Do not place it near an exhaust outlet of air-conditioning equipment. Otherwise, it may be damaged. If the projector is carried from a cold place to a warm place or the room temperature is raised rapidly, condensation may form on the lens and mirror due to the moisture in the atmosphere, resulting in a blurred picture.
-
Page 16: Features Of The Multimedia Projector Sx7 Markii/Sx60/X700
Major Features Smooth and Beautiful Imaging Capability Incorporation of AISYS, Canon's unique optical engine, and LCOS (Liquid Crystal On Sili- con) achieves high brightness, high contrast ratio, and smooth and beautiful lattice-free images. Super-Silent Operation of 27dB* (SX60) This projector achieves super-silence operation as low as 27dB which creates a comfort- able atmosphere where you can concentrate on watching a movie. -
Page 17: Supplied Manuals And Symbols Used In This Manual
Supplied Manuals User’s Manual (This Document) This is a universal manual for the projector, SX7 MarkII/SX60/X700. This manual provides detailed information on how to use the projectors. Read this manual thoroughly to make the most of your projector and ensure safety. -
Page 18: Copyright Notice
COPYRIGHT NOTICE Please note that enlarging or reducing the size of an image for commercial purposes or public presentation may infringe on the legally protected copyright or the copyright holder of the original material. About Trademarks Microsoft, Windows, Windows XP, Windows Vista and Windows 7 are registered trade- marks or trademarks of Microsoft Corporation in the United States and/or other coun- tries. - Page 19 Table of contents/Safety Instructions Before Use Setting Up the Projector BEFORE USE Projecting an Image from the Computer Projecting an Image from AV Equipment Useful Functions Available During a Presentation Setting Up Functions from Menus Maintenance Troubleshooting Appendix Index...
-
Page 20: Before Use
Before Use Supplied Accessories Check whether the following accessories are supplied with the projector. Remote control Power cord (1.8m/5.9') For Continental Europe For the U.S.A and Canada Carrying bag Batteries (type AAA, two) for remote control USB cable (1.8m/5.9') YH7-2054... - Page 21 The projector may be damaged due to the heat. Attach the lens cap to the lens to protect it and put the projector in the carrying bag. Replace the adjustable foot to prevent the damage on the projector.
-
Page 22: Part Names
Anti-theft Lock Hole An anti-theft wire cable on the market can be connected. Rear Side Speaker Exhaust Vent (SX7 MarkII is used in the following illustrations) Infrared Remote Receiver (P29) Ranging Window Lens Adjustable Foot Lock Button (P43) Lens Cap (P21) - Page 23 Make sure to use the optional ceiling mounting bracket. You should never install the ceiling mounting bracket by yourself. If you mount the projector on the ceiling, you have to invert the projected image by selecting [Image flip H/V] from the menu (P97).
- Page 24 (14) (13) (17) (20) (18) This projector can be operated using but- tons on the remote control or the top con- trol on the main unit. The remote control allows you to operate all functions of the projector. (1) Infrared Remote Emitter Sends a signal to the infrared remote receiver on the main unit.
- Page 25 Top Control (10) POINTER button (P87) Selects the upper, lower, left, or right item in the menu. Also moves the mouse cursor under the USB connec- tion. On the top control, the [<] and [>] buttons also turn the volume up and down, respectively (P79).
- Page 26 Input Terminals on Main Unit SX7 MarkII/X700 SX60 (10) (10) (10) (10)
- Page 27 (1) Input Terminal-1 (DIGITAL IN/ANALOG IN-1) (P36, 37, 65) Receives a digital (DIGITAL PC) and analog PC signal (ANALOG PC-1). Receives a digital content image signal (DIGITAL VIDEO). (2) Input Terminal-2 (ANALOG IN-2) (P36, 37, 64) Receives an analog PC signal (ANALOG PC-2). Receives a component and SCART image signal (COMPONENT/SCART).
- Page 28 Red: Flashing red: Green: Flashing green: Blink between red and green: The projector is under the power management (2) WARNING lamp (P126) Flashes red when a problem has been detected on the projector. (3) LED illumination lamp (P115) Indicate the projector status with 3 blue LEDs.
-
Page 29: Preparing The Remote Control
If all buttons on the remote control do not light when the [LIGHT] button is pressed, or but- tons are inoperative when you attempt to operate the projector, replace with new batteries. It is recommended to check the batteries before a presentation. -
Page 31: Setting Up The Projector
SETTING UP THE PROJECTOR Table of contents/Safety Instructions Before Use Setting Up the Projector Projecting an Image from the Computer Projecting an Image from AV Equipment Useful Functions Available During a Presentation Setting Up Functions from Menus Maintenance Troubleshooting Appendix... -
Page 32: Setting Up The Projector
Setting Up the Projector Determining the Distance to the Screen The projected image size is determined by the distance between the projector lens and the screen. Select the place where the desired image size is obtained according to the illustra- tion shown below. -
Page 33: Determining The Installation Position
Ceiling Mounting or Rear Projection You can mount the projector on the ceiling (Ceiling mounted) with it turned up side down or place it behind the screen (Rear) if you use a translucent screen. For ceiling mounting or rear projection, you have to invert the projected image. (P97). - Page 35 PROJECTING AN IMAGE FROM THE COMPUTER Table of contents/Safety Instructions Before Use Setting Up the Projector Projecting an Image from the Computer Projecting an Image from AV Equipment Useful Functions Available During a Presentation Setting Up Functions from Menus Maintenance...
-
Page 36: Projecting An Image From The Computer
Projecting an Image from the Computer Connecting the Projector to the Computer Connect the projector to the computer. Connecting to Video Terminals Supplied computer connection cable To monitor output terminal (mini D-sub 15-pin terminal) Supplied computer connection cable Input Terminal-1... -
Page 37: Dvi Cable
Before connecting cables, turn off both the projector and computer. It may project an image inappropriately when projecting the digital PC signal in 1280 x 1024 or 1400 x 1050 depending on the type of computer or DVI cable (SX7 II/SX60). -
Page 38: Connecting To An External Monitor
Connecting to AUDIO IN Termi- nals (SX7 II/X700) Connect an audio cable to the AUDIO IN ter- minal corresponding to the input image sig- nal if you want to use the projector's speaker. Audio cable AUDIO OUT terminal Projector AUDIO IN terminal... - Page 39 Using an audio cable with a built-in resistor turns down the sound. The built-in speaker is monaural. The speaker plays the sound from the equipment which the audio cable is connected to regardless of the image input signal. Computer Projector SX60...
-
Page 40: Starting Projection
Connect the power cord and turn on the projector to start the projection. Once the projector is turned off, it cannot be turned on for a while. Wait until the lamp is cooled down and the [POWER] indicator lights in red. - Page 41 You can skip the countdown window (P100). Selecting a Language A window appears when the projector is turned on for the first time. You can select a language to be used by the projector for displaying menus and so on in the window.
-
Page 42: Adjusting The Image
The Zoom adjustment window appears. Adjust the image size. Press the [OK] button. Change the projector installation position if your desired image size is too large or too small to adjust with the zoom function (P32). Zoom in: Press [ ] for rough adjustment. -
Page 43: Adjusting The Projection Angle
Adjusting the Projection Angle You can adjust the projection angle with the adjustable foot. Lift the front side of the projector and push the adjusting foot lock button. The adjustable foot extends. Adjust the projection angle while pushing the adjustable foot lock button, and then release the lock button. -
Page 44: Preparing The Computer
Preparing the Computer Determining the Output Resolution of the Computer To make the most of the display performance of this projector, set output signal resolution of the computer to an optimum value. Windows 7 1. Open the [Control Panel] from the start menu, then select [Appearance and Per- sonalization] –... - Page 45 4. Close [System Environment Setting] win- dow. For SX7 MarkII/SX60 If the display resolution of the computer is set to SXGA (1280 by 1024 dots) or WXGA (1280 by 768 dots), it is recommended to select [True size] as the screen mode (P90).
-
Page 46: Performing The Auto Setup
Performing the Auto Setup With the auto setup function, the following set of adjustments is performed automatically when projecting an image from a computer. You can start the projection only with this oper- ation if the input signal has been appropriately selected. Auto focus Adjusts the focusing automatically. - Page 47 Press the [AUTO SET] button. The Auto setup window appears. Press the [AUTO SET] button again. One or more functions highlighted in black are performed automatically. You can perform this step by selecting [OK] with the [<] button, and then pressing the [OK] button.
-
Page 48: Selecting An Input Signal
Selecting an Input Signal You can select an input signal type. Select an input signal from the followings: ANALOG PC-1 : Analog signal Connecting with a DVI/Mini D-sub 15-pin cable DIGITAL PC : Digital signal Connecting with a DVI digital cable ANALOG PC-2 : Analog signal Connecting with a VGA cable or 5-BNC cable Select an appropriate input signal before starting the auto setup function by following the steps below if you change the input signal due to changing the connection to the computer... - Page 49 If the target input signal is unavailable from the list at the left, press the [>] button, and then press the [ ] / [ ] button to select the target input signal from the list at the right. Press the [OK] button.
- Page 50 Selecting ANALOG PC-2 Select [ANALOG PC-2] for Input Terminal-2. Press the [INPUT] button. The [INPUT] window appears. Select the second top item in the menu with the [INPUT] button. The selection is toggled through available input signals from above. You can select any input signal type from all options through the [ ] / [ ] button. If the ANALOG PC-2 is unavailable from the list at the left, press [>], and then press [ ] / [ ] to select the ANALOG PC-2 from the list at the right.
-
Page 51: Adjusting The Focus
The projected image may be out of focus if the projection distance is beyond the range of 1.2 m (3.9') to 9 m (29.5'). Move the projector installation position if such is the case (P32). Rough adjustment: [ ] [ ]... -
Page 52: Adjusting Keystone Distortion
Adjusting Keystone Distortion The Auto setup function (Auto keystone) automatically adjusts the keystone distortion in a longitudinal direction. Follow the steps below if the function does not adjust the distortion appropriately or you want to adjust the keystone distortion in a horizontal direction. Press the [KEYSTONE] button. - Page 53 Press the [OK] button. The result of keystone adjustment is memorized. If you place the projector at the same posi- tion, the keystone adjustment is not necessary. When the Keystone adjustment is selected, signals are processed digitally. The image may look different from the original one.
-
Page 54: Setting Up The Computer Screen Automatically (Auto Pc)
This projector automatically makes optimum settings for the total number of dots and track- ing depending on a signal type (SXGA+, XGA, etc.). The auto PC adjustment function does not need to be performed if the projector is project- ing an image properly with [Auto Setup]. -
Page 55: Selecting An Image Mode (Image)
Select this if you want to project an image in the display mode conforming to Windows standard color space. It is suited to project an image shot by an sRGB-compatible digital camera. enjoy the atmosphere of a movie theater in a dark room. (SX7 MarkII) - Page 56 SX7 MarkII Standard Presentation Movie Photo AdobeRGB sRGB You can adjust the followings for each image mode. For detailed information on the proce- dures, refer to "Image Adjustment Menu" (P102 to 110). Brightness Adjust this when the image is too bright or dark.
-
Page 57: Selecting A Screen Mode (Aspect)
Selecting a Screen Mode (Aspect) You can select one of the following screen modes depending on the aspect ratio or display resolution of your computer. You can specify the aspect ratio from the menu. Refer to [Aspect] in the menu (P90). The available screen mode will be different depending on the setting of [Screen aspect]. - Page 58 True size If the display resolution of the computer is higher than 1400 by 1050 dots (1024 by 768 dots for X700), select a lower resolution before starting projection. The upper, lower, left, and/or right portions of a projected image may be missing depending on the Aspect setting.
-
Page 59: Selecting Aspect Ratio Of The Projecting Image (Screen Aspect)
[Auto focus], [Auto keystone], and [Auto screen color] are disabled in the [Auto setup] func- tion. You cannot register the image for [Projector on], [No signal screen], or [NO SHOW]. [SPOT] will be disabled. [ ]: Moves up the image. -
Page 60: Turning Off The Projector
Turning Off the Projector You may shorten the lamp life if turning off the projector while its lamp is still in an unstable state shortly after turning on the projector. Wait at least 5 minutes before turning off the pro- jector. -
Page 61: Setting Up The Power Management Function
The projector may be damaged due to the heat. Attach the lens cap to the lens to protect it and put the projector in the carrying bag. Replace the adjustable foot to prevent the damage on the projector. - Page 63 PROJECTING AN IMAGE FROM AV EQUIPMENT Table of contents/Safety Instructions Before Use Setting Up the Projector Projecting an Image from the Computer Projecting an Image from AV Equipment Useful Functions Available During a Presentation Setting Up Functions from Menus Maintenance...
-
Page 64: Projecting An Image From Av Equipment
AV equipment. About the Component Cable The projector cannot be connected to an AV equipment only with the supplied component cable (RCA/Mini D-sub 15-pin). Please purchase either of the following cables according to the type of the terminal on the AV equipment:... -
Page 65: Scart Cable
Set the input signal as [COMPONENT] by referring to "Projecting an Image from the Com- puter" and "5-BNC cable" if you want to connect the projector to an AV equipment using a 5- BNC extension cable via an video control apparatus in a hall or so (P37). -
Page 66: Video Cable
(S-VIDEO IN) SX7 MarkII/ X700 SX60 INPUT Signal: [S-VIDEO] is selected automati- cally Connect an audio cable if you want to use the projector's speaker. (SX7 II/X700: P67, SX60: P39) Video cable Video output terminal (VIDEO OUT terminal) Projector Video input... -
Page 67: Audio Cable
Connecting to AUDIO IN Terminals (SX7 II/X700) Connect an audio cable to the AUDIO IN terminal corresponding to the input image signal if you want to use the projector’s speaker. Audio cable (RCA terminal) (RCA/Stereo mini jack) Audio input terminal... - Page 68 The internal speaker is disabled if you input the audio cable to the AUDIO OUT terminal. If you connect the projector directly to a speaker, make sure to use the amplified speaker. (Stereo mini jack)
-
Page 69: Projecting A Video Image From An Av Equipment
Select an appropriate image mode depending on the projecting image. Select an appropriate screen mode from the [Aspect] menu. Stopping projection... Turn off the projector. Turn off the projector and remove the power cord from the AC outlet. P40* P46, 51 P60* * Those steps are same as those for projecting the computer screen. -
Page 70: Performing The Auto Setup
Performing the Auto Setup With the auto setup function, a series of screen adjustment and settings, such as Auto focus and Auto keystone is performed automatically when projecting a video image from an AV equipment. You can start the projection only with this operation if the input signal has been appropriately selected. - Page 71 Selecting DIGITAL VIDEO Press the [INPUT] button. The [INPUT] window appears. Select the top item in the menu with the [INPUT] button. The selection is toggled through available input signal types from above. You can select any input signal type from all options through the [ ] / [ ] button. If [DIGITAL VIDEO] is unavailable from the list at the left, press [>], and then press [ ] / [ ] to select it from the list at the right.
- Page 72 Selecting SCART Select [SCART] for Input Terminal-2. Press the [INPUT] button. The [INPUT] window appears. Select the second top item in the menu with the [INPUT] button. The selection is toggled through available input signals from above. You can select any input signal type from all options through the [ ] / [ ] button. If the SCART is unavailable from the list at the left, press [>], and then press [ ] / [ ] to select the SCART from the list at the right.
-
Page 73: Selecting A Screen Mode (Aspect)
Selecting a Screen Mode (Aspect) You can select one of the following screen modes depending on the aspect ratio of your AV equipment or content software. You can specify the aspect ratio from the menu. Refer to [Aspect] in the menu (P90, 91). -
Page 74: Selecting Aspect Ratio Of The Projecting Image (Screen Aspect)
Selecting Aspect Ratio of the Projecting Image (Screen aspect) You can select among three aspect ratios of the projecting image according to the aspect ratio of the projected screen. You can project an image on the whole screen by setting [Screen aspect]. You can set [Screen aspect] from menu. - Page 75 Keystone adjustment will be disabled. Project the image at right angle to the screen. [Auto focus], [Auto keystone], and [Auto screen color] are disabled in the [Auto setup] func- tion. You cannot register the image for [Projector on] or [No signal screen]. [SPOT] will be disabled. Available [Aspect] mode...
-
Page 77: Useful Functions
FUNCTIONS AVAILABLE DURING A PRESENTATION Table of contents/Safety Instructions Before Use Setting Up the Projector Projecting an Image from the Computer Projecting an Image from AV Equipment Useful Functions Available During a Presentation Setting Up Functions from Menus Maintenance Troubleshooting... -
Page 78: Useful Functions Available During A Presentation
Useful Functions Available During a Presentation Blackened Out an Image Temporarily Useful when: You finished the presentation. You want to divert attendees' attention from the screen. Blacken out the image temporarily. Blackening out an Image The screen changes to black or blue. Showing the Image Again Press the button to show the image... -
Page 79: Muting The Sound
MUTE function. Pressing the button also cancels the MUTE function. For SX7 MarkII/X700, you can also mute the audio with the same opera- tion when you output the audio to the external audio-visual equipment. Adjusting the Volume... -
Page 80: Showing The Elapsed Time
Page Up Page Down This function is available only if the projector and the computer are con- nected via the USB cable that came with your projector (P82). This function acts as the Page Up and Page Down keys on the computer keyboard. -
Page 81: Zooming An Image
Zooming an Image Useful when: Zoom in an object such as a small graph during a presentation. Moving unnecessary information off the screen to focus on the current subject. Zoom the projected image. Zooming In an Image Press this button repeatedly until the image becomes the desired size. -
Page 82: Operating A Mouse With The Remote Control
Connecting a USB Cable Make sure that both the computer and pro- jector are turned off, and then connect the supplied USB cable between the USB ter- minals on the computer and the projector. USB terminal USB cable USB terminal... -
Page 83: Pointing With A Spotlight
Pointing with a Spotlight Useful when: You want to point to a portion of an image that should draw attendees' attention. Highlight a desired portion of the projected image with a spotlight. Showing the Spotlight A spotlight appears at the center of the screen and the image becomes dark except for the spotlight. - Page 85 SETTING UP FUNCTIONS FROM MENUS Table of contents/Safety Instructions Before Use Setting Up the Projector Projecting an Image from the Computer Projecting an Image from AV Equipment Useful Functions Available During a Presentation Setting Up Functions from Menus Maintenance Troubleshooting...
-
Page 86: Setting Up Functions From Menus
It consists of following three menus. * The menu items may differ depending on the input signal. The projector stores the settings for each input signal (8) and image mode (up to 5). Symbols Indicating Item Categories Menu items are classified into two categories, menu items used to project the image from the computer and menu items used to project the image from the AV equipment. - Page 87 This section provides the basic operation on the menu. Press the [MENU] button. A menu window appears. Press the [MENU] button again to close the menu window. Press [<] / [>] to select the appropriate tab. Press [ ] to move the cursor on the tab if it is not on it.
- Page 88 Press the [OK] button to display a list. Press [ ] [ ] to select a desired setting. In a different screen Example: Menu position (SX7 MarkII) Press the [OK] button to display a dif- ferent screen. Then follow the instruc- tion on the screen.
- Page 89 Press the [OK] button. In some menu items, the setting is enabled just by making a selection. Press the [MENU] button when you finish. The menu disappears.
-
Page 90: Setting Display Status
Setting Display Status Selecting a Screen Mode (1) [Aspect] DIGITAL PC ANALOG PC You can adjust the aspect ratio of the image pro- jected on the screen. Display settings Aspect Projects a computer screen with Full screen aspect ratio of 4:3 fully on the screen with aspect ratio of 4:3. -
Page 91: Selecting A Screen Mode (3)
Display settings Input signal select Select an input signal type suitable for the com- puter from the displayed signal types. Press the [MENU] button when you finish. See P132 for the signal types sup- ported by this projector. -
Page 92: Selecting An Input Signal Type (2)
Selecting an Input Signal Type (2) [Input signal select] VIDEO/S-VIDEO You can select an input signal type manually if a video image from a AV equipment is not pro- jected correctly (irregular color or no image). Display settings Input signal select Selects the input signal automati- Auto cally. -
Page 93: Adjusting The Total Number Of Dots
Adjusting the Total Number of Dots [Total dots] ANALOG PC You can select the total number of dots in the horizontal direction. Adjust the number of dots when the image distorts or noise is displayed on the screen at both sides. Display settings Input signal settings Total dots... -
Page 94: Adjusting The Horizontal Position
Adjusting the Horizontal Position [Horizontal position] ANALOG PC You can adjust the horizontal position of the screen when the projected image is shifted in the horizontal direction. Display settings Input signal settings Horizontal position Moves the screen to the right. >... -
Page 95: Adjusting The Number Of Horizontal Pixels
Adjusting the Number of Horizontal Pixels [Horizontal pixels] ANALOG PC You can adjust the number of the pixels in the horizontal direction if the length of the screen is too long or too short in the horizontal direction. Display settings Input signal settings Horizontal pixels Increases the number of pixels in... -
Page 96: Performing Progressive Processing
Performing Progressive Processing [Progressive] COMP. VIDEO/S-VIDEO You can accumulate and composite information for a signal for a low resolution image to convert it to a high resolution image. Display settings Progressive Does not perform the progressive processing. Performs the progressive process- ing. -
Page 97: Performing The Ceiling-Mounted/Rear Projection
Press the [MENU] button when you finish. Setting Display Status None (Normal image) Ceiling mounted Rear Rear, Ceiling mounted When hanging the projector from the ceiling, make sure to use optional brackets. Contact your Canon dealer. The keystone adjustment will be reset. -
Page 98: Correcting The Screen Color
DIGITAL PC ANALOG PC DIGITAL VIDEO COMP./SCART VIDEO/S-VIDEO You can project a desired image (logo) when you turn on the projector, there is no input signal, or you blacken a projecting image temporarily. Display settings User screen settings Logo capture Projects the image to be captured on the screen. -
Page 99: Selecting A Logo Display Position (Sx60/X700)
DIGITAL VIDEO COMP./SCART VIDEO/S-VIDEO You can display a user logo on a screen when there is no input signal. (SX60/X700) For SX7 MarkII, you can display either of a black or blue screen. Display settings User screen settings No signal screen (SX60/X700) Displays no logo (black screen). -
Page 100: Displaying A Logo (No Show)
You can display a user logo on a screen when the projected image is blackened out tempo- rarily by pressing the [NO SHOW] button on the remote control. (SX60/X700) For SX7 MarkII, you can display either of a black or blue screen. Display settings User screen settings NO SHOW Displays no logo (black screen). -
Page 101: Selecting Aspect Ratio Of The Screen
Selecting Aspect Ratio of the Screen [Screen aspect] DIGITAL PC ANALOG PC DIGITAL VIDEO COMP./SCART VIDEO/S-VIDEO You can select the aspect ratio of the projecting screen. Display settings Screen aspect Select this when you use a screen with aspect ratio of 4:3. Select this when you use a screen 16:9 with aspect ratio of 16:9. -
Page 102: Setting The Image Quality
[sRGB] in [Image mode] and project the image with higher tone on the screen by setting [Ambient light]. It is suited to project an ornamental photo, etc. under an ambient light. Home Cinema AdobeRGB sRGB SX7 MarkII Standard Presentation Movie (SX7 MarkII) Photo AdobeRGB sRGB *1 It is available if the input signal is [DIGITAL VIDEO], [COMPONENT], [VIDEO] or [S-VIDEO]. -
Page 103: Adjusting The Brightness
You can adjust the contrast of an image if you want to make it more or less vivid, adjust the dif- ference in tone between the lightest and darkest portions of the image. (SX7 MarkII) > < Press the [MENU] button when you finish. -
Page 104: Adjusting The Sharpness
[Gamma] DIGITAL PC DIGITAL VIDEO You can make a gamma correction if light or dark portions of an image are obscure. (SX7 MarkII) > < Press the [MENU] button when you finish. This setting is saved for the currently selected input signal and image mode. -
Page 105: Making Color Adjustment (1) (Sx7 Ii)
Making Color Adjustment (1) (SX7 II) [Color adjustment] DIGITAL PC ANALOG PC You can adjust color level and color balance and make color adjustment for each color (red, green, and blue). Image adjustment Color adjustment Adjusts the color temperature of the Color temperature* image. -
Page 106: Making Color Adjustment (3)
Making Color Adjustment (3) [Color adjustment] COMP. VIDEO/S-VIDEO You can adjust color level and color balance and make color adjustment for each color (red, green, and blue). Image adjustment Color adjustment Adjusts the intensity of each color. Color level [>] Increases the intensity of color. [<] Decreases the intensity of color. -
Page 107: Making Advanced Color Adjustment (2)
Making Advanced Color Adjustment (2) [Mem. color correct] DIGITAL PC ANALOG PC DIGITAL VIDEO COMP./SCART VIDEO/S-VIDEO You can correct colors (e.g. blue sky) in our memory so that they can be projected more viv- idly. Image adjustment Advanced adjustment Mem. color correct Disables the memorized color cor- rection function. -
Page 108: Correcting The Image According To The Ambient Light (Sx7 Ii)
Correcting the Image According to the Ambient Light (SX7 II) [Ambient light] DIGITAL PC ANALOG PC You can correct and project an image more appropriately according to the ambient light on the screen if you have selected [Photo] for [Image mode]. Image adjustment Ambient light Projects an image with no correc-... -
Page 109: Reducing The Lamp Brightness
Press the [OK] button to confirm, and then press the [MENU] button. You can reduce the power consump- tion of the lamp if you select in the quiet mode. This setting is saved for the currently selected input signal and image mode. (SX7 MarkII) Setting the Image Quality... -
Page 110: Resetting The Image Settings
Performing [Color adjustment] or [Advanced adjustment]: A check mark ( ) appears on the Image Adjustment menu if you perform [Color adjustment] [Advanced (Dynamic gamma, Mem. color correct, or 6-axis color adjust)]. (SX7 MarkII) adjustment... -
Page 111: Setting Various Function
Selecting the Power Management Mode [Power management mode] DIGITAL PC ANALOG PC DIGITAL VIDEO COMP./SCART VIDEO/S-VIDEO You can turn off the lamp or projector automati- cally for saving power. System settings Power management mode Disables the power management mode. Enters... -
Page 112: Skip The Power Button Operation
Skip the POWER Button Operation [Direct power on] DIGITAL PC ANALOG PC DIGITAL VIDEO COMP./SCART VIDEO/S-VIDEO You can set the projector to be turned on when you connect the power cord. System settings Direct power on Disables the direct power on func- tion. -
Page 113: Selecting A Display Language
Selecting a Display Language [Language] DIGITAL PC ANALOG PC DIGITAL VIDEO COMP./SCART VIDEO/S-VIDEO You can select a language to be used in the menu from 20 different languages. System settings Language English Germany French Italian Spanish Portuguese Swedish Russian Dutch Finnish Norwegian Turkish... -
Page 114: Prohibiting The Projector Operation
DIGITAL PC ANALOG PC DIGITAL VIDEO COMP./SCART VIDEO/S-VIDEO You can enable/disable the guide message showing how to use the projector. System settings Guide Disables the guide message. Enables the guide message. Press the [OK] button to confirm, and then press the [MENU] button. -
Page 115: Turning On/Off The Led Illumination
System settings Other settings Remote control Selects the channel on the projector you use. Press the [OK] button to confirm, and then press the [MENU] button. Selecting a Channel on the Remote Control... -
Page 116: Setting Up The Digital Video Input Signal
[Password settings] DIGITAL PC ANALOG PC DIGITAL VIDEO COMP./SCART VIDEO/S-VIDEO You can set a password to the projector. Once you set the password, you will need to enter the password each time you turn on the projector. System settings Other settings Password settings Disables the password protection. -
Page 117: Registering A Password
[Register password] DIGITAL PC ANALOG PC DIGITAL VIDEO COMP./SCART VIDEO/S-VIDEO You can register a password that you need to enter when turning on the projector. System settings Other settings Register password Press the [OK] button to display the password entry screen. -
Page 118: Resetting The Lamp Counter
Display Examples of Lamp Counter If the time of use is: SX7 MarkII/X700: 1800 hours or less SX60: 2300 hours or less If the time of use is: SX7 MarkII/X700: 1800 to 2000 hours... - Page 119 Table of contents/Safety Instructions Before Use Setting Up the Projector MAINTENANCE Projecting an Image from the Computer Projecting an Image from AV Equipment Useful Functions Available During a Presentation Setting Up Functions from Menus Maintenance Troubleshooting Appendix Index...
-
Page 120: Maintenance
Wipe the projector's main unit softly with a soft cloth. If the projector is heavily soiled, soak the cloth in water with a small amount of detergent in it, squeeze the cloth very well, and then wipe the projector with it. After cleaning, wipe the projector with a dry cloth. -
Page 121: Cleaning And Replacing The Air Filter
An air filter is installed in the air intake vent on the bottom of the main body to protect the internal lens and mirror from dust. Should the air filter become clogged with dust, the pro- jector may be damaged since it will block the air flow into the projector and raises the inter- nal temperature of the projector. -
Page 122: Replacing The Lamp
When replacing the lamp, turn off the projector, wait until the cooling fan stops, remove the power plug from the AC outlet, and let the projector stand for at least 1 hour. Otherwise, you may get burned because the main unit is very hot immediately Caution after the projector is turned off. - Page 123 Replacing the Lamp Turn off the projector, disconnect the power plug from the AC outlet, and then let the pro- jector stand for at least 1 hour. Loosen a screw with a flathead screwdriver and remove the lamp cover. Loosen two screws, pull up the handle, and then remove the lamp.
- Page 125 TROUBLE- SHOOTING Table of contents/Safety Instructions Before Use Setting Up the Projector Projecting an Image from the Computer Projecting an Image from AV Equipment Useful Functions Available During a Presentation Setting Up Functions from Menus Maintenance Troubleshooting Appendix Index...
-
Page 126: Troubleshooting
Troubleshooting WARNING Lamp Flash Patterns The WARNING lamp on the Control Panel flashes in red after the projector is turned off when there is a trouble in the projector. Wait until the cooling fan stops and disconnect the power plug from the AC outlet before dealing with the trouble. -
Page 127: Symptoms And Solutions
You cannot turn on the projector until the [POWER] indicator turns red after connecting the power plug (P40). The projector cannot be turned on for a while after it is turned off. Wait for a while before pressing the [POWER] button again (P60). -
Page 128: You Cannot Project An Image Appropriately
1.2 m (3.9'), the projec- tor cannot focus on the screen (P32, 133). Check whether the projector is placed obliquely to the screen. A slight error in the projection angle can be corrected through the keystone adjustment function (P43, 52). -
Page 129: The Projector Is Forced To Be Turned Off
Check whether the air intake or exhaust vent is blocked. If the air intake or exhaust vent is blocked, the temperature inside the projector rises and the power is automatically turned off to protect the projector. Wait until the internal temperature gets down, and then turn on the projector without blocking the intake and exhaust vents (P22, 23, 40). -
Page 130: You Cannot Operate The Remote Control
Also check whether there is any obstacle between the infrared remote receiver of the projector and the remote control (P29). Check whether the infrared remote receiver of the projector is exposed to direct sunlight or strong light of lighting apparatus (P29). - Page 131 Specifications ... P138 Index... P140 Menu Configuration ... P144 Table of contents/Safety Instructions Before Use Setting Up the Projector Projecting an Image from the Computer Projecting an Image from AV Equipment Useful Functions Available During a Presentation Setting Up Functions from Menus...
-
Page 132: Appendix
70.09 800 x 600 D-SVGA 75.00 1024 x 768 D-XGA 72.81 1280 x 1024 D-SXGA* 74.38 1400 x 1050 D-SXGA+* 85.01 Only for SX7 MarkII/SX60 70.09 55.38 56.25 DIGITAL VIDEO 60.32 61.03 Signal Horizontal frequency 60.51 type 60.31 D-480p 31.469 75.00... -
Page 133: Relationship Between Screen Size And Projecting Distance
Relationship between Screen Size and Projecting Distance Screen size at 4:3 Projecting distance at (m) aspect ratio Max. zooming Type – W x D (cm) 40" 81 x 61 1.2 (3.9') 50" 102 x 76 1.5 (4.9') 60" 122 x 91 1.8 (5.9') 70"... -
Page 134: Glossary
You can project an image with more accurate color reproduction since Its has wider color gamut than sRGB. In SX7 MarkII, if you select [AdobeRGB] in the [Image mode] setting, the projector can project the best-quality image conforming to the AdobeRGB Standard. - Page 135 Color temperature* (P105) A value that represents the related color in a light source in general. In this projector, the color temperature is used to adjust the RGB color balance for the projected image to cor- rect the related color influence by the ambi- ent light.
- Page 136 The repro- ducibility of the dark tone is mainly changed. Since you can adjust the offset for each RGB color in this projector, you can also adjust colors. The offset is normally adjusted with the gain.
- Page 137 (Y) and color sig- nal (C) separately. Connect the S-video ter- minal on the AV equipment and the S-VIDEO IN terminal on this projector with an S-video cable. Select [S-VIDEO] at projection. Tracking (P93) To reproduce an image from an analog...
-
Page 138: Specifications
Analog PC, component, SCART (mini D-sub 15-pin) composite (RCA) S-Video (mini DIN 4-pin) Audio signal (SX7 MarkII/X700: stereo mini jack x 3, SX60: stereo mini jack x 1) For mouse control (USB type B) RS-232C (mini DIN 8-pin) Analog PC (mini D-sub 15-pin) -
Page 139: External View
External View Screw Holes for installation of ceiling- mount hanger (M4 x 6) Input terminal-2 (ANALOG IN-2) (Analog PC-2 input/component input terminal) This terminal is used as a computer analog PC input or component input terminal. Use a D- sub computer cable for connection. Mini D-sub 15-pin The terminal specifications for the analog PC-2 input and component input are the same. -
Page 140: Index
6-axis color adjust ... 107, 134 Adjusting keystone distortion ... 52 AdobeRGB ... 56, 102, 134 Air filter ... 121 Ambient light (SX7 MarkII) ... 108 ANALOG IN-1 ... 26, 36 ANALOG IN-2 ... 26, 36, 64 Analog PC ... 36, 48, 134 Aspect ... - Page 141 Power management ... 61 Power management mode (setting) ... 111 Progressive ... 96, 136 Projection distance ... 32, 133 Projector installation ... 14, 33 Projector on ... 100 P-TIMER ... 80 Rear projection ... 33, 97 Register password ... 117 Remote control ...
- Page 142 Ceiling-mount pipe (35 cm/13.8 in to 55 cm/21.7 in) Part No.: RS-CL08* * This part is used to hang the projector from a ceiling. For more detailed information, refer to the instruction manual that comes with the ceiling-mount hanger RS-CL07.
-
Page 144: Menu Configuration
[S-VIDEO]. Red/Green/Blue OK/Cancel Upper L Upper R Center * Lower L Lower R Black Blue * User logo (SX60/X700) Black * P100 Blue User logo (SX60/X700) Canon logo * P100 Skip User logo (SX60/X700) P101 16:9 16:9 D. image shift... -
Page 145: The Image Adjustment Menu
The Image adjustment menu Image mode DIGITAL PC/ANALOG PC Photo (SX7 II) COMMON Standard * Presentation Movie*** Home Cinema (SX60) AdobeRGB (SX7 II) sRGB Brightness P103 Contrast P103 Sharpness P104 Gamma P104 Color adjustment COMPONENT/VIDEO/ S-VIDEO Color level Color balance DIGITAL PC/ANALOG PC Color temperature** COMMON... - Page 146 CANON INC. 30-2, Shimomaruko 3-chome, Ohta-ku, Tokyo 146-8501, Japan U.S.A. CANON U.S.A. INC. One Canon Plaza, Lake Success, NY 11042- 1198, U.S.A. For all inquires concerning this product, call toll free in the U.S. 1-800-OK-CANON CANADA CANON CANADA INC. HEADQUARTERS...
Need help?
Do you have a question about the SX7 MARKII and is the answer not in the manual?
Questions and answers