Table of Contents
Advertisement
Quick Links
G-SPEED eS INSTALLATION GUIDE
G-SPEED™ eS
Mac Installation Guide
G-Technology Inc.
Tel: (310) 449-4599
Fax: (310) 449-4670
support@g-technology.com
P/N GSPEED eS v1.2
TABLE OF CONTENTS
1. INTRODUCTION (Pg 4)
5. G-SPEED eS OVERVIEW (Pg 5)
7. G-SPEED eS AUDIBLE ALARMS (Pg 6)
9. G-TECH RAID CONTROLLER WEB GUI
10.
CHANGING THE G-TECH RAID CONTROLLER MODE (Pg 9)
11.
CONFIGURING TWO G-SPEED eS UNITS IN
RAID 5 MODE
(Pg 11)
12.
WHAT TO DO IN THE EVENT OF A DISK
DRIVE FAILURE
(Pg 15)
13.
TECHNICAL SUPPORT (Pg 17)
14.
APPENDIX A - DETAILED INFORMATION ON USING THE WEB GUI
APPENDIX B - EXPLANATION OF RAID LEVELS
APPENDIX C - NOTES
(Pg 8)
Page 1
Advertisement
Table of Contents

Related Manuals for G-Technology G-SPEED eS


Summary of Contents for G-Technology G-SPEED eS
-
Page 1: Table Of Contents
5. G-SPEED eS OVERVIEW (Pg 5) 6. OPTIONAL G-TECH PCIe RAID CONTOLLER OVERVIEW 7. G-SPEED eS AUDIBLE ALARMS (Pg 6) 8. SETTING UP G-SPEED eS WITH THE G-TECH PCIe RAID CONTROLLER 9. G-TECH RAID CONTROLLER WEB GUI CHANGING THE G-TECH RAID CONTROLLER MODE (Pg 9) - Page 2 G-SPEED eS INSTALLATION GUIDE Page 2...
- Page 3 G-SPEED eS INSTALLATION GUIDE Page 3...
-
Page 4: Introduction
(310) 449-4599. Please keep the shipping container and packing materials. In the unlikely event that you need to return G-SPEED eS to us for any reason, you must use the G-Tech shipping container. If the Product is returned damaged caused by improper packaging, the warranty will be void and liability will rest with the user. -
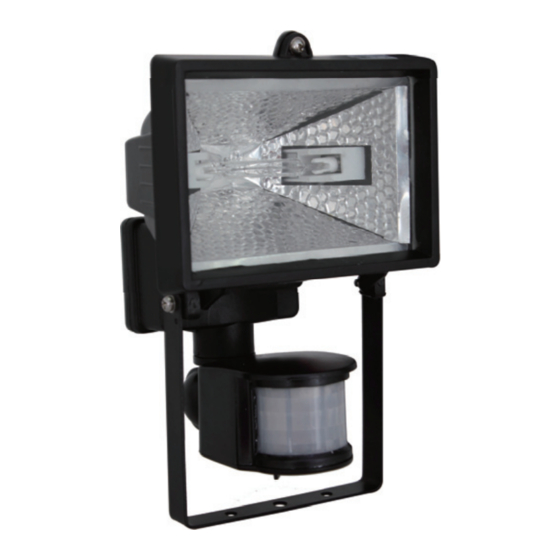
Page 5: G-Speed Es Overview
Removable ON/ OFF Switch 6. OPTIONAL G-TECH PCIe RAID CONTOLLER OVERVIEW The optional G-Tech PCIe RAID controller connects G-SPEED eS to any Mac Pro workstation and provides RAID 0, 1, 5, 10 & JBOD functionality. Drive Module Power/Activity Disk Module... -
Page 6: G-Speed Es Audible Alarms
G-SPEED eS INSTALLATION GUIDE 7. G-SPEED eS AUDIBLE ALARMS 7.1 The G-SPEED eS enclosure is equipped with an audible alarm that sounds when: 1. The internal temperature of the G-SPEED eS enclosure reaches a temperature of 60° centigrade and/or 2. When the main FAN fails or the RPM of the fan slows to a state where the fan can longer adequately cool the system. - Page 7 G-TECH RA Attach one en nd of the suppli ied eSATA cable port located o on the back of G G-SPEED eS. Attach the oth her end of the eSATA cable to port) on the G G-Tech RAID co...
- Page 8 Click t button. NOTE: A shortc cut has been provid ded to access the w “G-SPEED eS W Web GUI” file (locate ed in the folder Ma SPEED eS\Short tcut to Web GUI) t to your Documents...
- Page 9 G-SPE EED eS INSTA ALLATION G UIDE The main scre een of the web GUI will appea below. Note t hat the G-SPEE ED eS is set up Each of the fo our drives in th e unit are displ lower Section n of the GUI.
- Page 10 G-SPE EED eS INSTA ALLATION G UIDE Click on the < <DELETE> butt ton. The followi will appear. C Click the <OK> button to proce WARNING: This wil l delete any data ored on G-SPEED e The GUI will r refresh and the e array is now d Click the <C...
- Page 11 G-Tech RA AID controller i s properly nd the driver an nd web GUI are e loaded. h G-SPEED eS u units to the G-T Tech RAID as shown below w, power the un nits and restart uter...
- Page 12 Maintenance” l ink next to the array with “OS sk 1_0. The wi indow shown b elow will appea elete> button. The following w window ARNING: This will delete any data red on G-SPEED eS Page e 12...
- Page 13 G-SPE EED eS INSTA ALLATION G UIDE Click the <OK K> button to de elete the array. Click on the “ Maintenance” l ink next to the Name” GS Dis sk 1_1. The w indow below w Click the <De elete>...
- Page 14 G-SPE EED eS INSTA ALLATION G UIDE Select RAID 5 for “Array Ty pe:”, enter G-S R5 for “Array Name:”, select t Foreground Back for “Init tialization Meth hod:” and “Cach respectively a and click the <S Select All> butt Click the <Cre eate>...
- Page 15 “Status” as N Normal. The Mac OS w will display the “Disk Insertion indicating the e G-SPEED eS is s now ready to Click on the < <Initialize> but tton to launch t Utility and ref fer to your syst tem documenta instructions.
- Page 16 G-SPE EED eS INSTA ALLATION G UIDE 3. Remove the e failed drive (I n this example G-SPEED eS S connected to port 2 of the G controller) b by inserting the e provided key hole and ge ently sliding the e drive module enclosure.
-
Page 17: Technical Support
Amount of memory installed • Other devices attached to your computer Thank you for purchasing G-SPEED eS. If you have any comments or questions about this manual or the Product, please call (310) 449-4599, or send an email to info@g-technology.com. - Page 18 ENDIX A: WEB B GUI 1. Manage: Array: This s is the main screen of the web GUI. G G-SPEED eS is configured an from this pa age. (See Appe endix A.1 for de Devices: H Hard drive param meters are mod...
- Page 19 NOTE: While cont troller recomm mend shutting the system down whe disconne ecting G-SPEED eS S from the controlle 7.3 Rename : Renames arra ay as displayed 7.4 OCE/ORL 7.5 Shows the maintenance er depending WILL DELET 7.6 Verify: Ve...
- Page 20 G-SPE EED eS INSTA ALLATION G UIDE 8. C Create Array Click on “Create Array” and the e following will appear. .1 Array Type e: select the RA AID level for new .2 Array Nam me: This is the name that wi the MAIN pa age of the GUI.
- Page 21 G-SPE EED eS INSTA ALLATION G UIDE 9. Lo ocation: Show ws the location o of disks attache ntroller. ocation: “Contr roller#/Port#/ /Drive#” 10. Mo odel: Displays s the drive mo odel and serial sks currently at ttached to the c controller.
- Page 22 G-SPE EED eS INSTA ALLATION G UIDE pendix A.4: S ettings Auto Rebuild Enables or r disables the feature. en enabled, a critical RAID 5 array will aut tomatically reb build when a n inserted. See e Section 12 for r details.
- Page 23 Applications in cable length of 1 meter (3 feet). which data security is Up to (4) G-SPEED eS storage units can be attached paramount to the G-Tech RAID controller for up to 16TB of capacity and over 600 MB/sec of performance.
Need help?
Do you have a question about the G-SPEED eS and is the answer not in the manual?
Questions and answers