
Related Manuals for G-Technology G-SAFE


Summary of Contents for G-Technology G-SAFE
-
Page 1: Table Of Contents
4. WHAT’S IN THE BOX 5. G-SAFE OVERVIEW 6. INSTALLING G-SAFE 7. G-SAFE OPERATION 7.1 Powering on G-SAFE for the First Time 7.2 Front Panel STATUS LED & Alarm 7.3 LCD Panel Messages 8. REPLACING A DISK DRIVE MODULE 9. USING G-SAFE FOR OFFSITE DATA BACKUP 9.1 Disaster Recovery using Offsite Backup Module... - Page 2 G-SAFE Product Guide Page 2...
- Page 3 G-SAFE Product Guide Page 3...
-
Page 4: Introduction
(310) 449-4599. Please keep the shipping container and packing materials. In the unlikely event that you need to return G-SAFE to us for any reason, you must use the G-Tech shipping container. If the product is returned damaged caused by improper packaging, the warranty will be void and liability will rest with the user. -
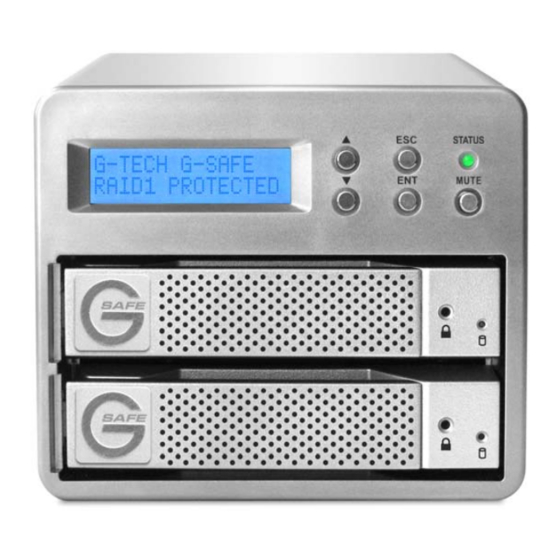
Page 5: G-Safe Overview
Ports USB 2.0 Port Attention Mac OS X Users G-SAFE is set up at the factory for use with Mac OS X systems. If you are running Mac OS X, G-SAFE will mount on the OS X desktop right out of the box. -
Page 6: Installing G-Safe
Note: G-SAFE is set up at the factory for use with Mac OS X systems. If you are running Mac OS X, G-SAFE will mount on the OS X desktop right out of the box. G-SAFE must be formatted for the Windows Operating System before use on a PC. -
Page 7: Front Panel Status Led & Alarm
If the fan malfunctions, the LCD will display the message below. Stop using G-SAFE until the fan module is replaced If the system is overheating, the LCD will display the message below. Stop using G-SAFE and move the unit to a cooler environment. Power off G-... - Page 8 8. REPLACING A DISK DRIVE MODULE In the event of a disk drive failure, the G-SAFE alarm will sound and the LCD will display a message like that below. Mute the alarm by pressing the MUTE button on the front panel.
-
Page 9: Using G-Safe For Offsite Data Backup
Note: The rebuild process takes approximately one minute for each 2.5 GB of storage capacity. So the rebuild time for a 250GB drive is approximately 100 minutes. While it is possible to access the G-SAFE during rebuild, data access may be very slow. - Page 10 G-SAFE Product Guide 3. Turn on G-SAFE (the alarm will sound and the display will indicate a MISSING drive) 4. Mute the alarm by pressing the “MUTE” button on the front panel. 5. Insert the target drive module while the unit is on. (This...
-
Page 11: Disaster Recovery Using Offsite Backup Module
2. Remove both drive modules. 3. Insert the offsite backup drive module in either bay. 4. Turn on G-SAFE (the alarm will sound and the display will indicate a MISSING drive). 5. Mount the drive on your system and verify the contents of the drive. -
Page 12: Initializing G-Safe
G-SAFE Product Guide 10. INITIALIZING G-SAFE G-SAFE is set up at the factory for use with Mac OS X systems. If you are running Mac OS X, G-SAFE will mount on the OS X desktop right out of the box. If it becomes necessary to re-format G-SAFE, follow the instructions below. - Page 13 Name: under Volume Information (in this example G-SAFE) and set Format: to Mac OS Extended as shown below. Note: Alternatively, G-SAFE can be set up in multiple volumes by selecting the desired number of partitions from the Volume Scheme pull-down menu.
-
Page 14: Windows 2000/Xp
G-SAFE Product Guide 9.2 Windows 2000/XP 1. Power on G-SAFE, wait 10 seconds, then power on your computer. 2. Open the Disk Management utility by right-clicking on the My Computer icon on the desktop and selecting “Manage” from the drop down menu as shown below. - Page 15 9. The window shown below will appear. Click on the <Next> button to continue. This will create one large volume using all of the available space on G-SAFE. Note: Multiple partitions can be created on G-SAFE. Consult your Windows documentation for instructions on setting up multiple partitions. Page 15...
- Page 16 12. The following window will appear. Click on the <Finish> button to continue. 13. Windows will format the volume and then display the following window. Disk 1 is now identified as G-SAFE (E:). Exit the Computer Management console Page 16...
-
Page 17: Cross Platform Use
G-SAFE (E:) G-SAFE is now ready to safeguard your data!! 9.3. Cross Platform Use To setup your G-SAFE for use on both Windows and Macintosh systems, use the Apple Disk utility and format G-SAFE FAT32. 1. Open the Apple Disk Utility. (The Apple Disk Utility is in the Utilities Folder located in the Applications Folder on your system drive). -
Page 18: Unmounting/Disconnecting G-Safe
1. Before powering down and disconnecting G-SAFE, you must unmount the system by simply dragging the G-SAFE icon to the trash located in the dock. 2. It is now safe to power off and remove G-SAFE from your system. 10.2 Windows Computers 1) Before powering down and disconnecting G-SAFE, left-click on the Eject icon shown below. - Page 19 G-SAFE Product Guide 13. LIMITED WARRANTY G-Technology Inc. (G-Tech) warrants your product against any defect in material and workmanship, under normal use, for the designated warranty period. become defective within the warranty period, G-Tech, will at its discretion, repair or replace the product.
Need help?
Do you have a question about the G-SAFE and is the answer not in the manual?
Questions and answers