Table of Contents
Advertisement
G-SPEED Product Guide
G-SPEED™
Product Guide
G-Technology Inc.
Tel: (310) 449-4599
Fax: (310) 449-4670
support@g-technology.com
TABLE OF CONTENTS
APPENDIX
P/N GSPEED120506
7.
7.3 Installing SFP and Optical Cable (FC version)
7.4 Installing SCSI Terminator and Cables (SCSI version)
7.5 Setting SCSI ID
8.1 Connecting to the GUI
8.2 Setting SCSI ID via the GUI (SCSI version)
10.1 Silencing the Audible Alarm
Description of RAID Levels
Page 1
Advertisement
Table of Contents

Related Manuals for G-Technology G-SPEED FC


Summary of Contents for G-Technology G-SPEED FC
-
Page 1: Table Of Contents
G-SPEED Product Guide G-SPEED™ Product Guide G-Technology Inc. Tel: (310) 449-4599 Fax: (310) 449-4670 support@g-technology.com TABLE OF CONTENTS 1. INTRODUCTION 2. SAFETY PRECAUTIONS 3. SYSTEM REQUIREMENTS 4. WHAT’S IN THE BOX 5. G-SPEED OVERVIEW 6. LED Indicators INSTALLING G-SPEED 7.1 Installing ATTO HBA 7.2 Installing Disk Drive modules... - Page 2 G-SPEED Product Guide Page 2...
- Page 3 G-SPEED Product Guide Page 3...
-
Page 4: Introduction
G-SPEED Product Guide 1. INTRODUCTION Thank you for purchasing G-SPEED from G-Technology, Inc. (G-Tech)! Designed from professionals, G-SPEED supports uncompressed HD video editing workflows with multiple levels of RAID protection. G-SPEED ideally suited performance creative environments including audio & video editing, motion graphics and digital photography. -
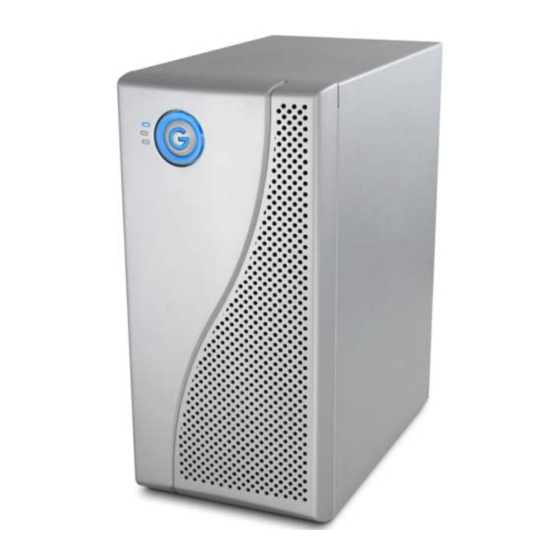
Page 5: G-Speed Overview
G-SPEED Product Guide G-SPEED OVERVIEW Removable Bezel Fibre Channel SCSI Ports Ports Removable Fans Power Supply Fault Alert Reset Button Removable/Redundant Standard Power Supply Power Supply 6. LED Indicators G-SPEED is equipped with three LED’s located on the front panel. The top blue LED indicates the system is powered, the LCD Panel bottom blue LED will flash when the data is being read from or written to the array and the middle LED will glow RED... -
Page 6: Installing Disk Drive Modules
G-SPEED Product Guide 7.2 Installing the Disk Drive Modules 1. Remove the G-SPEED Bezel by pulling forward. 2. Install the six disk drive modules into the G-SPEED enclosure and secure them in place by pushing on the lever. Note: The G-SPEED writes a signature to each drive so the drive modules can be installed in any position in the G-SPEED enclosure. - Page 7 G-SPEED Product Guide 3. Insert the optical cable into the SFP, it will seat with an audible click. 4. Remove the protective plug from PORT 0 of the SFP installed in the ATTO HBA and insert the free end of the optical cable.
-
Page 8: Formatting G-Speed
G-SPEED Product Guide 2. Enter the system through the LCD panel by pressing the “ENTER” button once. You will be prompted for your password. Use the UP / DOWN buttons to change the characters and ENTER button to move the cursor to the right. -
Page 9: Manual Configuration
G-SPEED Product Guide 8. MANUAL CONFIGURATION This section will describe how to manually configure G-SPEED using the web GUI. The G-SPEED employs a very sophisticated controller with many advanced options. Some of these options can erase data on the G-SPEED, so be careful and backup your data if the G-SPEED has been in use. -
Page 10: Initializing G-Speed / Creating A Raid Set
G-SPEED Product Guide 8.2 (SCSI) Configuring G-SPEED SCSI ID To set the SCSI ID of G-SPEED select “Modify Volume Set” on the left NAV bar under “Volume Set Functions.” next page select the volume you wish to set the SCSI ID. Click the “submit”... - Page 11 G-SPEED Product Guide 3. G-SPEED with capacities over 2TB must be configured to work properly with your operating system. a. Mac OS X Users: item “Greater Support” to “64bit LBA”, this configures G-SPEED to report full capacity in MAC OSX b.
-
Page 12: Deleting A Raid Set
G-SPEED Product Guide 4. Accept all other default settings on the Quick Create page. To complete the process and create the RAID/Volume Set, check the “Confirm The Operation” check box and hit the “Submit” button. This will begin the initialization process. - Page 13 G-SPEED Product Guide C. An email is sent to specified email address if email notification is enabled. (To enable email notification see Section 10.2) 2. The specific failure is reported on the front panel LCD (accessed by removing the G-SPEED front bezel) and the web GUI.
-
Page 14: Silencing The Audible Alarm
G-SPEED Product Guide 9.1 Silencing the Audible Alarm During a Failure event, the audible alarm is silenced through the web GUI or by the LCD panel. (to disable the audible alarm see section 10.1) 1. Silencing Through Web GUI Select “View Events/Mute Beeper” under the “System Control”... -
Page 15: Alert By Mail Config
G-SPEED Product Guide 10.2 Alert By Mail Config In the event of a system failure G-SPEED can alert up to four individuals of the problem via an email message. applicable information in to the window shown below, click the “Confirm The Operation” box and then click on the “Submit”... -
Page 16: Technical Support
(310) 449-4599, or send an email to info@g-technology.com. 12. LIMITED WARRANTY G-Technology Inc. (G-Tech) warrants your Product against any defect in material and workmanship, under normal use, for the designated warranty period. become defective within the warranty period, G-Tech, will at its discretion, repair or replace the Product. - Page 17 Level Description Advantage Disadvantage Disk striping Offers the highest No fault tolerance - performance and failure of one drive useable storage in the array results capacity in complete data loss Mirroring High level of fault Not the most tolerance efficient in regards...
Need help?
Do you have a question about the G-SPEED FC and is the answer not in the manual?
Questions and answers