Table of Contents
Advertisement
Advertisement
Table of Contents

Related Manuals for Vemer memo


Summary of Contents for Vemer memo
- Page 1 INTERRUTTORI ORARI DIGITALI Manuale d’Uso memo Digital time switches: User Manual...
-
Page 3: Table Of Contents
■ Automatic programming page Index Creating a new programme page ON/OFF Programmes page IMPULSE Programmes page ■ Safety warnings page CYCLE Programmes page ■ Technical characteristics page HOLIDAY Programmes page ■ Dimensions page Checking a programme page ■ Connection diagrams page Displaying a programme page... - Page 4 Digital programmable switches Digital programmable switches - 2 -...
-
Page 5: Safety Warnings
SAFETY WARNINGS TECHNICAL CHARACTERISTICS 1) The instrument must be installed and started up by a qualified person, strictly in observance of the connection diagrams shown in this manual. 2) After installation inaccessibility to the terminals without using dedicated tools must be guaranteed 3) Before accessing the connection terminals, make sure that the leads are not live. -
Page 6: Dimensions
DIMENSIONS CONNECTION DIAGRAMS Memo DW2 Memo DW Memo Y2 Memo Y - 4 -... -
Page 7: Display And Keypad Description
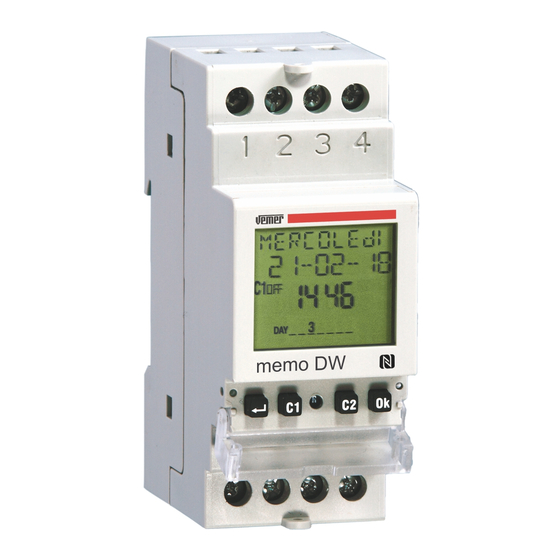
“day of the week” DISPLAY AND KEYPAD DESCRIPTION “programme running” “CET/DST” “key functions” “ ” “Ok” “C1” “C2” “R” “text1 / day” “Ok” “C1” “text 2 / date” “Ok” “C2” “status relay1” “time” “lock” “random programme"... -
Page 8: Installation
“R” INSTALLATION Note: in case of powerfail, IR receipt is not activated so that pole (+) is visible as shown in the figure “ ”... -
Page 9: Setting Language
Setting the language “C1” and “C2” “Ok” Setting the date “C1” and “C2” “Ok” “C1” and “C2” “Ok” Setting data format... -
Page 10: Setting Time
“Ok” normal operational status Setting the time “C1” and “C2” “Ok” “Ok”... -
Page 11: Programmings
CYCLE events PROGRAMMINGS Events ON/OFF IMPULSE event HOLIDAY events - 9 -... -
Page 12: Programming Priority
Programming priority... -
Page 13: Manual Operation
MANUAL OPERATION 3 seconds “C1” and “Ok” “C2” and “Ok” Manual switching on/off “C1” “C2” “C1” and “Ok” “C2” and “Ok” memo DW2 and memo Y2 Casual on/off switchings - 11 -... -
Page 14: Lock Output Switchings (Lock)
Battery Test Lock output switching (Lock) “ ” IR interface activation “C1” “C2” “R” 3 seconds “Ok” “C1” The manual functions which work on the output relays have “C2” priority over any set programming. The highest priority function is the lock switchings function (LOCK). -
Page 15: Menu Overview
“Menu Overview” - 13 -... -
Page 16: Automatic Programming
“C1” and “C2” 1. Creation of a new programme 1.1 Programmes ON / OFF “ ” “C1” and “C2” “Ok” “Ok” This choice is only available on memo DW2 and memo Y2 models. “C1” and “C2” “Ok” - 14 -... - Page 17 “C1” and “C2” “Ok” “Ok” For DW memo and DW2 memo models, monthly and yearly programmings are not available. “C1” and “C2” “Ok” “C2”...
- Page 18 “C2” Note: recursive function “Ok” At this point the instrument activates the recursive function which allows several on-off events to be programmed in succession on the same day. Thereby once an activation (deactivation) “C1” and “C2” event has been programmed, it “Ok”...
-
Page 19: Impulse Programmes
1.2 IMPULSE programmes “ ” “C1” and “C2” “C1” and “C2” “Ok” “Ok” This choice is only “C1” and available on memo “C2” “Ok” DW2 and memo Y2 models. - Page 20 “C1” and “C1” “C2” and “C2” “Ok” “Ok” For DW memo and DW2 memo “C1” models and “C2” monthly and yearly programmings are not available. “Ok”...
- Page 21 “C1” and “C2” “Ok” “Ok” - 19 -...
-
Page 22: Cycle Programmes
1.3 CYCLE Programmes “ ” “C1” and “C2” “C1” and “C2” “Ok” “Ok” “C1” and “C2” “Ok” This choice is only available on memo DW2 and memo Y2 models. “C1” and “C2”... - Page 23 “Ok” “Ok” - 21 -...
-
Page 24: Holiday Programmes
1.4 HOLIDAY programmes “ ” “C1” and “C2” “C1” and “C2” “Ok” “Ok” “C1” and “C2” “Ok” This choice is only available on memo DW2 and memo Y2 models. “C1” and “C2” - 22 -... - Page 25 “Ok” “C1” and “C2” “Ok” “Ok” - 23 -...
- Page 26 Note: recursive function At this point the instrument activates the recursive function which allows several holiday days (or holiday periods) to the programmed in succession. If you do not wish to enter another days' holiday (or period), press key “ ” to end programming.
-
Page 27: Checking A Programme
2. Checking a programme 2.1 Displaying a programme “ ” “C1” and “C2” “Ok” “C1” and “C2” “C1” and “C2” “Ok” “C1” and “C2”... -
Page 28: Modifying A Programme
“C1” and “C2” 2.2 Modifying a programme “Ok” “ ” “Ok” 2.3 Deleting a programme “C1” and “C2” “Ok” “Ok”... -
Page 29: Resetting Programmes
“C1” and “C2” 3. Reset programmes “Ok” “ ” “ ” “C1” and “C2” “Ok” “C1” and “C2” “Ok” “Ok” “C2” “Ok” modify, delete and next “C1” and “C2” “Ok”... -
Page 30: Settings Menu
LANGUAGE Menu SETTINGS MENU “C1” and “C2” “Ok” “Ok” “C1” and “C2” “ ” “Ok” “C1” and “C2” “Ok”... -
Page 31: Date Menu
“C1” and “C2” “Ok” DATE Menu “C1” and “C2” “Ok” “Ok” - 29 -... -
Page 32: Time Menu
CHANGE CET/DST Menu “C1” and “C2” “Ok” TIME Menu “C1” and “C2” “Ok” “C1” and “C2” “Ok” “Ok” “C1” and “C2” “Ok” “Ok” “C1” and “C2” Ok”... - Page 33 “Ok” “C1” and “C2” “Ok” “C2” - 31 -...
- Page 34 “Ok” “C2” “Ok” “ ” - 32 -...
-
Page 35: Casual Parameters Menu
CASUAL PARAMETERS Menu “Ok” “C1” and “C2” “Ok” “Ok” “C2” - 33 -... -
Page 36: Programme Options Menu
PROGRAMME OPTIONS Menu “C1” and “C2” “Ok” “C1” and “C2” “Ok” “C1” and “C2” “Ok” “C1” “C2” on “Ok” - 34 -... -
Page 37: Pin Menu
PIN Menu The pin code is a number composed of 4 digits which may assume values from 1 to 4. “C1” and “C2” “ ” “Ok” “C1” “C2” “Ok” “Ok” “Ok” “C2” “Ok” “ ” “ ” “C1” and “C2” and “Ok”... -
Page 38: Reset Menu Settings
RESET SETTINGS Menu METER MENU “ ” “C1” and “C2” “C1” and “C2” “Ok” “Ok” “Ok” “C1” and “C2” “Ok” “Ok” “Ok” “ ”... -
Page 39: Reset Menu
RESET MENU IR INTERFACE “ ” “C1” and “C2” “Ok” “C1” and “C2” “Ok” “Ok” Code Model Description VE345500 To perform a complete instrument reset, restoring the instrument to VE366100 factory conditions, you need to use a pointed object to press key “R”. In this way all the settings carried out are cancelled and the initial conditions restored. -
Page 40: Copy Function
Note: during transmission keep the remote control pointed towards Copy function the front of the instrument to facilitate transmission. Any problems with transmission are notified by the words on the remote control display. Paste function 3 seconds “R” 3 seconds “Ok”... -
Page 41: Battery Replacement
BATTERY REPLACEMENT Note: during transmission keep the remote control pointed towards the front of the instrument to facilitate transmission. Any problems with transmission are notified by the words on the clock display. Only use CR-2032 type batteries. Dispose of the used batteries observing the laws in force in relation to the disposal of hazardous waste. -
Page 42: Reference Standards
REFERENCE STANDARDS 2006/95/EC 2004/108/EC EN 60730-2-7... - Page 44 Vemer S.p.A.
Need help?
Do you have a question about the memo and is the answer not in the manual?
Questions and answers