Table of Contents
Advertisement
Quick Links
Nocturne
+ E 220V
®
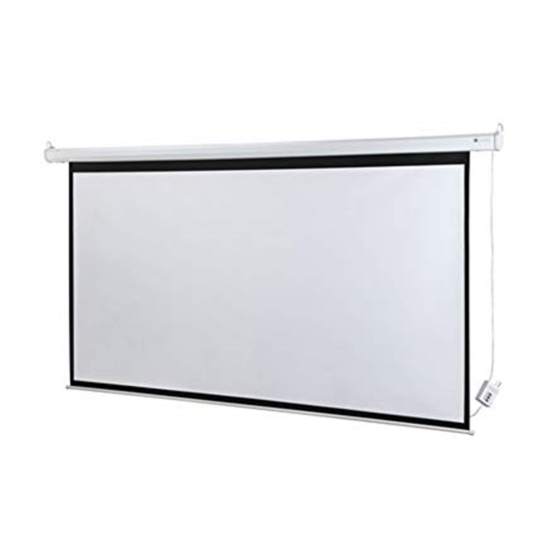
Outdoor electric projection screen
Overview - Components
SIDE
CABLE
MOUNT
(Deck Mount
Contents
Overview - Components .......................................................................................1
PLEASE READ - Important Safety Information .................................................2
Section 1 - Prepare for Installation ....................................................................2
Section 2 - Mounting Case with Brackets .........................................................3
Section 3 - Mounting Case Directly to Ceiling or Wall ....................................3
Section 4 - Installing Cable Guides ....................................................................4
Section 5 - Replace Roller Assembly & Fascia .................................................6
CABLE
shown)
CABLE MOUNT
(Wall Mount shown)
INSTALLATION & OPERATION
SIDE
CABLE
Section 6 - Securing Guide Cable ......................................................................7
Section 7 - Electrical Connections .....................................................................8
Section 9 - Wiring Diagrams ................................................................................9
Section 10 - Dimensions: Components ...........................................................10
Section 11 - Assembled Dimensions ................................................................12
If you have any difficulties installing or servicing your
Draper, Inc. | 411 S. Pearl St. Spiceland, IN 47385
draperinc.com | 765.987.7999 | 800.238.7999
© 2022 All Rights Reserved
INSTRUCTIONS
PERSONNEL REQUIRED
1
2
TOOLS REQUIRED
TAPE MEASURE
PENCIL
LASER LEVEL
LEVEL
POWER DRILL
WIRE STRIPPERS
PLIERS
HARDWARE
(by others)
CRIMPING TOOL
HEX WRENCH
CAUTION
Read and understand
all warnings before
beginning installation.
..................................................8
Nocturne+ E, call your dealer or Draper, Inc.
|
FORM: NocturnePlus_E_220V_Inst22
Advertisement
Table of Contents

Related Manuals for Draper Nocturne + E 220V


Summary of Contents for Draper Nocturne + E 220V
-
Page 1: Table Of Contents
Section 5 - Replace Roller Assembly & Fascia ..........6 If you have any difficulties installing or servicing your Nocturne+ E, call your dealer or Draper, Inc. Draper, Inc. | 411 S. Pearl St. Spiceland, IN 47385 draperinc.com | 765.987.7999 | 800.238.7999 FORM: NocturnePlus_E_220V_Inst22... -
Page 2: Please Read - Important Safety Information
9. Do not wire motors in parallel without written permission from Draper, Inc. 2. Installation and calibration of the unit should only be performed by an 10. During testing or operation, carefully watch the surrounding area for any authorized, qualified, and experienced professional. -
Page 3: Section 2 - Mounting Case With Brackets
Nocturne+ E 220V page 3 of 12 Section 2 - Mounting Case with Brackets - Wall Installation Figure 2 Section 2.1 - Attaching Mounting Brackets 1. Attach mounting brackets to wall using #10 flat head screws installed flush with bracket. Be sure to use AT LEAST 2 of top mounting holes (Fig. -
Page 4: Section 4 - Installing Cable Guides
Nocturne+ E 220V page 4 of 12 Section 4 - Installing Cable Guides Install Mounting Bracket using appropriate fasteners. (Wall mount option shown.) Mark Place washer and nut on threads of Pull cable up, bolted end of cable through the to allow space for Mounting travel. - Page 5 Trim excess cable as end of cable, above the Cable approximately 1/ 8 " desired. (3mm) Mounting Hole on Endcap. above mark. Please Note: Draper recommends using two crimps per cable. PLEASE NOTE: Draper recommends ® 32-VC:VG Crimper, available from...
-
Page 6: Section 5 - Replace Roller Assembly & Fascia
Nocturne+ E 220V page 6 of 12 Section 5 - Replace Roller Assembly & Fascia Replace Operator End Replace Idler Mounting Gudgeon of Roller Assembly. on Idler End of Roller Assembly. Replace Quick Release Pin. Replace Fascia. Replace screws on bottom of Case. -
Page 7: Section 6 - Securing Guide Cable
Nocturne+ E 220V page 7 of 12 Section 6 - Securing Guide Cable While capturing Dowel of screen, pull cable through Mounting Bracket, until crimped barrels are resting on Cable Replace Washer and Nut on the bottom Mounting Hole on Endcap. bracket and tighten until desired tension (Deck mount option shown) is reached. -
Page 8: Section 7 - Electrical Connections
Please check with CAUTION: Draper prior to resetting screen limits. - Be sure all switches are in “off" position before adjusting limit switches. Please Note: If Screen is “Right Hand Motor" the WHITE/DOWN - Be prepared to shut off manually while testing. -
Page 9: Section 9 - Wiring Diagrams
220V orientation, turn power back off and switch the red and black wires from the motor to the switch. Do not wire motors in parallel without written permission from Draper. Please Note: Telis 1 Quick disconnect and RF Remote NEMA 3 prong plugs provided by others. -
Page 10: Section 10 - Dimensions: Components
Nocturne+ E 220V page 10 of 12 Section 10 - Dimensions: Components Side Cable Wall Mount Option Side Cable Ceiling Mount Option " (8mm) 3 " 3 " (92mm) (92mm) 3 " (92mm) 3 " SCREEN SCREEN (92mm) HEIGHT HEIGHT Deck Mounted Wall Mounted Cable Guide... - Page 11 Nocturne+ E 220V page 11 of 12 CASE STYLES Case Wall Mounting Bracket Mounting Bracket 3 " 3 " (92mm) (92mm) 4" (102mm) 1" (25mm) 3 " 1 " 3 " 3 " (92mm) (45mm) (92mm) (92mm) " (22mm) 1 " 1 "...
-
Page 12: Section 11 - Assembled Dimensions
Nocturne+ E 220V page 12 of 12 Section 11 - Assembled Dimensions Overall Case Length = Screen Width + 2 " (29mm) Screen Width 3 " (92mm) (13mm) from end of case to cable SCREEN Cable HEIGHT Guide Length (27mm) from end of case to screen HEM POCKET...
Need help?
Do you have a question about the Nocturne + E 220V and is the answer not in the manual?
Questions and answers