
Related Manuals for Morgana MB300 XL Pro


Summary of Contents for Morgana MB300 XL Pro
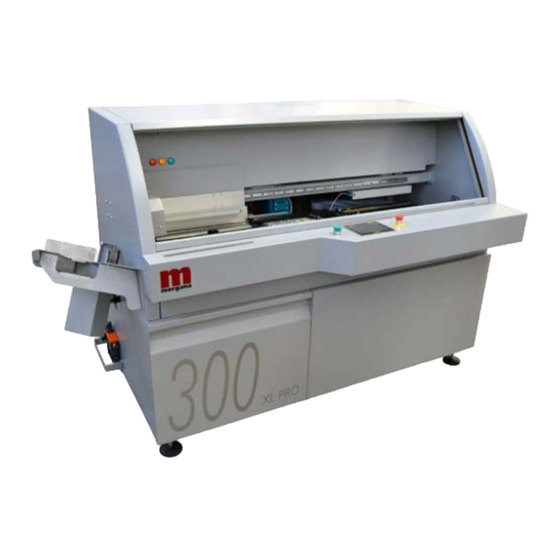
- Page 1 MB300 XL Pro OPERATOR MANUAL Translation of the original instructions rev.0.2 ID03570...
- Page 2 MB300 XL Pro REVISIONE DATA MOTIVO 23/03/2017 Prima edizione 20/04/2018 Aggiornamento foto Aggiornamento Dich. CE 15/02/2019 Integrazione Lista Fusibili Aggiornamento capitolo Spec. Elett. rev.0.2 ID03570...
-
Page 3: Table Of Contents
MB300 XL Pro CONTENTS 1. INTRODUCTION ..................5 DECLARATION OF CONFORMITY ............... 6 CAUTION LABELS ..................7 SAFE OPERATION ..................8 1.3.1 GENERAL ......................... 8 1.3.2 USER QUALIFICATION ..................8 1.3.3 MACHINE OPERATORS ..................8 1.3.4 GUIDELINES FOR SAFE OPERATION ..............9 1.3.5... - Page 4 MB300 XL Pro 6. INSTALLATION ..................41 PHYSICAL CHARACTERISTICS OF THE POSITIONING AREA ....41 FLOOR ......................41 LIGHTING ......................41 ENVIRONMENTAL CONDITIONS ..............41 POSITIONING AND WORKSPACES ............42 LAYOUT ......................43 POWER CONNECTION .................. 44 6.7.1 EARTH CONNECTION .................... 44 PNEUMATIC CONNECTION ................
-
Page 5: Introduction
MB300 XL Pro INTRODUCTION It is essential for operator safety and correct use of the machine reading this manual of use and maintenance. This manual describes how to use the machine, the configuration of the basic operations work. This manual was written so as to be easily understandable even to those users who have never used this type of machine. -
Page 6: Declaration Of Conformity
MB300 XL Pro 1.1 DECLARATION OF CONFORMITY DICHIARAZIONE DI CONFORMITÀ CE DIRETTIVA CE PER MACCHINE 2006/42/CE, E SEGUENTI DIRETTIVE EUROPEE (ALLEGATO IIA) CE CONFORMITY DECLARATION DIRECTIVE FOR MACHINES 2006/42/CE, AND FOLLOWING EUROPEAN DIRECTIVES (ANNEX IIA) COSTRUTTORE - MANUFACTURER: K.G.S.SRL •... -
Page 7: Caution Labels
MB300 XL Pro 1.2 CAUTION LABELS During the manual and applied to the machine uses the following symbols to alert of any danger to persons and / or property damage. In extreme cases of non-compliance can cause damage to persons or property. -
Page 8: Safe Operation
MB300 XL Pro 1.3 SAFE OPERATION 1.3.1 GENERAL The manufacturer guarantees that the contents of this manual are in accordance with the procedures required by the machine. The manufacturer shall not therefore be liable for any use of the machine in a manner inconsistent with the information contained in this manual. -
Page 9: Guidelines For Safe Operation
MB300 XL Pro 1.3.4 GUIDELINES FOR SAFE OPERATION The application of procedures other than those specifically described in this manual may cause operational errors. Carefully read the safety instructions in this manual. The manufacturer is relieved from any liability arising from an arbitrary and improper use of the machine, such as: ▪... -
Page 10: Personal Protective Equipment
MB300 XL Pro 1.3.5 PERSONAL PROTECTIVE EQUIPMENT Safety clothing is not supplied with the machine and must be procured by the user. In the various sections of the manual will be shown the symbols of personal protection equipment to be in the different operations to be carried out. -
Page 11: Residual Risks
MB300 XL Pro 1.4 RESIDUAL RISKS These are the risks that cannot be completely eliminated either by protective devices or the design of the machine. Glue Head. CAUTION! Hot surfaces! Risk of burns. Use protective gloves. Glue tank. CAUTION! Hot surfaces! Risk of burns. -
Page 12: Intended Use
MB300 XL Pro 1.5 INTENDED USE The machine is designed to bind books using the following materials: ▪ Signatures or single sheets of paper (printed or not) for the book block; ▪ Card as book cover. The machine must be used by one operator only to the extent and in the manner prescribed in this user manual. -
Page 13: Transport
MB300 XL Pro TRANSPORT CAUTION! For no reason the staff is authorized to pass under a suspended load during transport or in the vicinity of it. CAUTION! The transport phase will have to be carried out by trained competent and authorized personnel, equipped with the necessary personal safety protections. -
Page 14: Disposal
MB300 XL Pro DISPOSAL If you decide to stop using the machine, or some part of it, the disposal and decommissioning of the same must be carried out. The machine must be handed to designated wasted recycling centres and disposed of according to the country’s current regulations. -
Page 15: Storage
MB300 XL Pro STORAGE The information contained in this section shall be observed during periods of temporary storage of the machine that may occur, eg., In the following situations: ▪ Installation of the machine immediately after its delivery. ▪ Decommission of the machine. -
Page 16: General Description
MB300 XL Pro GENERAL DESCRIPTION 5.1 TECHNICAL SPECIFICATIONS Features of the machine: Hour cycles 300 cycles / mechanical Length of processed spine from 100 to 450 mm Height of processed book from 120 to 450 mm Cover size Max 1000x450/240x110 mm... -
Page 17: Electrical Specifications
MB300 XL Pro Cover Back hit cover adjustment Auto according to parameters inserted on Touch- Screen Cover position Manual Check presence of missing covers Dimensions weight Length 2200 mm Width 1200 mm Height 1400 mm Weight 525 Kg 5.2 ELECTRICAL SPECIFICATIONS Power Supply 220-230 V ±... -
Page 18: Pneumatic Specifications
MB300 XL Pro 5.3 PNEUMATIC SPECIFICATIONS Provided the devices and pneumatic circuits can work reliably, efficiently and safely, you need the compressed air used for pneumatic system supply to have the following quality requirements according to DIN ISO 8573-1: ▪ Air quality provided to the binder CLASS 3, ▪... -
Page 19: Name Of The Main Parts
MB300 XL Pro 5.4 NAME OF THE MAIN PARTS 5.4.1 VICE UNIT 1a. Mobile jaw; 1b. Press pressure regulator with gauge. Regulator 1b enables regulation of the side press force on the book. Pressure = 0 - 3 bar minimum pressure... -
Page 20: Milling Unit
MB300 XL Pro 5.4.2 MILLING UNIT 2a. Cutter mobile protection; 2b. Milling height regulator Enables regulation of milling millimetres. position 0 = notching only position 0.5 to 1 = ideal milling and notching position 2.3 = max. milling and notching 2c. -
Page 21: Press Unit
MB300 XL Pro 5.4.4 PRESS UNIT 4a. Cover presence sensor. 5.4.5 GLUE TANK AND CLEANER Cleaner tank; Cleaner tank opening handwheel; Tap ON OFF for glue tank air; Glue tank; Glue tank opening handwheel; Handle for opening. Identification label on glue unit. -
Page 22: Shavings Extractor Machine
MB300 XL Pro 5.4.6 SHAVINGS EXTRACTOR MACHINE The shavings extractor is contained in the body of the binder and is connected electrically to it. On delivery of the binder, the extractor machine is ready, therefore connected both electrically and mechanically (extractor tube), it switches on and off simultaneously with the cutter. -
Page 23: Accessories Supplied
MB300 XL Pro 5.4.8 ACCESSORIES SUPPLIED Blu-Cleaner pack; Collection tank (2x); Glue release tap handle; Extra-soft blade (double hole) for normal cleaning of the spine glue exit slot (2x); Soft blade (single hole) to clean the spine glue exit slot if there is difficult residue to remove (1x);... -
Page 24: Operator Panel
MB300 XL Pro 5.5 OPERATOR PANEL The operator panel contains the configuration of the machine parameters and allows editing and the choice of processing mode. 5.5.1 MAIN PAGE All the values written in blue can be changed, those in green are the actual positions of the axis 11. -
Page 25: Cart Parameters Page (2)
MB300 XL Pro 18. When the machine is in automatic pressure mode it displays on the left the measured pressure value and on the right allows you to apply a corrective value ± 1.5 bar; with the machine in manual mode it allows to set the desired value on the right and display the actual reading on the left. - Page 26 MB300 XL Pro 999999 1-30 Pressing the arrows, you can execute cart and vice movements 10 FREE With the BUTTON/ICON (yellow) , you preset the relevant axis. The green values indicate the actual axis value rev.0.2 ID03570...
-
Page 27: Glue Unit Page (3)
MB300 XL Pro 5.5.3 GLUE UNIT PAGE (3) Numbers 3b and 3d are the values attributable to temperature for the glue tank and the extruder. Numbers 3a and 3c are the current temperature values. Indicators 3g and 3h will be red if the temperature is outside the tolerance threshold, green if within the threshold. -
Page 28: Press Operation Page (4)
MB300 XL Pro 10 F Displays the current height of the coating head. The extruder preset can run even from this page by selecting the icon N.B. All movements can be performed only when the machine is at temperature. 5.5.4 PRESS OPERATION PAGE (4) It allows setting the distance between the spine of the book and the spine plate. - Page 29 MB300 XL Pro 4c. Button icons that move the rear guide placed on the press to contain the cover; 4d. Button icons to move the press height; 4e. Button icons that lift or lower the press, to use only when the spine of the plate is out.
-
Page 30: Advanced Set-Up Page (7)
MB300 XL Pro 5.5.5 ADVANCED SET-UP PAGE (7) 7a. Access to the advanced set-up page; 7b. Button icon for language selection; 7c. Button icons to change brightness, contrast of the display as well as regulate the date and time of the machine;... - Page 31 MB300 XL Pro 5.5.5.1 VICE ADVANCED SET-UP Vice with standard set-up; Vice with set-up for sewn books. This set-up facilitates insertion of the books inside the vice. 5.5.5.2 CUTTER ADVANCED SET-UP Activates chip extraction. Release the brake on the cutter motor.
- Page 32 MB300 XL Pro 5.5.5.3 COATING HEAD ADVANCED SET-UP Button icon to close the coating head; Button icon to open the coating head; Current value of head opening; Indicates the glue pressure when button F is pressed. The value in green is that of the pressure inside the pre-melter, in blue the value that the tank will reach keeping button F pressed.
- Page 33 MB300 XL Pro 5.5.5.4 PRESS ADVANCED SET-UP Selected, it disables press operation; Selected, it enables press operation; Value to move the cover on the press forward or back. Max Value ± 7mm; 5.5.5.5 THICKNESS DETECTION ADVANCED SET-UP Selected, it disables continuous measurement of the measurement table: measurement will only be carried out on command;...
- Page 34 MB300 XL Pro 5.5.5.6 SERVICE INFO PAGE The grey icons indicate the axis was not preset. If the icons are grey, reset to zero is requested. The icons that change from yellow to green indicate the axis has executed preset, but is not in the work position;...
-
Page 35: Alarms Page (8)
MB300 XL Pro 5.5.5.7 CREASING MACHINE PAGE Sets the height value for courtesy creasing of the cover; Apply a correction value to the rear hit; Apply a corrective value to the thickness of the book. 5.5.6 ALARMS PAGE (8) This page displays the active alarms on the machine. -
Page 36: Processing Recipes Page (10)
MB300 XL Pro 5.5.7 PROCESSING RECIPES PAGE (10) The machine allows you to save up to a maximum of 100 recipes. 10a. Button icon to pass ten previous recipes; 10b. Button icon to pass to a previous recipe; 10c. Button icon to select the processing recipe;... -
Page 37: Books Counter Page (12)
MB300 XL Pro 5.5.8 BOOKS COUNTER PAGE (12) 12a. Counter to display the pieces produced during the life cycle of the machine, not possible to reset it. 12b. Counter to display the pieces produced by the machine, it is possible to reset it by pressing the Reset key;... -
Page 38: Processing Type Page (14)
MB300 XL Pro 5.5.9 PROCESSING TYPE PAGE (14) 14a. Selects the button to produce the books with a cover; 14b. Button to produce book blocks to check glue coating. In this case, the press, the page inserter and the discharge are disabled. To remove the book from the vice, press the START button: 14c. -
Page 39: Safety Devices
MB300 XL Pro 5.6 SAFETY DEVICES CAUTION! It is forbidden to remove or make inefficient the guards planned to protect people, as well as tamper with and/or modify, even partially, the safety devices installed on the machine. In the event of alarm signals due to safety device intervention, the operator must request immediate intervention of the technicians qualified for maintenance. - Page 40 MB300 XL Pro CUTTER PROTECTIVE DISC The disc is composed of a mobile plate which, apart from those instances when the book block passes, covers the cutter in every working condition, also when the machine is off. A long stretching elastic cord constantly exerts a force on the disc that covers the cutter disc.
-
Page 41: Installation
MB300 XL Pro INSTALLATION CAUTION! The machine must be installed by K.G.S. technicians or by personnel authorized by K.G.S. 6.1 PHYSICAL CHARACTERISTICS OF THE POSITIONING AREA In the vicinity of the area where the machine is positioned, power sources of electric and pneumatic power must be prepared in accordance with the requirements in the marking label. -
Page 42: Positioning And Workspaces
MB300 XL Pro 6.5 POSITIONING AND WORKSPACES The binder must be positioned so as to have a free space around of at least 80 cm and the working area at least 150 cm. The room where the machine is installed must be properly ventilated and air exchange according to current legislation. -
Page 43: Layout
MB300 XL Pro 6.6 LAYOUT rev.0.2 ID03570... -
Page 44: Power Connection
MB300 XL Pro 6.7 POWER CONNECTION CAUTION! Cables should be placed in special ducts in order to avoid tripping and / or falling. Power cable The cable is 3 metres long with an industrial type, mono-phase plug, with the protective earth (PE). -
Page 45: Pneumatic Connection
MB300 XL Pro 6.8 PNEUMATIC CONNECTION Connect the air supply according to the following procedure: Connect the 10 mm hose outer diameter to the quick coupling of the binder. Pneumatically feed the machine by moving the cursor to the right. -
Page 46: Operation And Use
MB300 XL Pro OPERATION AND USE 7.1 PREPARATION OF THE MACHINE 7.1.1 GLUE TANK LOADING The glue tank must be filled in the case in which the amount of glue is less than the minimum level imprinted on the tank. - Page 47 MB300 XL Pro In order to load the glue carefully follow the sequence below: Turn on the machine by putting the switch to ON. Check if the indicated pressure in the inlet pressure gauge is correct. MIN 6 BAR Open the tap on premelter: The tap with the lever positioned vertically is open.
- Page 48 MB300 XL Pro Open the top sliding door (1) of the machine, provided with a handle. The machine goes into a state of emergency, and releases pressure to the glue reservoir, while the cleaner tank remains in pressure at 2 bar.
- Page 49 MB300 XL Pro Carefully read the safety data sheets of the glue used, and follow all the instructions of the manufacturer of the glue Take a pack of glue and check the integrity of the aluminium coloured container also make sure that it has not passed the expiry date written on the packaging.
- Page 50 MB300 XL Pro Replace the cover. Lift the knob, paying attention to the high temperature of the components. Turn the knob clockwise in order to vigorously seal the tank. Close the rear sliding door of the machine, provided with handle.
-
Page 51: Load The Cleaner
MB300 XL Pro 7.1.2 LOAD THE CLEANER CAUTION! Wear hand protection and protective goggles. CAUTION! Carefully read the safety data sheets of the cleaner used, and follow all the instructions of the manufacturer of the glue To carry out the loading of the cleaner carefully follow the sequence below: Turn on the machine by putting the switch to ON. - Page 52 MB300 XL Pro Open the access compartment cleaner tank provided with a handle Unscrew the cleaner tank knob. You will notice an air leak because the machine continues to provide air to fuel the tank. Fill the tank up to about 3/4 of its volume with the cleaner by using a small container.
-
Page 53: Measuring The Book
MB300 XL Pro 7.1.3 MEASURING THE BOOK The measuring of the book to be bound is necessary for an automatic set the opening of the vice and of the glue unit From the main page, start measuring by pressing the indicated button icon. -
Page 54: Start Processing
MB300 XL Pro 7.2 START PROCESSING 7.2.4 GLUE REACTIVATING PROCEDURE CAUTION! Wear face, hand, protection, mask suitable for using glue and protective goggles. 999999 The glue reactivating procedure must be carried out every time the machine is turned off by using the END JOB procedure. - Page 55 MB300 XL Pro Clean the extruder from the glue using the calibrated blade to clean the glue output nozzle. Facilitate the flow of material in the tank by using the green palette. Press the icon to release additional glue until the cleaner traces disappear.
- Page 56 MB300 XL Pro Replace the grains using the allen key supplied (pay attention to the temperature), press OK. Caution the grains must protrude max. 1 mm Press OK rev.0.2 ID03570...
-
Page 57: Launch
MB300 XL Pro 7.2.5 LAUNCH CAUTION! Wear hand protection and proper clothing. From the home page, type the parameters of the front and rear stop-glue in the field indicated by pressing on the value. Set the press time. Select the type of processing. - Page 58 MB300 XL Pro Position the cover over the press, resting it on the fixed reference on the left and on the adjustable one at the bottom of the press. Load the file in the vice as shown by the arrows in the picture.
-
Page 59: Machine Cleaning
MB300 XL Pro MACHINE CLEANING CAUTION! Wear face, hand, protection, mask suitable for using glue and protective goggles. CAUTION! If the machine is used for more than 120 minutes you need to carry out the “End of job cleaning” cycle. -
Page 60: End Of Work Cleaning
MB300 XL Pro 999999 8.1 END OF WORK CLEANING In order to turn off the machine at the end of the day you have to remove the glue from inside the extruder. To do this you must activate the automatic procedure... - Page 61 MB300 XL Pro Replace the grains using the allen key supplied (pay attention to the temperature), press OK. Caution the grains must protrude max. 1 mm Press OK Once you have finished the cleaning procedure, close the rear tap. The tap is closed when it is in a horizontal position.
-
Page 62: Cleaning Procedure For Spine Glue Extruder
MB300 XL Pro 8.2 CLEANING PROCEDURE FOR SPINE GLUE EXTRUDER From the main page, select the advanced Set-up page. Select the coating head advanced set-up page Press reset to open the head to the reset position. Insert the calibrated blade within the extrusion slit until the bottom is reached and move it along the slot to remove or unlock any possible occlusion. - Page 63 MB300 XL Pro Wipe the blade carefully. When the glue is completely crosslinked it will make the blade unusable. rev.0.2 ID03570...
-
Page 64: Side Glue Extruders Cleaning Procedure
MB300 XL Pro 8.3 SIDE GLUE EXTRUDERS CLEANING PROCEDURE Wipe the blade carefully. When the glue is completely crosslinked it will make the blade unusable. Press reset to open the head to the reset position. The glue spread on the side of the book is extruded through 3 small channels placed on the plates containing the book. - Page 65 MB300 XL Pro Pass the thread also in the main line in order to enter into the slit underneath. Careful when refitting the grains, they must not protrude otherwise a collision with the vice could be caused. They may protrude max. 1 mm.
-
Page 66: Details Cleaning
MB300 XL Pro 8.4 DETAILS CLEANING From the main page, select the advanced Set-up page. Select the coating head advanced set-up page. Press reset to open the head to the reset position. Use the blade to remove all visible traces of glue residues. - Page 67 MB300 XL Pro If necessary use liquid solvents for a more complete surface cleaning. While using liquid solvents, follow the safety specifications provided by the manufacturer of the solvent. Thoroughly clean all the tools used, otherwise they will become unusable thereafter.
-
Page 68: Glue System Drainage
MB300 XL Pro 8.5 GLUE SYSTEM DRAINAGE CAUTION! Wear face, hand, protection, mask suitable for using glue and protective goggles. CAUTION! This must be carried out by a qualified maintenance expert. The total emptying of the glue system must be run when you want to completely free up the machine from a certain type of glue. - Page 69 MB300 XL Pro Place an empty container under the glue discharge protection to collect the material that is coming out; Open the glue release tap placed under the glue release protection. Press and hold on the indicated icon until all the material flows from the tank.
- Page 70 MB300 XL Pro Open the glue emptying plate by loosening the two allen screws. Place one of the trays provided under the tap glue Using the handle supplied, open the tap and wait for the tank to empty. When finished, close the two glue release...
-
Page 71: Maintenanace
MB300 XL Pro MAINTENANACE CAUTION! Wear hand protection and protective goggles. CAUTION! These operations must be performed by a qualified maintenance technician. 9.1 PINS LUBRICATION Every 15 days the machine displays a screen when you try to run the glue load cycle or the cleaner load cycle. - Page 72 MB300 XL Pro Press on the indicated icon for moving the pins so as to distribute the oil. Press OK when finished. Fit the guard and tighten the knob that locks it. N.B. In order to prolong the life of the valves it is possible to lubricate them at the end of each day.
-
Page 73: Deep Cleaning Of Glue Unit Clamp
MB300 XL Pro 9.2 DEEP CLEANING OF GLUE UNIT CLAMP The cleaning of the glue unit clamp is necessary in case of heavy soiling. Cleaning should be performed with the machine at working temperature. Press the emergency button. Remove the two screws indicated by the arrow with an allen key. - Page 74 MB300 XL Pro Lubricate the entire clamp with high temperature grease and in particular the slide pins of the brass runner. Reposition the runner to the clamp. Mount the clean clamp by inserting the left side in the runner and lowering it until it makes contact.
-
Page 75: Coating Head Deep Cleaning
MB300 XL Pro 9.3 COATING HEAD DEEP CLEANING The coating head cleaning is necessary in case of heavy soiling. Cleaning should be performed with the machine at operating temperature after having carried out the final cleaning work. Press the emergency button. - Page 76 MB300 XL Pro Using a Torx T9 key unscrew and remove the five screws holding the top strip Remove the top strip Press the button until the traces of glue disappear, make use of the calibrated blade in this operation.
- Page 77 MB300 XL Pro Replace the top strip and hold it pushed on the vertical surface on the left secure it with 5 Torx T9 screws. Mount the clean clamp by inserting the left side in the runner and lowering it until it makes contact.
-
Page 78: Lista Fusibili
MB300 XL Pro 9.4 LISTA FUSIBILI The table lists the fuses and the reference number inside the wiring diagram. Position Tag Model Value Type Q.ty Item FU01.00 Bussmann 20 A 10x38 KTK (Fast) C40660040 FU01.02 Bussmann 10 A 10x38 FNQ (Time delay) C40660120 FU02.01... -
Page 79: Problems - Solutions
MB300 XL Pro 10. PROBLEMS - SOLUTIONS Description N° Alarms Check that the EMERGENCY stop button has not been Machine in Emergency pressed and press the START button. The press has not reached the position in the given time. Check the movement. Reset the alarm if it does... - Page 80 MB300 XL Pro When the machine is switched off the head is cleaned using the automatic cycle of the cleaner. Use the load Machine with Cleaner cycle to load the glue. The cart does not work with this alarm. The head valves do not work correctly. Call the technical Carry out PINS maintenance !!! support service.
- Page 81 MB300 XL Pro SHAVINGS EXTRACTOR - VACUUMS LITTLE: ▪ Make sure that the shavings extractor bin is empty. ▪ Check that the inspection Plexiglas, located on the cutter is free. ▪ Make sure the vacuum hose is not full of shavings.
- Page 82 MB300 XL Pro rev.0.2 ID03570...
- Page 83 MB300 XL Pro rev.0.2 ID03570...
Need help?
Do you have a question about the MB300 XL Pro and is the answer not in the manual?
Questions and answers