
Related Manuals for Morgana DocuFold Pro


Summary of Contents for Morgana DocuFold Pro
- Page 1 90-134 Issue 3 FEBRUARY 2013 DocuFold Pro (CB/UL) OPERATORS MANUAL Automatic Paper Folding Machine Morgana Systems Limited United Kingdom www.morgana.co.uk Telephone: ( 01908 ) 608888 Facsimile: ( 01908 ) 692399...
-
Page 2: Table Of Contents
INDEX INTRODUCTION & SPECIFICATION PAGE SAFETY Do’s & Don'ts THE DocuFold Pro Labelled Photograph OPERATING THE DocuFold Pro Adjusting the Paper Gate Setting the Suction Slot Setting the Vacuum Bleed Setting the Adjustable Side Lay Setting the Back Stop Setting the Air Distribution Knob... - Page 3 DocuFold Pro INDEX FOLDING TIPS AND TROUBLESHOOTING Sheets Difficult To Feed Double Sheet Feeding Fold Is Not Square Or Consistent Paper Will Not Stack Consistently Paper Will Not Deflect When Using One Fold Or Perforating Total Batch Counter Not Working ‘Overlap Error Keeps Appearing...
-
Page 4: Introduction & Specification
The Morgana DocuFold Pro can be used by non-skilled personnel by following this easy to use operator's guide. There are very few operator adjustments required and in conjunction with our new 'Smart screen' you will get started very quickly, but we do recommend that you take a little time to read this manual, to ensure that you fully understand the machine. -
Page 5: Safety Do's & Don'ts
DocuFold Pro Safety Do’s & Don’ts Safety Do’s & Don’ts REGLES DE SECURITE : « A FAIRE » ET « A NE PAS FAIRE » Do - read this operator manual fully before operating the machine. Lire ce mode d'emploi avant d'utiliser la machine. - Page 6 Warning Labels Do - be aware of any finger traps and rotating parts when operating the machine. Attention au risque de se coincer les doigts, et aux pièces en mouvement lors du fonctionnement de la machine. Do - read this operator manual fully before operating the machine. Lire ce mode d’emploi avant d’utiliser la machine.
-
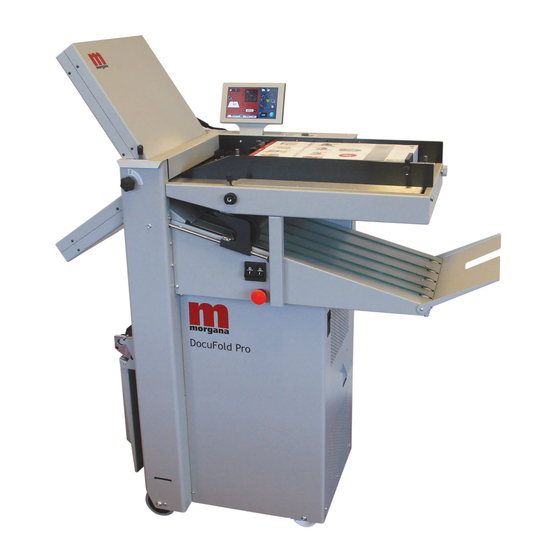
Page 7: Labelled Photograph
DocuFold Pro Docufold Pro AUTOMATIC PAPER FOLDING MACHINE Key to drawing below A Moving side lay knob H System switch R Roller Tilt lever B Paper gate knob Front pins S Emergency stop switch C Suction slot knob K Upper fold plate... -
Page 8: Operating The Docufold Pro
Operating the DocuFold Pro ADJUSTING THE PAPER GATE Adjust the height of the paper gate using knob (B) (clockwise to lower, anti-clockwise to raise) so that the clearance above the vacuum roller is two thicknesses of the paper to be folded. Do not make this adjustment, when the face of the paper gate is above a hole in the vacuum roller, if it is, rotate the vacuum roller by hand to bring the metal between holes below the paper gate. -
Page 9: Setting The Vacuum Bleed
DocuFold Pro Operating the DocuFold Pro SETTING THE VACUUM BLEED (L). Situated on the front of the feed table, the Vacuum Bleed Knob is used to allow more control of the suction on the vacuum drum. When light weight paper of 90gsm and lower is being fed through the machine turn the knob clockwise to reduce the possibility of marking, or damage to the leading edge of the paper. -
Page 10: Fold Plates
Operating the DocuFold Pro FOLD PLATES ALWAYS UNPLUG POWER CONNECTIONS BEFORE REMOVING FOLD PLATES. Fitting Fit the fold plates into their respective positions (long fold plate upper and short plate lower), by locating the front pins (J) into the long slots and carefully sliding forwards (without twisting) until the rear pins can be located into the short slots. -
Page 11: Roller Tilt
DocuFold Pro Operating the DocuFold Pro Roller Tilt Lever (R) should always be set in the ‘0’ (square) position. To adjust folding out of square you can move the roller assembly in the + or - direction by releasing knobs (Y) and moving lever (R) - always re-tighten Knobs (Y) -
Page 12: Delivery Roller
Operating the DocuFold Pro Delivery Roller The delivery roller will adjust automatically according to the paper length and the fold type selected. Manual or fine adjustment for the position of the delivery roller can be made as shown on Page 19. -
Page 13: Touchscreen Operation
Select the green tick icon only if you have been trained to operate this machine. If you have not been trained to operate this machine and you select the green tick icon, Morgana Systems Ltd accept no responsibility for personal injury, damage to the machine or damage to materials being processed by the machine. -
Page 14: Paper Settings Page
Operating the DocuFold Pro Setting Pages. Paper settings Page Vacuum suck – There Fold Selection – For quick setting of crease positions on standard size sheets. are three selections available – 1 short Highlighted fold is type currently selected, other folds may be selected. -
Page 15: Batch Size Selection
DocuFold Pro DocuFold Pro Operating the DocuFold Pro Batch size Selection. Pre-set Batch sizes for quick insertion. Speed Selection Feed Speed selection slider - 20 positions to choose from. Note: Motor speed will not change until you select run. FOLDER... -
Page 16: Fold Settings Pages (Pre-Defined Fold Types)
Operating the DocuFold Pro Fold Settings Pages. To get to the Fold setting page click the lower tab Pre- defined Standard Folds. If you have selected a pre-defined standard Fold Type from the paper settings page the recommended fold positions will be shown in parenthesis and can be micro adjusted as required. -
Page 17: Setting Fold Positions Manually (Set By Position)
DocuFold Pro Operating the DocuFold Pro Setting Fold Positions Manually (Set By Position). If you have selected the Ruler Icon from the paper settings page the fold positions can be set manually. EXAMPLE 1. (Set Fold 1 to 210.0, Set Fold 2 to 90.0) Paper Length = 297.0mm... - Page 18 Operating the DocuFold Pro EXAMPLE 2. (Set Fold 1 to 90.0, Set Fold 2 to 210.0) Paper Length = 297.0mm Feed Direction Leading Edge Fold 1 Fold 2 SETTINGS Fold 1 = 90.0mm All dimensions are from the leading edge of the paper...
-
Page 19: Delivery Settings Pages
DocuFold Pro Operating the DocuFold Pro Delivery Settings Pages. To get to the Delivery setting page click the lower tab Roller position may be Micro adjusted by clicking Here. Roller adjustment calculator Page 19... -
Page 20: Status Screen
Operating the DocuFold Pro Status Screen. Paper length - input from the Fold Positions & Trim paper setting screen. settings Currently selected Vacuum Suck setting - for slow pulse choose selection 2 - for stream feed choose Currently selected fold type... -
Page 21: Run Job
DocuFold Pro Operating the DocuFold Pro Run Job. Click to run machine. System Switch Not On, warning. Click to confirm System switch is on. Switch Compressor switch on & then click run button again. Or click the icon to run three test sheets. - Page 22 Operating the DocuFold Pro The machine running screen will appear. Run count Batch Count Sheet Count Click to stop machine. Batch Count NOTES:- 1. The folds can be micro adjusted from the run screen, if necessary, while the job is still running.
-
Page 23: Store Pages
DocuFold Pro Operating the DocuFold Pro Store Pages. To get to the Store setting page click the lower tab from the status area. New Jobs. Having set up your job you can give the job a name and save it to a store. You can also retrieve previously saved jobs, modify them or delete jobs you no longer require. - Page 24 Operating the DocuFold Pro Save confirmation screen. To confirm saving of job click here. Search for current jobs to load or modify. You can search for jobs by clicking the search icon , this will bring up the search keyboard for text input.
- Page 25 DocuFold Pro Operating the DocuFold Pro Loading job confirmation screen. To cancel loading of Job press here To confirm loading of Job press here Loaded job may be modified and then re-saved as the same job name. Overwrite job confirmation screen.
-
Page 26: Tools Menu
Operating the DocuFold Pro Tools Menu. To get to the Tools page click the lower tab Touch Screen Calibration Change Machine measurement Clicking this icon will settings, Imperial / Metric See Page 27 show Machine program revision & Touch Screen Touch screen software software revision. -
Page 27: Touch Screen Calibration
DocuFold Pro Operating the DocuFold Pro Touch Screen Calibration. Switch the mains power on and wait for the main screen to appear before commencing to check the horizontal and vertical position of the display. The position of the display within the surround is achieved by operating the button... -
Page 28: Plug In Perforator
Press the start button, the built in deflector on the fold plate will close automatically to the deflect position. Note: - the Docufold Pro will automatically recognise that the lower plate is in the upper plate position and that the plug-in perforator unit is in the lower plate position. - Page 29 DocuFold Pro Operating the DocuFold Pro FOLDER Page 29...
- Page 30 Operating the DocuFold Pro SCALE PERFORATING BLADE PERFORATOR STRIPPER UPPER TYRE AND HUB ASSEMBLIES FRAME PAD UPPER PERF SHAFT ANVIL LOWER PERF SHAFT LOWER HUBS (SOLID) EDGE OF SHEET DRIVE HUB RECOMMENDED PERFORATOR SET - UP SCALE UPPER PERF SHAFT...
-
Page 31: Setting Perforators
DocuFold Pro Operating the DocuFold Pro SETTING PERFORATORS Upper and lower hubs can be positioned on the shaft by unscrewing the 2mm-grub screw. Slide the hub with the blade attached along, the shaft into position to correspond to the work using the scale as a guide. For example, to perforate 20mm from the edge of an A4 sheet, you would set the blade at 190mm (210 minus 20). -
Page 32: Folding Card
With the roller assembly removed, the safety circuit prevents the machine from running. Replace the roller unit in the reverse sequence. Clean the rollers with a stiff brush between the grooves using QD wash supplied by Morgana. Page 32 PAPER... -
Page 33: Roller Adjustment
Operating the DocuFold Pro ROLLER ADJUSTMENT The unique fold roller design of your Morgana Docufold Pro will fold most paper stocks without the need for adjustment. If you have a requirement to fold very delicate or thicker stock or re- feeding to produce a cross-fold the fold roller gap can be easily adjusted as follows: - 1. -
Page 34: Sensor Cleaning
SENSOR CLEANING The sensors to detect and count the sheets are located on the ends of the ball holder just next to the fold roller unit. If the counter is failing the sensor can be accessed for cleaning by removing the roller assembly as described on page 32. Clean by using a soft brush or damp cloth. -
Page 35: Folding Tips And Troubleshooting
DocuFold Pro FOLDING TIPS AND TROUBLE SHOOTING: SHEETS DIFFICULT TO FEED Check that you have not got too many sheets in the feeder. Heavy-coated stock will not feed as high a pile as for example 80-gsm copier paper. Make sure the moving side lay is not pushed in too tightly against the paper. Similarly, if the moving side lay is set too far away from the paper stack, this will allow the air to escape instead of blowing through the paper. -
Page 36: Paper Will Not Stack Consistently
Check that you have no foreign bodies or torn paper stuck inside the fold plates or machine. MACHINE WILL NOT RESET Your Docufold Pro is a mini computer; you must have a clean consistent power supply. Switch off at power switch (S), wait 20 seconds and re-power. -
Page 37: No Power To Machine
The main switch will cut out if you have a paper jam or overlap is indicated. FOLD ROLLER REPLACEMENT: Your Morgana Docufold Pro has been designed to make fold roller replacement an easy and low cost operation. Your local sales agent will be able to supply you with a complete replacement roller assembly which allows you to change the roller assembly yourself as described in the roller assembly removal section of this manual. -
Page 38: Error Screens
Error Screens Sheet did not arrive. If the machine stops and error message 01 is displayed on the touch screen, this indicates that the paper did not arrive at the end of the suck process; so the machine timed out. Press the green tick button and then press the start button. Overlap If the machine stops and error message 13 is displayed on the touch screen, this indicates that the ‘Lead Edge Sensor’... - Page 39 DocuFold Pro Error Screens (continued) Lower fold plate set out of range. If the touchscreen shows the error screen shown below, this indicates that the fold that has been set for the lower fold plate is out of range. Incorrect fold plate fitted for perforating or scoring (without folding) .
- Page 40 Error Screens (continued) Perforating / Scoring unit not fitted . If the touchscreen shows the error screen shown below, this indicates that the machine has been set for perforating or scoring (with or without folding) and the perforating / scoring unit has not been fitted. System switch not on .
-
Page 41: Dispatch Kit
DISPATCH KIT 9-95-13 (USA) ITEM PART NUMBER DESCRIPTION 90 - 134 DOCUFOLD PRO OPERATORS MANUAL ROLLER CLEANING KIT 90 - 018 650 -040 POWER CORD - C19 - 3Pin - UK 650 -041 POWER CORD - C19 - 3Pin - USA... -
Page 42: Accessories And Options
ACCESSORIES & OPTIONS ITEM PART NUMBER DESCRIPTION 6-99-06 SCORING SET - TYPE B 6-99-09 SCORING SET - TYPE D 1-99-10 PERFORATING SET - 20T SLITTING 1-99-11 PERFORATING SET - 20T SLITTING - HEAVY DUTY 1-99-12 PERFORATING SET - 28T SLITTING 1-99-41 PERFORATING SET - 56T SLITTING 1-99-13... -
Page 43: Recommended Spares
DESCRIPTION 75 - 06 - 02 TOUCH SCREEN ASSY - 7" (NEW CONTROLLER) 75 - 500 - 08 MINI ITX MOTHERBOARD - DOCUFOLD PRO 76 - 272 PSU ASSEMBLY - ATX12V - 300W 90 - 06 - 02 CONTROL PCB ASSY + CHIP-DOCUFOLD PRO-UL... - Page 44 RECOMMENDED SPARES PART NUMBER DESCRIPTION 609 - 014 'O' RING ‘O' RING 609 - 023 PLUNGER & SPRING ASSY 613 - 137 613 - 255 SOLENOID COIL 613 - 365 EMERGENCY STOP SWITCH 652 - 011 SWITCH - LOW CURRENT COIL - BLACK ROCKER 655 - 015 POWER SUPPLY UNIT - SWITCHED MODE - 24V 655 - 016...
-
Page 45: Fuse Positions & Ratings
DocuFold Pro FUSE POSITIONS & RATINGS (POSITION ET CLASSIFICATION DES FUSIBLES) TRANSFORMER ASSY. MAINS IN T500mAH 250V (681-020) T15AH 250V (652-047) PSUs (24V & 48V) (FUSIBLE PSUs (24 V & 48 V) T4.0AH 250V (681-015) DC MOTOR BOARD F3.15AH 250V (613-023) -
Page 46: Product Recycling And Disposal
PRODUCT RECYCLING & DISPOSAL European Union Disposal Information for Commercial Users Application of this symbol on your equipment is confirmation that you must dispose of this equipment in compliance with agreed national Procedures. In accordance with European legislation end of life electrical and electronic equipment subject to disposal must be managed within agreed procedures. - Page 47 DocuFold Pro REVISION HISTORY Rev. Mod No. Mod Description Date Mod By ECO2811 23/01/13 BAL Page 45 Changes:- T15A Fuse was F15A. Page 47...
Need help?
Do you have a question about the DocuFold Pro and is the answer not in the manual?
Questions and answers