Table of Contents
Advertisement
Advertisement
Table of Contents

Related Manuals for Thermo Scientific Odalog G20


Summary of Contents for Thermo Scientific Odalog G20
- Page 1 Odalog G20 and G20 RTX User Manual XXXXXX • Revision A • November 2021...
- Page 2 This document is confidential and is the property of Thermo Fisher Scientific. It may not be copied or reproduced in any way without the express written consent of Thermo Fisher Scientific. Thermo Fisher reserves the right to make changes to the product and this document without notice. ©...
-
Page 3: Table Of Contents
Safety Precautions ............2 FCC ................. 2 EMC................. 2 Odalog G20 Gas Logger .......... 2 Alert Signals ............. 2 Odalog G20 RTX Gas Logger-Alert Signals ....4 Unpacking ..............6 Packing List ............. 6 Introduction ..............7 Odalog G20 Gas Logger .......... 7 Odalog G20 RTX Gas Logger........ - Page 4 Chart Screen............35 Connect to FTP server .......... 37 Online Parameters..........39 File Preferences ............ 39 Firmware Updater ..........40 Change Admin Password........40 Recommended Deployment ........41 Signal Strength............41 Maintenance ..............42 Filter Replacement for G20 and G20 RTX....42 Sensor Calibration............
-
Page 5: Models
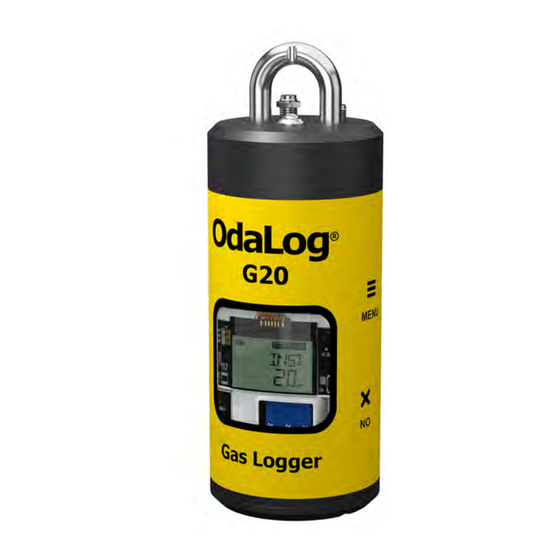
Models Table 1 shows the units covered in this User manual.The Gas Loggers are portable gas monitoring devices capable of logging poisonous gases in the most harsh environments. Table 1. Applicable Models Model Range Part Number Resolution Communications 0-200 ppm Odalog-G20-H2S-200 0.1 ppm Modbus and Bluetooth... -
Page 6: Safety Precautions
Safety Precautions Odalog G20 Gas Logger This device complies with Part 15 of the FCC Rules and with As the user of the product, it is your responsibility to Innovation, Science and Economic Development Canada’s understand the proper function and operational licence-exempt RSS(s). - Page 7 The enclosure shall only be disassembled in the non-hazardous area. The following parameters shall be taken into account during interconnection in a system: Odalog G20 Entity Parameters at Connector Uo 3.9 V Io 275 mA Lo 55.77 µH Co 22 µF Ui 3.7 V...
-
Page 8: Odalog G20 Rtx Gas Logger-Alert Signals
Odalog G20 RTX Gas Logger-Alert Signals The apparatus is suitable for ambient This instrument transmits radio frequencies temperature range of -20°C to +50°C. (2 g/3 g/wifi*), ensure all safety precautions are observed (depending on model). A separation distance of at least 20 cm must be maintained between the modem transmitter’s antenna and... - Page 9 The enclosure shall only be disassembled in the non-hazardous area. The following parameters shall be taken into account during interconnection in a system: Odalog G20 RTX Entity Parameters at Connector CN6: Uo 3.9 V Io 275 mA Lo 55.77 µH Co 22 µF...
-
Page 10: Unpacking
Unpacking At delivery, examine the exterior for physical damage while the carrier’s representative is present. If exterior damage is present, carefully unpack and inspect the unit and all accessories for damage. If there is no exterior damage, unpack and inspect the equipment within five days of delivery. -
Page 11: Introduction
Odalog G20 is low power logger which is coupled with a long- impressive repertoire. With low power consumption coupled life lithium cell power-source and battery life is exceeded 12 with a long-life Lithium D-cell power-source, battery life will months in most cases. -
Page 12: General Specifications
Storage of the Odalog instrument, with sensors fitted, should be limited to the temperature range of 0°C (32°F) to 25°C (75°F), and between 20% to 80% RH. Table 2. General Product Specifications Specification Odalog G20 Odalog G20 RTX Operating temperature -20°C (-4°F) to 50°C (122°F) Instrument Relative 5-95% RH... - Page 13 Table 4. Battery Specifications Model Battery Type Size Quantity Model G20 RTX Lithium LSH20 Lithium LS33600 Note: Only the battery types in Table 4 can be used. Table 5. Technical Specifications-Digital Sensor Measurement Value Operating Principle Electrochemical Target Gas Accuracy ±5% of measuring value T50* Response Time <15 seconds...
-
Page 14: Operation
Operation Odalog G20 screens usually alphabetic characters, some numerical values displayed on some screens. 3. Battery Level Indicator – Displays the battery levels, 4 This section describes a brief operating procedure for the Stage Depletion. Odalog instrument G20, covering the basics of all major functionality. - Page 15 Main Menu Start / Stop Log Move • INST START LOGGING HOLD HOLD STATUS START INST HOLD STATUS magnet 0.0ppm • 0.0ppm • HOLD • HOLD HOLD UART NULL Move • LOGGING LOGGING LOGGING LOGGING STOP HOLD magnet STATUS • HOLD •...
- Page 16 Odalog L2: This screen displays the variant • MODBUS: This screen displays the status of the (G20 or G20 RTX) of Odalog G20 series. communication. It is 0 when the instrument is not connected to the software and 1 when the instrument is SWVER: his screen displays the Firmware version •...
- Page 17 ‘Y’ between computers, peripherals and other computers. In DONE Odalog G20, it transfers data between the instrument and the Odastat NX software. The device is the transmission line and the software is the receiving line. Hold the Magnet next to the Menu and remove the magnet when the “USB”...
- Page 18 NULL On / Off Prog START HOLD HOLD STATUS UART HOLD Move the NULLIN HOLD magnet NULL Prog Swipe Y DONE Prog Figure 12. NULL Screen 8.8:8.8 Ensuring the Odalog is in Clean Air, hold the magnet next to the Menu until display progresses to “NULL” and then release button.
-
Page 19: Odalog G20 Rtx Screens
Odalog G20 RTX screens • INST: This screen displays the instantaneous gas reading in ppm (parts per million) units. If the Transmit mode is ON, this screen indicates whether the data is logging or This section describes a brief operating procedure for the not. - Page 20 Start / Stop Log Transmit On / Off LOGGING LOGGING TRNSMT TRNSMT HOLD HOLD STATUS INST TRNSMT HOLD HOLD STATUS LASt 0.0ppm Move magnet HOLD LOGGING Move INST MODEM HOLD LOGGING START INST magnet 0.0ppm In It 0.0ppm LOGGING LOGGING LOGGING TRNSMT STOP...
- Page 21 DUECAL: This screen displays No of days for sensor • Instrument data. recalibration. • Odalog G20: This screen displays the variant (G20 or • MODBUS: This screen displays the status of the G20 RTX) of Odalog G20 series. communication. It is 0 when the instrument is not SWVER: This screen displays the Firmware version •...
- Page 22 (interfacing) magnet between computers, peripherals and other computers. In near ‘Y’ Odalog G20 RTX , it transfers data between the instrument and the Odastat NX software. The device is the transmission DONE line and the software is the receiving line.
- Page 23 Null Span TRNSMT START TRNSMT START HOLD HOLD HOLD HOLD STATUS STATUS HOLD HOLD HOLD HOLD HOLD HOLD UART NULL UART NULL Move the HOLD magnet Move the NULLIN SPANIN magnet Swipe Y DONE SPAN Swipe Y Prog Prog Figure 21. NULL Screen Ensuring the Odalog is in Clean Air, Hold the Magnet next to DONE the Menu until display progresses to “NULL”...
-
Page 24: Modem And Sms
Modem and SMS The Modem used in instrument has added support for FTPS server Explicit Mode on Port 21. Table 6. Modem Specifications Explicit Connection on Port 21 Should support TLS 1.2 AES 265SHA A Test SMS will be sent when the unit initializes. The SMS is sent during the initialization stage instead of sending an SMS every 5 minutes during an installation. -
Page 25: Pc Software-Odastat Nx
PC Software-Odastat NX Home Screen The main functions of Odastat NX software are easily accessible on the Start screen. See Figure 23 for reference. Figure 23. Odastat NX User Interface OdaLog Portable Gas Loggers PC Software-Odastat NX |... -
Page 26: Select Connection Screen
Select Connection Screen • “Select Connection” tab is present at the top right of the display screen. The user can choose an option from the drop down and Click on “Connect” to connect to the device. User can configure the device and download the data using an USB or Bluetooth. -
Page 27: Bluetooth Communication Screen
• Display shows “Successfully Connected”. Click OK. This will take you to the Login Screen. Figure 26. USB Configuration-Successful Login Bluetooth Communication screen Select the “Bluetooth Communication” screen from the “Select Connection” tab at the top right end of the screen. Click “Connect”... - Page 28 Figure 28. Communication-Device Paired Bluetooth User get a “Successfully Connected and Paired” message as shown in Figure 29 after the device is successfully connected. Figure 29. Communication-Successfully Connection Bluetooth Once connected, Login and using the UI user can configure the unit and download the data. 24 | PC Software-Odastat NX OdaLog Portable Gas Loggers...
- Page 29 Figure 30. Communication-Login Screen Bluetooth After Login, user can set the date and time from the “Set Date and Time”. Figure 31. Communication-Date and Time Screen Bluetooth OdaLog Portable Gas Loggers PC Software-Odastat NX |...
-
Page 30: Login Screen
Login Screen Enter your Username and Password to Login into your Odalog account. Figure 32. Odalog Login Screen If the Username and password are correct, then a “Successfully logged in” message appears on the screen. Figure 33. Odalog Successful Login Screen 26 | PC Software-Odastat NX OdaLog Portable Gas Loggers... -
Page 31: Set Date And Time Screen
Set Date and Time Screen • Ensure that the Odalog unit is connected to the PC. • Select the date from “Set Date and Time” screen from the Odalog main menu. • Select the time from “Set Date and Time” screen from the Odalog main menu. •... -
Page 32: Instrument Parameters
Instrument Parameters Figure 35. Instrument Parameters-Main Tab From the Odalog main menu click the “Instrument Parameters” tab to set the below parameters. Site ID - This User ID is to identify the instrument and where Temperature Setup - Select the temperature to be logged in its deployed. - Page 33 The parameters are available only as shown in Figure 36 when the User selects the Modbus option. Enabling the checkbox in the RTX Communication Setting displays the options. Odalog G20 supports Modbus RTU functionality. User can send data and device status via Modbus to a central system. Figure 36. Instrument Parameters-Modbus Before the user requests the instrument to send data via Table 8.
- Page 34 The highlighted parameters are only visible when the User enables the 4G Modem checkbox in the RTX Communication Setting as seen in Figure 37. Figure 37. Instrument Parameters-4G Modem - This is the strength of signal Modem Signal Strength transmitted by the cable modem. Enter the relevant value. - This is time interval for data Modem Wakeup Interval Transmission.
- Page 35 Manufacturing Tab Click the “Manufacturing” tab from the “Instruments Parameters” menu to find Device Details. The screen displays “Model, Firmware version, Sensor Selection and the Serial Number” of Odalog. Figure 38. Instrument Parameters-Manufacturing Modify User Details Click the “Modify User Details” tab from the “Instruments Parameters” menu to change the “User Name” and “Password”. Figure 39.
-
Page 36: Download Log Screen
Open Parameter File From the Instrument Parameters main tab, the Odalog parameters for ModBus and 4G Modem are saved as configuration files. These can be opened as shown in Figure 40. Figure 40. Open Parameter File Download Log Screen After successfully connection, select “Download Log” from the Odalog main menu.The program will immediately start to download the currently connected Odalog's logged data. - Page 37 When the instrument has finished downloading, user will receive the message that the data is saved. Figure 42. After Downloading data Clear Log This sends a signal to the Odalog instrument to clear the entire log. Operation is only allowed when an Odalog unit is connected.
- Page 38 Open Log File Opening a previously saved Log File can be performed by clicking on the “Open Log File” button as shown in Figure 44. After clicking the button the Open File Selector will be displayed. This open dialog is unique to Odastat NX and allows the user to see information about the logged files without opening them.
-
Page 39: Chart Screen
Select by clicking in the corresponding check boxes to view the sessions.Then click the “View Log File” button. Odastat NX will then open this file as a Graph. Figure 46. Session File Selection Chart Screen When a previously stored log file is opened, it can be displayed in a Graph Format. Selected sessions of data collected from different devices or time periods can be joined together and displayed on a single graph by clicking on the “Join Sessions”... - Page 40 Figure 47 and Figure 48 show sessions of data collected from different time periods. Figure 48. Sensor Data Chart-September The parameters in the graph can also be displayed in a Seperate Mode as shown in Figure 49. Figure 49. Chart Screen-Seperate Mode 36 | PC Software-Odastat NX OdaLog Portable Gas Loggers...
-
Page 41: Connect To Ftp Server
Connect to FTP server In order to set “Instrument Parameters” or “Download Log” data, communications link between the PC software and the Odalog instrument is to be established. Odalog G20 RTX communicates with the software through internet using File Transfer Protocol. - Page 42 After entering the username and password, another dialog box will appear to allow the customer to select a folder containing data transmitted by each Odalog G20 RTX. Select the respective Odalog folder.See Figure 52. Figure 52. Odalog Folder Selection •...
-
Page 43: Online Parameters
Online Parameters The Parameters of the Odalog software can be changed from “Online Parameters” screen as shown in Figure 54. Figure 54. Online Parameters File Preferences The “File Preferences” are used to change default settings of the file save destination directories that OdaStat will use to save files as shown in Figure 55. -
Page 44: Firmware Updater
Firmware Updater The admin or the user can update the firmware in the “Firmware Updater” screen. Figure 56. Firmware Updater Change Admin Password Figure 57. Production Tool Screen-Change Admin Password 40 | PC Software-Odastat NX OdaLog Portable Gas Loggers... -
Page 45: Recommended Deployment
• The Odalog G20 RTX uses wireless transmission to connect to the internet server, communication can sometimes be disrupted by other similar devices and electrical interferences by nearby equipment. -
Page 46: Maintenance
Maintenance Routine maintenance of the Odalog instrument is an extremely important factor affecting the reliability of the instrument. Optimum instrument performance and reliable operation will only be achieved if a dedicated maintenance program is followed. To ensure reliable measurements, the Odalog should be checked at regular intervals with test gas as described in the Calibration Section of the user manual. -
Page 47: Sensor Calibration
Sensor Calibration Null Mode TRANSMIT MODE should be TURNED OFF prior to calibration, as the wireless transmissions can interfere with the sensor readings. If transmit mode is turned ON during calibration – any transmissions to the server will cause any NULL or SPAN screens to be cancelled. -
Page 48: Calibrating The Odalog
Calibrating the Odalog Digital Sensor Error Log The Odalog-G20 series use an pre calibrated digital sensor to detect levels of a specific gas in ppm (parts per million). Table 9. Error Log- Digital Sensor Table 10. Error Code SENSOR bAd1 Error code 103=Electrolyte dry-out SENSOR bAd2 Error code 113=Waterlogged... -
Page 49: Contact Information
Contact Information In Australia: For customer service, call 1300-735-292 To fax an order, use 1800-067-639 To email an order, ordersau@thermofisher.com In New Zealand: For customer service, call 0800-933-966 To fax an order, use 0800-329-246 To email an order, ordersnz@thermofisher.com Find out more at www.thermofisher.com ©...
Need help?
Do you have a question about the Odalog G20 and is the answer not in the manual?
Questions and answers