
Subscribe to Our Youtube Channel
Related Manuals for Grundfos RADIOMODULE 2G4


Summary of Contents for Grundfos RADIOMODULE 2G4
- Page 1 GRUNDFOS INSTRUCTIONS Grundfos solar surface pump Installation and operating instructions...
-
Page 3: Pump End
Grundfos solar surface pump Pump end ................. 4 Motor . -
Page 4: Table Of Contents
Products manufactured by GRUNDFOS PUMPS CORPORATION CONTENTS (Grundfos) are warranted to the original user only to be free of defects in material and workmanship for a period of 24 months from date of installation, but not more than 30 months from date 1. -
Page 5: Introduction
The CR range is based on the inline multistage centrifugal pump Pump without motor (CR, CRI, CRN 1s, 1, 3, 5, 10, 15, and 20 first pioneered by Grundfos. CR is available in four basic only): materials and over one million configurations. CR is suitable for... -
Page 6: Identification
6. Identification 6.2 Type keys 6.1 Nameplate data Type key CR, CRI, CRN 1s, 1, 3, 5, 10, 15, and 20 Example Type range: CR 3 -10 A FGJ A E HQQE CR, CRI, CRN Rated flow rate in [m /h] (x 5 gpm) Number of impellers Code for pump version... - Page 7 6.2.1 Codes Example Pump version Basic version Oversize motor Certificate/approval CR pump for high temperatures (air-cooled top assembly) Horizontal version High-pressure pump with high speed MLE motor Different pressure rating Pump with different max speed Pump with low NPSH Magnetic drive Fitted with sensor Undersize motor Horizontal version with bearing bracket...
- Page 8 Example Shaft seal O-ring seal with fixed driver Rubber bellows seal Cartridge seal with O-ring Balanced cartridge seal with O-ring Metal bellows cartridge seal Double seal, back-to-back Double seal, tandem Special version Carbon, synthetic resin-impregnated Cemented tungsten carbide, embedded (hybrid) Silicon carbide Cemented tungsten carbide Other ceramics...
-
Page 9: Application
145 (10) 1 to 12 1 to 17 362 (25) CR, CRI, CRN 1 217 (15) Consult Grundfos in case of other operating conditions. 2 to 15 2 to 29 145 (10) CR, CRI, CRN 3 17 to 25 31 to 36... -
Page 10: Installation
9. Installation Warning Do not turn on the power supply until the pump is properly installed. 9.1 Pump location Locate the pump in a dry, well-ventilated, frost-free area which is not subject to extreme variation in temperature. Make sure the pump is mounted at least 6" (150 mm) clear of any obstruction or hot surfaces. -
Page 11: Pump Mounting
If there is excessive sediment or suspended particles, we recommend that a strainer or filter is used. Butterfly Grundfos recommends that pressure gauges are installed on Check valve Eccentric... -
Page 12: Flange Forces And Torques
6, one of these values may exceed the normal to prevent the pump’s inlet pressure from being exceeded. limit. Contact Grundfos for further information. When a pump with no check valve is stopped because there is no demand on the system (all valves are closed), the high system pressure on the discharge side of the pump will "find"... -
Page 13: Position Of Terminal Box
Gradually open the isolating valve in the suction line until a 9.11 Position of terminal box steady stream of airless water runs out of the priming hole. The motor terminal box can be turned to any of four positions in Close the plug and tighten securely. -
Page 14: Maintaining The Pump
11. Maintaining the pump 13. Replacing the motor Depending on the conditions and operating time, make the Motors used on CR pumps are specifically following checks at regular intervals: selected to our rigid specifications. • Check that the pump meets the required performance and is Replacement motors must be of the same frame operating smoothly and quietly. -
Page 15: Parts List
6. Remove plastic shaft seal spacer and hang it on inside of coupling guard. Fig. 11 Prepacked flange kits 14.1 Spare parts Grundfos offers an extensive list of spare parts. For a current list of these parts, see Grundfos All Product Spare Parts/Service Kits Price List, part number L-SK-SL-002. -
Page 16: Diagnosing Specific Problems
15. Diagnosing specific problems Warning Before removing the terminal box cover and before removing/dismantling the pump, make sure that the power supply has been switched off and that it cannot be accidentally switched on. Problem Possible cause Remedy 1. The pump does not run. a) No power at motor. - Page 17 Problem Possible cause Remedy 3. Pump cycles too much a) Pressure switch is not properly adjusted or is Check pressure setting on switch and operation. defective. Check voltage across closed contacts. Readjust switch or replace if defective. b) Level control is not properly adjusted or is Check setting and operation.
- Page 18 Earth leakage circuit breaker. 26.2 Changing the position of the control panel Functional module. 26.3 R100 remote control 26.4 Grundfos GO Remote Grundfos Digital Sensor. Factory-fitted sensor in some Grundfos pumps. Bus signal GENIbus Proprietary Grundfos fieldbus standard. Priority of settings GFCI Ground fault circuit interrupter.
- Page 19 The motors incorporate a functional module. See section 22.5 Functional modules for further information. As an accessory option, the motors can be fitted with a Grundfos CIM module. A CIM module is an add-on communication interface module. The CIM module enables data transmission between the motor and an external system, for example a BMS or SCADA system.
- Page 20 Maximum ambient temperature [°C] / [F] Part number of nameplate Power factor* Grundfos logo Weight [kg] Grundfos company address Non-drive-end bearing * Power factor The power factor is defined as the ratio between active power and apparent power. This ratio is normally called cos φ, but cos φ is only defined for sinusoidal voltages and currents.
- Page 21 20.2 Type key Code Example 14 56C -H Motor Grundfos Electronic control Frame size according to IEC (center line height of motor shaft in mm, foot-mounted motor) Length of stator core Rated motor power P2 [HP] 1.18" (30 mm) 1.00 2.36"...
- Page 22 The cover must be sufficiently large to ensure that the motor is Do not make any connections in the terminal box not exposed to direct sunlight, rain or snow. Grundfos does not unless the power supply has been switched off supply covers.
- Page 23 22.3 Power supply 22.4 Additional protection 22.3.1 Single-phase supply voltage 22.4.1 Single-phase motors MLE Flex motors operate on the voltages below: If the motor is connected to an electric installation where an earth leakage circuit breaker (ELCB) or ground fault circuit interrupter •...
- Page 24 23. Basic CRFlex control connections Sens Sens Black White Dry Run Green Sensor Orange Fig. 11 Dry run sensor Jumper Wire Fig. 8 Sens Sens Black White Dry Run Sensor Green Orange Tank filling level/pressure switch Level/Pressure switch Fig. 12 Dry run sensor with level/pressure switch Fig.
- Page 25 • one analog output • two dedicated digital inputs • two configurable digital inputs or open-collector outputs • Grundfos Digital Sensor input and output • two Pt100/1000 inputs • two signal relay outputs • GENIbus connection. See fig. 13.
- Page 26 +24 V Supply +24 V Supply Supply to potentiometer +5 V and sensor Ground Grundfos Digital Sensor GDS TX output Grundfos Digital Sensor GDS RX input Analog input: 0-20 mA / 4-20 mA 0.5 - 3.5 V / 0-5 V / 0-10 V...
- Page 27 If the motor is to operate at ambient temperatures between +122 °F (50 °C) and 140 °F 23.2 Bus connection cable (60 °C), an oversized motor must be selected. Contact Grundfos for further information. 23.2.1 New installations For the bus connection, use a screened 3-core cable with a 24.3 Installation altitude...
- Page 28 (50 °C). Figure 18 illustrates the min. and max. curves. • Keep cooling fins and fan blades clean. 25. Operating and control modes Grundfos E-pumps are set and controlled according to operating and control modes. Max. 25.1 Overview Operating modes Min.
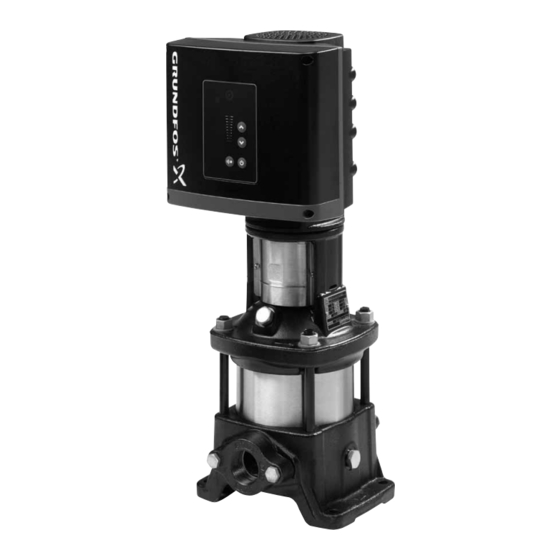
- Page 29 Fig. 19 Standard control panel Pos. Symbol Description Grundfos Eye Shows the operating status of the motor. See section 30. Grundfos Eye for further information. Light fields for indication of setpoint. Changes the setpoint. Enables radio communication with the Grundfos GO Remote and with other MLE motors of the same type.
- Page 30 If the motor has been stopped by pressing , it can only be restarted by pressing The motor can also be stopped with the R100, Grundfos GO Remote or via a digital input set to "External stop". See section 28. Priority of settings.
- Page 31 (pos. C). Make sure that the locking tabs (pos. A) are placed panel. When the R100 communicates with the motor, the correctly. indicator light in the middle of the Grundfos Eye will flash green. See page 47. The R100 offers additional possibilities of setting and status displays for the motor.
- Page 32 26.3.1 R100 menu structure 0. GENERAL 1. OPERATION 2. STATUS 3. INSTALLATION Actual setpoint and Switch off R100 Setpoint Control mode external setpoint Return to start Operating mode Operating mode Controller Delete all changes Manual speed Actual controlled value Signal relay 1 and 2 Store settings Alarm Analog input 1, 2 and 3...
- Page 33 26.3.2 OPERATION menu Manual speed When communication between the R100 and the motor has been established, the first display in this menu will appear. Setpoint In this display, the motor speed can be set in %. When the operating mode has been set to "Manual", the motor will run at the set speed.
- Page 34 Warning Warning log 1 to 5 In case of a warning, the cause will appear in this display together In case of "warning" faults, the last five warning indications will with a fault code. appear in the warning log. "Warning log 1" shows the latest fault, "Warning log 2"...
- Page 35 Actual controlled value Pt100/1000 input 1 and 2 The actual controlled value will appear in this display if a sensor has been connected and the function of the analog input has been set to "Feedback sensor". See section Analog input 1, 2 and 3, Function, page 39. Analog input 1, 2 and 3 These displays show the measured parameter and the corresponding value.
- Page 36 Operating hours 26.3.4 INSTALLATION menu Control mode Tolerance: ± 2 % The value of operating hours is an accumulated value and cannot Select one of the following control modes: be reset. • Closed loop Replace motor bearings • Open loop. If the motor is connected to a bus (see section Note Note...
- Page 37 Signal relay 1 and 2 Radio communication In this display, wireless radio communication can be enabled or disabled. The wireless, infrared communication will not be affected by the settings made in this display. Possible settings: • Active • Not active. Digital input 1 and 2, Function The signal relays can be configured to be activated by one of the following incidents:...
- Page 38 The number of available displays depends on the functional The digital input/output 3 and 4 can be set to these functions: module fitted in the motor. See below. Possible functions, digital input/output 3 Function (terminal) FM 300 Set to digital input Set to digital output Digital input 1, Function (2 and 6) ●...
- Page 39 Analog input 1, 2 and 3, Function Analog input 1, 2 and 3, Measured parameter The analog inputs can be set to these functions: The analog inputs can be set to these measured parameters: • Not active • Inlet pressure •...
- Page 40 Analog input 1, 2 and 3 Pt100/1000 input 1 and 2, Function The Pt100/1000 inputs can be set to these functions: • Not active • Feedback sensor • Ext. setpoint infl. For further description, see section 27. Bus signal. • Other function.
- Page 41 Select the desired direction of rotation of the motor when seen Operating range from the drive end: • Clockwise • Anti-clockwise. The displayed direction of rotation will apply when the digital input for reversing is not active. See section Digital input 1 and 2, Function, page 37.
- Page 42 (Bluetooth communication is required). 26.4.1 Communication When the Grundfos GO Remote communicates with the motor, the indicator light in the middle of the Grundfos Eye will flash green. See section 30. Grundfos Eye. Communication must be established using one of these communication types: •...
- Page 43 Fig. 33 Example of dashboard Pos. Description Action This text appears when the Grundfos GO Remote app has connected to an MI 201, MI 202 or MI 301. Connection indicator If the hardware is not connected, it will not be possible to communicate with a Grundfos product.
- Page 44 Start Start * "Stop" and "Max. speed" settings made with the R100, Grundfos GO Remote or on the motor control panel can be overruled by another operating-mode command sent from bus, for example "Start". If the bus communication is interrupted, the motor will resume its previous operating mode, for example "Stop", selected with the R100, Grundfos GO Remote...
- Page 45 ) x % sensor external setpoint + Analog input as follows: (Grundfos GO) setpoint = (50 - 0) x 80 % + 0 = 40 psi (Analog input 2) Terminals 7 and 23 External setpoint function as follows: (Grundfos GO)
- Page 46 Example: At a set setpoint of 65 % of n and an external setpoint max. of 70 %, the actual setpoint is 0.70 x (65 - 12) + 12 = 49 %. (Analog input 2) Terminals 7 and 23 External setpoint function as follows: (Grundfos GO)
- Page 47 30. Grundfos Eye The operating condition of the motor is indicated by the Grundfos Eye on the motor control panel. See fig. 36, pos. A. Fig. 36 Grundfos Eye Grundfos Eye Indication Description Power off. No lights on. Motor not running.
- Page 48 The signal outputs can be set to "Operation", "Running", "Ready", "Alarm" and "Warning". The functions of the two signal relays appear from the table below: Contact position for signal relays when activated Operating Description Grundfos Eye mode Operation Running Ready Alarm Warning Power off.
- Page 49 32. Megging Open-collector digital outputs (OC) Current sinking capability: 75 mADC, no current sourcing. Megging of an installation incorporating MLE Load types: Resistive or/and inductive. Caution motors is not allowed, as the built-in electronics Low-state output voltage at 75 mADC: Max. 1.2 VDC. may be damaged.
- Page 50 CISPR 11, class A, group 1. 1. Use the public or private waste collection service. Contact Grundfos for further information. 2. If this is not possible, contact the nearest Grundfos company or service workshop. Enclosure class The waste battery should be disposed of through the national Standard: NEMA 3 TEFC.
- Page 51 102 %. For USA Grundfos Holding A/S Contains FCC ID: OG3-RADIOM01-2G4. For Canada Grundfos Holding A/S Model: RADIOMODULE 2G4 Contains IC: 10447A-RA2G4M01. Pour le Canada Numéros d'identification Grundfos Holding A/S Modèle: RADIOMODULE 2G4 Contient IC: 10447A-RA2G4M01.
- Page 55 GRUNDFOS Canada GRUNDFOS México GRUNDFOS Kansas City 2941 Brighton Road Boulevard TLC No. 15 17100 West 118th Terrace Oakville, Ontario L6H 6C9 Canada Parque Industrial Stiva Aeropuerto Olathe, Kansas 66061 Phone: +1-905 829 9533 C.P. 66600 Apodaca, N.L. México Phone: (913) 227-3400...
- Page 56 98620964 0514 ECM: 1128447 www.grundfos.com www.grundfos.us...
Need help?
Do you have a question about the RADIOMODULE 2G4 and is the answer not in the manual?
Questions and answers