Advertisement
Quick Links
Advertisement

Related Manuals for Artec Sensor Melody


Summary of Contents for Artec Sensor Melody
- Page 1 Sensor Melody Light Robot Assembly Instructions Assembly Instructions...
- Page 2 Sensor Melody Light Robot Components Studuino Unit Studuino Unit Battery Box Battery Box USB Cable USB Cable Sound Sensor Sound Sensor Sound Sensor Sound Sensor Sound Sensor Sensor Connecting Cable Sensor Connecting Cable Sound Sensor (three-wire 15 cm) (three-wire 15 cm) LED (red) LED (red) LED (red) LED (red) LED (red) LED (green) LED (green) LED (green) LED (green) LED (green) Light Sensor Light Sensor Buzzer Buzzer Light Buzzer Green Sensor LED (blue)
-
Page 3: Preparing For Assembly
Sensor Melody Light Robot Preparing for Assembly Preparing for Assembly Connect the sensor Sensor Connecting Cable connecting cable to each sensor. Sensor side Circuit board side Make sure the cable is inserted correctly! Reverse Side of LED/Light Sensor/Buzzer Reverse Side of Sound Sensor Gray cable Gray cable Gray cable Gray cable Black cable Black cable Black cable Black cable... - Page 4 Sensor Melody Light Robot Assembling the Torso Assembling the Torso ① White Buzzer...
- Page 5 Sensor Melody Light Robot ② Completed Torso...
- Page 6 Sensor Melody Light Robot Assembling the Head Assembling the Head ① ②...
- Page 7 Sensor Melody Light Robot ③ ④ Green Blue...
- Page 8 Sensor Melody Light Robot ⑤ Completed Head...
-
Page 9: Putting The Parts Together
Sensor Melody Light Robot Putting the Parts Together ① Make sure the Studuino unit is inserted correctly! LED cables should run over the Studuino unit. ②... - Page 10 Sensor Melody Light Robot ③ Buzzer cables should run around the Studuino unit. ④ Connect the white LED, red LED, and buzzer to A2, A3, and A5. Make sure the cables are inserted correctly! White White Buzzer Buzzer...
- Page 11 Sensor Melody Light Robot ⑤ Light Sensor Connect the light sensor to A4. Make sure the cables are inserted correctly!
- Page 12 Sensor Melody Light Robot ⑥ Sound Sensor Connect the sound sensor to A7. Make sure the cables are inserted correctly!
- Page 13 Sensor Melody Light Robot ⑦ Make sure not to pinch any cables between blocks. ⑧ Connect the blue and green LEDs to A0 and A1. Make sure the cables are inserted correctly! Blue Blue Green Green...
- Page 14 Sensor Melody Light Robot ⑨ Connect the cables from the battery box to the POWER section. Make sure the cables are inserted correctly! − + POWER POWER ⑩ ⑪...
- Page 15 Sensor Melody Light Robot Replacing the Batteries ① ② ③ ④ ⑤ Use a screwdriver (Phillips #1) to open. Insert batteries in the correct polarity. Put the lid of the battery box back in place.
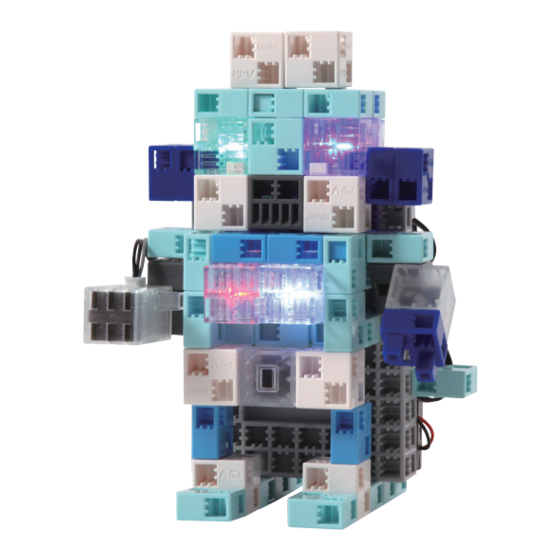
- Page 16 Sensor Melody Light Robot Completed Sensor Melody Light Robot ● Before operating your robot, check the Assembly Instructions again to confirm your robot has been assembled correctly. Front Left Back Right...
- Page 17 Sensor Melody Light Robot Making Your Sensor Melody Light Robot Run Install the software from the URL below to setup the Studuino Programming Environment. ★ Proceed to Step 1 when software installation is complete. http://www.artec-kk.co.jp/studuino/ ① Connect the USB cable to the PC and the Studuino unit. Refer to 1.3 Studuino in Studuino Programming Environment Manual for more details. ② Download the program file SensorMelodyLightRobot̲1.ipd from the URL below in the Robotist section. http://www.artec-kk.co.jp/robotist/ ③ Open the downloaded file. ④ Transfer the program to the Studuino unit by clicking the Transfer button . ⑤ Remove the USB cable from the Studuino unit. ...
- Page 18 Sensor Melody Light Robot Making Your Sensor Melody Light Robot Run ① The LEDs on your robot flash in response to sound. ② The light sensor in your robot will make the LEDs flash when it gets dark, and the buzzer will play music if the sound sensor hears a sound.
- Page 19 Sensor Melody Light Robot Sensor Calibration Some sensors may not function properly after you run the program for the first time. If the sensors are malfunctioning, calibrate the sensor settings. Click the sensor icon in the box and you can adjust the range settings in the condition box below. Drag the mouse left or right to adjust the range settings. Refer to the Condition Icon sections in 4.4. The Attribute Field of the Studuino Programming Environment Manual for more details.
- Page 20 Sensor Melody Light Robot Working with Arduino IDE You can use Arduino IDE to perform more complex tasks, such as making melodies play and lights flash at the same time or playing even longer songs. Under Use Arduino IDE, install the software for Windows or Macintosh from the URL below. ★ Proceed to Step 1 when software installation is complete. http://www.artec-kk.co.jp/studuino/ ① Connect the USB cable to the PC and the Studuino unit. Refer to 1.3 Studuino in Studuino Programming Environment Manual for more details. ② Download the program file SensorMelodyLightRobot̲2.ino from the URL below in the Robotist section. http://www.artec-kk.co.jp/robotist/ ③ Open the downloaded file. ④ Transfer the program to the Studuino unit by clicking the Transfer button . ⑤ Remove the USB cable from the Studuino unit. ⑥ How strongly the lights flash depends on the strength of the sound. ⑦ The light sensor in your robot will make the LEDs flash when it gets dark, and the buzzer will play music.
- Page 21 Sensor Melody Light Robot Adjusting Values in Arduino IDE You can change how strongly the sensors respond in a program by adjusting their value. ● Light Sensor Changing the value of "if (analogRead(LIGHT̲SENSOR̲PIN) < 400" in "loop()" will change the amount of light it will take for your robot to play a song. Changing the less than sign to a greater than sign will make your robot play songs when it's light rather than dark. This value can be from 0-1023.
Need help?
Do you have a question about the Sensor Melody and is the answer not in the manual?
Questions and answers