Advertisement
Quick Links
TAG2
WARNING
Whiteboard (1)
Upper WhiteBoard
Support (1)
End Frame (2)
Bookledge (1)
Channel (10)
Small Tub (2)
Lower "U" Spacer (2)
Please Recycle
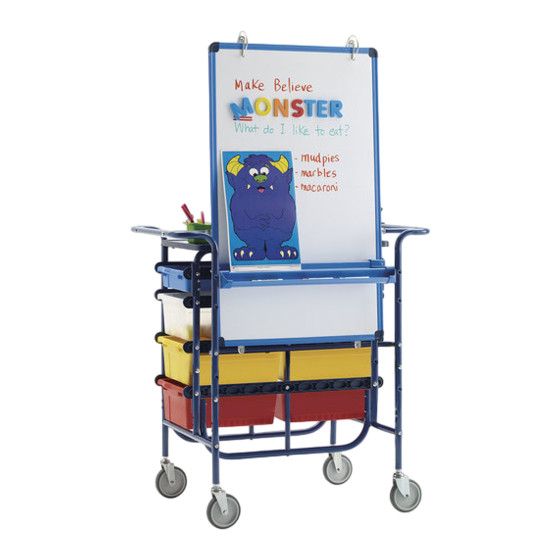
Premium Teach N' Go Cart
Assembly Guide
TAG2_2014_A
Check out our other products online at
www.copernicused.com
This product is meant to be assembled by an adult.
In its unassembled state, small parts present a hazard.
To be used under direct supervision of an adult.
Don't forget to check out our tips for your whiteboard at:
www.copernicused.com
Upright Stretcher B
Shorter (1)
For assistance, please contact us:
1-800-267-8494
Email info@copernicused.com
Have your packing slip ready for reference
Chart Loop Hook (2)
Shelf (1)
Lower Whiteboard Supports (2)
Short Stretcher (2)
Casters (4)
T op shelf Rack (2)
Stubby Tubby (2)
XL Poster Folder (4)
XL Poster Rack (1)
Middle Frame (1)
with Lock Bars
Lock Bar with holders (2)
Protective Brackets (2)
Open Tub (6)
Tub
Advertisement

Related Manuals for Copernicus Premium Teach N' Go


Summary of Contents for Copernicus Premium Teach N' Go
- Page 1 TAG2 Premium Teach N’ Go Cart For assistance, please contact us: Assembly Guide TAG2_2014_A 1-800-267-8494 Check out our other products online at Email info@copernicused.com www.copernicused.com Have your packing slip ready for reference This product is meant to be assembled by an adult. WARNING In its unassembled state, small parts present a hazard.
- Page 2 TAG2 Premium Teach N’ Go Cart - P arts Before beginning, you should have: Hardware Contents - Box 1 Actual Size Whiteboard Middle Frame Short Stretcher M6 x 35mm In Box 1 with Lock Bars 2 Thru Holes M6 x 55mm Channel M6 x 15mm Upper Whiteboard...
- Page 3 Tips for Assembly - Using this Manual Watch for These Helpful Symbols This symbol denotes a 2 Person Task. For safety, please ensure that there are two people working on steps displaying this symbol 2 Person Watch for this symbol throughout the Assembly Instructions. Wherever you see it, pay close attention.
- Page 4 Actual Size: You will need: (Not to Scale) Upper Whiteboard Support Short Stretcher x 2 End Frame x 2 2 Thru Holes Attach Stretchers to End Frames Connect End Frames together Note orientation: Handles bend outwards Note: Assemble the short stretcher with the indentations to the floor.
- Page 5 Actual Size: B x 6 You will need: (Not to Scale) Upright Stretcher B Short x1 Lower U Spacer x1 Middle Frame with Lock Bar x1 5 Thru holes Assemble Middle Frame Note The indents must face the FRONT of unit, away from Locking Bar Note Locking Bars must face the BACK of unit...
- Page 6 Actual Size: B x 2 D x 2 You will need: (Not to Scale) Lower U Spacer x1 Middle Frame with Lock Bar x1 End Frame Assembly x1 Assemble Middle Frame Front Note Locking Bars face BACK of unit Back Front Back...
- Page 7 Actual Size: A x 2 B x 6 You will need: (Not to Scale) Protective Brackets x 2 Long Stretcher x1 Upright Stretcher A Long x1 Lower “U” Spacers x 1 1 left, 1 right 3 Thru Holes 4 Thru holes Assemble Outside Frame and Attach to Cart Back Note...
- Page 8 Actual Size: You will need: (Not to Scale) Caster x 4 Install Casters Tighten all Fasteners Use adjustable wrench to tighten casters Note It is recommended that the Front casters with brakes be installed at the back to prevent children from playing with them...
-
Page 9: You Will Need
Actual Size: You will need: (Not to Scale) Channels Assemble Tub Channels Repeat at other end with mirror image T op Bottom Attach Channels at Centre hole Back Front... - Page 10 Actual Size: You will need: (Not to Scale) XL Poster Rack Channels Attach Poster File Holder and Channels Install center bolts first T op T op Bottom Make sure to use Lock Nuts here, not regular nuts...
- Page 11 Actual Size: You will need: (Not to Scale) Channels Attach Tub Channels at center holes first T op Bottom Hardware Item F goes on the outside Back Front...
- Page 12 Actual Size: You will need: (Not to Scale) Shelf Attach Shelf Back...
- Page 13 Actual Size: You will need: (Not to Scale) Channels Attach Tub Channels Hardware Item F goes on the outside Front...
- Page 14 Actual Size: A x 2 D x 2 You will need: (Not to Scale) Lock Bar for Small Tubs Attach Small Tub Lock Bar...
- Page 15 Actual Size: You will need: (Not to Scale) Lower WhiteBoard Support Attach Lower Whiteboard Support Use middle holes...
- Page 16 Tighten all Fasteners Actual Size: You will need: (Not to Scale) Whiteboard Attach Whiteboard...
- Page 17 Actual Size: You will need: (Not to Scale) Bookledge Chart Loop Hook T op shelf Rack Attach Bookledge and Chart hooks and Shelf Rack...
- Page 18 Actual Size: Actual Size: You will need: You will need: (Not to Scale) (Not to Scale) 10 lbs Weight Limit 5 lbs Weight Limit 5 lbs Weight Limit Open Tub Stubby Tubby Small Tub Insert Tubs...
- Page 19 Actual Size: Actual Size: You will need: You will need: (Not to Scale) (Not to Scale) 5 lbs Weight Limit XL Poster File...
Need help?
Do you have a question about the Premium Teach N' Go and is the answer not in the manual?
Questions and answers