Table of Contents
Advertisement
Quick Links
Please read all instructions before installing
PIR Dual Relay Universal Application
Wall Switch Vacancy Sensor
SPECIFICATIONS
Voltage ............................................................... 120VAC, 60Hz
Load rating for each relay
Incandescent or fl uorescent ............................ 0-600 Watts
Fan motor .................................................................. 1/6 hp
Time Delay Adjustment ....................15 seconds to 30 minutes
Light Level Adjustment ....................................... 10 fc to 150 fc
Environment ..................................Residential Indoor use only
Operating Temperature ............... 32° to 131°F (0° to 55°C)
Humidity ...................................... 95% RH, non-condensing
Tools Needed
Insulated Screwdriver
Wire Strippers
DESCRIPTION AND OPERATION
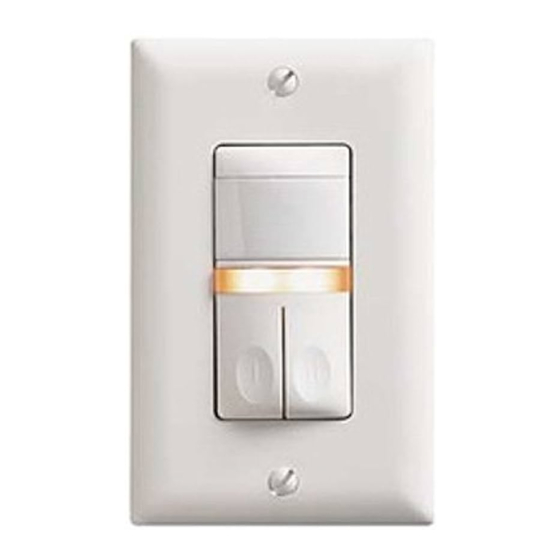
The RS-350-N PIR Dual Relay Universal Application Wall Switch Vacancy Sensor
is designed to replace two single pole standard residential switches or one
combination switch ("double switch"). It is ideal for living and dining rooms, family
rooms, bedrooms, bathrooms and any other indoor area in a residential space
where occupancy sensor-based manual ON/OFF control of two different loads
(i.e., a lamp and a fan) from a single location is desirable.
Like a standard combination switch, you press either or both of the two ON/OFF
buttons to turn lights and/or fans (controlled loads) ON and OFF. Unlike a
standard combination switch, the RS-350-N automatically turns OFF the
controlled loads after the coverage area has been vacant for a period of time
(Time Delay). If motion is detected within 30 seconds after they automatically turn
OFF, the RS-350-N automatically turns the loads back ON.
While the sensor is factory preset as a Vacancy Sensor with manual-ON
operation, it can be adjusted to work as an Occupancy Sensor that turns the
controlled loads ON automatically upon detection of occupancy in the area.
Lighted Switch
To help you locate the RS-350-N in a dark room, an amber LED illuminates
each of the ON/OFF buttons while the controlled loads are OFF. When one of the
controlled loads is ON, the corresponding LED is OFF.
Nightlight
While the controlled load connected to relay #1 is OFF, the nightlight built into the
RS-350-N is ON. When this load is ON, the nightlight is OFF.
Operating Modes
There are two operating modes that can be selected independently for each relay
during set up:
MODE 1 Vacancy sensor (Manual-ON/OFF, Auto-OFF): The user must press the
ON/OFF button to turn the load ON. The RS-350-N keeps the load ON until no
motion is detected for the selected time delay period (adjustable from 15 seconds
to 30 minutes). There is a 30 second reset delay. If motion is detected during this
time, the sensor turns the load back on automatically. After the reset delay time
has elapsed, the ON/OFF button must be pressed to turn ON the load.
MODE 2 Occupancy sensor (Auto-ON/OFF with manual control and reset to auto
after 5 minutes of vacancy): The load turns ON and OFF automatically based on
occupancy detection. The RS-350-N keeps the load ON until no motion is detected
for the selected time delay period. If the load is turned OFF manually, automatic-
ON is re-enabled when no motion is detected for 5 minutes. This prevents the
load from being turned ON after it was deliberately turned OFF.
Call 888.817.0571 for Technical Support
RS-350-N
with Manual ON/OFF
Lens
Nightlight
ON/OFF button for Relay 1
ON/OFF button for Relay 2
Santa Clara, CA 95050
Advertisement
Table of Contents

Summary of Contents for LEGRAND WattStopper RS-350-N
- Page 1 Please read all instructions before installing RS-350-N PIR Dual Relay Universal Application Wall Switch Vacancy Sensor with Manual ON/OFF Lens Nightlight ON/OFF button for Relay 1 ON/OFF button for Relay 2 SPECIFICATIONS Voltage ............... 120VAC, 60Hz Load rating for each relay Incandescent or fl...
- Page 2 Time Delay The time delay can be selected by the user during set up. It can be adjusted from 15 seconds up to 30 minutes and it applies to both relays (hence to both controlled loads) simultaneously. For additional information on how to adjust the time delay, please read the SENSOR ADJUSTMENT &...
- Page 3 B. Separate-circuit wiring (see WIRES Fig. 3): Four black wires are attached to the combination LOADS NEUTRAL WIRES switch. HOT feed wires from the power source are attached to the side of switch that has a connecting tab, and the GROUND connecting tab is removed.
- Page 4 • Connect the green or non-isolated (copper) GROUND wire from the circuit to the RS-350-N green terminal. • Connect the NEUTRAL wire from the circuit and from the loads to the white wire on the RS-350-N. • Connect the power wire from circuit #1 (HOT#1) to the black wire on the RS-350-N.
- Page 5 Below are the possible mode logic combinations that can be selected by pressing the Mode button: Logic LED #1 blinks Relay #1 LED #2 blinks Relay #2 Combination 1 Once Manual Once Manual Combination 2 Twice Auto-ON Once Manual Combination 3 Once Manual Twice...
- Page 6 WARRANTY INFORMATION Watt Stopper/Legrand warranties its products to be free of defects in materials and workmanship for a period of fi ve (5) years. There are no obligations or...


Need help?
Do you have a question about the WattStopper RS-350-N and is the answer not in the manual?
Questions and answers