Table of Contents
Advertisement
Quick Links
Advertisement
Table of Contents

Related Manuals for IFM SAxx20


Summary of Contents for IFM SAxx20
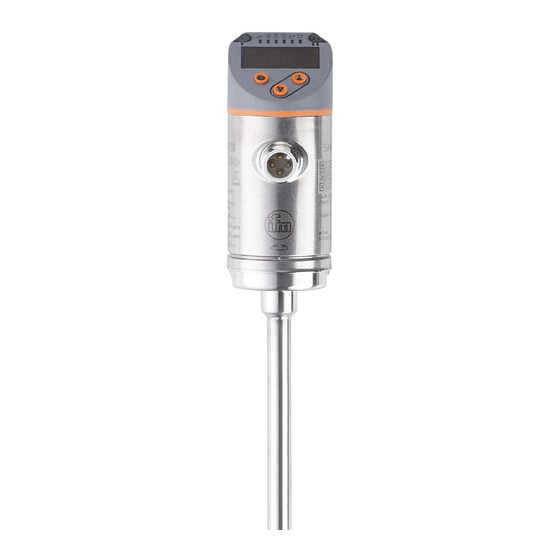
- Page 1 Operating instructions Flow sensor SAxx20...
-
Page 2: Table Of Contents
Contents 1 Preliminary note ..................... 5 Symbols used ..................5 Warnings used..................5 2 Safety instructions..................5 3 Getting started ....................6 Device function with factory setting............6 4 Functions and features .................. 7 Application area ..................7 5 Function ......................7 Output OUT1 selection options............... - Page 3 9 Menu ......................24 Menu overview..................24 Main menu and submenus..............25 10 Set-up ......................29 11 Parameter setting................... 29 11.1 Parameter setting in general..............30 11.2 Presetting....................30 11.2.1 Process value for OUT2 ..............30 11.2.2 Operating mode ................30 11.2.3 Standard unit of measurement for flow..........
- Page 4 14.1 Error messages..................39 14.2 Warning messages ................. 39 15 Maintenance, repair and disposal ..............40 16 Factory settings....................40...
-
Page 5: Preliminary Note
1 Preliminary note You will find instructions, technical data, approvals and further information using the QR code on the unit / packaging or at www.ifm.com. 1.1 Symbols used Requirement Instruction Reaction, result [...] Designation of keys, buttons or indications Cross-reference Important note... -
Page 6: Getting Started
• The product must be suitable for the corresponding applications and environmental conditions without any restrictions. • Only use the product for its intended purpose (Ò Functions and features). • Only use the product for permissible media (Ò Technical data). •... -
Page 7: Functions And Features
Factory setting Display • Red text colour • Update of the measured values every 200 ms • Standard display: flow More information: (Ò Factory setting / 40). 4 Functions and features The unit monitors gaseous media. It detects the process categories flow and medium temperature. 4.1 Application area •... -
Page 8: Operating Modes
• Switching signal temperature • Analogue signal flow • Analogue signal temperature • Frequency signal flow • Frequency signal temperature • Input for external teach signal (remote calibration) 5.3 Operating modes The unit provides 2 selectable operating modes for flow measurement: Operating mode Display unit [ModE]... -
Page 9: Switching Output
Operating value for display and output signals Flow 140 % MEW MEW: Final value of the measuring range Curve of measured values at 100 % MEW factory setting 60 % MEW Curve of measured values 1 after calibration Curve of measured values 2 after calibration Fig. 1: Calibration The change in the gradient is indicated in per cent. - Page 10 SP: Set point Reset point HY: Hysteresis Hno: Hysteresis function NO (normally open) Hnc: Hysteresis function NC (normally closed) Time Fig. 2: Hysteresis function When the hysteresis function is set, the set point [SP] and the reset point [rP] are defined. The rP value must be lower than the SP value. The distance between SP and rP is at least 4 % of the final value of the measuring range (= hysteresis).
-
Page 11: Analogue Output
When set to the window function the upper limit value [FH] and the lower limit value [FL] are defined. The distance between FH and FL is at least 4 % of the final value of the measuring range. FH and FL have a fixed hysteresis of 0.25 % of the final value of the measuring range. -
Page 12: Frequency Output
[mA] FOU=On 21,5 FOU=OFF [% MEW] +124 [°C] Fig. 4: Characteristics of the analogue output according to the standard IEC 60947-5-7 1: Analogue signal MAW: Initial value of the measuring range 2: Measured value MEW: Final value of the measuring range 3: Display range ASP: Analogue start point 4: Measuring range... - Page 13 • [FEPx] defines the upper measured value at which the output signal has the frequency set under FrPx. – FEPx is only available for flow measurement in the operating mode GAS. Minimum difference between FSP2 and FEP2 = 20 % of the final value of the measuring range.
-
Page 14: Measured Value Damping
Frequency signal Measured value FOU=On Display range 130 % Measuring range 120 % Scaled measuring range FrPx MAW: Initial value of the measuring range =100 % MEW: Final value of the measuring range FSPx: Frequency start point FEPx: Frequency end point FrPx: Frequency signal (Hz) for upper measured value FOU=OFF... -
Page 15: Io-Link
When the hysteresis function is set, the colour changes if the process value is above the set point: MAW: Initial value of the measuring range MEW: Final value of the measuring range SPx: Set point SP1 / Fig. 7: Hysteresis function When the window function is set, the colour changes if the process value is within the window section: MAW: Initial value of the measuring range... -
Page 16: Io-Link Process Values
The process values for flow and temperature are transmitted via IO-Link in the following units of measurement: Operating mode [ModE] Flow unit Temperature unit °C °C A change of [uni] does not affect the IO-Link process values. More information Ò IO Device Description at www.ifm.com. -
Page 17: Installation
Using process adapters the unit can be adapted to different process connections. Adapters have to be ordered separately as accessories. • Information about the available mounting accessories at www.ifm.com. • A correct fit of the unit and ingress resistance of the connection are only ensured using ifm adapters. -
Page 18: Installation Position
5...10 x D 3...5 x D Fig. 9: Inlet and outlet pipe lengths Outside diameter of the pipe Interference 6.3 Installation position 6.3.1 Immersion depth ≥15 mm Fig. 10: Immersion depth The sensor tip must be completely surrounded by the medium. Recommended immersion depths: •... -
Page 19: Recommended Mounting Position
6.3.2 Recommended mounting position Fig. 11: Recommended mounting position • For horizontal pipes: mounting from the side. • For vertical pipes: mounting in the rising pipe. 6.3.3 Conditionally possible installation position Fig. 12: Conditionally possible installation position • For horizontal pipes, if the pipe is free from build-up: mounting from below. •... -
Page 20: Impermissible Installation Position
6.3.4 Impermissible installation position Fig. 13: Impermissible installation position • The sensor tip must not be in contact with the pipe wall. • Do not mount in downpipes that are open at the bottom. -
Page 21: Alignment
6.3.5 Alignment Fig. 14: Flow direction u To achieve the optimum measuring accuracy, mount the sensor as shown in the figure: Align the spanner flats parallel to the piping; the smaller spanner flat (1) is facing the front if the flow comes from the left. For easier readability of the display the sensor housing can be rotated by 345°... - Page 22 OUT2 OUT1/IO-Link Fig. 15: Wiring diagram (colours to DIN EN 60947-5-2) BK: black BN: brown BU: blue WH: white Connection • Switching signal flow (OUT1) • Frequency signal flow • IO-Link • Switching signal flow (OUT2) • Switching signal temperature • Analogue signal flow •...
-
Page 23: Operating And Display Elements
Fig. 16: Circuit examples 2 x positive switching 2 x negative switching 1 x positive switching / 1 x analogue 1 x negative switching / 1 x analogue 8 Operating and display elements Switching status LED for OUT1 Switching status LED for OUT2 Process value in the indicated unit of measurement (%;... -
Page 24: Menu
9 Menu 9.1 Menu overview Use the operating keys to navigate from the process value display to the main menu and from there to the submenus. See also (Ò Parameter setting in general / 30). Process value display 1: Main menu 2: Initialisation menu [INI] 3: Extended functions 4: Basic settings [CFG] [EF]... -
Page 25: Main Menu And Submenus
9.2 Main menu and submenus The following applies to the menu illustrations below: Parameters with white background are indicated in case of factory setting. If the default settings for the operating mode and output functions are changed, the parameters with a grey background are also visible. Process value display t.HGH t.LOW... - Page 26 Main menu ModE REL GAS MEdI 15...400 60...140 % Fig. 19: Initialisation menu INI Main menu - - - - Fig. 20: Menu Extended functions EF...
- Page 27 Hno Hnc Fno Fnc FRQ Hno Hnc Fno Fnc tch FRQ 0,0...60 s 0,0...60 s 0,0...60 s 0,0...60 s l/min PnP nPn 0,0...5,0 s FOU1 FOU2 SEL2 FLOW TEMP Fig. 21: Menu Basic settings CFG...
- Page 28 Lo.F 0,0 l/min Hi.F 0,0 l/min Lo.T 0,0 °C Hi.T 0,0 °C Fig. 22: Menu Min/max memory MEM * (Ò Measured value in the standard unit of measurement / 31) coLr GrEn r1ou G1ou r2ou G2ou rd1 rd2 rd3 OFF SELd FLOW TEMP Fig. 23: Menu Display settings DIS...
-
Page 29: Set-Up
10 Set-up After power on and expiry of the power-on delay time, the unit is in the normal operating mode. It carries out its measurement and evaluation functions and generates output signals according to the set parameters. During the power-on delay time the outputs are switched as programmed: •... -
Page 30: Parameter Setting In General
11.1 Parameter setting in general Intention Action Change from the process value display to the main menu [●] Change to the submenu Use [▼] to navigate to the submenu (e.g. EF), then [●] Select the requested parameter [▲] or [▼] Change to the setting mode [●] Modification of the parameter value [▲] or [▼] >... -
Page 31: Standard Unit Of Measurement For Flow
For the operating mode GAS, an internal pipe diameter must be entered. When the factory setting is changed ([ModE] = REL), the unit displays [≡≡≡≡] to force the entry of the internal pipe diameter: u Press [●] to display [diA]. u Define the internal pipe diameter in mm. -
Page 32: Remote Calibration
w Display [donE]: adjustment successful. w Display [FAIL]: repeat the adjustment. w The unit defines the existing flow as maximum flow (final value of the measuring range = 100 %). u Briefly press [●]. Low-flow adjustment: u Activate the minimum flow in the installation. u Select the main menu. -
Page 33: Setting The Output Functions
11.3 Setting the output functions The parameters for flow monitoring and temperature monitoring are set in the same way. The prerequisite is that the process value for OUT2 has first been defined via [SEL2] (Ò / 30). 11.3.1 Limit monitoring OUTx / hysteresis function u Select the CFG menu. u Select [oux] and set the switching signal: •... -
Page 34: Analogue Signal Out2
For flow measurement the following applies: FEP1x is only available if the operating mode GAS is selected. u Select [FrPx] and set the maximum frequency: 100 Hz...1000 Hz. 11.3.4 Analogue signal OUT2 u Select the CFG menu. u Select [ou2] and set the function: I: flow-proportional current signal 4…20 mA. -
Page 35: Output Logic
u Select [coLr] and define the colour of the characters in the process value display: • rEd: red • GrEn: green • rxou: colour change from green to red • Gxou: colour change from red to green 11.4.3 Output logic u Select the CFG menu. u Select [P-n] and set PnP or nPn. -
Page 36: Calibration
• Frequency output – On: The frequency signal goes to 130 % of FrPx. – OFF: The frequency signal goes to 0 Hz. – OU: The frequency signal still corresponds to the measured value. 11.4.7 Calibration u Select the INI menu. u Select [CGA] and set a value between 60 and 140 % (100 % = factory setting). -
Page 37: Diagnostic Functions
11.5 Diagnostic functions 11.5.1 Reading minimum values / maximum values u Select the MEM menu. u Select [Lo.x] or [Hi.x] to display the highest or lowest process value measured: • Lo.F: minimum value of the flow value measured in the process (flow volume or flow velocity) •... -
Page 38: Reading The Parameter Setting
The currently set value is displayed for 30 s. Then the unit returns to the process value display. 13 Technical data Technical data and scale drawing at www.ifm.com. 14 Troubleshooting The unit has many self-diagnostic options. It monitors itself automatically during operation. - Page 39 14.1 Error messages Display Problem/remedy Unit faulty / malfunction u Replace the unit. None • Supply voltage too low Display u Check the supply voltage. • Display switched off u Check whether setting diS = OFF and change setting if necessary. PARA Parameter setting outside the valid range u Check parameter setting.
- Page 40 Display Problem/remedy Switching status LED for OUT1 flashing: short circuit OUT1. u Check switching output OU1 for short circuit or excessive current. Switching status LED for OUT2 flashing: short circuit OUT2. u Check switching output OUT2 for short circuit or excessive current. Switching status LEDs for OUT1 and OUT2 flashing: short circuit OUT1 and OUT2.
- Page 41 Parameter Factory setting User setting FrP1 100 Hz SP2 (FLOW) 40 % 12 m/s rP2 (FLOW) 35 % 10.6 m/s SP2 (TEMP) 28 °C rP2 (TEMP) 26 °C FH2 (FLOW) 40 % 12 m/s FL2 (FLOW) 35 % 10.6 m/s FH2 (TEMP) 28 °C FL2 (TEMP) 26 °C...
- Page 42 Parameter Factory setting User setting FOU1 FOU2 SEL2 FLOW coLr SELd FLOW The percentage values refer to the final value of the measuring range (MEW).
Need help?
Do you have a question about the SAxx20 and is the answer not in the manual?
Questions and answers