Advertisement
Introduction:
It's a wild world out there in microcontroller-land, and you're about to take your first step away from
the wonderful – though sometimes stifling – simplicity of the Arudino Pro Mini.
In this tutorial, we'll go over how to set up and use the 3.3V Arduino Pro Mini, everything from
assembling the tiny Arduino to programming it.
To follow along, you'll need a few extra items:
The FTDI Basic will be used to program (and power) the Pro Mini. The headers are optional, but
they're our preferred way to interface other devices to the Pro Mini.
Assembly of the Pro Mini also requires soldering. This is a great place to start soldering, if you've
never done it before! The joints are all easy, through-hole jobs.
What It Is (and Isn't):
So what differentiates the Arduino Pro Mini from the Arduino Uno? Well, the most obvious difference
is the form factor. The Pro Mini's pretty...mini, measuring in at just 1.3x0.70". It's about ⅙th the size of
the Arduino Uno. The compact size is great for projects where you may need to fit the Arduino into a
tiny enclosure, but it also means that the Pro Mini is not physically compatible with Arduino
shields (you could still hard-wire the Mini up to any Arduino shield).
The Mini packs almost as much microprocessor-punch as the regular Arduino, but there are a few
major hardware changes you should be aware of before you start adapting your project to the Mini.
The first glaring hardware difference is the voltage that the Mini operates at: 3.3V. Unlike the Arduino
Uno, which has both a 5V and 3.3V regulator on board, the Mini only has one regulator. This means
that if you've got peripherals that only work at 5V, you might have to do some level shifting before you
hook it up to the Pro Mini (or you could go for the 5V variant of the Pro Mini).
ARDUINO MINI PRO 3.3V
User Manual
w w w . e k t
. c o m
2
Electronics
Katrangi
Trading
Advertisement
Table of Contents

Related Manuals for Arduino MINI PRO 3.3V


Summary of Contents for Arduino MINI PRO 3.3V
- Page 1 The Pro Mini’s pretty…mini, measuring in at just 1.3x0.70". It’s about ⅙th the size of the Arduino Uno. The compact size is great for projects where you may need to fit the Arduino into a tiny enclosure, but it also means that the Pro Mini is not physically compatible with Arduino shields (you could still hard-wire the Mini up to any Arduino shield).
- Page 2 Another major variation from the standard Arduino lies in the speed at which the ATmega328 runs. The Pro Mini 3.3V runs at 8MHz, half the speed of an Arduino Uno. We put a slower resonator on the Mini to guarantee safe operation of the ATmega. That said, don’t let the slower speed scare you away from using the Mini;...
- Page 3 FTDI Basic Breakout. The pins on the other two sides are an assortment of power and GPIO pins (just like the standard Arduino). There are three different power-related pins: GND, VCC, and RAW. GND, obviously, is the common/ground/0V reference.
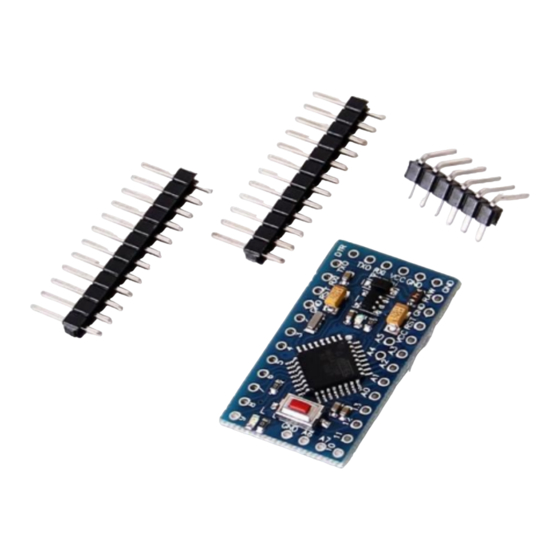
- Page 4 Assembly: The Arduino Pro Mini doesn’t look like much when you first get it; it’s as bare-bones as can be. We’ve left it up to you to solder headers or wires into the open through-holes. There are a few things to make you aware of though.
- Page 5 If you have a supply that’s greater than 3.3V (but less than 12V), you’ll want to connect that to the RAW pin on the Mini. This pin is akin to the VIN pin, or even the barrel jack, on the Arduino Uno.
- Page 6 8MHz clock speed in mind, that way the delay(1000); calls will actually delay one second. You’ll next need to tell Arduino which serial port your FTDI Basic Breakout has been assigned to. On Windows this will be something like COM2, COM3, etc. On Mac it’ll look something like /dev/tty.usbserial-A6006hSc .
Need help?
Do you have a question about the MINI PRO 3.3V and is the answer not in the manual?
Questions and answers