Table of Contents
Advertisement
Quick Links
Advertisement
Table of Contents

Related Manuals for cable matters Easy Transfer Cable


Summary of Contents for cable matters Easy Transfer Cable
- Page 1 Easy Transfer Cable Windows USER MANUAL www.cablematters.com...
-
Page 2: Table Of Contents
3.1 Quick Start Instructions 3.2 Getting Started 3.2.1 Installation Checklist 3.3.2 Easy Computer Sync Software Installation 3.3 Easy Transfer Cable Installation and Use 3.3.1 Starting the Easy Computer Sync Software 3.3.2 Mode: Synchronizing Files 3.3.3 Mode: Transfer Data to a New Computer 3.3.4 Mode: Drag &... -
Page 3: Introduction
Cable Matters. Where they occur these references are for illustrative purposes only and do not represent an endorsement of a product or service by Cable Matters, or an endorsement of the product(s) to which this manual applies by the third-party company in question. -
Page 4: Product Overview
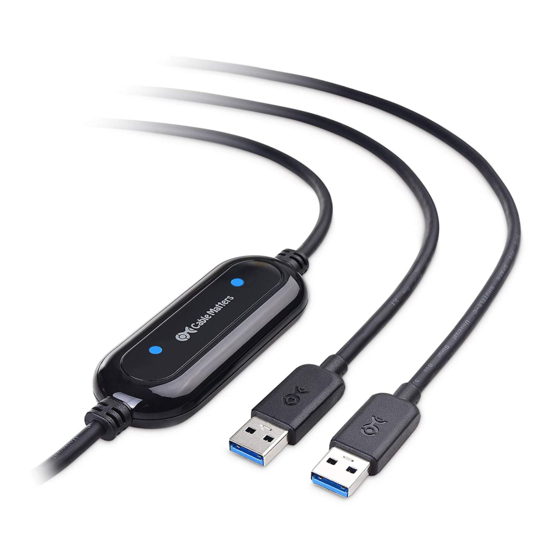
2. PRODUCT OVERVIEW 2.1 Package Contents Please check that the following items are contained in the box: 1 x Easy Transfer Cable for Windows – USB 2.0 Type A, 6 Feet 1 x CD with Software (Download from cablematters.com/downloads) ... -
Page 5: Connection And Operation
2. Run the program from the Setup Wizard or click on the Easy Computer Sync desktop icon to start the program. 3. Connect the Easy Transfer Cable to a USB port on both computers. 4. Follow the instructions on the pop-up Install the software for the menus. -
Page 6: Getting Started
Programs installed on the source computer cannot be transferred, they must be reinstalled. Do not connect the Easy Transfer Cable through a USB hub. Both Windows operating systems must be using the same language. Verify that the USB ports on both computers are functioning and will transfer at a minimum USB 2.0 rate. -
Page 7: Easy Computer Sync Software Installation
Easy Transfer Cable for Windows 3.2.2 Easy Computer Sync Software Installation 1. Install the Easy Computer Sync software from the Install the software included CD on BOTH computers. For computers BEFORE without a CD Drive, the CD contents can be copied... -
Page 8: Easy Transfer Cable Installation And Use
Click ‘Next’ until you see ‘Connection Detected!’ XP and Vista Users: If your computer does not recognize the Easy Transfer Cable you may need updated Windows drivers. Download the Windows Easy Transfer software from Microsoft and check that your computer has the latest updates. -
Page 9: Mode: Synchronizing Files
Easy Transfer Cable for Windows 3.3.2 Mode: Synchronizing Files 1. Select Sync Files in the Tools screen to synchronize files BETWEEN computers. Choose a folder or create a new one to synchronize files for one-time use or an on- going basis. - Page 10 Easy Transfer Cable for Windows ‘Options’ Button: Changes default settings: Choose the file transfer direction Manage file conflicts 3. Select ‘Next’ to start the synchronization: If ‘Ask me what to do’ was selected from the Sync Options Menu, a ‘File Conflict’...
-
Page 11: Mode: Transfer Data To A New Computer
Easy Transfer Cable for Windows 3.3.3 Mode: Transfer Data to a New Computer 1. Select Transfer Data to a New Computer in the Tools screen to migrate data from an old to a new computer. 2. The software automatically chooses default folders to transfer or you can customize the selections. - Page 12 Easy Transfer Cable for Windows Click on a drive and hit 'Properties' to open the screen for choosing a different drive on the target computer. Click on a folder and select ‘Properties’ to open the screen for mapping the location of a folder on the target computer.
-
Page 13: Mode: Drag & Drop Files
Easy Transfer Cable for Windows 3.3.4 Mode: Drag & Drop Files 1. Select Drag & Drop Files in the Tools screen to manually transfer files and folders BETWEEN computers. 2. Choose files or folders and simply drag them to the desired location. -
Page 14: Mode: Remotely Control Other Computer
Easy Transfer Cable for Windows 3.3.5 Mode: Remotely Control Other Computer 1. Selecting Control Other Computer allows you to view the connected computer from your computer for convenience or when you only have one monitor. 2. Connect the remote computer to the monitor to start the Easy Computer Synch software and then switch it back to the controlling computer. -
Page 15: Using With Windows Easy Transfer Software
Windows Easy Transfer with the operating systems of both computers. Log onto both computers as an Administrator. Connect the Easy Transfer Cable to both computers Select Transfer files and settings from the Tools Screen. - Page 16 Easy Transfer Cable for Windows 4. Look for the Windows Easy Transfer Menu and press ‘Next’. 5. On the New PC, select, ‘This is my new computer’. 6. Select the best choice for how Windows Easy Transfer is installed on your old computer.
-
Page 17: Troubleshooting Notes
The CD will not automatically start: Drag the application to the desktop to start. My computer does not recognize the Easy Transfer Cable: Make sure that you have downloaded and installed both the Easy Computer Sync software and the latest drivers from Windows. -
Page 18: Frequently Asked Questions (Faq)
Can I use this cable with a USB Hub? Do not use the Easy Transfer Cable with a USB hub. You can use it with an active or passive USB cable extender. Can both computers share a monitor? Yes. -
Page 19: Technical Specifications
Easy Transfer Cable for Windows 4. Technical Specifications Easy Transfer Cable Connectors: 2 x USB Type A - Male OS Support USB Host: Windows XP, Vista, 7, 8, 8.1, 10 Certifications: LED Indicators: Green Cable Length: 6 Feet Model No:... -
Page 20: Warranty And Support
Easy Transfer Cable for Windows 5. Warranty and Support 5.1 Customer Support and Contact Information Cable Matters offers lifetime technical support as an integral part of our commitment to provide industry leading solutions. Email us with questions at support@cablematters.com. 5.2 Warranty Information This product is backed by a limited one-year warranty.
Need help?
Do you have a question about the Easy Transfer Cable and is the answer not in the manual?
Questions and answers