
Related Manuals for eta EEP 50


Summary of Contents for eta EEP 50
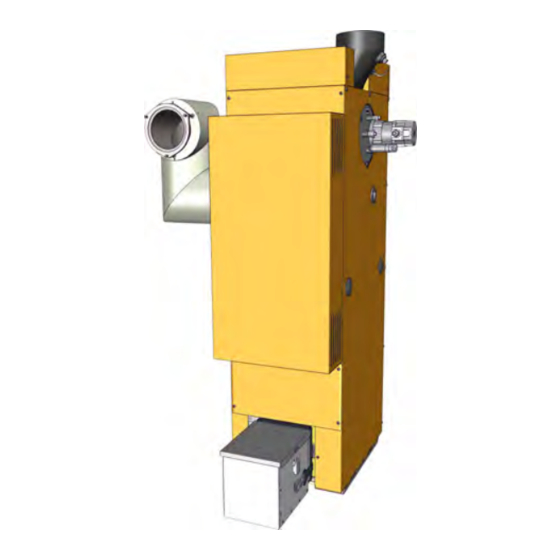
- Page 1 2017-10-04 0000000234 V.009 X.35.4, X.39.1 93523-003 Precipitator EEP 50, EEP 90, EEP 130 Operating Instructions...
- Page 2 ETA Heiztechnik Gewerbepark 1 A-4716 Hofkirchen an der Trattnach Tel: +43 (0) 7734 / 22 88 -0 Fax: +43 (0) 7734 / 22 88 -22 info@eta.co.at www.eta.co.at...
-
Page 3: Table Of Contents
Contents General ................4 Preface. -
Page 4: General
On non-compliance with this safety instruction, there is Copyright a risk of major physical injury. All contents of this document are property of ETA Heiztechnik GmbH and are protected by copyright. Warranty, guarantee and liability Any reproduction, transfer to third parties or use for other purposes is prohibited without written permission from the owner. - Page 5 Repair of defects For repairs of defects carried out by the customer or by a third party, ETA shall only bear the costs or remain obligated by warranty if this work was approved in writing in advance by the customer service of ETA Heiztechnik GmbH.
-
Page 6: Technical Data
63 - 90 kW 440 mm 1700 mm 1888 mm 1153 mm 320 mm 150 mm 210 mm >2500 mm 110 - 130 kW 440 mm 1760 mm 1947 mm 1767 mm 347 mm 180 mm 230 mm >2500 mm www.eta.co.at... - Page 7 Technical data Precipitator Unit EEP 50 EEP 90 EEP 130 Weight Ash box volume Litres Electrical power consumption during operation (maximum 38 / 19 75 / 38 113 / 57 value/regular operation) Electrical power consumption in ready mode Electrical connection...
-
Page 8: Functional Description
30 kV voltage), the discharge electrode "pushes" the dust particles from the flue gas to the inner wall of the precipitator. The dust particles accumulate there Fig. 3-3: Precipitator de-ashing Sliding rake Lever shaft for the sliding rake Ash screw www.eta.co.at... -
Page 9: Safety
Safety General information Safety General information Operation only by trained personnel The product may be operated by trained adults only. Training may be provided by the heating technician or our customer service. Please read the associated doc- umentation carefully in order to avoid errors during operation and maintenance. -
Page 10: Installation
1 (20-50 kW) wood chip boiler with the fuel conveying system on the left side. The illustrations are representative for all compatible ETA boilers. Assembly and installation only by qualified specialist personnel The assembly and installation may be performed by specialist personnel with the corresponding qualifications only. -
Page 11: Connect The Precipitator With The Boiler
Installation Connect the precipitator with the boiler If a flue gas recirculation is installed, the flue Place the precipitator next to the boiler. The supplied ducts must also be removed from the flue gas re- piping is suitable for placing the precipitator on the circulation. - Page 12 If the boiler is placed on sound insulation mats, cable duct to the boiler. Remove the existing line the precipitator must also be placed on located there and clamp in the longer connection line sound insulation mats. in its place. www.eta.co.at...
- Page 13 Installation Connect the precipitator with the boiler Fasten the flue gas connection with a new seal to the Attach the temperature sensor for the flue gas to the precipitator. connection in the connecting pipe. Put the insulation over the flue pipe and attach Install piping for the flue gas aluminium adhesive tape to the piles.
-
Page 14: Installing Flue Gas Recirculation
Use a pipe clamp to mount the joint for the flue gas re- (minimum cross-section 6 mm²). circulation onto the precipitator. Only hand-tighten the screws of the pipe clamp. Fig. 5-6: Joint www.eta.co.at... - Page 15 Installation Installing flue gas recirculation Connect the horizontal flue pipe with the flue pipe Put the insulation over the flue pipe and seal the piles already installed. Add a seal and only hand-tighten the with aluminium adhesive tape. screws. Fig. 5-7: Horizontal flue pipe Fasten the horizontal line onto the flue gas connection with a seal.
-
Page 16: Concluding Activities
Attach the ash box Attach the ash box to the precipitator. Fig. 5-10: Install the shut-off device The flue gas recirculation function must be deactivated in the control system of the boiler after installing the shut-off device. See the boiler's operating instructions. www.eta.co.at... - Page 17 Installation Concluding activities Connecting the flue pipe from the precipitator to the chimney The flue pipe (flue tube) from the precipitator to the chimney must be connected on site. See the technical data for the required dimensions; see chapter "Technical data".
-
Page 18: Configuration
[Selected function blocks] column in the function blocks overview. If you have accidentally deleted the function block and wish to reinsert it, contact ETA Customer Service. As some parameters have to be reset. Adjusting options in the function block [Boiler]... -
Page 19: Electrical Connections
Electrical connections Requirements Electrical connections Requirements DANGER! Do not carry out work on high voltage units Electrical connection must only be made by The housing of the high voltage unit may qualified specialist personnel not be opened or damaged as there are The electrical installation must only be performed parts inside it that are under high voltage. - Page 20 If multiple circuit boards of the same design (e.g.: 2x EM-C) are connected to one another via CAN-bus, the circuit boards of the same design must have serial node numbers. In this way they are recognized in CAN-bus and can be configured. www.eta.co.at...
- Page 21 Electrical connections Electrical connection Therefore, compare the node numbers of the individual circuit boards of the same design and set them as needed using the node switch.
-
Page 22: Circuit Board Em-C3
Unassigned S602 Analogue output Voltage specification for the high voltage unit S603 Analogue output High voltage unit current limit S604 24 V input Unassigned S605A CAN-Bus to boiler S605B CAN-Bus Unassigned CAN-Bus terminator resistor RS-485 terminal resistor Boot jumper www.eta.co.at... - Page 23 Electrical connections Circuit board EM-C3 Terminal allocation on the plug-in circuit board [IN-E] Terminal Function Default assignment S610 Analogue input Specification of the voltage for the high voltage unit S611 Analogue input Unit current from high voltage unit S612 Digital input Position switch of the electrode dedusting S613 Digital input...
-
Page 24: Etatouch Controller
[Precip.]. Operating condition and information. A description of the operating conditions can be found in the integrated Help menu by pressing the button. Actual voltage value Operating condition (mode) Actual current value Actual voltage value Actual current value www.eta.co.at... -
Page 25: Empty The Ash Box
Empty the ash box Empty the ash box End heating mode Inspect the seal on the ash box cover to ensure it is in good order, and replace it if necessary. End the boiler's heating mode with the On/Off switch in the boiler overview window. - Page 26 Empty the ash box Switch the boiler on via the mains switch and start de-ashing Restore the boiler's power supply from the mains switch. Start de-ashing, so that the boiler can perform de-ashing. Switch the boiler back on with the On/Off switch. www.eta.co.at...
-
Page 27: 10 Rectifying Problems
Rectifying problems 10 Rectifying problems WARNING! DANGER! Troubleshooting may be performed by specialist Switch precipitator power supply personnel with the corresponding qualifications prior to troubleshooting only. Before troubleshooting on the precipitator, the power If you troubleshoot without corresponding specialist supply must be switched off. training and above all without the required experience, ... - Page 28 Check the insulation of the flue tube. The path from the boiler to the flue entire flue tube must be insulated. Further gas connection via the precip- measures should be discussed with ETA itator, the exhaust customer service. temperature sinks and condensate can form in the chimney.
-
Page 29: 11 Dismantling, Disposal
Dismantling, disposal 11 Dismantling, disposal Dismantling Dismantling is done in the reverse order of assembly. Clean the parts and remove them in accordance with the local regulations for workplace safety and environ- mental protection. Disposal Disposal including all components must be done in an environmentally friendly manner according to waste disposal laws. - Page 30 www.eta.co.at...
- Page 32 DOWNLOAD www.eta.co.at...
Need help?
Do you have a question about the EEP 50 and is the answer not in the manual?
Questions and answers