
Related Manuals for Carrier CCU


Summary of Contents for Carrier CCU
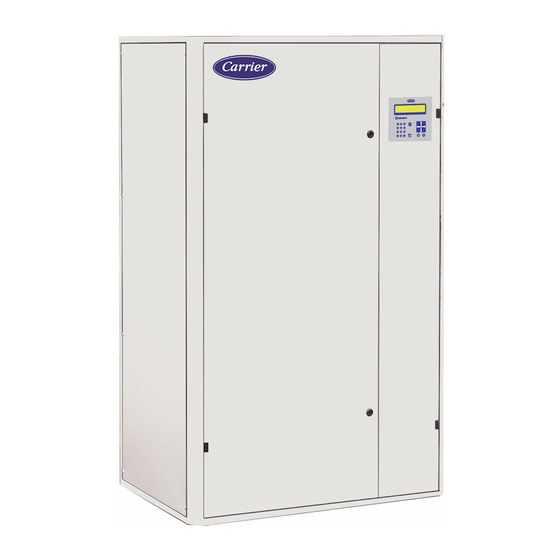
- Page 1 C O N T R O L M A N U A L Close control units CARRIER CCU Controller Translation of the original document...
-
Page 3: Table Of Contents
CONTENTS 1 - GENERAL INFORMATION ................................4 2 - COMPONENTS ....................................5 2.1 - On the front: ..................................... 5 2.2 - On the rear: ....................................6 2.3 - Batteries ....................................8 3 - MENU TREE ....................................9 4 - ACCESS LEVEL (MENU 8) ................................. 12 5 - CONFIGURING THE NUMBER OF UNITS .......................... -
Page 4: General Information
1 - GENERAL INFORMATION The CCU CONTROLLER is fitted as standard to Close Control Unit systems. Setting and display console equipped with a 160-character LCD screen. The CCU CONTROLLER is equipped with a microprocessor and an expansion board to provide the following functions: ■ Filtration Checking the pressure drop in the filters, by monitoring the air flow and fouling level. ■ Control function (Cooling Mode) • Chilled water model: Gradual opening of the three-way valve following an increase in temperature. • Direct expansion model: Triggering of one or more refrigerating stages following an increase in temperature. (Action on condensation unit). ■ Control function (Heating Mode) - Hot water coil model: Gradual opening of the three-way valve following a decrease in temperature. ... -
Page 5: Components
Cursor pad 6 - Number pad 7 - Validation Correction 9 - Setpoints values 10 - 160-character LCD screen The dialogue between the machines and the user is provided by simple, precise text messages on a 160-character LCD screen. The CCU CONTROLLER automatically displays information on the operation of the unit. (ExampleAppearance of a fault). It comprises: - A backlit crystal screen with 4 lines of 40 characters. - A forced off or on authorisation push button, equipped with LED indication (green LED). • Green LED off → unit off. • Green LED flashing → remote control open. • Green LED permanently on → unit on - A voltage on indicator (yellow LED). - A fault signal indicator (red LED). ... -
Page 6: On The Rear
2 - COMPOSITION NOTE: The text that follows the unit number indicates its operating status. The first line is simply a display of the date and time. We can access this main menu via the "0" number key from any of the displays. Move the cursor opposite the line corresponding to the required information using the cursor pad, then hit "ENTER". The "CONFIGURATION OF NUMBER OF UNITS"’ line is used to configure the operation of the units connected to the bus. The "UNIT…" lines are used to query the machine. To return to the main menu, press the number key "0" several times. ■ Locking the keypad The control can be locked or unlocked by pressing the “right arrow” and “left arrow” keys simultaneously for 5 seconds. When the controller is locked, the user can view the information but cannot edit the settings. 2.2 - On the rear: The various connectors used to connect the various elements required to control the unit. ■ INPUTS - On/off: • Acquisition of states via the traditional electro-mechanical components. - Analogue: • Acquisition of temperatures via a thermistor type sensor. • Acquisition of relative humidities via sensors delivering a voltage varying from 0 to 10 V for relative humidity of 0 to 100 %. • Acquisition of differential pressures in the air on the filter via a sensor delivering a voltage varying from 0 to 10 V or from 0.5 to 4.5 V for 0 to 1000 Pa. • Acquisition of differential pressures in the air on the fan (enabling flow rate calculation) via a sensor delivering a voltage varying from 0 to 10 V for 0 to 2500 Pa ■ OUTPUTS - On/off: •... - Page 7 2 - COMPOSITION ■ Designation of terminals EA = Analogue inputs EL = Logic inputs SA = Analogue outputs SL = Logic outputs TERMINAL CCU Controller Target temperature sensor (10 K Ω) 0 V Supply air limit temperature sensor (10 K Ω) Target relative humidity sensor (0 - 10 V) (EA) 0 V Sensor for controlling the differential pressure on the filter (0-10 V or 0,5 - 4,5 V) +12 V Remote control Fire detection/External safety Supply air fan operation feedback Electric heater safety thermostat with manual reset (EL) Humidifier fault or maintenance...
-
Page 8: Batteries
2 - COMPOSITION TERMINAL CCU Controller Control of electric heater stage 1 Control of electric heater stage 2 Electric heater control common terminal (SL) Supply air fan control Not used Fan control common terminal 24 V AC power supply 24 V AC power supply 0 V... -
Page 9: Menu Tree
3 - MENU TREE Depending on the configuration, only the menus in use are displayed. M O N 1 0 / 0 4 / 2 0 1 7 0 9 : 3 0 C C U S Y S T E M C O N F I G U R A T I O N N U M B E R U N I T S U N I T... - Page 10 3 - MENU TREE Unit 1 With no fault, the temperature, humidity, setpoints ENTER 1 Operating info ENTER and unit state on the master/slave connection are displayed With a fault, the type of fault is displayed along with its solution (reset button to cancel after resolution) Back to menu ENTER List of the last 20 timestamped faults. To view the 2 Fault memory state of the machine at the time of the fault, select the fault with the cursors and hit ENTER Back to menu 3 Parameters 3.1 Unit type ENTER 3.2 Control and P100 settings...
- Page 11 3 - MENU TREE 20 programming steps to 5.1 Ventilation on 5 Timer programming ENTER switch the fan on 20 timer programming steps to 5.2 Setpoint shift shift setpoint Back to menu 6 Fault level ENTER Selection for forwarding faults to the critical or non-critical fault relays Back to menu P700 7 Communication ENTER...
-
Page 12: Access Level (Menu 8)
P1099 10.1 FMA3 P1100 information P1149 Back to menu Back to menu 4 - ACCESS LEVEL (MENU 8) The CCU CONTROLLER has 3 access levels, two of which require an access code. The various levels are accessed using menu 8 in the unit's menu. ■ Access to level 1 (No access code) This is a general level designed for the end user. This level gives access to all the reading parameters and the settings for the main setpoints and proportional bands: - Cooling - Heating - Humidification - Dehumidification - Supply air temperature limits - Temperature and humidity limit thresholds - Filter check. -
Page 13: Configuring The Number Of Units
5 - CONFIGURING THE NUMBER OF UNITS These parameters are only visible if parameter P215 = 1 (master unit) This sub-menu groups together the operating parameters for the units. They can operate individually or grouped as master/slaves. Access level Description Setting By default Display condition OPERATING CONFIGURATION 1 to 32: self-contained units C01 Number of units 2 to 10: in master/slave 0: No additional unit C02 Additional unit C01 > 1 and C01 < 11 1: One additional unit 0: No backup unit... - Page 14 5 - CONFIGURING THE NUMBER OF UNITS TREE FOR CONFIGURING THE NUMBER OF UNITS (only visible if parameter P215 = 1 "master unit") Number of units No backup No additional Backup Additional The additional unit acts as backup One additional backup unit One backup unit French English German No rotation Spanish Automatic rotation Rotation time delay Unlocked Periodic restart Locked Number of days between 2 restarts Restart time Restart period Cooling setpoint shift...
-
Page 15: Configuring The Unit
6 - CONFIGURING THE UNIT 6.1 - Unit parameters 6.1.1 - UNIT TYPE (sub-menu 3.1) To limit the amount of different software required whilst meeting our customers' need for applications, the CCU CONTROLLER is provided with a configuration system. It allows the composition of the unit to be configured, along with all the functions which must be managed by the system To configure the CCU CONTROLLER, use the menu No.3: PARAMETER and the sub-menu No. 3.1: UNIT TYPE. (Menu on CCU CONTROLLER display) These parameters are directly linked to the composition of the unit, and they must not be modified on site. The procedure for saving these parameters is carried out in the workshop. (To view the type of programming specific to your control, refer to the configuration guide attached to the unit). To modify parameters P01 to P99, the unit must be stopped and the configuration unlocked. Parameter P99 (Locking of configuration) is equipped with a system which counts the number of times the configuration is unlocked. Most of the parameters can only be modified if the correct authorisation level is accessed in Menu No.8 of the CCU CONTROLLER (See paragraph 4 in this guide). Access level Description Setting By default Display condition CONFIGURATION OF THE FANS 1: ... - Page 16 6 - CONFIGURING THE UNIT Access level Description Setting By default Display condition CONTROL SELECTION 0: No heating control 1: One hot water coil Heating control 2: One electric heater 3: Electric heater or hot water coil via contact 0: No dehumidification control Dehumidification control 1: One chilled water coil 2: One direct expansion system 0: No humidification control Humidification control 2: Progressive MODBUS 0 = Without Free cooling control P07 > 0 1 = With...
- Page 17 6 - CONFIGURING THE UNIT Access level Description Setting By default Display condition LOCKING 0: Configuration unlocked (The unit cannot be started up; the unit type parameters may be changed). 1: Configuration locked Locking of the configuration (The unit can be started up by pressing the "On/Off" push button on the console. The unit type parameters may no longer be modified. The number of times the configuration is unlocked is counted.) (*) When these parameters are modified, a sequence is launched to configure the FMAs. 6.1.2 - CONTROL AND SETTINGS (sub-menu 3.2) Access level Description...
- Page 18 6 - CONFIGURING THE UNIT Access level Description Setting By default Display condition FREE COOLING CONTROL Free cooling activation 3 to 20 K 3 K P11 = 1 differential Free cooling activation low limit -5 to 20°C 0°C P11 = 1 setpoint Free cooling opening limit 0 to 100% 100% P11 = 1 P11 = 1 and External weight in water low 0 to 15 g (P09>0 or limit setpoint P10>0) P11 = 1 and External weight in water high ...
- Page 19 6 - CONFIGURING THE UNIT Access level Description Setting By default Display condition CHECK THE FILTERS The values correspond to the unit's maximum air flow. If there is a variation in the fan speed, these values are reduced proportionally Setpoint for differential pressure indicating 10 to 80 Pa 30 Pa P02 ≠ 17 air flow present Setpoint for differential pressure indicating 60 to 500 Pa 150 Pa filter fouling Setpoint for differential pressure indicating 100 to 550 Pa 190 Pa filter blocked AIR FLOW CONTROL Air flow rate low limit 0 to MIN (P146,10,000) 4000 m³/h P02 = 17 COMPRESSOR VALIDATION 0: compressor stopped Validation of compressor circuit 1 P17 = 1 to 16...
- Page 20 2-10 V sensor fault Heating temperature setpoint with MAX (8,P212) to 45,0 °C if P07>0 20,0 °C P08 > 0 and P207 = 2 2-10 V sensor fault MASTER/SLAVE BUS Unit number on console 1 to 32 6.1.3 - Reading parameters (sub-menu 3.3) This third sub-menu gives access to all the values (temperatures, relative humidities, pressures, time delays, meters, input and output states, etc.) managed by the CCU CONTROLLER.. Only the useful parameters are displayed. They cannot be modified The meters can be reset to zero. To do this, place the cursor on the chosen meter and simultaneously press the Reset and 0 keys for 5 to 6 seconds. All these parameters are accessible from the "customer" access level. Access level Description Unit Display condition CALCULATED SETPOINT Cooling setpoint value °C P07 > 0...
- Page 21 Operating-hour meter indicating the non-critical faults STATE OF THE FAN CONTROLS Fan on request Off/On P01 = 2 Temperature setpoint shift request Off/On P31 = 2 or P32 = 2 TIME DELAY COUNTDOWN Warm-up mins Activation time delay for the compressor stages mins P17 = 3 or 4 VERSION NUMBER CCU CONTROLLER software version number TEMPERATURE FOR CONTROL Temperature measured by the controller °C P207 = 1 and P207=2 Temperature received by ModBus °C P207 = 1 Temperature measured at 2-10 V input °C (P07>0 or P08>0) and P207=2 percentage on external signal (P07>0 and P08=0) and P207=3 ORDER NUMBER SO order number...
-
Page 22: Humidifier Parameters (Visible If P10 =2)
6 - CONFIGURING THE UNIT 6.2 - Humidifier parameters (visible if P10 =2) 6.2.1 - Settings (sub-menu 9.1) Access level Description Setting By default Display condition Maximum production 20 to 100% 100% P10 = 2 Off delay time 0 s to 120 s 0 s P10 = 2 Water conductivity (0 = automatic measurement > 0 = 0 to 125 µS/cm 0 µS/cm P10 = 2 forced conductivity) Conductivity pre-alarm threshold 0 to 2000 µS/cm 1500 µS/cm P10 = 2... -
Page 23: Supply Air Fan Parameters (Visible If P05 = 1 Or 2 Or 3)
6 - CONFIGURING THE UNIT 6.2.3 - Alarm (sub-menu 9.3) Alarm Description The humidifier has no fault Replace the cylinder Water conductivity too high Configuration parameter error Internal memory error Electrode overcurrent Low steam flow rate during reduced production Water level raised without humidification request Lack of supply water Drain problem To acknowledge a fault on the humidifier, go to the "ALARM" menu (menu 9.3) and press the "Reset" key 6.3 - Supply air fan parameters (visible if P05 = 1 or 2 or 3) 6.3.1 - FMA1 information (sub-menu 10.1) Access level... - Page 24 6 - CONFIGURING THE UNIT 6.3.2 - FMA2 information (sub-menu 10.2) Access level Description Unit Display condition 1050 FMA2 max. speed P05 = 2 or 3 1051 FMA2 requested speed P05 = 2 or 3 1052 FMA2 current speed P05 = 2 or 3 1053 FMA2 current consumed P05 = 2 or 3 1054 FMA2 peak supply voltage P05 = 2 or 3 1055 FMA2 power input P05 = 2 or 3 1060 FMA2 fault summary...
-
Page 25: Fault Level (Menu 6)
7 - FAULT LEVEL (MENU 6) Each type of fault can be forwarded to one of the following two changeover contact relays: - Non-critical fault relay. - Critical fault relay. This menu is used to configure which type of fault will be forwarded to which relay (critical or non-critical). Description Setting Unit Display condition 0: Non-critical fault N02 No air flow (*) 1: Critical fault 0: Non-critical fault N03 Fan (*) 1: Critical fault (Condensation unit 0: Non-critical fault Low pressure for each circuit P17 > 0 1: Critical fault High pressure or circuit breaking for each circuit) -
Page 26: Using The Weekly Program
8 - WEEKLY PROGRAMMING (MENU 5) 8.3 - Using the weekly program Weekly program V E N T I L A T I O N T I M E R P R O G R A M P R O G . : 0 1 A C T I V A T E D E A C T I V A T E C O N F I R M... -
Page 27: Sensors
9 - CONTROL - Operation in free cooling mode W (chilled water) units • Return air temperature sensor: Progressive operation of motorised dampers then the three-way valve. • Air supply temperature sensor: limitation of the three-way valve then the FRESH AIR damper. X (direct expansion) units • Return air temperature sensor: progressive operation of the dampers (condensation units off). • Supply air temperature sensor: FRESH AIR damper limit ■ Control of the "Target" relative humidity This is proportional or proportional integral. - Dehumidification control The master control is increased if the relative humidity exceeds the setpoint. This value is broken down according to the parameter ... -
Page 28: Commissioning
• Periodic restart: The units are operating as master/slaves. At least one unit is configured as backup or additional. The unit in question is authorised by the console button and by the external safety contact. The unit is not faulty, it is powered up. The unit is not controlled by the on/off (contact or timer). The unit is selected as an additional or backup unit and is periodically restarted. • With non-critical fault: The unit in question is powered up. It has at least one non-critical fault, but no critical faults. • With critical fault: The unit in question is powered up. It has at least one critical fault. • Powered off: The CCU CONTROLLER for the unit in question is not responding. It is not powered up or the bus connection is broken. 11.2 - Operating information for each unit (menu 1 "operating info'') • Unit with no fault The first line: displays the values measured by the target relative humidity and/or temperature sensors. The second line: displays the target relative humidity and/or temperature setpoint values. ... -
Page 29: Table Of Alarms
Water leak sensor • Check that the air flow is not too high Coil or humidifier leak • Find the leak and stop it Temperature • Check the sensor Sensor sensor • Check the connection and continuity of the cable No more operation or Eprom memory • Contact CARRIER After-Sales display Fault with the CPU board The time is wrong battery - the timer has • Change the battery stopped working... - Page 30 11 - COMMISSIONING Faults Sources Causes Solutions • Check the sensor Sensor • Replace the sensor Temperature • Check the stability of the control Low temperature Malfunction sensor • Check the operation of the heating valve or the electric heater Drift in dehumidification • Internal load insufficient mode • Check the sensor Sensor • Replace the sensor Temperature High temperature • Check the stability of the control sensor Malfunction • ...
-
Page 31: Bus For Master/Slave Function
Multiconductor cables shielded, j a c k e t e d ( s h i e l d i n g w i t h braiding), length between the 1st and the last CCU CONTROLLER: 1000 m 1: Line A or + 2: Line B or -... -
Page 32: Bus For Connection To An Rs485 Modbus Cms
13 - BUS FOR CONNECTION TO AN RS485 MODBUS CMS 13.1 - Bus connection between the units and the CMS The communication bus between the units and the CMS is a 2-wire RS485 bus The green light indicates that the data sent by the CMS to the CCU CONTROLLER has been received. The yellow light indicates that data has been sent by the CCU CONTROLLER to the CMS. To CMS 1st Unit Multiconductor cables, shielded, jacketed (shielding with braiding) length between the 1st and the l a s t C C U C O N T R O L L E R : 1000 m... -
Page 33: Configuring The Communication Bus Parameters (Menu 7)
13 - BUS FOR CONNECTION TO AN RS485 MODBUS CMS 13.2 - Configuring the communication bus parameters (menu 7) This menu gives access to all parameters used to define the communication protocol and the 2-wire RS485 serial link parameters. Access level Description Setting By default Display condition Communication mode 1: MODBUS/JBUS 0: 4800 bauds Communication speed 1: 9600 bauds 2: 19200 bauds 0: None Parity 1: Even 2: Odd 1: stop bit Number of stop bits 2: stop bits... - Page 34 13 - BUS FOR CONNECTION TO AN RS485 MODBUS CMS Register No. Description Format Type Unit No adjustment Scale Controller type Decimal 43 = CCU Controller 3 and 4 P258 Controlled temperature Float 5 and 6 P255 Controlled temperature Float °C -40,0 99,9 7 and 8 P256 Controlled humidity Float % RH P250 Temperature setpoint in cooling ...
- Page 35 13 - BUS FOR CONNECTION TO AN RS485 MODBUS CMS ■ Bit composition - Function 1 or 2 is used for reading - Function 5 or 15 is used for writing Register No. Description Format Type Unit 0 = Local P706 control type Binary 1 = Remote 0 = Off P330 supply air fan operation...
-
Page 36: Bus For Connection To A Cms Bacnet Ip Or Mstp
Checking connection of the gateway kit RS 485 - BACNET side/ CARRIER unit system start-up (1) CARRIER service if a CARRIER warranty extension (including system start-up) was sold (2) Installer service if no CARRIER system start-up sold Note: The MODBUS RS485 / BACNET gateway can only operate correctly if it is connected to a Building Technical Management system (not supplied by CARRIER). -
Page 37: Bus Connection Between The Controllers, The Gateway And The Cms
14 - BUS FOR CONNECTION TO A CMS BACNET IP OR MSTP 14.1 - Bus connection between the controllers, the gateway and the CMS Modbus: The distance between the gateway and the last controller must be less than 1000 metres. ■ A maximum of 1 cabinet can communicate with the BacNet gateway CABINET No.1 ■ The communication cable to be used must be: AWG24 - 22 type (1 shielded twisted pair) ■ Please note that, beyond a certain distance and depending on the cabling carried out, it may be necessary to use additional equipment (not provided - e.g. polarisation device, etc.) It is strongly recommended that the distance between the gateway and controller is limited. J10-2 J10-1 J10-3... -
Page 38: Information For The Integrator
15 - INFORMATION FOR THE INTEGRATOR 15.1 - ModBus Modbus RTU communication is preconfigured on the gateway kit. To guarantee communication with the controller, it is necessary to configure the following parameters on the machine: ■ Precision air conditioning controllers: - P700 = Modbus - P701 = 9600 bauds (speed) - P702 = Without (parity) - P703 = 1 (stop bit) - P704 = No (not swapped) - P705 = 1 (Bus no.) - P706 = Remote ■ Note: - Versions compatible with the gateway: • Precision air conditioning: from version V21 For earlier versions, the service must update the machine controller, otherwise communication errors may occur. 15.2 - BACnet IP BACnet communication must be implemented using a BACnet integrator. ■ The BACnet IP gateway kit is configured to the following specifications: - Protocol: BACnet IP UDP/IP slave. The CMS must be a "client" (or "master") type system. -
Page 39: Precision Air Conditioning Controller
15 - INFORMATION FOR THE INTEGRATOR 15.4 - Precision air conditioning controller Registers accessible to customer BACnet Unit/ Description Register No. Mnemonic Read/Write Format object Enumeration AHU no.1 – AHU_1.mnemonique 3 and 4 Outdoor temperature (P258) OutdoorTemp AV0002 Float °C 5 and 6 Controlled temperature (P255) TempRegulee... - Page 40 Administrative number: EN7519369-05, 06.2021 - Replaces No.: EN7519369-04, 10.2020. Manufactured for Carrier S.C.S, Rte de Thil - 01122 Montluel – France. The manufacturer reserves the right to make changes to the product specifications without notice. Printed in the European Union.
Need help?
Do you have a question about the CCU and is the answer not in the manual?
Questions and answers