Table of Contents
Advertisement
Available languages
Available languages
Advertisement
Chapters
Table of Contents
Troubleshooting

Related Manuals for Beko BEHPH 090


Summary of Contents for Beko BEHPH 090
- Page 1 Split Type Air Conditioner User Manual BEHPH 090/BEHPH 091 BEVPI 090/BEVPI 091 BEHPH 120/BEHPH 121 BEVPI 120/BEVPI 121 BEHPH 180/BEHPH 181 BEVPI 180/BEVPI 181 BEHPH 240/BEHPH 241 BEVPI 240/BEVPI 241 EN - IT - FR 10M-8505543200-4921-01...
- Page 2 CONTENTS ENGLISH 3-56 ITALIANO 57-114 FRANÇAIS 115-172 V2110002 AB UM...
- Page 3 Please read this user manual first! Dear Customer, Thank you for preferring a Beko product. We hope that you get the best results from your product which has been manufactured with high quality and state-of-the-art technology. Therefore, please read this entire user manual and all other accompanying documents carefully before using the product and keep it as a reference for future use.
-
Page 4: Table Of Contents
CONTENTS 1 Safety Precautions 8 Test run 8.1 Test run instructions ..........42 2 Overview 9 Care and maintenance 2.1 Unit parts ..............13 2.2 Controls and parts ............. 14 9.1 Cleaning your indoor unit ........... 43 9.2 Cleaning your air filter ..........43 3 Unit specifications and features 9.3 Maintenance –... -
Page 5: Safety Precautions
1 Safety Precautions Warning Warnings for product use I f a n a b n o r m a l s i t u a t i o n • This appliance can be used by arises (like a burning smell), children aged from 8 years and immediately turn off the unit above and persons with reduced... - Page 6 1 Safety Precautions Do not expose your body D o n o t c l e a n t h e a i r • • d i r e c t l y t o c o o l a i r f o r a conditioner with combustible prolonged period of time.
- Page 7 1 Safety Precautions Electrical warnings The product must be properly • g r o u n d e d a t t h e t i m e o f Only use the specified power • installation, or electrical shock cord.
- Page 8 1 Safety Precautions Warnings for product If connecting power to fixed • installation wiring, an all-pole disconnection device which has at least 3mm 1. Installation must clearances in all poles, and performed by an authorized have a leakage current that dealer or specialist.
- Page 9 1 Safety Precautions 5. Install the unit in a firm location 11. How to install the appliance that can support the unit’s to its support, please read weight. If the chosen location the information for details in cannot support the unit’s “indoor unit installation”...
- Page 10 1 Safety Precautions 4. For equipment that contains For R290 refrigerant models, fluorinated greenhouse gases appliance shall be installed, in quantities of 5 tonnes of operated and stored in a room CO2 equivalent or more, but with a floor area larger than: of less than 50 tonnes of <=9000Btu/h units: 13m CO2 equivalent, If the system...
- Page 11 1 Safety Precautions When mechanical connectors When disposing of this appliance, • are reused indoors, sealing parts you have the following options: shall be renewed. When flared Dispose of the appliance at • joints are reused indoors, the designated municipal electronic flare part shall be re-fabricated.
-
Page 12: Overview
2 Overview The air conditioning system comes with the following accessories. Use all of the installation parts and accessories to install the air conditioner. Improper installation may result in water leakage, electrical shock and fire, or cause the equipment to fail. The items are not included with the air conditioner must be purchased separately. -
Page 13: Unit Parts
2 Overview Name Shape Quantity(PC) 6.35 (1/4 in) Liquid side Parts you must purchase 9.52 (3/8in) separately. Consult the 9.52 (3/8in) Connecting pipe assembly dealer about the proper pipe size of the unit you 12.7 (1/2in) Gas side purchased. 16 (5/8in) 19 (3/4in) 1 2 3 Magnetic ring and belt (if supplied, please refer to... -
Page 14: Controls And Parts
2 Overview Air-break switch Air-break switch (1) (2) 2.2 Controls and parts 1. Wall mounting plate 2. Front panel 3. Power cable (some units) 4. Louver 5. Functional Filter (On Back of Main Filter - Some Units) 6. Drainage pipe 7. -
Page 15: Unit Specifications And Features
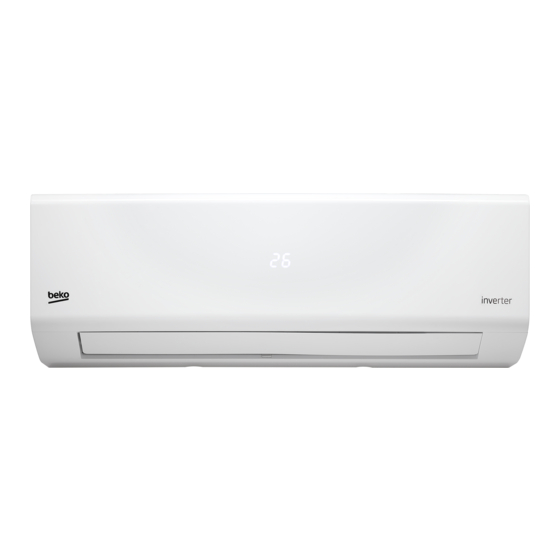
3 Unit specifications and features 3.1 Indoor unit display Illustrations in this manual are Different models have different for explanatory purposes. The front panel and display window. actual shape of your indoor unit Not all the indicators describing may be slightly different. The below are available for the air actual shape shall prevail. -
Page 16: Operating Temperature
3 Unit specifications and features Power Cable (Some Units Front Panel Power Cable (Some Units Power Cable (Some Units Front Panel Front Panel Power Cable (Some Units Front Panel Power Cable (Some Units Power Cable (Some Units) Front Panel Power Cable (Some Units Front Panel Power Cable (Some Units Front Panel... -
Page 17: Inverter Split Type
3 Unit specifications and features 3.3 Inverter Split type COOL mode HEAT mode DRY mode 0°C - 30°C 10°C - 32°C Room Temperature 17°C - 32°C (62°F - 90°F) (32°F -86°F) (50°F - 90°F) 0°C - 50°C (32°F - 122°F) 0°C - 50°C -15°C - 50°C (5°F - 122°F) (32°F - 122°F) -
Page 18: Other Features
3 Unit specifications and features For the USB device access, replacement, Room relative humidity less maintenance operations must be carried out by than 80%. If the air conditioner professional staff. operates in excess of this figure, the surface of the air conditioner •... -
Page 19: Setting Angle Of Air Flow
3 Unit specifications and features 3.6 Setting angle of air flow 3.6.1 Setting vertical angle of air flow While the unit is on, use the SWING/DIRECT button on remote control to set the direction (vertical angle) of airflow. Please refer to the Remote Insert Control Manual for details. - Page 20 3 Unit specifications and features 5. Press the manual control button a third time to turn the unit off. 6. Close the front panel. Deflector Deflector Fig.B Fig. B Do not move louver by hand. This will cause the louver to become out of sync.
-
Page 21: Installation
4 Installation 4.1 Installation summary - indoor unit 15cm (5.9in) 15cm (5.9in) 12cm (4.75in) 12cm 12cm 12cm (4.75in) (4.75in) (4.75in) 2.3m (90.55in) 2.3m (90.55in) Determine Wall Hole Position Attach Mounting Plate Select Installation Location Attach Mounting Plate Select Installation Location Determine Wall Hole Position Drill Wall Hole Drill Wall Hole... -
Page 22: Installation Instructions - Indoor Unit
4 Installation 4.2 Installation Instructions – If there is no fixed refrigerant Indoor unit piping: While choosing location, be aware that you should leave ample room for 4.2.1 Prior to installation a wall hole (see Drill wall hole Before installing the indoor unit, refer to the label for connective piping step) for on the product box to make sure that the model the signal cable and refrigerant... -
Page 23: Mounting Plate Dimensions
4 Installation 4.2.2 Mounting plate dimensions If the wall is made of brick, concrete, or similar material, drill Different models have different mounting plates. 5mm-diameter (0.2in-diameter) For the different customization requirements, holes in the wall and insert the the shape of the mounting plate may be slightly sleeve anchors provided. - Page 24 4 Installation 2. If the wall hole is behind the unit, keep the 517.4mm (20.37in) knock-out panel in place. If the wall hole is to 517.4mm (20.37in) 144mm (5.65in) 144mm (5.65in) 138mm (5.45in) 138mm (5.45in) the side of the indoor unit, remove the plastic Indoor unit outline Indoor unit outline knock-out panel from that side of the unit.
- Page 25 4 Installation CAUTION! Be extremely careful not to dent or damage the piping while bending them away from the unit. Any dents in the piping will affect the unit’s performance. CORRECT CORRECT NOT CORRECT NOT CORRECT Step 5: Connect drain hose Make sure there are no kinks Make sure there are no kinks Kinks in the drain hose...
- Page 26 4 Installation 4. Power voltage should be within 90-110% of Step 6: Connect signal and power cables rated voltage. Insufficient power supply can The signal cable enables communication between cause malfunction, electrical shock, or fire. the indoor and outdoor units. You must first choose the right cable size before preparing it for 5.
- Page 27 4 Installation In North America, please choose CAUTION! Do not mix up live and the right cable size according to null wires. This is dangerous, and the Minimum Circuit Ampacity can cause the air conditioning indicated on the nameplate of unit to malfunction.
- Page 28 4 Installation 4. Hook the top of the indoor unit on the upper Make sure that the drain hose hook of the mounting plate. is at the bottom of the bundle. 5. Check that unit is hooked firmly on mounting Putting the drain hose at the top of the bundle can cause the by applying slight pressure to the left and right-...
-
Page 29: Outdoor Unit Installation
4 Installation 4.3.1 Installation Instructions – Outdoor 7. Using even pressure, push down on the bottom unit half of the unit. Keep pushing down until the unit snaps onto the hooks along the bottom of Step 1: Select installation location the mounting plate. - Page 30 4 Installation Step 2: Install drain joint (Heat pump unit only) If the unit is exposed to heavy Before bolting the outdoor unit in place, you must wind: Install unit so that air outlet fan is at a 90° angle to the install the drain joint at the bottom of the unit.
- Page 31 4 Installation CAUTION! In cold climates, Air inlet Air inlet make sure that the drain hose is as vertical as possible to ensure Air inlet Air inlet swift water drainage. If water drains too slowly, it can freeze in Air outlet Air outlet the hose and flood the unit.
- Page 32 4 Installation If you will install the unit on the ground or on a 6. Carefully lift unit and place its mounting feet on concrete mounting platform, do the following: brackets. 1. Mark the positions for four expansion bolts 7. Bolt the unit firmly to the brackets. based on dimensions chart.
- Page 33 4 Installation If the cable clamp looks like While crimping wires, make sure the following, please select you clearly distinguish the Live the appropriate through-hole (“L”) Wire from other wires. according to the diameter of the wire. WARNING! All wiring work must be performed strictly in Buckle accordance with the wiring...
- Page 34 4 Installation Terminal block Terminal block Connecting cable Connecting cable Power supply cord Power supply cord Conduit panel Conduit panel Wire Cover Wire Cover Please select the appropriate through-hole Please select the appropriate through-hole according according to the diameter of the wire. to the diameter of the wire.
-
Page 35: Refrigerant Piping Connection
5 Refrigerant piping connection When connecting refrigerant piping, do not let substances or gases other than the specified refrigerant enter the unit. The presence of other gases or substances will lower the unit’s capacity, and can cause abnormally high pressure in the refrigeration cycle. -
Page 36: Connection Instructions - Refrigerant Piping
5 Refrigerant piping connection 5.1 Connection Instructions – Pipe Pipe Refrigerant Piping Reamer Reamer Step 1: Cut pipes When preparing refrigerant pipes, take extra care Point down Point down to cut and flare them properly. This will ensure efficient operation and minimize the need for future maintenance. -
Page 37: Instructions For Connecting Piping To Indoor Unit
5 Refrigerant piping connection When bending connective refrigerant piping, the minimum bending radius is 10cm. Radius ≥10cm (4in) Radius ≥10cm (4in) Piping extension beyond flare form Outer Diameter of A (mm) Pipe (mm) Min. Max. Ø 6.35 (Ø 0.25”) 0.7 (0.0275”) 1.3 (0.05”) 5.2 Instructions for connecting Ø... -
Page 38: Instructions For Connecting Piping To Outdoor Unit
5 Refrigerant piping connection Torque requirements Outer Diameter of Flare shape Tightening Torque (N•m) Flare dimension(B) (mm) Pipe (mm) Ø 6.35 (Ø 0.25”) 18~20 (180~200kgf.cm) 8.4~8.7 (0.33~0.34”) Ø 9.52 (Ø 0.375”) 32~39 (320~390kgf.cm) 13.2~13.5 (0.52~0.53”) Ø 12.7 (Ø 0.5”) 49~59 (490~590kgf.cm) 16.2~16.5 (0.64~0.65”) Ø... -
Page 39: Air Evacuation
6 Air evacuation 6.1 Preparations and precautions 6. Close the Low Pressure side of the manifold gauge, and turn off the vacuum pump. Air and foreign matter in the refrigerant circuit 7. Wait for 5 minutes, then check that there has can cause abnormal rises in pressure, which can been no change in system pressure. -
Page 40: Note On Adding Refrigerant
6 Air evacuation 6.1.3 Note on adding refrigerant length is 7.5m (25’). In other areas, the standard pipe length is 5m (16‘). The refrigerant should be Some systems require additional charging charged from the service port on the outdoor unit’s depending on pipe lengths. -
Page 41: Electrical And Gas Leak Checks
7 Electrical and gas leak checks 7.1 Before test run All wiring must comply with local and national electrical codes, and Only perform test run after you have completed must be installed by a licensed the following steps: electrician. • Electrical Safety Checks – Confirm that the unit’s electrical system is safe and operating properly 7.3 Gas leak checks... -
Page 42: Test Run
8 Test run 8.1 Test run instructions During operation, the pressure of the refrigerant circuit will You should perform the Test Run for at least 30 increase. This may reveal leaks minutes. that were not present during 1. Connect power to the unit. your initial leak check. -
Page 43: Care And Maintenance
9 Care and maintenance 9.1 Cleaning your indoor unit 5. Clean the large air filter with warm, soapy water. Be sure to use a mild detergent. CAUTION! Always turn off your 6. Rinse the filter with fresh water, then shake off air conditioner system and excess water. - Page 44 9 Care and maintenance CAUTION! • Before changing the filter or cleaning, turn off the unit and disconnect its power supply. • When removing filter, do not touch metal parts in the unit. The sharp metal edges can cut Filter Tabs Filter Tabs you.
-
Page 45: Maintenance - Long Periods Of Non-Use
9 Care and maintenance 9.3 Maintenance – long periods of 9.4 Maintenance – Pre-Season non-use Inspection If you plan not to use your air conditioner for an After long periods of non-use, or before periods of extended period of time, do the following: frequent use, do the following: Turn on FAN function until Turn on FAN function until... -
Page 46: Troubleshooting
10 Troubleshooting CAUTION! If any of the following conditions occurs, turn off your unit immediately! • The power cord is damaged or abnormally warm. • You smell a burning odor. • The unit emits loud or abnormal sounds. • A power fuse blows or the circuit breaker frequently trips. •... -
Page 47: Troubleshooting
10 Troubleshooting Issue Possible Causes The outdoor unit makes noises The unit will make different sounds based on its current operating mode. Dust is emitted from either the indoor The unit may accumulate dust during extended periods of non-use, or outdoor unit which will be emitted when the unit is turned on. - Page 48 10 Troubleshooting 10.2 Troubleshooting When troubles occur, please check the following points before contacting a repair company. Problem Possible Causes Solution Temperature setting may be higher Lower the temperature setting than ambient room temperature The heat exchanger on the indoor or Clean the affected heat exchanger outdoor unit is dirty The air filter is dirty...
- Page 49 10 Troubleshooting Problem Possible Causes Solution Power failure Wait for the power to be restored The power is turned off Turn on the power The fuse is burned out Replace the fuse The unit is not Remote control batteries are dead Replace batteries working The Unit’s 3-minute protection has...
- Page 50 10 Troubleshooting If your problem persists after performing the checks and diagnostics above, turn off your unit immediately and contact an authorized service center. Split Type Air Conditioner / User Manual 50 / 172 EN...
-
Page 51: European Disposal Guideline
11 European disposal guideline This symbol indicates that this product shall not be disposed This appliance contains refrigerant and other potentially with other household wastes at the end of its service life. hazardous materials, When disposing of this appliance, the Used device must be returned to official collection point for law requires special collection and treatment, Do not dispose recycling of electrical and electronic devices. -
Page 52: Installation Instructions
12 Installation instructions 12.1 F-Gas instruction This product contains fluorinated greenhouse gases. The fluorinated greehouse gases are contained in hermetically sealed equipment. Installs, services, maintains, repairs, checks for leaks or decommissions equipment and product recycling should be carried out by natural persons that hold relevant certificates. - Page 53 13 Specifications BEHPH Indoor unit BEHPH 090 BEHPH 120 BEHPH 180 BEHPH 240 Model name Outdoor unit BEHPH 091 BEHPH 121 BEHPH 181 BEHPH 241 Refrigerant Total Refrigerant Amount (g) 1100 1450 CO2 equivalent (tonnes) 0.37 0.37 0.74 0.98 Anti-Electric...
- Page 54 13 Specifications Indoor unit BEHPH 090 BEHPH 120 BEHPH 180 BEHPH 240 Model name Outdoor unit BEHPH 091 BEHPH 121 BEHPH 181 BEHPH 241 Heating Running Current (A) Noise Pressure Level - Indoor Unit (dBA) Noise Pressure Level - Outdoor Unit (dBA)
- Page 55 13 Specifications BEVPI Indoor unit BEVPI 090 BEVPI 120 BEVPI 180 BEVPI 240 Model name Outdoor unit BEVPI 091 BEVPI 121 BEVPI 181 BEVPI 241 Refrigerant Total Refrigerant Amount (g) 1100 1450 CO2 equivalent (tonnes) 0.37 0.37 0.74 0.98 Anti-Electric Class I Class I Class I...
- Page 56 13 Specifications Indoor unit BEVPI 090 BEVPI 120 BEVPI 180 BEVPI 240 Model name Outdoor unit BEVPI 091 BEVPI 121 BEVPI 181 BEVPI 241 Noise Pressure Level - Indoor Unit (dBA) Noise Pressure Level - Outdoor Unit (dBA) Air flow volume (m 416/309/230 584/477/395 730/500/420...
- Page 57 Prima dell’utilizzo, leggere il presente manuale. Gentile Cliente, grazie per aver scelto un prodotto Beko. Ci auguriamo che possa essere soddisfatto del prodotto che è stato realizzato secondo elevati standard di qualità e con una tecnologia all'avanguardia. Pertanto, prima di utilizzare il prodotto, legga attentamente tutto il manuale e i documenti che lo accompagnano avendo cura di conservarli per un riferimento futuro.
- Page 58 SOMMARIO 1 Misure di sicurezza 8 Esecuzione del test 8.1 Istruzioni per l’esecuzione del test ......99 2 Presentazione 9 Cura e manutenzione 2.1 Componenti dell'unità ..........68 2.2 Dispositivi di controllo e componenti ......69 9.1 Pulizia dell'unità interna ........... 101 9.2 Pulizia del filtro dell'aria ...........
-
Page 59: Misure Di Sicurezza
1 Misure di sicurezza Attenzione sicurezza. I bambini devono essere sorvegliati per assicurarsi che non Questo elettrodomestico può giochino con l'elettrodomestico. essere utilizzato dai bambini dagli 8 anni in su e dalle persone con Avvertenze sull'uso del capacità fisiche, sensoriali o prodotto Se si verifica una situazione mentali ridotte, anche in caso di... - Page 60 1 Misure di sicurezza Non utilizzare il condizionatore di utilizzare climatizzatori • d ' a r i a n e i p r e s s i d i g a s appositamente progettati. combustibili. I gas emessi Avvertenze sulla pulizia e la potrebbero raccogliersi attorno manutenzione all'unità...
- Page 61 1 Misure di sicurezza Non utilizzare il condizionatore provocare incendi o scosse • con le mani bagnate. In questo elettriche. modo potrebbero verificarsi N o n t i r a r e i l c a v o d i •...
- Page 62 1 Misure di sicurezza elettrici nonché al Manuale Nel caso di collegamento • di installazione. Collegare i d e l l ’ a l i m e n t a z i o n e a cavi saldamente e fissarli in installazioni elettriche fisse, modo sicuro per impedire è...
- Page 63 1 Misure di sicurezza T3.15AL/250VAC, T5AL/250VAC, unità. L'elettrodomestico deve essere installato in conformità T3.15A/250VAC, T5A/250VAC, con le normative di cablaggio T20A/250VAC, T30A/250VAC ecc. nazionali. Nota: Per le unità che 4. Utilizzare solo gli accessori, utilizzano refrigerante R32 i componenti e i componenti o R290 è...
- Page 64 1 Misure di sicurezza Nota sui gas fluorurati (non 7. Per le unità che dispongono di applicabile all’unità che un impianto di riscaldamento elettrico ausiliario, non utilizza il refrigerante R290) installare l’unità entro 1 1. Questo climatizzatore contiene metro di distanza da qualsiasi gas fluorurati ad effetto serra.
- Page 65 1 Misure di sicurezza è dotato di un dispositivo di Per i modelli con refrigerante rilevamento delle perdite, R290, l’apparecchio deve quest’ultimo deve essere essere installato, messo in controllato almeno ogni funzione e conservato in una 24 mesi per individuare stanza con una superficie del eventuali perdite.
- Page 66 1 Misure di sicurezza Se i connettori meccanici vengono legge stabilisce una raccolta e un • riutilizzati all'interno al chiuso, trattamento speciali. Non smaltire occorre sostituire gli elementi di questo prodotto nei rifiuti domestici tenuta. Se i giunti svasati vengono o nei rifiuti indifferenziati.
-
Page 67: Presentazione
2 Presentazione Il sistema di climatizzazione include i seguenti accessori. Utilizzare tutti componenti e gli accessori di installazione per montare il condizionatore. Un’installazione non corretta potrebbe comportare perdite d’acqua, scosse elettriche e incendi o malfunzionamenti dell'apparecchiatura. I componenti non inclusi nell’imballaggio del condizionatore d’aria devono essere acquistati separatamente. -
Page 68: Componenti Dell'unità
2 Presentazione Nome Forma Quantità (pz.) 6,35 (1/4 di pollice) C o n d o t t o del liquido Componenti da acquistare 9,52 mm (3/8 di pollice) separatamente. Rivolgersi al 9,52 mm (3/8 di pollice) Gruppo tubazione di collegamento rivenditore per informazioni sulle dimensioni corrette del 12,7 mm (1/2 pollice) -
Page 69: Dispositivi Di Controllo E Componenti
2 Presentazione Interruttore di Air-break switch arresto aria (1) (2) 2.2 Dispositivi di controllo e componenti 1. Piastra di montaggio per parete 2. Pannello anteriore 3. Cavo di alimentazione (solo alcune unità) 4. Deflettore 5. Filtro operativo (sul retro del filtro principale, su alcuni modelli) 6. -
Page 70: Specifiche E Caratteristiche Dell'unità
3 Specifiche e caratteristiche dell’unità 3.1 Display dell’unità interna Il pannello anteriore e il illustrazioni questo display variano a seconda del manuale sono solo a scopo modello. Gli indicatori descritti informativo. La forma attuale di seguito non sono presenti dell'unità interna potrebbe su tutti i condizionatori d’aria. -
Page 71: Temperatura Di Funzionamento
3 Specifiche e caratteristiche dell’unità Power Cable (Some Units Front Panel Power Cable (Some Units Cavo di alimentazione (solo alcune unità) Front Panel Power Cable (Some Units Power Cable (Some Units Front Panel Pannello anteriore Front Panel Power Cable (Some Units Power Cable (Some Units Front Panel Front Panel... -
Page 72: Modelli Split Inverter
3 Specifiche e caratteristiche dell’unità 3.3 Modelli split inverter Modalità HEAT Modalità DRY Modalità COOL (RAFFREDDAMENTO) (RISCALDAMENTO) (DEUMIDIFICAZIONE) Temperatura da 17 °C a 32 °C da 0 °C a 30 °C da 10 °C a 32 °C dell'ambiente da 0 °C a 50 °C da -15 °C a 50 °C da 0 °C a 50 °C (Per modelli dotati di sistemi di... -
Page 73: Altre Caratteristiche
3 Specifiche e caratteristiche dell’unità • Controllo wireless (solo alcune unità) Umidità ambiente relativa inferiore all’80%. Il controllo wireless consente di controllare il condizionatore d'aria funziona condizionatore d'aria tramite il telefono cellulare in ambienti con valori superiori, e la connessione wireless. la sua superficie potrebbe Per l’accesso del dispositivo USB, la sostituzione attirare la condensa. -
Page 74: Impostazione Dell'angolazione Del Flusso D'aria
3 Specifiche e caratteristiche dell’unità 3.6.2 Impostazione dell'angolazione Funzione Notte SLEEP Operation orizzontale del flusso d'aria Modalità Cool (Freddo) (+1 °C) Cool mode(+1 C/2 F) per hour L'angolazione orizzontale del flusso d'aria deve all’ora per le prime due ore for the first two hours Keep Funzionamento Impostare la... -
Page 75: Funzionamento Manuale (Senza Telecomando)
3 Specifiche e caratteristiche dell’unità 3.8 Funzionamento manuale spostare deflettore (senza telecomando) a mano. In questo modo il deflettore andrà fuori sincronia. ATTENZIONE! pulsante Se si verifica questo problema, manuale è destinato solo a spegnere l'unità e scollegarla per scopi di collaudo ed emergenza. alcuni secondi, quindi riavviarla. -
Page 76: Installazione
4 Installazione 4.1 Riepilogo dell’installazione – Unità interna 15 cm 15cm (5.9in) 12cm 12 cm 12cm 12 cm (4.75in) (4.75in) 2,3 m 2.3m (90.55in) Stabilire la posizione dei fori sulla parete Fissare la piastra di montaggio Selezionare la posizione per l'installazione Attach Mounting Plate Select Installation Location Determine Wall Hole Position Praticare un foro sulla parete... -
Page 77: Istruzioni Di Installazione - Unità Interna
4 Installazione 4.2 Istruzioni di installazione – • In prossimità della porta d’ingresso Unità interna • In una posizione esposta alla luce solare diretta Se non è presente alcuna 4.2.1 Prima dell’installazione tubatura fissa del refrigerante: Prima di installare l’unità interna, fare riferimento Durante la scelta di una posizione, tenere presente che all’etichetta apposta sulla confezione del prodotto... -
Page 78: Dimensioni Della Piastra Di Montaggio
4 Installazione ATTENZIONE! Mentre si pratica il foro nella parete evitare di forare cavi elettrici, tubazioni idriche e altri componenti sensibili. Parete Wall Esterno Interno Indoor Outdoor • Fissare la piastra di montaggio alla parete con le viti fornite. Assicurarsi che la piastra di montaggio sia in posizione piatta rispetto alla parete. - Page 79 4 Installazione Passaggio 4: Preparare le tubature del refrigerante 348.4mm (13.7in) 348,4 mm Le tubature del refrigerante si trovano all’interno di 179mm (7.05in) 179 mm 101mm (4in) 101 mm 136mm (5.35in) una guaina isolante fissata sulla parte posteriore 136 mm dell’unità.
-
Page 80: Prima Di Effettuare Qualsiasi Collegamento Elettrico, Leggere Le Seguenti Avvertenze
4 Installazione Il tubo del refrigerante può uscire Accertarsi di sistemare il tubo di dall'unità interna da quattro scarico secondo quanto illustrato diverse angolazioni: lato sinistro, nelle figure che seguono. lato destro, lato posteriore destro, lato posteriore sinistro. CORRETTO CORRECT NON CORRETTO NOT CORRECT Assicurarsi che non siano... - Page 81 4 Installazione 3. Se si verifica un problema di sicurezza grave con 12. Non toccare mai i componenti elettrici subito dopo aver spento l’alimentazione per l’alimentatore, interromperne immediatamente evitare il pericolo di scosse elettriche. Una il funzionamento. Spiegare il problema al cliente volta scollegata l’alimentazione, attendere e rifiutarsi di installare l’unità...
- Page 82 4 Installazione Corrente nominale Area nominale assorbita della sezione Blocco terminale Terminal block dall’apparecchiatura trasversale (mm²) Coperchio Wire cover dei cavi > 3 e ≤ 6 0,75 > 6 e ≤ 10 Vite Screw Morsetto del Cable clamp > 10 e ≤ 16 cavo >...
- Page 83 4 Installazione 8. Sostituire il coperchio dei cavi sulla parte ATTENZIONE! Quando anteriore dell’unità e il pannello in plastica sulla avvolgono questi elementi parte posteriore. insieme, non intrecciare il cavo del segnale con alcun altro cavo. La procedura di collegamento cavi potrebbe essere...
-
Page 84: Installazione Dell'unità Esterna
4 Installazione 4. Agganciare la parte superiore dell’unità interna 5. Dopo aver completato il test delle perdite, avvolgere al gancio superiore della piastra di montaggio. il punto di collegamento con nastro isolante. 5. Verificare che l’unità sia agganciata saldamente 6. Rimuovere la staffa o zeppa che puntella l’unità. durante il montaggio applicando una leggera 7. -
Page 85: Istruzioni Per L'installazione - Unità Esterna
4 Installazione 4.3.1 Istruzioni per l'installazione – • In luoghi esposti a grandi quantità di aria Unità esterna salmastra. Passaggio 1: Selezionare la posizione per Se l'unità è esposta a venti l'installazione eccezionalmente forti: Installare l'unità in modo che la ventola Prima di installare l'unità... - Page 86 4 Installazione Passaggio 2: Installare il tubo di scarico (solo unità con pompa di calore) Prima di fissare l'unità esterna in loco, occorre installare il tubo di scarico nella parte inferiore dell'unità. Sono presenti due tipi diversi di tubi di Foro sul pannello della Base pan hole of scarico a seconda del tipo di unità...
- Page 87 4 Installazione Passaggio 3: Ancoraggio dell'unità esterna L’unità esterna può essere ancorata a terra o su una staffa montata a parete con bulloni (M10). Preparare la base di installazione dell'unità secondo quanto indicato nella tabella sottostante. Quanto segue è un elenco di diverse misure di unità...
- Page 88 4 Installazione Se si installa l'unità a terra o su una piattaforma 4. Avvitare i bulloni di espansione attraverso i fori di supporto in cemento, attenersi a quanto segue: sulla staffa di montaggio, collocare la staffa di montaggio in posizione e inserire i bulloni 1.
- Page 89 4 Installazione Nel Nord America, selezionare Coperchio Cover le corrette dimensioni del cavo in base alla portata di corrente minima del circuito indicata sulla targhetta dell’unità. Vite Screw • Tramite uno spellacavi, spelare entrambe l'estremità del cavo scoprendo circa 40 mm del cavo interno.
- Page 90 4 Installazione 7. Utilizzare i controdadi per fissare i tubi del condotto. Blocco terminale Terminal block Cavo di connessione Connecting cable Cavo di Power supply cord alimentazione Pannello condotto Conduit panel Coperchio dei cavi Wire Cover Selezionare il foro passante appropriato in base Please select the appropriate through-hole according al diametro del cavo.
-
Page 91: Collegamento Delle Tubature Del Refrigerante
5 Collegamento delle tubature del refrigerante Durante il collegamento delle tubature del refrigerante, fare in modo che nessuna sostanza o gas diversi dal refrigerante specifico vengano introdotti nell’unità. La presenza di altri gas o sostanze ridurrà la capacità dell’unità e potrebbe provocare un innalzamento imprevisto della pressione all’interno del circuito di refrigerazione. -
Page 92: Istruzioni Di Collegamento - Tubatura Del Refrigerante
5 Collegamento delle tubature del refrigerante 5.1 Istruzioni di collegamento – Tubo Pipe Tubatura del refrigerante Alesatore Reamer Passaggio 1: Taglio dei tubi Quando si preparano i tubi del refrigerante, Verso il Point down prestare molta attenzione a tagliarli e svasarli correttamente. -
Page 93: Istruzioni Per Il Collegamento Dei Tubi All'unità Interna
5 Collegamento delle tubature del refrigerante Quando si piega il tubo del refrigerante di collegamento, il raggio di curvatura minimo è di 10 cm. Raggio ≥10cm ≥10cm (4in) Radius (4 pollici) Estensione del tubo oltre la forma svasata Diametro esterno A (mm) del tubo (mm) Min. -
Page 94: Istruzioni Per Il Collegamento Del Tubo All'unità Esterna
5 Collegamento delle tubature del refrigerante Coppia di serraggio Diametro esterno Dimensione della Forma svasata Coppia di serraggio (N·m) del tubo (mm) svasatura (B) (mm) Ø 6,35 18-20 (180-200 kgf.cm) 8,4-8,7 Ø 9,52 32-39 (320-390 kgf.cm) 13,2-13,5 Ø 12,7 49-59 (490-590 kgf.cm) 16,2-16,5 Ø... -
Page 95: Scarico Dell'aria
6 Scarico dell’aria 6.1 Preparazione e avvertenze Collettore a manometri Manifold Gauge Manometro Compound L'aria sostanze estranee circuito Indicatore della pressione Pressure gauge gauge refrigerante possono provocare aumenti anomali -76cmHg -76cmHg della pressione, che possono danneggiare il Valvola di alta High pressure Valvola di bassa Low pressure... -
Page 96: Note Sull'aggiunta Di Refrigerante
6 Scarico dell’aria ATTENZIONE! Quando si aprono Flare nut Dado svasato gli steli delle valvole, ruotare la chiave esagonale finché non entra in contatto con il tappo. Non tentare di forzare la valvola Cappuccio aprendola ulteriormente. Corpo della valvola valve body Stelo della valvola valve stem 6.1.3 Note sull’aggiunta di refrigerante... - Page 97 6 Scarico dell’aria Refrigerante aggiuntivo per lunghezza del tubo Lunghezza Metodo del tubo di di sfiato Refrigerante aggiuntivo collegamento dell'aria < Lunghezza Pompa a del tubo vuoto standard Lato liquido: Ø 6,35 Lato liquido: Ø 9,52 R32: R32: (Lunghezza tubo – Lunghezza standard) (Lunghezza tubo –...
-
Page 98: Verifiche Elettriche E Delle Perdite Di Gas
7 Verifiche elettriche e delle perdite di gas 7.1 Prima di eseguire il test Ciò potrebbe essere Eseguire il test solo dopo aver completato i necessario per alcune località seguenti passaggi: negli Stati Uniti. • Verifica della sicurezza elettrica: verificare che il sistema elettrico dell'unità... -
Page 99: Esecuzione Del Test
8 Esecuzione del test 8.1 Istruzioni per l’esecuzione del Durante il funzionamento, la test pressione del circuito refrigerante aumenta. Potrebbero verificarsi Occorre eseguire il test di funzionamento per quindi delle perdite non presenti almeno 30 minuti. durante il controllo iniziale. 1. - Page 100 8 Esecuzione del test Pulsante per il controllo Manual control button manuale Condizionatore d’aria di tipo split / Manuale utente 100 / 172 IT...
-
Page 101: Cura E Manutenzione
9 Cura e manutenzione 9.1 Pulizia dell'unità interna 9.2 Pulizia del filtro dell'aria Un condizionatore d'aria ostruito può vedere ATTENZIONE! Spegnere sempre ridotta l'efficacia del raffreddamento dell'unità ed il sistema del condizionatore d'aria scollegarne essere inoltre nocivo per la salute. Accertarsi di l'alimentazione prima della pulizia pulire il filtro una volta ogni due settimane. - Page 102 9 Cura e manutenzione ATTENZIONE! • Prima di sostituire il filtro o eseguire la pulizia, spegnere l'unità scollegarne l'alimentazione. • Durante la rimozione del filtro, non toccare le parti metalliche Filter Tabs Alette del filtro dell'unità. Le lame metalliche sono affilate e possono provocare lesioni.
-
Page 103: Manutenzione - Mancato Utilizzo Per Lunghi Periodi Di Tempo
9 Cura e manutenzione 9.3 Manutenzione – Mancato 9.4 Manutenzione – Controllo utilizzo per lunghi periodi di prima dell'inizio della stagione tempo Dopo lunghi periodi di non uso o prima di periodi di uso frequente, attenersi a quanto segue: Se si programma di non utilizzare il condizionatore d'aria per lunghi periodi di tempo, attenersi a quanto segue: Verificare che non vi siano fili... -
Page 104: Problemi Comuni
10 Risoluzione dei problemi ATTENZIONE! Se si verifica una qualunque delle seguenti condizioni, spegnere immediatamente l'unità! • Il cavo di alimentazione è danneggiato o caldo in maniera anomala. • Si percepisce un odore di bruciato. • L'unità emette rumori o suoni anomali. •... - Page 105 10 Risoluzione dei problemi Sia l'unità interna che quella esterna Un sibilo profondo durante il funzionamento: è normale ed è provocato emettono rumori dal gas refrigerante che scorre attraverso l'unità interna ed esterna. Un sibilo profondo quando il sistema si avvia, si è appena arrestato o è...
- Page 106 10 Risoluzione dei problemi 10.2 Risoluzione dei problemi Quando si verifica un problema, verificare i seguenti punti prima di contattare una ditta di riparazioni. Problema Possibili cause Soluzione L'impostazione della temperatura può essere superiore rispetto alla Impostare una temperatura più bassa temperatura ambiente della stanza Lo scambiatore di calore dell'unità...
- Page 107 10 Risoluzione dei problemi Problema Possibili cause Soluzione Interruzione di corrente Attendere che l'elettricità venga ripristinata L'alimentazione è spenta Accendere l'alimentazione Il fusibile è bruciato Sostituire il fusibile L'unità non Le batterie del telecomando sono esaurite Sostituire le batterie funziona La protezione della durata di 3 minuti Attendere 3 minuti prima di riavviare l'unità...
- Page 108 10 Risoluzione dei problemi Se il problema persiste dopo l'esecuzione delle verifiche e degli strumenti diagnostici sopra, spegnere immediatamente l'unità rivolgersi a un centro assistenza autorizzato. Condizionatore d’aria di tipo split / Manuale utente 108 / 172 IT...
-
Page 109: Normative Europee Per Lo Smaltimento
11 Normative europee per lo smaltimento Il presente simbolo indica che questo prodotto non può Questo elettrodomestico contiene refrigerante e altri essere smaltito insieme ai rifiuti domestici al termine del suo materiali potenzialmente pericolosi. La legge stabilisce che ciclo di vita. Il dispositivo usato deve essere conferito presso l’apparecchio venga smaltito tramite una raccolta e un il punto di raccolta ufficiale di riciclo di dispositivi elettrici trattamento speciali. -
Page 110: Istruzioni Per L'installazione
12 Istruzioni per l'installazione 12.1 Istruzioni per i gas fluorurati Questo prodotto contiene gas fluorurati a effetto serra. I gas fluorurati ad effetto serra sono contenuti in attrezzatura sigillata ermeticamente. Installazioni, riparazioni, manutenzione, controlli della presenza di perdite, smantellamento e riciclo del prodotto devono essere effettuati da personale qualificato. - Page 111 13 Specifiche tecniche BEHPH Unità interna BEHPH 090 BEHPH 120 BEHPH 180 BEHPH 240 Nome modello Unità esterna BEHPH 091 BEHPH 121 BEHPH 181 BEHPH 241 Refrigerante Quantità refrigerante totale (g) 1100 1450 Equivalente di CO2 (tonnellate) 0,37 0,37 0,74...
- Page 112 13 Specifiche tecniche Unità interna BEHPH 090 BEHPH 120 BEHPH 180 BEHPH 240 Nome modello Unità esterna BEHPH 091 BEHPH 121 BEHPH 181 BEHPH 241 220-240V~ 220-240V~ Tensione/Frequenza (V/Hz) 220-240V, 1Ph, 50Hz 220-240V, 1Ph, 50Hz 50Hz, 1Ph 50Hz, 1Ph Corrente di funzionamento raffreddamento (A) Corrente di funzionamento riscaldamento (A) Livello pressione rumore: unità...
- Page 113 13 Specifiche tecniche BEVPI Unità interna BEVPI 090 BEVPI 120 BEVPI 180 BEVPI 240 Nome modello Unità esterna BEVPI 091 BEVPI 121 BEVPI 181 BEVPI 241 Refrigerante Quantità refrigerante totale (g) 1100 1450 Equivalente di CO2 (tonnellate) 0,37 0,37 0,74 0,98 Antistatico Classe I...
- Page 114 13 Specifiche tecniche Unità interna BEVPI 090 BEVPI 120 BEVPI 180 BEVPI 240 Nome modello Unità esterna BEVPI 091 BEVPI 121 BEVPI 181 BEVPI 241 220-240V~ 50Hz, 220-240V~ 50Hz, Tensione/Frequenza (V/Hz) 220-240V, 1Ph, 50Hz 220-240V, 1Ph, 50Hz Corrente di funzionamento raffreddamento (A) Corrente di funzionamento riscaldamento (A) Livello pressione rumore: unità...
- Page 115 Veuillez d’abord lire ce manuel d’utilisation. Cher client, Nous vous remercions d’avoir acheté un produit Beko. Nous espérons que ce produit vous apportera entière satisfaction. Tous nos produits sont fabriqués dans une usine moderne et font l’objet d’un contrôle de qualité minutieux. À cet effet, veuillez lire en intégralité le présent manuel avant d’utiliser cet appareil et conservez-le soigneusement pour une utilisation ultérieure.
- Page 116 TABLES DES MATIÈRES 1 Consignes de sécurité 7 Vérifications des fuites d’électricité et de gaz 2 Vue d’ensemble 7 Vérifications des fuites d’électricité et de gaz 2.1 Pièces de l’appareil ..........126 7.1 Avant l’exécution des tests ........156 2.2 Pièces et commandes ..........127 7.2 Contrôle de sécurité...
-
Page 117: Consignes De Sécurité
1 Consignes de sécurité Avertissement du secteur. Appelez votre revendeur pour obtenir des Cet appareil peut être utilisé par instructions afin d’éviter une des enfants âgés d’au moins électrocution, un incendie ou 8 ans et par des personnes des blessures. ayant des capacités physiques, N’insérez pas de doigts, •... - Page 118 1 Consignes de sécurité N’exposez pas votre corps N e n e t t o y e z p a s l e • • d i r e c t e m e n t à l ’ a i r f r o i d climatiseur avec des nettoyants pendant une période prolongée.
- Page 119 1 Consignes de sécurité Avertissements d’ordre Ne partagez pas la prise • électrique électrique avec d’autres appareils. Une alimentation électrique Utilisez uniquement le cordon • inadéquate ou insuffisante peut d’alimentation spécifié. Si provoquer un incendie ou une l e c o r d o n d ’ a l i m e n t a t i o n décharge électrique.
- Page 120 1 Consignes de sécurité Remarque sur les To u t l e c â b l a g e d o i t ê t r e • caractéristiques du fusible aménagé convenablement de manière que le couvercle de La carte de circuit imprimé (PCB) la carte principale peut être du climatiseur est protégée contre fermé...
- Page 121 1 Consignes de sécurité 2. L’installation doit être n’est effectuée effectuée en suivant les correctement, l’appareil instructions d’installation. Une risque de tomber et provoquer installation incorrecte peut des blessures graves et des provoquer une fuite d’eau, dégâts matériels importants. une décharge électrique ou 6.
- Page 122 1 Consignes de sécurité 10. Lors du déplacement ou 2. L’installation, le service, du repositionnement du l’entretien et la maintenance climatiseur, contactez des de cet appareil doivent être techniciens expérimentés effectués par un technicien pour le débranchement et la qualifié. réinstallation de l’unité.
- Page 123 1 Consignes de sécurité Avertissement concernant Les connecteurs mécaniques • l’utilisation du réfrigérant réutilisables et les raccords R32/R290 évasés ne sont pas autorisés à l’intérieur. (Exigences de la En cas d’utilisation de réfrigérant • norme EN). inflammable, l’appareil doit Les connecteurs mécaniques être entreposé...
- Page 124 1 Consignes de sécurité Les connecteurs mécaniques traitement particulier. Ne jetez • utilisés à l’intérieur doivent pas ce produit parmi les déchets être conformes à la norme ménagers. ISO 14903. Pour la mise au rebut cet appareil, vous avez les options suivantes : Directives européennes Apportez cet appareil à...
-
Page 125: Vue D'ensemble
2 Vue d’ensemble Le climatiseur est livré avec les accessoires suivants. Utilisez toutes les pièces et accessoires d’installation pour installer le climatiseur. Une installation incorrecte peut provoquer une fuite d’eau, une décharge électrique ou un incendie, ou endommager l’unité. Ces articles ne sont pas fournis avec le climatiseur et doivent être achetés séparément. -
Page 126: Pièces De L'appareil
2 Vue d’ensemble Forme Quantité (PC) 6,35 (1/4 po) Pour liquide Pièces à acheter séparément. 9,52 (3/8 po) Consultez le vendeur pour connaître dimension 9,52 (3/8 po) Tuyauterie appropriée des tuyaux pour 12,7 (1/2 po) l’appareil que vous avez Pour gaz acheté. -
Page 127: Pièces Et Commandes
2 Vue d’ensemble Interrupteur- Air-break switch sectionneur (1) (2) 2.2 Pièces et commandes 1. Plaque de fixation murale 2. Façade 3. Câble d’alimentation (certains appareils) 4. Volet d’aération 5. Filtre fonctionnel (à l’arrière du filtre principal, sur certains appareils) 6. Tuyau d’évacuation 7. -
Page 128: Caractéristiques Et Fonctionnalités De L'appareil
3 Caractéristiques et fonctionnalités de l’appareil 3.1 Écran de l’unité intérieure Les illustrations figurant dans Les différents modèles ont des manuel sont fournies panneaux avant et des écrans uniquement à titre explicatif. d’affichage variés. Les témoins La forme réelle de votre unité décrits ci-dessous ne sont pas tous présents sur le climatiseur que vous intérieure... -
Page 129: Température De Fonctionnement
3 Caractéristiques et fonctionnalités de l’appareil Power Cable (Some Units Front Panel Power Cable (Some Units Power Cable (Some Units Câble d’alimentation (certains appareils) Front Panel Front Panel Power Cable (Some Units Power Cable (Some Units Front Panel Front Panel Façade Power Cable (Some Units Front Panel... -
Page 130: Type Bibloc À Variateur
3 Caractéristiques et fonctionnalités de l’appareil 3.3 Type bibloc à variateur Mode HEAT Mode DRY Mode COOL (REFROIDISSEMENT) (CHAUFFAGE) (DÉSHUMIDIFICATION) Température de 0 à 30 °C 17 à 32 °C (62 à 90 °F) 10 à 32 °C (50 à 90 °F) la pièce (32 à... -
Page 131: Autres Fonctions
3 Caractéristiques et fonctionnalités de l’appareil • Commande sans fil Wi-Fi (certains appareils) Humidité relative ambiante inférieure à 80 %. Si La commande sans fil Wi-Fi vous permet de piloter climatiseur fonctionne votre climatiseur grâce à votre téléphone mobile, dehors de ces valeurs, de la l’application HomeWhiz ainsi qu’une connexion condensation peut se former sans fil. -
Page 132: Réglage De L'angle De Flux D'air
3 Caractéristiques et fonctionnalités de l’appareil 3.6.2 Réglage de l’angle horizontal de Fonction SLEEP (Sommeil) SLEEP Operation flux Mode Cool (refroidissement) (+1 °C/2 °F) par Cool mode(+1 C/2 F) per hour L’angle horizontal du flux d’air doit être réglé heure pendant les deux premières heures for the first two hours Keep Continue de... -
Page 133: Commande Manuelle (Sans Télécommande)
3 Caractéristiques et fonctionnalités de l’appareil 3.8 Commande manuelle Ne bougez pas le volet avec la (sans télécommande) main. Cela désynchroniserait le volet. Si cela se produit, éteignez ATTENTION ! Le bouton manuel l’appareil débranchez-le est prévu à des fins d’essai et pendant quelques secondes, de fonctionnement d’urgence puis redémarrez l’appareil. -
Page 134: Installation
4 Installation 4.1 Sommaire de l’installation - Unité intérieure 15 cm (5,9 po) 15cm (5.9in) 12cm 12 cm 12cm 12 cm (4,75 po) (4,75 po) (4.75in) (4.75in) 2,3 m (90,55 po) 2.3m (90.55in) Déterminer la position du trou dans le mur Fixer la plaque de montage Attach Mounting Plate Choisir l’emplacement de l’installation Select Installation Location Determine Wall Hole Position... -
Page 135: Instructions D'installation De L'unité Intérieure
4 Installation 4.2 Instructions d’installation de S’il n’y a pas de tuyauterie de l’unité intérieure réfrigérant fixée : Il faut prévoir un trou dans le mur (voir l’étape Percer un trou dans le mur 4.2.1 Avant l’installation pour le raccordement de la Avant d’installer l’unité... -
Page 136: Dimensions De La Plaque De Montage
4 Installation 4.2.2 Dimensions de la plaque de Si le mur est en brique, en béton montage ou en un matériau similaire, percez des trous de diamètre La plaque de montage dépend du modèle. Pour 5 mm (0,2 po) et insérez-y les les différentes exigences de personnalisation, chevilles fournies. - Page 137 4 Installation 3. Le cache-trou dispose d’une rainure qui permet 517.4mm (20.37in) une découpe facile. La taille de la fente est 517,4 mm (20,37 po) 144mm (5.65in) 144 mm (5,65 po) 138 mm (5,45 po) 138mm (5.45in) déterminée par le diamètre de la conduite. Contour de l’unité...
-
Page 138: Avant D'effectuer Tout Travail Électrique, Veuillez Lire Ces Réglementations
4 Installation Étape 5 : Raccordement du tuyau de drainage Bouchage du trou de drainage Par défaut, le tuyau de drainage est fixé au côté inutilisé. Pour éviter toute fuite gauche de l’unité (par l’arrière de l’unité). Il peut indésirable, branchez le trou de également être fixé... - Page 139 4 Installation 8. N’oubliez pas que le climatiseur doit être mis Si vous résidez en Amérique à la terre. du Nord, choisissez le type de câble en fonction des codes 9. Tous les fils doivent être solidement serrés. et réglementations électriques Un câblage non serré...
- Page 140 4 Installation 7. Après avoir vérifié que chaque connexion est bien effectuée, remettez le serre-câble Bornier pour fixer le câble de signal de l’unité. Vissez Terminal block Couvre-fils fermement le serre-câble. Wire cover 8. Remettez en place le couvercle de la boîte de jonction à...
- Page 141 4 Installation 5. Vérifiez que l’unité est bien accrochée à la ATTENTION ! Lors plaque de montage en appuyant légèrement regroupement des câbles et des sur ses côtés gauche et droit. L’unité ne doit ni tuyaux, ne croisez pas le câble de se balancer ni se déplacer.
-
Page 142: Installation De L'unité Extérieure
4 Installation 4.3.1 Instructions d’installation - Unité 7. Poussez vers le bas la moitié inférieure de l’unité extérieure en exerçant une pression uniforme. Continuez à pousser doucement vers le bas jusqu’à ce Étape 1 : Choisir l’emplacement de l’installation que l’unité s’enclenche dans les crochets se Avant d’installer l’unité... - Page 143 4 Installation • Près d’une source de gaz combustible Étape 2 : Installez le raccord d’évacuation (unité de pompe à chaleur uniquement) • Dans un endroit poussiéreux. Avant de fixer l’unité extérieure en place, vous • Dans un endroit exposé aux dépôts salins devez installer le raccord de vidange au bas de excessifs.
- Page 144 4 Installation Préparez la base d’installation de l’unité en fonction des dimensions ci-après. La liste suivante donne les différentes tailles des unités extérieures et l’écart entre les Trou du plateau de base Base pan hole of pieds de fixation. Préparez la base de l’unité...
- Page 145 4 Installation Dimensions des unités extérieures (mm) Dimensions de montage l x H x P Distance A (mm) Distance B (mm) 890 x 673 x 342 (35 x 26,5 x 13,5 po) 663 (26,1 po) 354 (13,9 po) 946 x 810 x 420 (37,2 x 31,9 x 16,5 po) 673 (26,5 po) 403 (15,9 po) 946 x 810 x 410 (37,2 x 31,9 x 16,1 po)
- Page 146 4 Installation 5. Après avoir vérifié la solidité de toutes les section câble connexions, enroulez les fils autour pour éviter d’alimentation/signal, du fusible que l’eau de pluie ne s’écoule dans le bornier. et de l’interrupteur est déterminée 6. À l’aide du serre-câble, fixez le câble à l’unité. par le courant maximal de l’unité.
- Page 147 4 Installation Si vous résidez en Amérique du Nord 1. Retirez le couvre-fils de l’appareil en desserrant les 3 vis. 2. Démontez le couvercle sur le panneau des conduits. 3. Montez temporairement les tubes de conduit (non inclus) sur le panneau des conduits. 4.
-
Page 148: Raccordement De La Tuyauterie De Réfrigérant
5 Raccordement de la tuyauterie de réfrigérant Lors du raccordement de la tuyauterie de réfrigérant, veillez à ce qu’aucune substance et aucun gaz autre que le réfrigérant spécifié ne pénètre dans l’unité. La présence d’autres gaz ou substances réduit la capacité de l’appareil et peut provoquer une pression anormalement élevée dans le cycle de réfrigération. -
Page 149: Instructions De Raccordement De La Conduite De Gaz Réfrigérant
5 Raccordement de la tuyauterie de réfrigérant 5.1 Instructions de raccordement Conduite Pipe de la conduite de gaz réfrigérant Alésoir Reamer Étape 1 : couper les conduits Lors de la préparation des conduits de gaz Diriger vers Point down réfrigérant, procédez avec précaution à leur coupe et évasez-les correctement. -
Page 150: Instructions De Raccordement De La Conduite À L'unité Intérieure
5 Raccordement de la tuyauterie de réfrigérant Lorsque vous courbez une conduite de raccordement de gaz réfrigérant, le rayon de courbure minimum doit être de 10 cm. Rayon ≥ 10 cm ≥10cm (4in) Radius (4 po) Prolongement du conduit au-delà de la forme évasée Diamètre A (mm) -
Page 151: Instructions De Raccordement De La Conduite À L'unité Extérieure
5 Raccordement de la tuyauterie de réfrigérant Exigences du couple Diamètre Dimension de l’évasement de conduite Couple de serrage (N•m) Forme d’évasement (B) (mm) extérieure (mm) Ø 6,35 (Ø 0,25 po) 18 à 20 (180 à 200 kgf.cm) 8,4 à 8,7 (0,33 à 0,34 po) Ø... - Page 152 5 Raccordement de la tuyauterie de réfrigérant Climatiseur fixe / Notice d’utilisation 152 / 172 FR...
-
Page 153: Évacuation De L'air
6 Évacuation de l’air 6.1 Préparations et précautions Jauge à conduit Manifold Gauge Jauge de Compound De l’air ou des corps étrangers dans le circuit Manomètre Pressure gauge composé gauge du gaz réfrigérant peuvent produire une -76 cmHg -76cmHg hausse anormale de la pression, en mesure Vanne haute High pressure Vanne basse... -
Page 154: Remarque Sur L'appoint De Gaz Réfrigérant
6 Évacuation de l’air ATTENTION ! Lors de l’ouverture Flare nut Écrou évasé de la tige de vanne, tournez avec la clé hexagonale jusqu’à ce qu’elle bute. N’essayez pas de forcer l’ouverture de la vanne au-delà. Bouchon Corps de vanne valve body 6.1.3 Remarque sur l’appoint de gaz Tige de vanne... -
Page 155: Vérifications Des Fuites D'électricité Et De Gaz
7 Vérifications des fuites d’électricité et de gaz Gaz réfrigérant supplémentaire par longueur de conduit Longueur de Méthode conduite de de purge Gaz réfrigérant supplémentaire raccordement d’air < Longueur Pompe à de conduite vide normale Côté liquide : Ø 6,35 (ø 0,25 po) Côté... -
Page 156: Vérifications Des Fuites D'électricité Et De Gaz
7 Vérifications des fuites d’électricité et de gaz 7.1 Avant l’exécution des tests Cette valeur n’est pas obligatoire Exécutez les tests uniquement après avoir dans certaines régions complété les étapes suivantes : Amérique du Nord. • Contrôle de sécurité électrique - Vérifiez que le circuit électrique de l’unité... -
Page 157: Essai
8 Essai 8.1 Instructions d’exécution des Pendant le fonctionnement, la tests pression du circuit de gaz réfrigérant augmentera. fuites L’exécution des tests devrait durer au moins n’existaient pas pendant le contrôle 30 minutes. de fuite initiale peuvent apparaître. Prenez le temps pendant l’exécution 1. -
Page 158: Nettoyage Et Entretien
9 Nettoyage et entretien 9.1 Nettoyage de votre unité 9.2 Nettoyage de votre filtre d’air intérieure Une obstruction du climatiseur peut réduire l’efficacité de refroidissement de votre appareil ATTENTION ! Éteignez toujours et nuire à votre santé. Nettoyez le filtre une fois votre climatiseur et débranchez- toutes les deux semaines. - Page 159 9 Nettoyage et entretien ATTENTION ! • Avant de changer ou de changer le filtre, éteignez l’appareil et débranchez-le du secteur. • En enlevant le filtre, ne touchez pas les pièces métalliques Filter Tabs Pattes de filtre dans l’appareil. Les bords métalliques tranchants peuvent vous couper.
-
Page 160: Entretien - Périodes D'arrêt Prolongées
9 Nettoyage et entretien 9.3 Entretien - périodes d’arrêt 9.4 Maintenance - inspection prolongées présaisonnière Si vous ne comptez pas utiliser votre climatiseur Après de longues périodes sans utilisation ou avant longtemps, faites ce qui suit : avant des périodes d’usage fréquent, faites ce qui suit : Activez la fonction FAN (VENTILATION) Nettoyez tous les filtres. -
Page 161: 10 Dépannage
10 Dépannage ATTENTION ! Si l’UNE des conditions suivantes se présente, éteignez immédiatement votre appareil ! • Le cordon d’alimentation est endommagé ou anormalement chaud. • Il y a une odeur de brûlé. • L’appareil émet des sons forts ou anormaux. •... - Page 162 10 Dépannage Problème Causes possibles L’unité extérieure fait du bruit L’appareil fera différents sons selon son mode de fonctionnement actuel. L’unité intérieure ou l’unité extérieure Durant de longues périodes de non-utilisation, l’appareil peut accumuler émet de la poussière de la poussière, qui sera émise au démarrage de l’appareil. Cela peut être atténué...
-
Page 163: Dépannage
10 Dépannage 10.2 Dépannage Lorsque des problèmes surviennent, vérifiez les points suivants avant de contacter un réparateur. Problème Causes possibles Solution Le réglage de température peut être supérieur à la température ambiante Baissez le réglage de température de la pièce L’échangeur de chaleur sur l’unité... - Page 164 10 Dépannage Problème Causes possibles Solution Coupure d’alimentation Attendez que l’alimentation soit rétablie L’alimentation électrique est désactivée Mettez l’appareil sous tension Le fusible est grillé Remplacez le fusible L’appareil ne Les piles de la télécommande sont usées Remplacez les piles. fonctionne pas La protection de 3 minutes de l’appareil Attendez trois minutes après le redémarrage de...
- Page 165 10 Dépannage Si votre problème persiste après avoir effectué les vérifications et diagnostics ci-dessus, éteignez immédiatement votre appareil et contactez un réparateur agréé. Climatiseur fixe / Notice d’utilisation 165 / 172 FR...
-
Page 166: Directive Européenne Concernant La Mise Au Rebut
11 Directive européenne concernant la mise au rebut Ce symbole indique que ce produit ne doit pas être jeté avec Cet appareil contient du réfrigérant et d’autres substances les déchets ménagers à la fin de sa vie. Les appareils usagés potentiellement dangereuses. -
Page 167: Instructions D'installation
12 Instructions d’installation 12.1 Consignes de la F-Gaz Ce produit contient des gaz à effet de serre fluorés. Les gaz à effet de serre fluorés sont contenus dans un dispositif hermétiquement scellé. Les opérations d’installation, d’entretien, de maintenance, de réparation, de vérifications de fuites éventuelles, de mise hors service des équipements obsolètes ainsi que de recyclage des produits doivent être effectuées par une personne... -
Page 168: Spécifications
13 Spécifications BEHPH Unité intérieure BEHPH 090 BEHPH 120 BEHPH 180 BEHPH 240 Nom du modèle Unité extérieure BEHPH 091 BEHPH 121 BEHPH 181 BEHPH 241 Gaz réfrigérant Quantité totale de gaz réfrigérant (g) 1100 1450 équivalent (tonnes) 0,37 0,37... - Page 169 13 Spécifications Unité intérieure BEHPH 090 BEHPH 120 BEHPH 180 BEHPH 240 Nom du modèle Unité extérieure BEHPH 091 BEHPH 121 BEHPH 181 BEHPH 241 Courant de fonctionnement en mode chauffage Niveau de pression sonore - Unité intérieure (dBA) Niveau de pression sonore - Unité extérieure (dBA) Volume d’écoulement d’air (m...
- Page 170 13 Spécifications BEVPI Unité intérieure BEVPI 090 BEVPI 120 BEVPI 180 BEVPI 240 Nom du modèle Unité extérieure BEVPI 091 BEVPI 121 BEVPI 181 BEVPI 241 Gaz réfrigérant Quantité totale de gaz réfrigérant (g) 1100 1450 équivalent (tonnes) 0,37 0,37 0,74 0,98 Anti-électrocution.
- Page 171 13 Spécifications Unité intérieure BEVPI 090 BEVPI 120 BEVPI 180 BEVPI 240 Nom du modèle Unité extérieure BEVPI 091 BEVPI 121 BEVPI 181 BEVPI 241 Courant de fonctionnement en mode chauffage Niveau de pression sonore - Unité intérieure (dBA) Niveau de pression sonore - Unité extérieure (dBA) Volume d’écoulement d’air (m 416/309/230...
- Page 172 Arçelik A.Ş. Karaağaç Caddesi No:2-6 34445, Sütlüce, İstanbul, Türkiye www.beko.com...
- Page 173 Remote Control User Manual EN - IT - FR 10M-8505543200-4921-01...
- Page 174 CONTENTS ENGLISH 3-19 ITALIANO 20-37 FRANÇAIS 38-56 V2110002 AB RC...
- Page 175 Please read this user manual first! Dear Customer, Thank you for preferring a Beko product. We hope that you get the best results from your product which has been manufactured with high quality and state-of-the-art technology. Therefore, please read this entire user manual and all other accompanying documents carefully before using the product and keep it as a reference for future use.
- Page 176 CONTENTS 1 Remote controller specifications 1.1 Quick start guide ..........5 2 Handling the remote controller 2.1 Inserting and replacing batteries ......6 2.2 Tips for using remote control ......6 2.3 Notes for using remote control ......6 3 Buttons and functions 4 Remote screen indicators 5 How to use basic functions 5.1 Basic operation ..........11 5.2 AUTO Mode .............11...
-
Page 177: Remote Controller Specifications
1 Remote controller specifications Model RG10B(L)/BGEF Rated voltage 3.0V (Dry batteries R03/LR03×2) Signal receiving range Environment -5°C~60°C (23°F~140°F) 1.1 Quick start guide NOT SURE WHAT A FUNCTION DOES? Refer to the How to Use Basic Functions and How to Use Advanced Functions sections of this manual for a detailed description of how to use your air conditioner. -
Page 178: Handling The Remote Controller
2 Handling the remote controller 2.1 Inserting and replacing 2.2 Tips for using remote control batteries • The remote control must be used within 8 meters of the unit. Your air conditioning unit may come with two • The unit will beep when remote signal is batteries (some units). - Page 179 2 Handling the remote controller However, there is no guarantee that interference will not occur in a particular installation. If this equipment does cause harmful interference to radio or television reception, which can be determined by turning the equipment off and on, the user is encouraged to try to correct the interference by one or more of the following measures:...
-
Page 180: Buttons And Functions
3 Buttons and functions Before you begin using your new air conditioner, make sure to familiarize yourself with its remote control. The following is a brief introduction to the remote control itself. For instructions on how to operate your air conditioner, refer to the How to Use Basic Functions section of this manual. - Page 181 3 Buttons and functions 1. ON/OFF 9. SLEEP Turns the unit on or off. Press this button to enter Sleep mode. 2. TEMP 10. TIMER Increases temperature in 1°C (1°F) increments. Set timer to turn unit on or off. Max. temperature is 30°C (86°F). 11.
-
Page 182: Remote Screen Indicators
4 Remote screen indicators Information are displayed when the remote controller is power up. Fresh feature display (some units) Fresh feature display(some units) (No displays when Fresh feature is activated) (No displays when Fresh feature is activated) Sleep mode display Sleep mode display ZoneFollow feature display Zone Follow... -
Page 183: How To Use Basic Functions
5 How to use basic functions 5.1 Basic operation ATTENTION! Before operation, please ensure the unit is plugged in and power is available. Mode Sleep Mode Sleep Timer Timer Swing Swing Self Self Turbo Turbo Clean+ Clean+ 5.3 COOL Mode 5.2 AUTO Mode 1. -
Page 184: Fan Mode
5 How to use basic functions Mode Sleep Mode Sleep Timer Timer Swing Swing Self Turbo Self Clean+ Turbo Clean+ 5.4 FAN Mode 5.5 DRY Mode (dehumidifying) 1. Press the MODE button to select FAN mode. 1. Press the MODE button to select DRY. 2. -
Page 185: Heat Mode
5 How to use basic functions Mode Sleep Timer Swing Self Turbo Clean+ 5.6 HEAT Mode 1. Press the MODE button to select HEAT mode. 2. Set your desired temperature using the TEMP or TEMP button. 3. Press FAN button to select the fan speed: AUTO, LOW, MED or HIGH. -
Page 186: Setting The Timer
6 Setting the timer TIMER ON/OFF - Set the amount of time after which the unit will automatically turn on/off. 6.1 Timer on setting Press TIMER button to initiate the Press Temp. up or down button for multiple Point remote to unit and wait 1sec, ON time sequence. -
Page 187: Timer On & Off Setting (Example)
6 Setting the timer 6.3 Timer on & off setting (example) Keep in mind that the time periods you set for both functions refer to hours after the current time. TIMER TIMER Timer Unit turns Unit turns Unit turns Timer Unit turns starts starts... -
Page 188: How To Use Advanced Functions
7 How to use advanced functions 7.1 Swing function If pushing more than 2 seconds, the system will automatically restore the current operation Press Swing button settings including operating mode, setting temperature, fan speed level and sleep feature (if activated). Swing 7.3 Led display Press LED button... -
Page 189: Selfclean
7 How to use advanced functions 7.4 SelfClean+ The SLEEP function is not available Press SelfClean+ button in FAN or DRY mode. 7.6 Silence function Self Clean+ Airborne bacteria can grow in the moisture that condenses around heat exchanger in the unit. With regular use, most of this moisture is evaporated from the unit. -
Page 190: Freezing Protection
7 How to use advanced functions 7.7 Freezing protection 7.9 Turbo function Press TURBO button Turbo The unit will operate at high fan speed (while compressor on) with temperature automatically When you select Turbo feature in COOL mode, the set to 8°C/46°F. unit will blow cool air with strongest wind setting to jump-start the cooling process. -
Page 191: Set Function
7 How to use advanced functions 7.10 Set function • Press the SET button to enter the function Press and hold turbo button for setting, then press SET button or TEMP Seven seconds start/stop memory feature of ZoneFollow TEMP button to select the desired function. function. - Page 192 Prima dell’utilizzo, leggere il presente manuale. Gentile Cliente, grazie per aver scelto un prodotto Beko. Ci auguriamo che possa essere soddisfatto del prodotto che è stato realizzato secondo elevati standard di qualità e con una tecnologia all'avanguardia. Pertanto, prima di utilizzare il prodotto, legga attentamente tutto il manuale e i documenti che lo accompagnano avendo cura di conservarli per un riferimento futuro.
- Page 193 SOMMARIO 1 Specifiche tecniche del telecomando 1.1 Guida di avvio rapido ........22 2 Gestione del telecomando 2.1 Inserimento e sostituzione delle batterie ....23 2.2 Consigli sull'utilizzo del telecomando ....23 2.3 Note per l'utilizzo del telecomando ....23 3 Tasti e funzioni 4 Indicatori luminosi del telecomando 5 Come utilizzare le funzioni di base 5.1 Funzionamento di base........28...
-
Page 194: Specifiche Tecniche Del Telecomando
1 Specifiche tecniche del telecomando Modello RG10B(L)/BGEF Tensione nominale 3,0 V (2 pile a secco R03/LR03) Intervallo di ricezione del segnale Ambiente da -5 °C a 60 °C 1.1 Guida di avvio rapido DUBBI SULL’UTILIZZO DI UNA FUNZIONE? Consultare sezioni Come utilizzare le funzioni di base e Come utilizzare le funzioni... -
Page 195: Gestione Del Telecomando
2 Gestione del telecomando 2.1 Inserimento e sostituzione 2.2 Consigli sull'utilizzo del delle batterie telecomando • Utilizzare il telecomando entro 8 m dall'unità. Il condizionatore d’aria potrebbe essere fornito con due batterie (alcuni modelli). Inserire le batterie nel • L'unità emette un segnale acustico quando telecomando prima dell'uso. - Page 196 2 Gestione del telecomando Tuttavia, non vi è alcuna garanzia che non si verifichino interferenze in una particolare installazione. Se questa apparecchiatura causa interferenze dannose alla ricezione radio o televisiva, che può essere determinato spegnendo l'apparecchio e riaccendendolo, si consiglia di tentare di correggere l'interferenza adottando una o più...
-
Page 197: Tasti E Funzioni
3 Tasti e funzioni Prima di iniziare ad utilizzare il condizionatore d’aria, assicurarsi di acquisire familiarità con il telecomando. Quella che segue è una breve introduzione allo stesso. Per istruzione sull’uso del condizionatore, consultare la sezione Come utilizzare le funzioni di base di questo manuale. Mode Sleep Timer... - Page 198 3 Tasti e funzioni 1. ON/OFF (Accensione/Spegnimento) 8. MODE (Modalità) Consente l'accensione o lo spegnimento dell'unità. Consente di scorrere tra le modalità di funzionamento come segue: AUTO (AUTOMATICA) COOL 2. TEMP (TEMPERATURA) (RAFFREDDAMENTO) DRY (DEUMIDIFICAZIONE) Aumenta la temperatura con incrementi di 1°C HEAT (RISCALDAMENTO) FAN (VENTILAZIONE) ...
-
Page 199: Indicatori Luminosi Del Telecomando
4 Indicatori luminosi del telecomando Le informazioni vengono visualizzate quando il telecomando è acceso. Icona della funzione Fresh (Fresco) (solo alcuni modelli) Fresh feature display(some units) (No displays when Fresh feature is activated) (non appare quando la funzione Fresh (Fresco) è attiva) Sleep mode display Modalità... -
Page 200: Come Utilizzare Le Funzioni Di Base
5 Come utilizzare le funzioni di base 5.1 Funzionamento di base in modalità AUTO (AUTOMATICO) non è possibile impostare la ATTENZIONE! Prima della velocità di ventilazione FAN SPEED messa in funzione, assicurarsi (VELOCITÀ VENTILAZIONE). che l’unità sia collegata e che l'alimentazione sia disponibile. -
Page 201: Modalità Fan (Ventilazione)
5 Come utilizzare le funzioni di base L’intervallo della temperatura operativa dell'unità in modalità FAN (VENTILAZIONE) è 17-30 °C (62-86°F)/20-28 °C. non è possibile impostare la È possibile aumentare o diminuire la temperatura temperatura. Di conseguenza, sullo schermo LCD del telecomando impostata con incrementi di 1 °C . -
Page 202: Modalità Heat (Riscaldamento)
5 Come utilizzare le funzioni di base quando la temperatura esterna scende, le prestazioni della funzione di Riscaldamento dell'unità in uso potrebbero risentirne. In tal caso, si consiglia di utilizzare il condizionatore d’aria insieme a un altro apparecchio di riscaldamento. Mode Sleep Timer... -
Page 203: Impostazione Del Timer
6 Impostazione del timer TIMER ON/OFF (Timer di accensione/spegnimento): consente di impostare il lasso di tempo dopo il quale l’unità si accende o si spegne automaticamente. 6.1 Impostazione del timer di accensione Premere il pulsante TIMER per Premere più volte il pulsante Temp Puntare il telecomando verso l’unità... - Page 204 6 Impostazione del timer 1. Quando si impostano le funzioni TIMER ON (TIMER ACCENSIONE) TIMER (TIMER SPEGNIMENTO), ogni pressione del tasto incrementa il valore di 30 minuti, fino a un massimo di 10 ore. Dopo le 10 ore e fino alle 24 ore, gli incrementi sono di 1 ora.
-
Page 205: Impostazione Del Timer Di Accensione/Spegnimento (Esempio)
6 Impostazione del timer 6.3 Impostazione del timer di accensione/spegnimento (esempio) Tenere bene a mente che i periodi di tempo che si impostano per entrambe le funzioni si riferiscono alle ore successive all'ora corrente. TIMER TIMER Avvio del L'unita si L'unita si Unit turns Timer... -
Page 206: Come Utilizzare Le Funzioni Avanzate
7 Come utilizzare le funzioni avanzate 7.1 Funzione SWING Premere questo tasto quando il telecomando è acceso per ripristinare le impostazioni precedenti (OSCILLAZIONE) del sistema, incluse modalità di funzionamento, Premere il pulsante Swing (Oscillazione) temperatura impostata, livello di velocità di ventilazione e funzione Sleep (Notte) (se attivata). -
Page 207: Selfclean+ (Auto-Pulizia+)
7 Come utilizzare le funzioni avanzate 7.4 SelfClean+ (Auto-pulizia+) La funzione SLEEP (NOTTE) si utilizza per diminuire l'energia consumata durante le ore di sonno Premere il tasto SelfClean+ (Auto-pulizia+) (quando non occorre la stessa temperatura per dormire in modo confortevole). È possibile attivare questa funzione solo tramite telecomando. -
Page 208: Protezione Antigelo
7 Come utilizzare le funzioni avanzate 7.7 Protezione antigelo 7.9 Funzione Turbo Pressione del tasto TURBO Turbo L’unità funziona con una velocità di ventilazione elevata (mentre il compressore è acceso) e la temperatura Premendo il tasto Turbo in modalità COOL viene impostata automaticamente su 8 °C/46 °F. -
Page 209: Funzione Set (Impostazione)
7 Come utilizzare le funzioni avanzate 7.10 Funzione Set (Impostazione) • Premere il tasto SET (IMPOSTA) per accedere Tenere premuto il tasto turbo per all’impostazione delle funzioni, quindi premere 7 secondi per avviare/interrompere l’opzione di memorizzazione della il tasto SET (IMPOSTA) o il tasto TEMP funzione Temperatura zona. - Page 210 Veuillez d’abord lire ce manuel d’utilisation. Cher client, Nous vous remercions d’avoir acheté un produit Beko. Nous espérons que ce produit vous apportera entière satisfaction. Tous nos produits sont fabriqués dans une usine moderne et font l’objet d’un contrôle de qualité minutieux. À cet effet, veuillez lire en intégralité le présent manuel avant d’utiliser cet appareil et conservez-le soigneusement pour une utilisation ultérieure.
- Page 211 TABLES DES MATIÈRES 1 Spécifications de la télécommande 1.1 Guide de démarrage rapide ......40 2 Manipulation de la télécommande 2.1 Insérer et remplacer les piles ......41 2.2 Conseils pour l’utilisation de la télécommande ...41 2.3 Remarques sur l’utilisation de la télécommande 41 3 Boutons et fonctions 4 Témoins de l’affichage de la télécommande 45 5 Comment utiliser les fonctions de base...
-
Page 212: Spécifications De La Télécommande
1 Spécifications de la télécommande Modèle RG10B(L)/BGEF Tension nominale 3 V (2 piles sèches R03/LR03) Portée de réception du signal Environnement -5 à 60 °C (23 à 140 °F) 1.1 Guide de démarrage rapide AVEZ-VOUS DES DOUTES SUR DE LA FONCTION D’UN BOUTON ? Reportez-vous sections «... -
Page 213: Manipulation De La Télécommande
2 Manipulation de la télécommande 2.1 Insérer et remplacer les piles 2.2 Conseils pour l’utilisation de la télécommande Deux piles peuvent être fournies avec votre climatiseur (sur certains modèles). Insérez les • La télécommande doit être utilisée dans un piles dans la télécommande avant de l’utiliser. rayon de 8 mètres de l’appareil. - Page 214 2 Manipulation de la télécommande Cependant, il n’existe pas de garantie qu’aucune interférence ne se produira dans une installation particulière. Si cet appareil cause des interférences nuisibles à la réception des signaux de radio ou de télévision, ce qui peut être déterminé en allumant et en éteignant l’appareil, on encourage l’utilisateur d’essayer de corriger ces interférences par l’un des moyens suivants :...
-
Page 215: Boutons Et Fonctions
3 Boutons et fonctions Avant l’utilisation de votre nouveau climatiseur, familiarisez-vous bien à l’avance avec sa télécommande. Ce qui suit est une brève présentation de la télécommande. Pour les instructions d’utilisation du climatiseur, veuillez- vous référer à la section Comment utiliser les fonctions de base de ce manuel. - Page 216 3 Boutons et fonctions 1. ON/OFF (Marche/Arrêt) 8. MODE Ce bouton permet de mettre l’appareil sous Ce bouton permet le défilement des modes de tension ou hors tension. fonctionnement comme suit : AUTO (Automatique) REFROIDISSEMENT DÉSHUMIDIFICATION 2. TEMP (Température) CHAUFFAGE VENTILATEUR ...
-
Page 217: Témoins De L'affichage De La Télécommande
4 Témoins de l’affichage de la télécommande Des informations sont affichées lorsque la télécommande est allumée. Affichage de la fonction Fresh (Fraîcheur) (certaines modèles) Fresh feature display(some units) (Cette icône s’affiche lorsque la fonction Fresh est activée) (No displays when Fresh feature is activated) Affichage du mode Sleep (Sommeil) Sleep mode display Affichage de la fonction ZoneFollow (Capteur télécommande... -
Page 218: Comment Utiliser Les Fonctions De Base
5 Comment utiliser les fonctions de base 5.1 Fonctionnement de base La vitesse de ventilation ne peut pas être réglée en mode AUTO ATTENTION ! Avant toute (Automatique). utilisation, assurez-vous l’appareil est branché et qu’il y a du courant. Mode Sleep Mode Sleep... -
Page 219: Mode Fan (Ventilation)
5 Comment utiliser les fonctions de base La plage de température du fonctionnement de Vous ne pouvez pas régler la l’appareil va de 17 à 30 °C / 20 à 28 °C. température lorsque l’appareil Vous pouvez augmenter ou diminuer la est en mode Fan (Ventilation). -
Page 220: Mode Heat (Chauffage)
5 Comment utiliser les fonctions de base Lorsque températures extérieures chutent, la performance fonctionnalité HEAT (Chauffage) de votre appareil peut s’en trouver affectée. Dans de telles situations, nous vous recommandons d’utiliser climatiseur en combinaison avec d’autres appareils de chauffage. Mode Sleep Timer Swing... -
Page 221: Réglage De La Minuterie
6 Réglage de la minuterie TIMER ON/OFF (MINUTERIE DE MISE EN MARCHE/D’ARRÊT) - Ce bouton règle la durée au bout de laquelle l’appareil s’allumera/éteindra automatiquement. 6.1 Réglage de la minuterie de mise en marche Appuyez sur le bouton TIMER Appuyez à plusieurs reprises sur le bouton Pointez télécommande vers... - Page 222 6 Réglage de la minuterie 1. Lorsque vous réglez les fonctions TIMER ON (Minuterie de mise en marche) ou TIMER OFF (Minuterie d’arrêt), la durée augmente par incréments de 30 minutes à chaque pression, jusqu’à 10 heures. Après 10 heures et jusqu’à 24 heures, l’heure avance par incrément d’une heure.
-
Page 223: Réglage De La Minuterie De Mise En Marche/Arrêt (Exemple)
6 Réglage de la minuterie 6.3 Réglage de la minuterie de mise en marche/arrêt (exemple) Gardez à l’esprit que les périodes que vous réglez pour les deux fonctions se réfèrent aux heures qui suivent l’heure actuelle. TIMER TIMER Démarrage de L’appareil L’appareil Timer... -
Page 224: Comment Utiliser Les Fonctions Avancées
7 Comment utiliser les fonctions avancées 7.1 Fonctionnalité Swing Si vous appuyez sur ce bouton lorsque la télécommande est en marche, le système retourne (Oscillation) automatiquement aux réglages précédents, Pression du bouton Swing (Oscillation) notamment le mode de fonctionnement, le réglage de la température, le niveau de vitesse de ventilation et le mode veille, si ce dernier est Swing... -
Page 225: Selfclean+ (Auto-Nettoyage)
7 Comment utiliser les fonctions avancées 7.5 Fonction Sommeil Après une pression de plus de 5 secondes sur ce bouton, l’unité intérieure affichera la température Appuyez sur le bouton Sleep (Sommeil). ambiante réelle. Une nouvelle pression de plus de 5 secondes fera revenir à l’affichage de la température réglée. -
Page 226: Protection Antigel
7 Comment utiliser les fonctions avancées 7.8 Fonctionnalité Lock Mode, Sleep (Sommeil), Turbo ou SelfClean+ (Auto-nettoyage) pendant le fonctionnement (Verrouillage) annulera la fonction de silence. 7.7 Protection antigel Self Turbo Clean+ Appuyez sur le bouton SelfClean+ (Auto-nettoyage) et le bouton Turbo en même temps pendant plus L’appareil fonctionnera à... -
Page 227: Fonctionnalité Set (Régler)
7 Comment utiliser les fonctions avancées 7.10 Fonctionnalité Set (Régler) • Appuyez sur le bouton SET (Régler) pour Maintenez le bouton Turbo enfoncé accéder au réglage des fonctions, puis appuyez pendant sept secondes pour sur la touche SET (Régler) ou sur le bouton démarrer/arrêter la fonction de mémoire de la fonction ZoneFollow TEMP (Température) - Page 228 Arçelik A.Ş. Karaağaç Caddesi No:2-6 34445, Sütlüce, İstanbul, Türkiye www.beko.com...
Need help?
Do you have a question about the BEHPH 090 and is the answer not in the manual?
Questions and answers