
Related Manuals for Omron HEM-9210T


Summary of Contents for Omron HEM-9210T
- Page 1 ® INSTRUCTION MANUAL Automatic Upper Arm Blood Pressure Monitor Model HEM-9210T 2800028-0I Issue Date: 2021-06-21...
-
Page 2: Table Of Contents
Table of Contents Introduction ....................3 Important Safety Information ................4 1. Know Your Device .................8 2. Preparation ..................12 3. Using the Device..................15 4. Error Messages and Troubleshooting..........22 5. Maintenance and Storage..............27 6. Specifications..................32 7. FCC/IC/RE Statement and Trademarks ..........38 8. Limited Warranty..................40 9. -
Page 3: Introduction
Introduction Please follow this instruction manual thoroughly for your safety. Please keep for future reference. For specific information about your own blood pressure, CONSULT WITH YOUR PHYSICIAN. Intended Use The device is a digital monitor intended for use in measuring blood pressure and pulse rate in adult patient population. -
Page 4: Important Safety Information
Important Safety Information Warning: Indicates a potentially hazardous situation which, if not avoided, could result in death or serious injury. General Usage • DO NOT adjust medication based on measurement results from this blood pressure monitor. Take medication as prescribed by your physician. Only a physician is qualified to diagnose and treat high blood pressure. - Page 5 Data Transmission • Do not use this product on an aircraft or in hospitals. Please remove the battery and AC adapter from the device. This product emits radio frequencies (RF) in the 2.4 GHz band, use of this product in locations where RF is restricted is not recommended.
- Page 6 • During measurement, make sure that no mobile phone or any other electrical devices that emit electromagnetic fields are within 12 inches (30 cm) of this device. This may result in incorrect operation of the device and/or cause an inaccurate reading. •...
- Page 7 • Ensure that this monitor has acclimated to room temperature before taking a measurement. Taking a measurement after an extreme temperature change could lead to an inaccurate reading. OMRON recommends waiting for approximately 2 hours for the monitor to warm up or cool down when the monitor is used in an environment within the temperature specified as operating conditions after it is stored either at the maximum or at the minimum storage temperature.
-
Page 8: Know Your Device
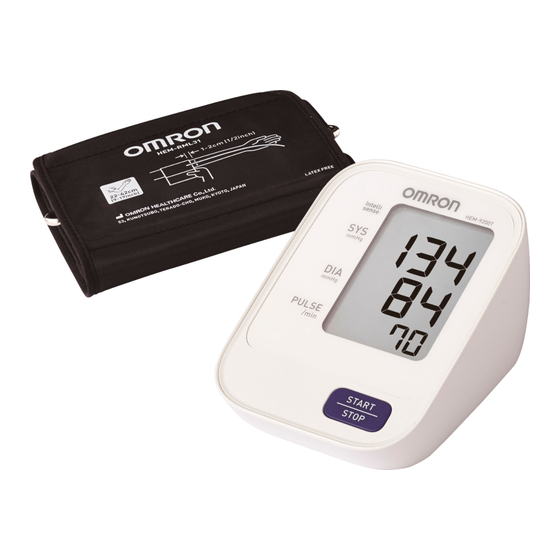
1. Know Your Device Contents: Monitor, arm cuff, battery set, instruction manual, quick start guide Monitor: A. Display C. Battery compartment B. START/STOP button D. Air jack E. AC adapter jack (for optional AC adapter) Arm cuff: Arm circumference 22 - 42 cm (9" - 17") F. - Page 9 Display: SYNC symbol P. Movement error symbol J. Connection symbol Q. Irregular heartbeat symbol K. OK symbol R. Deflation symbol L. Systolic blood pressure S. Pulse display M. Diastolic blood pressure N. Battery symbol (low/depleted) O. Heartbeat symbol (Flashes during measurement.)
- Page 10 1.1 Display symbols Irregular Heartbeat Symbol ( When the monitor detects an irregular rhythm two or more times during the Normal Heartbeat measurement, the irregular heartbeat Pulse symbol will appear on the display with the Blood pressure measurement values. An irregular heartbeat rhythm is defined as Irregular Heartbeat a rhythm that is 25% less or 25% more Short Long...
- Page 11 It will be necessary for the blood pressure monitor to be within the receiver’s transmission range to successfully transfer data. This Omron blood pressure monitor is designed to connect to specific Bluetooth ® receivers, and is not guaranteed to connect to all Bluetooth compatible ®...
-
Page 12: Preparation
2. Preparation Battery Installation Below connection process (step 4 and 5) can only be completed when inserting batteries. 1. Remove the battery cover. 2. Insert 4 “AA” batteries as indicated, into the battery compartment. 3. Replace the battery cover. Notes: •... - Page 13 4. The device will start the connection process. As soon as inserting the batteries, it will automatically start to connect to the Telehealth service receiver, as below. If the display shown above does not appear, refer to “Connection failure. / Data is not being transmitted.” in section 4.2. To retry connecting the Telehealth service receiver, remove batteries and press [START/STOP] button for 2-3 times.
- Page 14 5. Confirm the device is successfully connected. If the device is connected successfully to the Telehealth service receiver, OK symbol “ ” will appear on the display, as shown below. If “Err” appears, refer to “Connection failure. / Data is not being transmitted.”...
-
Page 15: Using The Device
3. Using the Device 3.1 Applying the Arm Cuff Remove tight-fitting clothing from your left upper arm. Do not place the arm cuff over thick clothing. 1. Connect the air plug to the unit. - Page 16 2. Wrap the arm cuff firmly in place around your left upper arm. The bottom edge of the arm cuff should be 1/2 inch (1 to 2 cm) above the elbow. The air tube is on the inside of your arm and aligned with your 1 - 2 cm middle finger.
- Page 17 • The blood pressure can differ between the right arm and the left arm, and the measured blood pressure values can be different. Omron recommends to always use the same arm for measurement. If the values between both arms differ substantially, please check with your physician as to which arm to use for your measurements.
- Page 18 3.2 How to Sit Correctly To take a measurement, you need to be relaxed and comfortably seated, at a comfortable room temperature. • Sit in a chair with your legs uncrossed and your feet flat on the floor. • Sit with your back and arm being supported.
- Page 19 1. Press the [START/STOP] button. The arm cuff will automatically start to inflate. START INFLATING DEFLATING COMPLETED What to do if your systolic pressure is more than 210 mmHg After the arm cuff starts to inflate, press and hold the [START/ STOP] button until the monitor inflates 30 to 40 mmHg higher than your expected systolic pressure.
- Page 20 2. Transfer your readings. As soon as the measurement is completed, your readings will be automatically transferred, as shown below. If the connection symbol “ ” does not appear, refer to “Connection failure. / Data is not being transmitted.” in section 4.2 for more detail.
- Page 21 4. Remove the arm cuff. DO NOT adjust medication based on measurement results from this blood pressure monitor. Take medication as prescribed by your physician. Only a physician is qualified to diagnose and treat high blood pressure. Always consult your physician. Self-diagnosis of measurement results and self- treatment are dangerous.
-
Page 22: Error Messages And Troubleshooting
4. Error Messages and Troubleshooting 4.1 Error Messages Error Display Cause Solution Remove the arm cuff. Wait 2 - 3 minutes and then take another Irregular heartbeat is measurement. Repeat the steps detected. in section 3.3. If this error continues to appear, contact your physician. - Page 23 Error Display Cause Solution Insert the plug securely. Air plug is disconnected. Refer to section 3.1. Arm cuff is applied too Apply the arm cuff tighter. loosely. Refer to section 3.1. Replace the arm cuff with a new Air is leaking from the arm one.
- Page 24 Error Display Cause Solution Movement during Repeat measurement. Remain measurement. still and do not talk during measurement. Movement during Refer to section 3.3. measurement. Remove any clothing interfering Clothing is interfering with with the arm cuff. the arm cuff. Refer to section 3.1. Measure your arm circumference The cuff may not be the to make sure that you are using...
- Page 25 4.2 Troubleshooting If any of the below problems occur during measurement, check to make sure that no other electrical device is within 12 inches (30cm). If the problem persists, please refer to the table below. Problem Cause and Solution Replace all batteries with new ones. Check the battery installation for No power.
- Page 26 Problem Cause and Solution The blood pressure monitor might not be properly placed within the receiver’s transmission range and is too far from the receiver. If there are no causes of data transmission interference found near the blood pressure monitor, move the blood pressure monitor within 5 m (16 ft.) of the receiver and try again.
-
Page 27: Maintenance And Storage
5. Maintenance and Storage 5.1 Maintenance To protect your device from damage, please follow the directions below: • Store the device and the components in a clean, safe location. • Do not use any abrasive or volatile cleaners. • Do not wash the device and any components or immerse them in water. - Page 28 • Changes or modification not approved by the manufacturer will void the user warranty. Do not disassemble or attempt to repair the device or components. 5.2 Storage 1. Unplug the air plug from the air jack. 2. Gently fold the air tube into the arm cuff. Note: Do not bend or crease the air tube excessively.
- Page 29 5.3 Optional Accessories Arm cuff Arm circumference Arm circumference Arm circumference 42 - 50 cm (17" - 20") 22 - 42 cm (9" - 17") 17 - 22 cm (7" - 9") Extra Large Cuff Wide Range Cuff Small Cuff •...
- Page 30 AC Adapter Australia and HHP-OH01 New Zealand HHP-BH01 India Note: Please check with your Telehealth service provider or local OMRON representatives for the appropriate optional parts models Omron representative in North Omron representative in Asia America Call: 1-800-634-4350 Visit: www.omronhealthcare-ap.com...
- Page 31 Using the Optional AC Adapter Note: Make sure to use an easily accessible power socket in which to connect and disconnect the AC adapter. 1. Insert the AC adapter plug into the AC adapter jack on the rear side of the monitor.
-
Page 32: Specifications
6. Specifications HEM-9210T Model Display LCD digital display Cuff pressure range Pressure: 0 to 299 mmHg Measurement range Pressure: 20 to 280 mmHg Pulse: 40 to 180 beats / min. Accuracy Pressure: ±3 mmHg Pulse: ±5% of display reading Inflation... - Page 33 Dimensions Monitor : Approximately 107 (w) mm × 79 (h) mm × 141 (l) mm (4 1/4" × 3 1/8" × 5 1/2") Arm cuff : Approximately 145 mm × 594 mm (air tube: 750 mm) (5 3/4" × 23 1/2" (air tube: 29 1/2")) Cuff circumference 22 to 42 cm (9"...
- Page 34 Part 3: Supplementary requirements for electromechanical blood pressure measuring systems. • This OMRON product is produced under the strict quality system of OMRON HEALTHCARE Co., Ltd., Japan. The Core component for OMRON blood pressure monitors, which is the Pressure Sensor, is produced in Japan.
- Page 35 Symbols description Serial number Temperature limit Humidity limitation Atmospheric pressure limitation Batch code Identifier of cuffs compatible for the device Cuff positioning indicator for the left arm Artery mark Range pointer and brachial artery alignment position Range indicator of arm circumferences to help selection of the correct cuff size.
- Page 36 Symbols description Crossed out wheelie bin Efficiency Level of power supply RCM compliance mark, which indicates compliance with electrical safety, EMC, EME & telecommunications requirements in Australia, as applicable to the product. SMPS incorporating a short-circuit-proof safety isolating transformer (inherently or non-inherently) SMPS (Switch mode power supply unit) Medical device Date of manufacture...
- Page 37 Correct Disposal of This Product (Waste Electrical & Electronic Equipment) This marking shown on the product or its literature, indicates that it should not be disposed of, with other household wastes at the end of its working life. To prevent possible harm to the environment or human health from uncontrolled waste disposal, please separate this product from other types of wastes and recycle it responsibly to promote the sustainable reuse of material...
-
Page 38: Fcc/Ic/Re Statement And Trademarks
® The Bluetooth word mark and logos are registered trademarks owned by Bluetooth SIG, Inc. and any use of such marks by OMRON HEALTHCARE Co., Ltd. is under license. Other trademarks and trade names are those of their respective owners. - Page 39 Hereby, OMRON HEALTHCARE Co., Ltd., declares that the radio equipment type HEM-9210T is in compliance with Directive 2014/53/EU. The full text of the EU declaration of conformity is available at the following internet address: www.omron-healthcare.com...
-
Page 40: Limited Warranty
SOME STATES DO NOT ALLOW LIMITATIONS ON HOW LONG AN IMPLIED WARRANTY LASTS, SO THE ABOVE LIMITATION MAY NOT APPLY TO YOU. OMRON SHALL NOT BE LIABLE FOR LOSS OF USE OR ANY OTHER SPECIAL, INCIDENTAL, CONSEQUENTIAL OR INDIRECT COSTS, EXPENSES OR DAMAGES. -
Page 41: Guidance And Manufacturer's Declaration
IEC60601-1-2:2014 Electro Magnetic Compatibility (EMC) standard.Nevertheless, special precautions need to be observed: • The use of accessories and cables other than those specified or provided by OMRON could result in increased electromagnetic emission or decreased electromagnetic immunity of the device and result in improper operation. - Page 42 Table 2 - IMMUNITY TEST LEVELS Phenomenon Basic EMC standard IMMUNITY TEST LEVELS Electrostatic discharge IEC 61000-4-2 ±8 kV contact ±2 kV, ±4 kV, ±8 kV, ±15 kV air for enclosure port Radiated RF IEC 61000-4-3 10 V/m electromagnetic fields 80 MHz to 2.7 GHz 80 % AM at 1 kHz for enclosure port Proximity fields from...
- Page 43 Table 3 - Test specifications for ENCLOSURE PORT IMMUNITY to RF wireless communications device IMMUNITY Test Maximum Distance TEST frequency Band (MHz) Service Modulation power LEVEL (MHz) (V/m) Pulse modulation 380 to 390 TETRA 400 18 Hz GMRS 460, 430 to 470 ±5 kHz deviation FRS 460 1 kHz sine...
- Page 44 617-0002 JAPAN Distributor OMRON HEALTHCARE, INC. 2895 Greenspoint Pkwy, Hoffman Estates, IL 60169 USA OmronHealthcare.com Asia Pacific HQ OMRON HEALTHCARE SINGAPORE PTE LTD. www.omronhealthcare-ap.com OMRON HEALTHCARE EUROPE B.V. Scorpius 33, 2132 LR Hoofddorp, THE NETHERLANDS www.omron-healthcare.com Importer in EU © 2021 OmronHealthcare, Inc.
Need help?
Do you have a question about the HEM-9210T and is the answer not in the manual?
Questions and answers