KSB LevelControl Basic 2 Supplementary Operating Manual
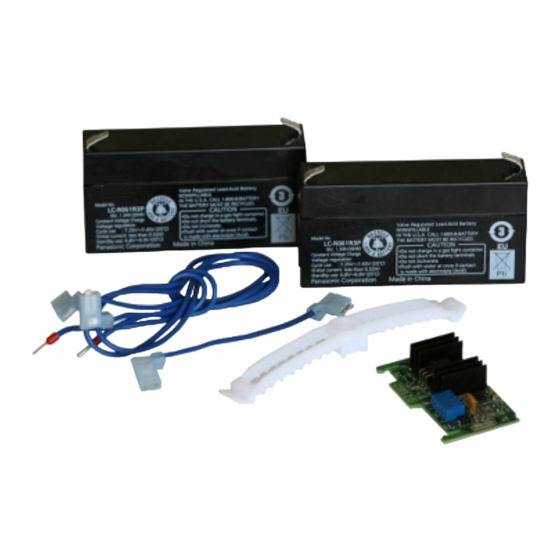
Rechargeable battery retrofit kit for bc type
Hide thumbs
Also See for LevelControl Basic 2:
- Supplementary operating manual (40 pages) ,
- Booklet (38 pages) ,
- Installation & operating manual (84 pages)

Related Manuals for KSB LevelControl Basic 2


Summary of Contents for KSB LevelControl Basic 2
- Page 1 Level Control Unit LevelControl Basic 2 Rechargeable Battery Retrofit Kit for BC Type Supplementary Operating Manual...
- Page 2 All rights reserved. The contents provided herein must neither be distributed, copied, reproduced, edited or processed for any other purpose, nor otherwise transmitted, published or made available to a third party without the manufacturer's express written consent. Subject to technical modification without prior notice. © KSB SE & Co. KGaA, Frankenthal 19/10/2021...
- Page 3 All information contained in the installation/operating manual must be observed. Table 1: Relevant operating manuals Type series Reference number of the installation/operating manual LevelControl Basic 2 4041.80 1.1 General information/Safety regulations DANGER Incorrect installation of the printed circuit board Danger to life! ▷...
- Page 4 2. Screw in the cable gland incl. flexible tube and tighten hand-tight. 3. Loosely twist, or tie the flexible tube according to the figure below. Fig. 1: Mounting the vent LevelControl Basic 2 4 of 8...
- Page 5 3. Hold the rechargeable batteries in place with the clamp (B) supplied. 4. Place the printed circuit board with the charge controller on the designated slot. See illustration below. Fig. 3: Fitting the printed circuit board A ACCU/+X03- terminal B Slot for PCB with charging unit LevelControl Basic 2 5 of 8...
- Page 6 ð If the display extinguishes, open the control unit and verify the correct position of the charge controller and connections. Correct if necessary. (ð Section 1.3, Page 5) ð When the control unit visually and acoustically signals a power failure, the function test is complete. 4. Connect the power supply. LevelControl Basic 2 6 of 8...
- Page 8 KSB SE & Co. KGaA Johann-Klein-Straße 9 • 67227 Frankenthal (Germany) Tel. +49 6233 86-0 www.ksb.com...
Need help?
Do you have a question about the LevelControl Basic 2 and is the answer not in the manual?
Questions and answers