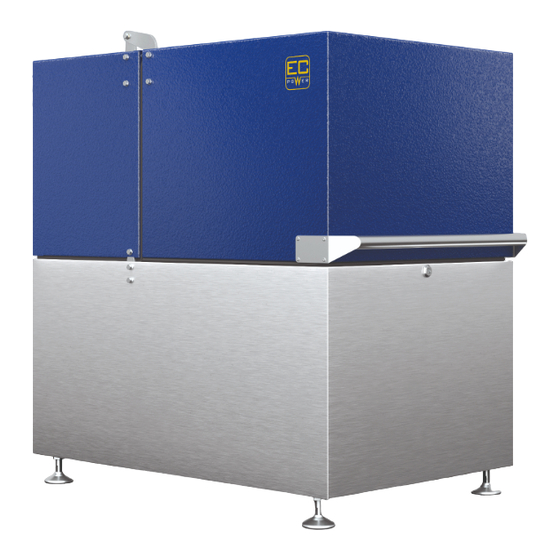
EC POWER XRGI 6 Commissioning Instruction
Hide thumbs
Also See for XRGI 6:
- Maintenance instruction (56 pages) ,
- Installation manual (62 pages) ,
- User manual (36 pages)
Table of Contents
Advertisement
Quick Links
Advertisement
Table of Contents

Related Manuals for EC POWER XRGI 6


Summary of Contents for EC POWER XRGI 6
- Page 1 CO M M I S S I O N I N G I N S T R U C T I O N 01DOC1075-01 VERSION 1.0 2019...
-
Page 3: Table Of Contents
XRGI® COMMISSIONING INSTRUCTION VERSION 1.0 2019 C O N T E N T SYSTEM AND DOCUMENTATION INFORMATION 1.1 VALIDITY OF THE INSTRUCTION 1.2 RATING PLATE SAFETY INSTRUCTIONS 2.1 INFORMATION, SAFETY AND WARNING SYMBOLS 2.2 INTENDED USE 2.3 GENERAL SAFETY INFORMATION 2.3.1 HANDLING COOLANT AND ENGINE OIL 2.3.2... - Page 4 VERSION 1.0 2019 XRGI® COMMISSIONING INSTRUCTION COMMISSIONING XRGI® 15 5.1 INSTALLATION CHECK 5.2 COMMISSIONING 5.2.1 BLEEDING 5.2.2 ELECTRONICS COMPARTMENT 5.2.3 PARAMETER SETTING 5.2.4 MAINTENANCE 5.2.5 IO STATUS 5.2.6 GAS QUALITY 5.2.7 PRODUCTION 5.2.8 GAS & AIR MIXTURE ADJUSTMENT 5.2.9 MODEM CALL 5.2.10 COMPLETION COMMISSIONING XRGI®...
-
Page 5: System And Documentation Information
WWW.ECPOWER.DK iQ-Control Panel serial no. Technical data of the iQ-Control Panel Type description of the iQ-Control Panel iQ15 - 17ELD1007 XRGI®-ID of the XRGI® system XRGI-ID 1534894421 Serial No. 3317050637 EC POWER A/S - Samsøvej 25, 8382 Hinnerup - www.ecpower.eu... -
Page 6: Safety Instructions
■ compliance with all inspection and maintenance conditions specified in the instructions The EC POWER XRGI® system is not intended for use in the industrial sector within the meaning of the Machinery Directive. Any improper use is prohibited! -
Page 7: General Safety Information
G E N E R A L S A F E T Y I N F O R M AT I O N Only a certified, skilled installer who has undergone special training for the XRGI® system through EC POWER may commission the XRGI®... -
Page 8: Handling Coolant And Engine Oil
VERSION 1.0 2019 XRGI® COMMISSIONING INSTRUCTION 2.3.1 H A N D L I N G C O O L A N T A N D E N G I N E O I L Always wear safety gloves and safety glasses when handling coolant and engine oil! I N T H E E V E N T O F C O N TA C T W I T H C O O L A N T A N D E N G I N E O I L : PROPERTY ■... -
Page 9: Actions With Fire Or Ingress Of Water
The installation of an equipotential bonding between the CHP and all metal parts near the XRGI® system, gas pipes, water pipes, ventilation etc. must comply with applicable regulations and ordinances and is strongly recommended by EC POWER. The equipo- tential bonding must be calculated and carried out professionally and depends on the type of soil protection used (TN-s, TT, etc.). The... -
Page 10: Explosive And Easily Flammable Materials
XRGI® system without consulting your authorised EC POWER specialist. Check with your authorised EC POWER specialist to ensure that there is still a sufficient supply of combustion air to the XRGI® system before fitting moisture-tight windows. -
Page 11: Filling And Top-Up Liquid
Use EC POWER Engine Coolant, supplied with every new XRGI® system, to fill and top up the engine circuit to avoid expensive repairs from corrosion in the pipes of XRGI® systems. Only use the heated EC POWER Engine Coolant for heating purposes in the closed circuit and do not drain it off for other purposes. -
Page 12: Working On The Electrical System
Sound insulation cladding on the Power Unit Make sure that the warning information labels (stickers) on the XRGI® system are always clearly visible, undamaged and complete. Replace damaged or dirty warning labels. The information labels are available from EC POWER. -
Page 13: Safety And Warning Labels On The Xrgi® System
R E T U R N O B L I G AT I O N S EC POWER is obliged to take back XRGI® systems after their use. XRGI® systems have to be reused or recycled following their return. Components that cannot be recycled have to be disposed of in an environmentally friendly manner. - Page 14 VERSION 1.0 2019 XRGI® COMMISSIONING INSTRUCTION...
-
Page 15: Commissioning Xrgi
I N S TA L L AT I O N C H E C K Start the commissioning with an installation check including: ■ Hydraulic solutions ■ Installation site ■ EC POWER Engine Coolant ■ Hydraulic connections ■ Gas-site connections ■ Flue gas-site connections ■... -
Page 16: Bleeding
VERSION 1.0 2019 XRGI® 6 COMMISSIONING INSTRUCTION 3.2.1 B L E E D I N G ■ Open the Power Unit and remove the Q-Heat Distributor cover. ■ Check whether all four valves on the manifold are open on the Q-Heat Distributor. Open any closed valves. -
Page 17: Electronics Compartment
XRGI® 6 COMMISSIONING INSTRUCTION VERSION 1.0 2019 Technician login ■ The prompt appears. Enter your ID no. and password by using TECHNICIAN LOGIN ▲▼ buttons. ▲▼ Log in ■ Move the cursor to by using the buttons and press on the user ID no.: 00000 interface. -
Page 18: Parameter Setting
IO status Yes: The IP address is obtained automatically. Make sure the correct APN address is specified. internet.ts.m2m EC POWER Telia SIM card: MODEM SETTINGS The IP address must be entered manually. Obtain an IP-addr. automatically: APN-Address: internet.ts.m2m When using another SIM card, contact the SIM card provider for the APN Obtain DNS-addr. - Page 19 Move the cursor to the desired field by using the ▲▼buttons and press ■ XRGI-ID: 1234567890 the user interface to activate the field. XRGI type: XRGI 6 ▲▼ Max power: 6.1 kW ■ Enter the value by using the buttons and press to save the entry.
-
Page 20: Maintenance
VERSION 1.0 2019 XRGI® 6 COMMISSIONING INSTRUCTION 3.2.4 M A I N T E N A N C E ▲▼ ■ In the technician menu, move the cursor to Maintenance by using the TECHNICIAN MENU buttons and press on the user interface. IO status ... -
Page 21: Flue Gas Measurement
XRGI® 6 COMMISSIONING INSTRUCTION VERSION 1.0 2019 Check the direction of engine rotation in the Power Unit. The crankshaft rotates to the right ■ (front view of the Power Unit) – clockwise checking MAP The direction of rotation is correct and you can continue with value. -
Page 22: Modem Call
Make small adjustments at a time in order to achieve the correct values. 3.2.8 M O D E M C A L L Finally, check whether the XRGI® system sends data correctly via internet connection MAIN MENU to the EC POWER service database. Storage status Operating info ... -
Page 23: Installation Check
I N S TA L L AT I O N C H E C K Start the commissioning with an installation check including: ■ Hydraulic solutions ■ Installation site ■ EC POWER Engine Coolant ■ Hydraulic connections ■ Gas-site connections ■ Flue gas-site connections ■... -
Page 24: Bleeding
VERSION 1.0 2019 XRGI® 9 COMMISSIONING INSTRUCTION 4.2.1 B L E E D I N G ■ Open the Power Unit and remove the Q-Heat Distributor cover. ■ Check whether all four valves on the manifold are open on the Q-Heat Distributor. Open any closed valves. -
Page 25: Electronics Compartment
XRGI® 9 COMMISSIONING INSTRUCTION VERSION 1.0 2019 Technician login ■ The prompt appears. Enter your ID no. and password by using TECHNICIAN LOGIN ▲▼ buttons. ▲▼ Log in ■ Move the cursor to by using the buttons and press on the user ID no.: 00000 interface. -
Page 26: Parameter Setting
IO status Yes: The IP address is obtained automatically. Make sure the correct APN address is specified. internet.ts.m2m EC POWER Telia SIM card: MODEM SETTINGS The IP address must be entered manually. Obtain an IP-addr. automatically: APN-Address: internet.ts.m2m When using another SIM card, contact the SIM card provider for the APN Obtain DNS-addr. - Page 27 XRGI® 9 COMMISSIONING INSTRUCTION VERSION 1.0 2019 S Y S T E M PA R A M E T E R S SYSTEM PARAMETERS Move the cursor to the desired field by using the ▲▼buttons and press ■ XRGI-ID: 1234567890 the user interface to activate the field.
-
Page 28: Maintenance
VERSION 1.0 2019 XRGI® 9 COMMISSIONING INSTRUCTION 4.2.4 M A I N T E N A N C E ▲▼ ■ In the technician menu, move the cursor to Maintenance by using the TECHNICIAN MENU buttons and press on the user interface. IO status ... -
Page 29: Flue Gas Measurement
XRGI® 9 COMMISSIONING INSTRUCTION VERSION 1.0 2019 Check the direction of engine rotation in the Power Unit. The crankshaft rotates to the right ■ (front view of the Power Unit) – clockwise checking MAP The direction of rotation is correct and you can continue with value. -
Page 30: Modem Call
Make small adjustments at a time in order to achieve the correct values. 4.2.8 M O D E M C A L L Finally, check whether the XRGI® system sends data correctly via internet connection MAIN MENU to the EC POWER service database. Storage status Operating info ... -
Page 31: Installation Check
I N S TA L L AT I O N C H E C K Start the commissioning with an installation check including: ■ Hydraulic solutions ■ Installation site ■ EC POWER Engine Coolant ■ Hydraulic connections ■ Gas-site connections ■ Flue gas-site connections ■... -
Page 32: Bleeding
VERSION 1.0 2019 XRGI® 15 COMMISSIONING INSTRUCTION 5.2.1 B L E E D I N G ■ Open the Power Unit and remove the Q-Heat Distributor cover. ■ Check whether all four valves on the manifold are open on the Q-Heat Distributor. Open any closed valves. -
Page 33: Electronics Compartment
XRGI® 15 COMMISSIONING INSTRUCTION VERSION 1.0 2019 Technician login ■ The prompt appears. Enter your ID no. and password by using TECHNICIAN LOGIN ▲▼ buttons. ▲▼ Log in ■ Move the cursor to by using the buttons and press on the user ID no.: 00000 interface. -
Page 34: Parameter Setting
IO status Yes: The IP address is obtained automatically. Make sure the correct APN address is specified. internet.ts.m2m EC POWER Telia SIM card: MODEM SETTINGS The IP address must be entered manually. Obtain an IP-addr. automatically: APN-Address: internet.ts.m2m When using another SIM card, contact the SIM card provider for the APN Obtain DNS-addr. - Page 35 XRGI® 15 COMMISSIONING INSTRUCTION VERSION 1.0 2019 S Y S T E M PA R A M E T E R S SYSTEM PARAMETERS Move the cursor to the desired field by using the ▲▼buttons and press ■ XRGI-ID: 1234567890 the user interface to activate the field.
-
Page 36: Maintenance
VERSION 1.0 2019 XRGI® 15 COMMISSIONING INSTRUCTION 5.2.4 M A I N T E N A N C E ▲▼ ■ In the technician menu, move the cursor to Maintenance by using the TECHNICIAN MENU buttons and press on the user interface. IO status ... -
Page 37: Production
XRGI® 15 COMMISSIONING INSTRUCTION VERSION 1.0 2019 5.2.7 P R O D U C T I O N ▲▼ Production ■ In the technician menu, move the cursor to by using the but- TECHNICIAN MENU tons and press on the user interface. Q-network statistics ... -
Page 38: Modem Call
Step 144 5.2.9 M O D E M C A L L Finally, check whether the XRGI® system sends data correctly via internet connection MAIN MENU to the EC POWER service database. Storage status Operating info In order to test the internet connection, or to update the service database with the Settings ... -
Page 39: Installation Check
I N S TA L L AT I O N C H E C K Start the commissioning with an installation check including: ■ Hydraulic solutions ■ Installation site ■ EC POWER Engine Coolant ■ Hydraulic connections ■ Gas-site connections ■ Flue gas-site connections ■... -
Page 40: Bleeding
VERSION 1.0 2019 XRGI® 20 COMMISSIONING INSTRUCTION 6.2.1 B L E E D I N G ■ Open the Power Unit and remove the Q-Heat Distributor cover. ■ Check whether all four valves on the manifold are open on the Q-Heat Distributor. Open any closed valves. -
Page 41: Electronics Compartment
XRGI® 20 COMMISSIONING INSTRUCTION VERSION 1.0 2019 Technician login ■ The prompt appears. Enter your ID no. and password by using TECHNICIAN LOGIN ▲▼ buttons. ▲▼ Log in ■ Move the cursor to by using the buttons and press on the user ID no.: 00000 interface. -
Page 42: Parameter Setting
IO status Yes: The IP address is obtained automatically. Make sure the correct APN address is specified. internet.ts.m2m EC POWER Telia SIM card: MODEM SETTINGS The IP address must be entered manually. Obtain an IP-addr. automatically: APN-Address: internet.ts.m2m When using another SIM card, contact the SIM card provider for the APN Obtain DNS-addr. - Page 43 XRGI® 20 COMMISSIONING INSTRUCTION VERSION 1.0 2019 S Y S T E M PA R A M E T E R S SYSTEM PARAMETERS Move the cursor to the desired field by using the ▲▼buttons and press ■ XRGI-ID: 1234567890 the user interface to activate the field.
-
Page 44: Maintenance
VERSION 1.0 2019 XRGI® 20 COMMISSIONING INSTRUCTION 6.2.4 M A I N T E N A N C E ▲▼ ■ In the technician menu, move the cursor to Maintenance by using the TECHNICIAN MENU buttons and press on the user interface. IO status ... -
Page 45: Flue Gas Measurement
XRGI® 20 COMMISSIONING INSTRUCTION VERSION 1.0 2019 Check the direction of engine rotation in the Power Unit. The crankshaft rotates to the right ■ (front view of the Power Unit) – clockwise Desired produc- The direction of rotation is correct and you can continue with tion. -
Page 46: Modem Call
XRGI® 20 COMMISSIONING INSTRUCTION 6.2.8 M O D E M C A L L Finally, check whether the XRGI® system sends data correctly via internet connection MAIN MENU to the EC POWER service database. Storage status Operating info ... - Page 47 XRGI® COMMISSIONING INSTRUCTION VERSION 1.0 2019 N O T E S...
- Page 48 VERSION 1.0 2019 XRGI® COMMISSIONING INSTRUCTION N O T I Z E N...
- Page 50 C O M M I S S I O N I N G I N S T R U C T I O N 01DOC1075-01 09/2019...
Need help?
Do you have a question about the XRGI 6 and is the answer not in the manual?
Questions and answers