
Related Manuals for Sony DVP-S725D


Summary of Contents for Sony DVP-S725D
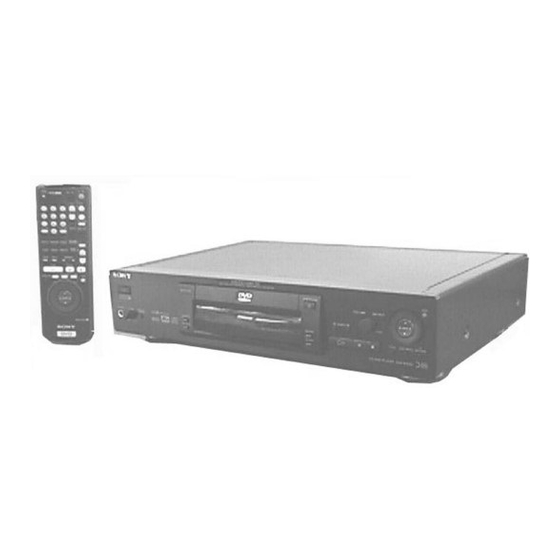
- Page 1 CD/DVD Player Operating Instructions DVP-S725D 1999 by Sony Corporation 3-866-153-81(1)
- Page 2 Welcome! Thank you for purchasing the Sony CD/ DVD Player. Before operating the unit, please read this manual thoroughly and retain it for future reference.
-
Page 3: Table Of Contents
ABLE OF CONTENTS About This Manual 4 This Player Can Play the Following Discs 4 Precautions 6 Notes on Discs 6 Getting Started 7 Unpacking 7 TV Hookups 8 Receiver (Amplifier) Hookups 12 5.1 Channel Surround Hookups 14 Selecting the Language for On-Screen Display 16 Playing Discs 17 Playing Discs Playing at Various Speeds/Frame by Frame... -
Page 4: About This Manual
Indicates the functions for Audio CDs. Audio CDs Audio 8 cm 12 cm 8 cm (CD single) 20 min. 74 min. 20 min. “DVD VIDEO” logo is a trademark. Region code MODEL NO. DVP–8306 CD/DVD PLAYER AC 110V 60Hz SONY CORPORATION MADE IN JAPAN 3-444-464-01... - Page 5 Terms for discs • Title The longest sections of a picture or a music piece on a DVD; a movie, etc., for a picture piece on a video software; or an album, etc., for a music piece on an audio software. Each title is assigned a title number enabling you to locate the title you want.
-
Page 6: Precautions
If you have any questions or problems concerning your player, please consult your nearest Sony dealer. IMPORTANT NOTICE Caution: The enclosed DVD player is capable of holding a still video image or On screen display image on your television screen indefinitely. -
Page 7: Getting Started
Getting Started This section describes how to hook up the CD/DVD player to a TV (with audio/video input jacks) and/or an AV receiver (amplifier). You cannot connect this player to a TV which does not have a video input connector. Be sure to turn off the power of each component before making the connections. -
Page 8: Tv Hookups
TV Hookups This connection is for listening to the sound through TV speakers (2ch – L,R). Refer to the instructions supplied with the component to be connected. You cannot connect this player to a TV without an EURO AV (SCART) connector or a video input connector. - Page 9 If your TV has two EURO AV (SCART) connectors CD/DVD player EURO AV 1 ( RGB ) – TV EURO AV 2 EURO AV EURO AV To EURO AV 1 (SCART) input If your TV has no EURO AV (SCART) connectors You can connect the player to a TV (with audio/video input jacks) using the supplied audio/video connecting cor d.
- Page 10 TV Hookups If you connect the player to a monitor or projector having component video input connectors that conform to output signals from the COMPONENT VIDEO OUT (Y, C connectors on the player Connect the component via the COMPONENT VIDEO OUT connectors using three video connecting cords (not supplied) of the same kind.
- Page 11 Setups for the player Some setups are necessary for the player depending on the TV or other components to be connected. Use the setup display to change the various settings. For details on using the setup display, see page 49. •...
-
Page 12: Receiver (Amplifier) Hookups
Receiver (Amplifier) Hookups This connection is for listening to the sound through speakers connected to a receiver (amplifier such as an integrated stereo amplifier, a receiver having a built-in Dolby Pro Logic decoder, etc.). Refer to the instructions supplied with the component to be connected. You can enjoy 5.1 channel surround sound by connecting a receiver (amplifier) with 5.1 channel inputs. - Page 13 If you have a digital component such as a receiver (amplifier) with a digital connector, DAT or MD Connect the component via the DIGIT AL OUT OPTICAL or COAXIAL connector using an optical or coaxial digital connecting cor d (not supplied). When you play a DVD, set “DIGIT AL OUT”...
-
Page 14: 5.1 Channel Surround Hookups
5.1 Channel Surround Hookups Some DVDs have a sound track with up to 5.1 channels recorded in Dolby* Digital or MPEG AUDIO format. Using a receiver (amplifier) having 5.1 channel inputs and the 5 (+1) speakers, you can enjoy more real audio presence in the comfort of your own home. - Page 15 CD/DVD player EURO AV 1 ( RGB ) – TV EURO AV 2 VIDEO S VIDEO COMPONENT VIDEO OUT DIGITAL OUT /B–Y C OPTICAL COAXIAL PCM/DTS/MPEG DOLBY DIGITAL (AC-3) AV Receiver DIGITAL TV/LD VIDEO 2 (Amplifier) with TV/LD IN AC-3 RF 5.1ch inputs DVD IN S-VIDEO...
-
Page 16: Selecting The Language For On-Screen Display
Selecting the Language for On-Screen Display You can select the language for the setup display, the Control Menu display or the messages displayed on the screen. Default setting is “ (RUSSIAN).” SET UP ENTER Press SET UP and select “ (LANGUAGE SETUP)”... -
Page 17: Playing Discs
Playing Discs This chapter describes how to play a DVD/CD/VIDEO CD. This player conforms to the PAL color system. When you play a disc recorded in the NTSC color system, the player outputs the video signal or the setup display etc. in the NTSC color system and the picture may not appear on the TV screen. - Page 18 Playing Discs You can turn on the player using the remote Press 1/u (POWER) when the indicator above the 1/u (POWER) button on the front panel is lit in red. Notes • If you leave the player or the remote in pause or stop mode for 15 minutes, the screen saver image appears automatically.
-
Page 19: Playing At Various Speeds/Frame By Frame
Playing at Various Speeds/Frame by Frame Using the click shuttle and the JOG button/indicator, you can play back a DVD/CD/VIDEO CD at various speeds or frame by frame. Each time you press JOG, it changes between shuttle mode and jog mode. To change the playback speed (Shuttle mode) Turn the click shuttle. -
Page 20: Resuming Playback From The Point Where You Stopped The Disc (Resume Play)
Playing at Various Speeds/Frame by Frame To play the disc frame by frame changing the playback speed (Jog mode) Press JOG. JOG lights up during jog mode. When you press JOG on the player, it pauses. Turn the click shuttle. Depending on the turning speed, the playback goes to frame-by-frame in the direction that the click shuttle is turned. -
Page 21: Using The Menu For Each Dvd
Notes • Resume Play may not be available depending on the DVD. • Resume Play is not available in Shuffle or Program Play mode. • Depending on where you stopped the disc, the player may resume playback from a different point. •... -
Page 22: Playing Video Cds With Pbc Functions (Pbc Playback)
Using the Menu for Each DVD Using the DVD menu Some DVDs allow you to select the disc contents using the menu. When you play these DVDs, you can select the language for the subtitles, the language for the sound, etc., using the DVD menu. -
Page 23: Using The Front Panel Display
Going back to the menu screen Press ˆ, =, or +. When playing VIDEO CDs with PBC functions PBC playback starts automatically. To cancel PBC playback of a VIDEO CD with PBC functions and play the disc in Continuous Play mode There are two ways. -
Page 24: Checking The Remaining Time
Using the Front Panel Display Playing time and number of the current chapter Digital DISC TITLE CHAPTER 1 2 3 4 5 6 7 8 9 10 11 12 13 14 15 MPEG DTS NTSC TRACK INDEX VIDEO CD ANGLE HOUR REPEAT 1 PGM A–B... -
Page 25: Using Various Functions With The Control Menu
Using Various Functions with the Control Menu This chapter describes how to play discs in various modes and how to use the convenient features of the on- screen menu (Control Menu). Using the Control Menu Display Z Using the Control Menu display, you can select the start point, label a disc, change the angles, adjust the picture, set for Digital Cinema Sound, etc. - Page 26 Using the Control Menu Display Select the item you want using >/., then press / or ENTER. 1 2 ( 2 7 ) 1 8 ( 3 4 ) C 0 1 : 3 2 : 5 5 1: ENGLISH Items To select, press , then...
-
Page 27: Control Menu Item List
Control Menu Item List (DVD only) (page 28) TITLE (DVD only) (page 28) CHAPTER (VIDEO CD/CD only) (page 28) TRACK (VIDEO CD/CD only) (page 28) INDEX (VIDEO CD during PBC playback only) SCENE (page 28) You can search by selecting the title/chapter/track/ index/scene. -
Page 28: Searching For The Title/Chapter/Track/Index/Scene
Control Menu Item List STROBE (DVD/VIDEO CD only) (page 47) PLAYBACK You can display 9 consecutive sections of the disc on the screen. In this case, the sections show still images. TITLE (DVD only) (page 48) VIEWER CHAPTER (DVD only) (page 48) VIEWER (VIDEO CD only) (page 48) TRACK... -
Page 29: Checking The Playing Time And Remaining Time
Press / or ENTER. “ ” is changed to “— — 1 2 ( 2 7 ) – – ( 3 4 ) C 0 1 : 3 2 : 5 5 Enter with number buttons, then ENTER Select the number of the title, chapter, track, index or scene you want to search for using the number buttons, then press ENTER. -
Page 30: Selecting A Start Point Using The Time Code
Selecting a Start Point Using the Time Code You can search by inputting the time code. Select “TIME/TEXT” or “TIME/MEMO” after pressing DISPLAY. The time code corresponds to the approximate actual playing time. For example, to search for a scene 2 hours 30 minutes 20 seconds past the beginning, input 2:30:20. -
Page 31: Checking The Information Of The Disc
Checking the Information of the Disc You can check the DVD TEXT or CD TEXT of the disc on the TV screen and the front panel display. When the disc is a VIDEO CD or the DVD TEXT or CD TEXT is not recorded on the disc, you can label the disc as a Disc Memo and then check it. - Page 32 Checking the Information of the Disc Press ENTER. C 0 1 : 3 2 : 5 5 DISC MEMO INPUT BRAHMS ABCDEFGHIJKLMNOPQRSTUVWX YZ 0 1 2 3 4 5 6 7 8 9 < > + – / = ? _ @ To select, press , then ENTER...
-
Page 33: Changing The Sounds
Changing the Sounds Z With DVDs recorded with multilingual sounds, you can select the language you want while playing the DVD. With multiplex CDs or VIDEO CDs, you can select the sound from the right or left channel and listen to the sound of the selected channel through both the right and left speakers. -
Page 34: Displaying The Subtitles
Changing the Sounds The display examples are as follows: •PCM (stereo) C 0 1 : 3 2 : 5 5 1: ENGLISH PROGRAM FORMAT PCM 48kHz 24bits To select, press , then ENTER •Dolby Surround C 0 1 : 3 2 : 5 5 1: ENGLISH PROGRAM FORMAT DOLBY DIGITAL 2/0... -
Page 35: Changing The Angles
Changing the Angles Z With DVDs on which various angles (multi-angles) for a scene are recorded, you can change the angles. For example, while playing a scene of a train in motion, you can display the view from either the front of the train, the left window of the train or from the right window without having the train’s movement interrupted. -
Page 36: Setting For Digital Cinema Sound
Setting for Digital Cinema Sound Z Select the mode to enjoy multi channel surround sound such as Dolby Digital and MPEG. Even if you connect only front speakers, Virtual Enhanced Surround lets you enjoy 3D sound by using 3D sound imaging to create virtual rear speakers from the sound of the front speakers (L, R) without using actual rear speakers. - Page 37 ENHANCED SURROUND Provides a greater sense of presence from Pro Logic source with monaural rear channel sound. Produces a stereo like effect in the rear channels. VIRTUAL REAR SHIFT Uses 3D sound imaging to shift the sound of the rear speakers away from the actual speaker position.
-
Page 38: Creating Your Own Program (Program Play)
Creating Your Own Program (Program Play) You can play the contents of the disc in the order you want by arranging the order of the titles, chapters or tracks on the disc and create your own program. One program can be restored in the player and contain up to 99 titles, chapters and tracks. - Page 39 pWhen playing a VIDEO CD or CD Select the track you want to program. Total time of the programmed tracks PROGRAM 0:15:30 ALL CLEAR – – 1. TRACK 0 2 2. TRACK 3. TRACK – – 4. TRACK – – 5.
-
Page 40: Playing In Random Order (Shuffle Play)
Playing in Random Order (Shuffle Play) You can have the player “shuffle” titles or tracks and play them in a random order. The playing order may differ from the previous “shuffling.” Select “SHUFFLE” after pressing DISPLAY. When you select “ON”, the indicator of the “SHUFFLE “ lights in green. -
Page 41: Playing Repeatedly (Repeat Play)
Playing Repeatedly (Repeat Play) You can play all the titles/tracks on a disc or a single title/ chapter/track. In Shuffle or Program Play mode, the player repeats the titles or tracks in the shuffled or programmed order. You cannot do Repeat Play during PBC playback of VIDEO CDs (page 22). - Page 42 Repeating a Specific Portion (A˜B Repeat) Setting a portion for A˜B repeat Select “SET/” in “A-B REPEAT.” The A˜B REPEAT setting display appears. 1 2 ( 2 7 ) 1 8 ( 3 4 ) C 0 1 : 3 2 : 5 5 To select, press , then ENTER...
-
Page 43: Checking The Play Information
Checking the Play Information Z You can check the play information on the bit rate, bit rate history or the portion where the disc is played (layer). While playing a disc, the approximate bit rate of the playback picture is always displayed by Mbps (Mega bit per second) and the audio by Kbps (Kilo bit per second). - Page 44 Checking the Play Information LAYER Appears when the DVD has dual layers Indicates the approximate point where the disc is playing. If it is a dual-layer DVD, the player indicates which layer is being read. For details on the layers, see page 70.
-
Page 45: Reducing The Picture Noise (Dnr: Digital Video Noise Reduction)
Reducing the Picture Noise (DNR: Digital Video Noise Reduction) Z You can make the picture clearer by reducing the picture noise of the background. Select “DNR” after pressing DISPLAY. When you select “DNR1,” “DNR2,” or “DNR3,” the indicator of the “DNR “ lights in green. 1 2 ( 2 7 ) 1 8 ( 3 4 ) C 0 1 : 3 2 : 5 5... - Page 46 Adjustments for Playback Picture (VIDEO EQ: Video Equalizer) Select “MEMORY/” in “VIDEO EQ.” The video control display appears. 1 2 ( 2 7 ) 1 8 ( 3 4 ) C 0 1 : 3 2 : 5 5 STANDARD STANDARD DYNAMIC CINEMA...
-
Page 47: Displaying Different Angles Simultaneously
Displaying Different Angles Simultaneously Z With DVDs on which various angles (multi-angles) for a scene are recorded, you can display all the angles recorded on the disc on the same screen, and start playback in continuous mode at the chosen angle directly. The angles are displayed on a screen divided in 9 sections. -
Page 48: Scanning The Title, Chapter And Track
Scanning the Title, Chapter and Track Z You can check the top picture of titles, chapters and tracks of the disc on a screen divided in 9 sections, and start playback from the chosen title ,chapter or track. Select “TITLE VIEWER”(DVD only), “CHAPTER VIEWER”(DVD only) or “TRACK VIEWER”(VIDEO CD only) after pressing DISPLAY. -
Page 49: Settings And Adjustments
Settings and Adjustments This chapter describes how to set and how to adjust using the on-screen SET UP menu. Most settings and adjustments are required to be set when you first use the player. This chapter also describes how to set the remote for controlling the TV or the AV receiver (amplifier). -
Page 50: Using The Setup Display
Using the Setup Display Select the main item you want using >/., and then press ENTER. The selected main item is highlighted. LANGUAGE SETUP OSD: DVD MENU: AUDIO: SUBTITLE: Main item To set, press , then To quit, press SETUP SCREEN SETUP TV TYPE: SCREEN SAVER:... -
Page 51: Setup Display Item List
Setup Display Item List Default settings are underlined. LANGUAGE SETUP (page 52) ENGLISH DVD MENU ENGLISH FRANÇAIS DEUTSCH ITALIANO ESPAÑOL NEDERLANDS DANSK SVENSKA SUOMI NORSK PORTUGUÊS CHINESE JAPANESE OTHERS / AUDIO ORIGINAL (same as DVD MENU) SUBTITLE AUDIO FOLLOW (same as DVD MENU) SCREEN SETUP (page 53) TV TYPE 16:9... -
Page 52: Setting The Language For Display And Sound (Language Setup)
Setting the Language for Display and Sound (LANGUAGE SETUP) Z Select “LANGUAGE SETUP” after pressing SET UP. “LANGUAGE SETUP” allows you to set various languages for on-screen display or sound. Default settings are underlined. Note When you select a language that is not recorded on the DVD, one of the recorded languages is automatically selected except for the “OSD”. -
Page 53: Settings For Display (Screen Setup)
Settings for Display (SCREEN SETUP) Z Select “SCREEN SETUP” after pressing SET UP. “SCREEN SETUP” allows you to set the display according to the playback conditions. Default settings are underlined. SCREEN SETUP TV TYPE: SCREEN SAVER: BACKGROUND: JACKET PICTURE STARTUP SCREEN: To set, press , then ENTER... -
Page 54: Custom Settings (Custom Setup)
Settings for Display (SCREEN SETUP) Storing the picture in memory During playback, when you find the scene to be stored in memory, press PICTURE MEMORY on the remote. The picture is stored in memory. Notes • The player can store in memory only one scene. The stored picture appears in both the background and the startup screen. - Page 55 • TIMER: starts playing a disc automatically when you connect the AC power cord to the AC outlet. By connecting a timer (not supplied), you can start playing at any time you want. • DEMO1: starts playing the demonstration 1 automatically.
- Page 56 Custom Settings (CUSTOM SETUP) Enter a password in 4 digits using the number buttons, then press ENTER. The digits change to asterisks ( ), and the display for confirming the password appears. CUSTOM SETUP PARENTAL CONTROL To confirm,enter password again, then press ENTER To return, press...
- Page 57 You can turn off the Parental Control function just after inserting the DVD (Parental Control Temporarily Canceled) When you set a playback limitation level and insert the DVD, the PARENTAL CONTROL display appears. Enter the password to turn off the Parental Control function. When you stop playing the DVD, the level returns to the original level.
-
Page 58: Settings For Sound (Audio Setup)
Settings for Sound (AUDIO SETUP) Select “AUDIO SETUP” after pressing SET UP. “AUDIO SETUP” allows you to set the sound according to the playback conditions. Default settings are underlined. AUDIO SETUP AUDIO ATT: AUDIO FILTER: AUDIO DRC: TRACK SELECTION: DOWNMIX: DOLBY SURROUND DIGITAL OUT: DOLBY DIGITAL:... - Page 59 pDOWNMIX* Switches the mixing down methods when you play a DVD on which the sound in Dolby Digital format is recorded. • DOLBY SURROUND: when the player is connected to an audio component that conforms to Dolby Surround (Pro Logic). •...
- Page 60 Settings for Sound (AUDIO SETUP) pMPEG Selects output MPEG AUDIO signals via the DIGITAL OUT OPTICAL and COAXIAL connectors. You cannot select this item when you set “DIGITAL OUT” to “OFF.” • PCM: when the player is connected to an audio component lacking a built-in MPEG decoder.
-
Page 61: Speaker Set Up
Speaker Set Up Select “SPEAKER SETUP” after pressing SET UP. To obtain the best possible surround sound, first specify the size of speakers you have connected and their distance from your listening position and set the balance and level. Then use the test tone to adjust the speaker volumes to the same level. - Page 62 Speaker Set Up pBALANCE You can vary the balance of each speaker as follows. Default adjustments are in the parentheses. • FRONT (0dB) Adjust the balance between the front left and right speakers (-6dB [L] to +6dB [R], 0.5dB steps). •...
-
Page 63: Controlling The Tv Or The Av Receiver (Amplifier) With The Supplied Remote
• If you enter a new code number, the code number previously entered will be erased. • When you replace the batteries of the remote commander, the code number may reset to 01 (Sony). Reset the appropriate code number. Manufacturer... - Page 64 Hold down 1/u (POWER), and enter your AV PROG receiver’s manufacturer’s code (see the table TV/VIDEO below) using the number buttons. Then release 1/ WIDE MODE ENTER u (POWER). TV/DVD* Manufacturer Sony ENTER Denon Kenwood Onkyo Pioneer Sunsui Technics Yamaha Code numbers of controllable receivers...
-
Page 65: Additional Information
If you experience any of the following difficulties while using the player, use this troubleshooting guide to help you remedy the problem. Should any problem persist, consult your nearest Sony dealer. Power The power is not turned on. / If the indicator above the 1/u (POWER) button is not lit, check that the AC power cord is connected securely. - Page 66 Troubleshooting The aspect ratio of the screen cannot be changed even though you set “TV TYPE” in “SCREEN SETUP” in the setup display when you play a wide picture. / The aspect ratio is fixed on your DVD. / If you connect the player with the S video cord, connect directly to the TV.
- Page 67 / In the set up display, “DIMMER” in “CUSTOM SETUP” is set to “OFF.” Set “DIMMER” to “BRIGHT” or “DARK.” (page The disc tray does not open and “LOCKED” is displayed on the front panel display. / Contact your Sony dealer or local authorized Sony service facility.
-
Page 68: Self-Diagnosis Function
/ Open the disc tray and insert the disc correctly. •To prevent the player from malfunctioning, the self-diagnosis function has worked. / When you contact your Sony dealer or local authorized Sony service facility, give the 5-character service number. (example: E:61:10) -
Page 69: Specifications
Specifications CD/DVD player Laser Semiconductor laser Signal format system PAL /(NTSC) Audio characteristics Frequency r esponse DVD (PCM 96 kHz): 2 Hz to 44 kHz (±0.5 dB)* DVD (PCM 48 kHz): 2 Hz to 22 kHz (±0.5 dB) CD: 2 Hz to 20 kHz (±0.5 dB) Signal-to-noise ratio More than 110 dB (AUDIO OUT connector only) -
Page 70: Glossary
Digital Cinema Sound (DCS) (page 36) The general name of technology that Sony developed to enjoy the surround sound in a home. To enjoy the surround sound of a movie theater in the comfort of your own home, it simulates the sound not in a concert hall as usual but in a movie editing studio. - Page 71 Title (page 5) The longest sections of a picture or a music piece on a DVD; a movie, etc., for a picture piece on video software; or an album, etc., for a music piece on an audio software. Each title is assigned a title number enabling you to locate the title you want.
-
Page 72: Language Code List
Language Code List For details, see page 34, 52. Code Language Code Language 1027 Afar 1186 Scots Gaelic 1194 Galician 1028 Abkhazian 1032 Afrikaans 1196 Guarani 1203 Gujarati 1039 Amharic 1209 Hausa 1044 Arabic 1045 Assamese 1217 Hindi 1051 Aymara 1226 Croatian 1229... -
Page 73: Index To Parts And Controls
Index to Parts and Controls Refer to the pages indicated in parentheses for details. Front Panel 1 g (remote sensor) (7) Accepts the remote control signals. 2 1/u (POWER) button and indicator (17) Turns on and off the power of the player. 3 VIRTUAL 3D SURROUND button/indicator (37) Selects the item of “VIRTUAL 3D SURROUND.”... - Page 74 Index to Parts and Controls Rear Panel EURO AV 1 ( RGB ) – TV EURO AV 2 VIDEO S VIDEO COMPONENT VIDEO OUT DIGITAL OUT OPTICAL COAXIAL PCM/DTS/MPEG DOLBY DIGITAL (AC-3) 1 EURO AV 1 (RGB)-TV connector (8, 54) Connects to the TV with EURO AV connector to output the signal from the player.
- Page 75 Remote 1 TV/DVD switch (63) Selects to control the player or the TV with the remote. 2 6OPEN/CLOSE button (17) Opens or closes the disc tray. 3 Number buttons Selects the items or settings. 4 CLEAR / ? (ten‘s digit)button (39, 40, 41) Press to return to the continuous play etc.
-
Page 76: Index
Index Numerics 4:3 LETTER BOX 53 4:3 PAN SCAN 53 5.1 Channel Surround 14, 36 16:9 53 A-B REPEAT 41 A˜B Repeat 41 ADVANCED 43 Angle 35, 47 ANGLE 35 ANGLE VIEWER 47 AUDIO 33, 52 AUDIO ATT 58 AUDIO DRC 58 AUDIO FILTER 58 AUDIO SETUP 58 AUTO PLAY 54... - Page 80 Sony Corporation Printed in Japan...
Need help?
Do you have a question about the DVP-S725D and is the answer not in the manual?
Questions and answers