Table of Contents
Advertisement
Available languages
Available languages
Advertisement
Table of Contents

Related Manuals for BH FITNESS G2362iE/02


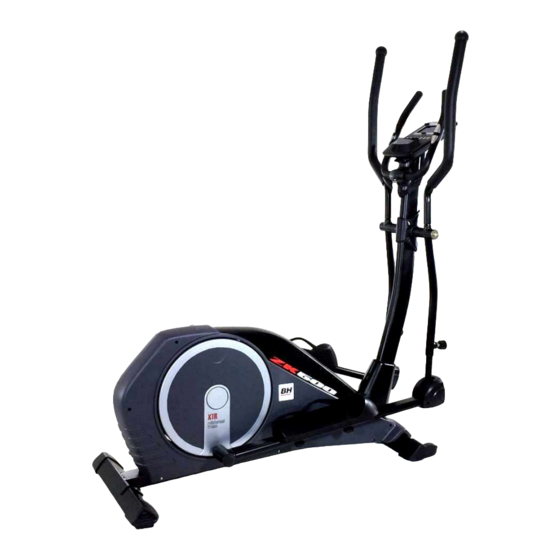
Summary of Contents for BH FITNESS G2362iE/02
- Page 1 G2362iE/02 Instrucciones de montaje y utilización Instructions for assembly and use Instructions de montage et utilisation Montage und gebrauchsanleitung Instruções de montagem e utilização Istruzioni di montaggio e uso Montage-en gebruiksinstrukties...
- Page 2 Fig.1 Fig.2...
- Page 3 Fig.3 Fig.4 Fig.5 Fig.6...
- Page 4 Fig.7 Fig.8 Fig.9...
- Page 5 Fig.10 Fig.11 Fig.12...
-
Page 6: Instrucciones De Seguridad
Español INSTRUCCIONES DE clase H.B. adecuado sólo para uso doméstico. Peso máximo del usuario SEGURIDAD.- 125kg. El frenado es independiente de Antes comenzar cualquier la velocidad. programa de ejercicio, consulte a su médico. Se recomienda la realización IMPORTANTE.- de un examen físico completo. Lea las instrucciones detenidamente Trabaje nivel... -
Page 7: Indicaciones Generales
Tonificación muscular. Para tonificar los músculos durante el ejercicio deberá seleccionar resistencia alta. Esto implicará una mayor tensión sobre la musculatura de las piernas y quizás deba reducir el tiempo del ejercicio. Si también desea mejorar su forma física general, deberá 2. -
Page 8: Instrucciones De Montaje
Esta unidad no ha de utilizarse en (102) Tapa embellecedora inferior de ningún caso como juguete. remo. 4 Es responsabilidad del propietario (8L) Tapa embellecedora de remo L. asegurarse que todos los usuarios de (8R) Tapa embellecedora de remo R. máquina estén adecuados... - Page 9 Baje la tapa embellecedora (102) del 7. MONTAJE DE LOS TUBOS tubo remo (24) hasta el tubo base del DE PIES.- cuerpo central (97), Fig.2. Coja derecho (48R), posiciónelo en la “U” de la parte inferior 5. MONTAJE DE LOS BRAZOS.- del brazo derecho (16R), Fig.4.
- Page 10 10. MONTAJE DE LOS Fig.8, introduciendo los cables en el interior del tubo remo y teniendo BRAZOS SUPERIORES.- cuidado de no pillar los cables. Coja el brazo superior izquierdo (6L) (marcado con la letra L). Coloque los tornillos (3) soltados Introduzca el brazo en el saliente del anteriormente.
-
Page 11: Conexión A La Red
(16) se disminuye el arco longitud de CONEXIÓN A LA RED.- los bastones, por el contrario si se Introduzca la clavija de enganche (m) saca el tubo (23) se aumentara el arco del transformador (113) en el punto de longitud de los bastones Fig.3. conexión (k), del cuerpo central (97), (parte trasera inferior) y conecte el NIVELACIÓN.-... -
Page 12: Safety Instructions
English SAFETY INSTRUCTIONS.- IMPORTANT.- Read the instructions carefully before Consult your doctor before starting any proceeding to assemble the equipment. exercise program. It is advisable to Remove all the parts from the cardboard undergo complete physical packaging and check them against the examination. -
Page 13: General Instructions
2. Exercise phase program. warm-up This phase requires the greatest cooldown exercises as normal but physical exertion. After regular when you are reaching the end of the exercise the leg muscles will become exercise phase, increase the exertion more flexible. It is important to keep level in order to make your legs work the rhythm constant. - Page 14 1. ASSEMBLY INSTRUCTIONS.- 3. FITTING THE BOTTOM Take the unit out of its box and make POST COVER.- sure that all of the pieces are there: Take the main post (102) and insert The assistance of a second person the bottom post cover (24) in the is recommended when assembling direction of the arrow, Fig.2.
-
Page 15: Fitting The Feet
6. FITTING THE FEET.- exercise) refit the screws (57), the washers (39-56) and the screws (50) Take the right pedal (48R), Fig.4, removed previously tighten (marked with the setter “R”) and slide securely. it onto the crank shaft on the right- Next, position the left footrest (51L hand side of the machine. -
Page 16: Mains Connection
connectors located at the back of the the knob outward Fig.3. monitor (1), as shown in Fig.8. Sliding tube (23) into tube (16) will reduce the length of focus bar swing ATTACHING THE MONITOR.- and pulling the tube (23) out will Release screws (3), Fig.8, at the back increase the length of the swing Fig.3. -
Page 17: Consignes De Sécurité
Français CONSIGNES DE SÉCURITÉ.- liste qu’il ne manque aucun élément. Ne pas jeter l’emballage avant d’avoir Avant de commencer tout exercice, monté complètement la machine. demandez l’avis de votre médecin. Il L’appareil doit toujours être utilisé selon est conseillé de passer un examen les instructions. -
Page 18: Indications Générales
2. Phase de l’exercice résistance élevée. Cela se traduira par Il s’agit de la phase dans laquelle est une tension plus élevée également sur réalisé l’exercice le plus important. la musculature des jambes et il faudra Après l’exercice réalisé régulièrement, peut être aussi réduire la durée de les muscles des jambes deviennent l’exercice. -
Page 19: Montage Des Bras
4 Il incombe au propriétaire de 2. MONTAGE DES TUBES l’appareil de s’assurer que tous les SUPPORT.- utilisateurs de la machine peuvent Approchez le tube du support avant l’utiliser et qu’ils ont été dûment avec roulettes (95) au corps central informés à... - Page 20 Poser les rondelles de séparation (17) 8. MONTAGE DES CACHES comme indiqué dans Fig.3, LATÉRAUX DE L’AXE DE introduire bras gauche (16L) ROTATION DES BRAS AVEC (portant la lettre L) dans l’axe de la LES PIEDS.- rotation des bras (104) Fig.3, ensuite Placez le cache rameur L (47 L) et le poser le bras droit (16R) (portant la cache rameur R (47R) des pieds ainsi...
- Page 21 11. MISE EN PLACE DU GUIDON.- tube rameur (24) Fig.8 et visser ces éléments avec les vis (9). Introduire le câble (105) de l’hand-grip dans la rainure, comme indiqué dans 14. MONTAGE DES CACHES la Fig.7. et le faire sortir par la partie LATÉRAUX DE L’AXE DE supérieure du tube du support des bras (24) comme indiqué...
-
Page 22: Branchement Au Réseau
moins pieds réglables (67A) BRANCHEMENT AU RÉSEAU.- comme indiqué dans la Fig.10. Introduire la fiche de branchement (m) du transformateur (113) dans le point DÉPLACEMENT & de connexion (k) du corps central (97), RANGEMENT.- (partie arrière inférieur) et connectez Pour un déplacement facile, l’unité transformateur courant porte... - Page 23 Deutsch SICHERHEITSHINWEISE.- Dieses Gerät wurde getestet und erfüllt die Norm EN957 in der Klasse H.B., für Bevor einem den häuslichen Gebrauch geeignet. Trainingsprogramme beginnen, Höchstgewicht des Nutzers 125kg. Die konsultieren Sie bitte Ihren Arzt. Wir Bremswirkung ist unabhängig von der empfehlen dabei eine...
- Page 24 Es ist ratsam, einige Streckübungen handelt sich z.B. um die Wiederholung vorzunehmen, weiter unten der Übungen aus der Aufwärmphase, erläutert werden. Führen Sie jeder reduziertem Rhythmus dieser Streckübungen während ungefähr Minuten. Sekunden lang durch, ohne jedoch die Wiederholen Sie die Streckübungen Muskeln zu überlasten.
-
Page 25: Allgemeine Hinweise
ALLGEMEINE HINWEISE.- (51L) Linke Fußstütze. (51R) Rechte Fußstütze. Lesen Sie dies Anleitungen dieses (48L) Linkes Pedal. Handbuchs aufmerksam. Hier finden (48R) Rechtes Pedal. Sie wichtige Anleitungen zur Montage (16L) Oberer linker Arm. und Hinweise zur Sicherheit und zur (16R) Oberer rechter Arm. Handhabung des Geräts. - Page 26 Schließen Ende markiert ist, auf die Kurbelstange (auf Widerstandskabels (2), das aus dem der rechten Seite des Geräts). unteren Teil Lenkstange (24) Setzen Sie die Unterlegscheibe (13-53) kommt, an die Widerstandsklemme mit dem 25er Durchmesser und die Fig.2. Schraube (14) ein und ziehen Sie fest Verbinden Sie die Klemme (2), die aus der Lenkerrohr (24) kommt, mit der Setzen Sie die hintere Blende des...
- Page 27 Anschließend führen Sie den gleichen Fig.7. Vorgang mit den Abdeckungen (47L) Nehmen Sie den Lenker (106) und und (47R) auf der linken Seite aus. lösen Schrauben (20). Positionieren Sie die Enden des 9. MONTAGE DER Lenkers auf dem Blech des oberen FUSSSTÜTZEN.- Teils des Ruderrohrs (24) Fig.7.
- Page 28 14. MONTAGE DER NIVELLIEREN DES GERÄTS.- SEITLICHEN ABDECKUNGEN Wenn sich das Gerät an seinem endgültigen Aufste-llungsort befi ndet, DER DREHACHSE DER prüfen Sie, ob es einen stabilen Stand GRIFFSTANGEN.- auf dem Boden hat und korrekt Nehmen Sie die Abdeckungen (10R), nivelliert ist.
-
Page 29: Instruções De Segurança
Português INSTRUÇÕES DE SEGURANÇA.- H.B. unicamente adequado para uso doméstico. Peso máximo do usuário Antes de começar qualquer programa 125kg. A travagem é independente da de exercício, consulte o seu médico. velocidade. Recomendamos a realização de um exame físico completo. IMPORTANTE. -
Page 30: Indicações Gerais
Tonificação muscular Para tonificar os músculos durante o exercício deverá seleccionar resistência elevada. Isto implicará uma maior tensão sobre a muscula-tura das pernas e talvez seja necessário reduzir o tempo do ejercício. Se também deseja melhorar a sua forma física geral, 2. -
Page 31: Instruções De Montagem
Esta unidade nunca deverá utilizarse (8L)Tampa embelezadora de remo L. como um brinquedo. (8R) Tampa embelezadora de remo R. 4 É da responsabilidade do proprie- (113) Transformador. tário comprovar se todos os usuários 2. COLOCAÇÃO DOS TUBOS da máquina estão adequadamente informados sobre todas... - Page 32 5. MONTAGEM DOS BRAÇOS.- arandela plana (27) porca autoblocante (28). Introduza o eixo volta de braços (104) Realize a mesmo montagem no pé nos casquilhos do tubo transversal do esquerdo (48L), que realizou para a tubo remo (24), Fig.3 e deixe-o montagem do pé...
- Page 33 Introduza o braço no saliente do braço Coloque os parafusos (3) soltos inferior esquerdo (16L) fazendo anteriormente. coincidir as letras (L) Fig.6, coloque os 13. MONTAGEM DE TAMPAS parafusos (100), as porcas cegas (13- CENTRAIS.- 99) e aperte. Depois realize a mesma montagem com o braço superior Pegue na tampa embelezadora de direito (6R).
-
Page 34: Ligação À Rede
tubo (23), aumentará o arco de Fig.11. Deverá guardar a sua máquina longitude dos bastões Fig.3. num lugar seco, com as menores variações de temperatura possíveis. NIVELAMENTO.- LIGAÇÃO À REDE.- Depois de ter colocado a unidade no Introduza a cavilha de engate (m) do seu lugar definitivo para a realização transformador (113) no ponto de exercício,... -
Page 35: Istruzioni Di Sicurezza
Italiano ISTRUZIONI DI SICUREZZA.- e controllato e segue la norma EN957 sotto la classe H.B. adatto solo per il Prima cominciare qualsiasi suo uso domestico. Peso massimo programma d’ allenamento, chieda dell’ utente 125kg. La frenata agisce in consulenza medica. Si consiglia di maniera indipendente alla velocità. -
Page 36: Indicazioni Generali
Con il passare dei giorni, avrà bisogno di un allenamento più prolungato e di maggior intensità. È consigliabile allenarsi un minimo di tre giorni a set- timana, in giorni alterni. Tonificazione muscolare Per tonificare i muscoli durante l’ Realizzi ogni stiramento più o meno allenamento dovrà... -
Page 37: Istruzioni Di Montaggio
3 I genitori ed altre persone responsabili (106) Coperchio decorativo inferiore dei bambini devono tenere conto della del remo. natura curiosa di questi che li può (8L) Coperchio decorativo del remo L. portare a situazioni e condotte che (8R) Coperchio decorativo del remo R. possono risultare pericolose. - Page 38 Abbassare coperchio decorativo Inserire la vite (45) come indica la Fig.4 (102) del tubo remo (24) fino al tubo e prendere la rondella piana (27) ed il base del corpo 2 (97), Fig.2. dado autobloccante (28) e stringere fino in fondo. 5.
-
Page 39: Montaggio Del Manubrio
10. MONTAGGIO DEI BRACCI MONTAGGIO DEL MONITOR.- Allentare le viti (3) Fig.15 della parte SUPERIORI.- posteriore del monitor. Prendere il braccio superiore sinistro Successivamente collocare il monitor (6L) (segnato con la lettera L). in direzione delle frecce sulla lamiera Introdurre il braccio nella linguetta del del tubo remo (24) Fig.8. -
Page 40: Collegamento Alla Rete Elettrica
superiori. manovra collocare Allentare un po’ il pomo (18) in senso apparecchio nel luogo scelto, alzando contrario alle lancette dell’orologio, leggeramente dalla parte anteriore e trattenere il piede e tirare verso spingendo, come mostra la Fig.11. l’esterno del pomo è stato Conservi il suo apparecchio in un allentato Fig.3. - Page 41 Nederlands VEILIGHEIDSAANWIJZINGEN gewicht van de gebruiker: 105 kg. De werkt onafhankelijk Raadpleeg uw geneesheer alvorens u snelheid. oefe ningenprogramma begint. Het wordt aangeraden om een BELANGRIJK volledig onderzoek te laten doen. Lees deze gebruiksaanwijzing Voer de oefening op het aanbevolen aandachtig voor niveau uit, vermijd elke vorm van...
-
Page 42: Algemene Aanwijzingen
per week te oefenen, telkens met een dag ertussen. Het versterken van de spieren Om de spieren tijdens de oefeningen steviger en sterker te maken dient u een hoge weerstand te kiezen. Dit geeft een hogere spanning op het 2. De oefening spierstelsel soms Tijdens... -
Page 43: Montage-Instructies
3 Ouders en andere personen met voetstang. kinderen onder hun hoede dienen er (52) Sierstuk achterkant rechter rekening mee te houden dat kinderen voetstang. van nature uit nieuwsgierig zijn en dat (102) Steunkap onderkant. ze daardoor zichzelf in gevaar kunnen (8L) Steunkap L. - Page 44 5. DE FOCUSSTANGEN Neem de linkspootstang (48L) en herhaal dezelfde montageprocedure MONTEREN.- als met de rechter. Steek de focusstangas (104) door de afstandsbussen op de hoofdsteun 8. DE (24), Fig.3, de as centrerend. FOCUSSTANGZIJKANTBEDE Monteer de tussenstuksluitringen (17) KKINGEN AAN DE zoals weergegeven in Fig.3.
- Page 45 Bevestig de bovenste stang op de controleert dat de kabels niet in de onderste linkerfocusstang (16L), de knel komen zitten. Bevestig letters (L) op een rij zettend, Fig.6, opnieuw de schroeven (3) die u eerder monteer de schroeven (100), de verwijderd heeft.
-
Page 46: Aansluiting Op Het Lichtnet
te maken, houd de poot vast en trek Berg het apparaat op een droge plaats de knop naar buiten Fig.3. waar mogelijk Als u de buis (23) verder in de buis temperatuursschommelingen plaats (16) laat glijden, zal de lengte van de vinden. - Page 47 G2362iE/02...
- Page 48 Para pedido de repuesto: Indicar el código de la pieza y la cantidad To order replacement parts: State the part code and Quantity Pour toute commande pièces détachées: Indiquer le code de la pièce et la quantité Bestellung von Ersatzteilen: Bitte angeben Teil-code und Menge Para encomenda de peça de recambio: Indicar o código da peça ea quantidade Per ordinare pezzi di ricambio: Indicare il codice del pezzo e la quantità...
- Page 49 G2525023 G2362E064 G2362E106 G2362E023 H9355085L G2362E107 G2362E024 H9355085R G2362E108 G2336017L H9355005 G2362E109 G2336017R G2362E067 G2362E110 G2336019 0190160 G2362E111 G2382049 G2382058 G2382112 G2382050 G2362E072 0190174 0190154 G2362E073...
- Page 50 Español Por medio de la presente Exercycle S.L. declara que este producto cumple con los requisitos esenciales y cualesquiera otras disposiciones aplicables o exigibles de las Directivas 2009/125/CE, 2011/65/CE, 2014/30/CE y 2014/35/CE. English Hereby, Exercycle S.L, declares that this product is in compliance with the essential requirements and other relevant provisions of Directives 2005/32/EC, 2011/65/EC, 2014/30/EC and 2014/35/EC.
- Page 51 BH FITNESS SPAIN BH GERMANY GmbH BH FITNESS ASIA EXERCYCLE,S.L. Grasstrasse 13 BH Asia Ltd. (Manufacturer) 45356 ESSEN No.80, Jhongshan Rd., P.O.BOX 195 GERMANY Daya Dist., 01080 VITORIA (SPAIN) Taichung City 42841, Tel.: +34 945 29 02 58 Tel: +49 2015 997018 Taiwan.
Need help?
Do you have a question about the G2362iE/02 and is the answer not in the manual?
Questions and answers