Table of Contents
Advertisement
Available languages
Available languages
Quick Links
Advertisement
Table of Contents

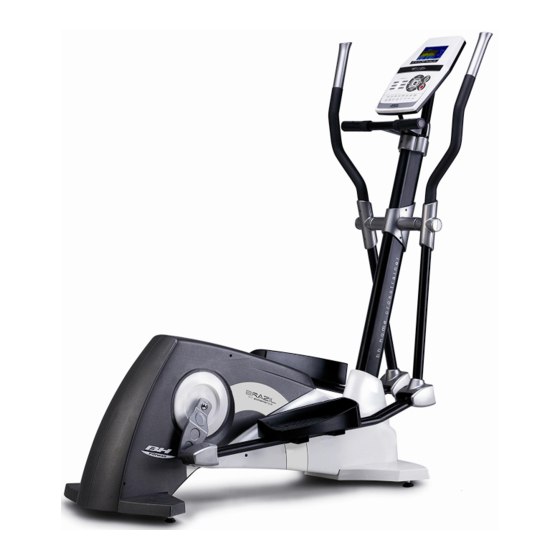
Related Manuals for BH FITNESS G2376


Summary of Contents for BH FITNESS G2376
- Page 1 G2374-G2376 Instrucciones de montaje y utilización Instructions for assembly and use Instructions de montage et utilisation Montage und gebrauchsanleitung Instruções de montagem e utilização Istruzioni di montaggio e uso Montage-en gebruiksinstrukties...
- Page 2 Fig.1 Fig.2...
- Page 3 Fig.3 Fig.4...
- Page 4 Fig.5 Fig.6 Fig.6A Fig.6B...
- Page 5 Fig.6C Fig.6D Fig.7 Fig.8...
- Page 6 Fig.9 Fig.10...
- Page 7 Fig.11 Fig.12 Fig.13...
-
Page 8: Instrucciones De Seguridad
Español INSTRUCCIONES DE embalaje e identifíquelas con respecto al listado, para asegurarse de que no SEGURIDAD.- falta ninguna. Antes comenzar cualquier No elimine el cartón hasta haber programa de ejercicio, consulte a su montado la elíptica completamente. médico. Se recomienda la realización Utilice el aparato siempre de acuerdo de un examen físico completo. -
Page 9: Indicaciones Generales
2. La fase de ejercicio. deberá cambiar su programa de En esta fase se realiza el esfuerzo más entrenamiento. Realice los ejercicios importante. Tras el ejercicio regular, los calentamiento y relajación de músculos de las piernas aumentarán costumbre, pero cuando esté llegando su flexibilidad. -
Page 10: Instrucciones De Montaje
5 Su unidad sólo puede ser usada por (71) Tornillos de M-8x20. una persona al mismo tiempo. (22) Tornillos DIN 603 M-8x60. 6 Utilice prendas de vestir y calzado Llave de tubo combinada. adecuado. Átese cordones 2. MONTAJE DE LOS TUBOS correctamente. - Page 11 Introduzca el tubo de remo (72) en el 5. MONTAJE DE LOS tubo saliente (H), del cuerpo central REPOSAPIES.- (51), en dirección a la flecha, Fig.5, Posicione el reposapiés izquierdo teniendo cuidado de no pillar los (23L marcado con la letra L) sobre el cables.
- Page 12 8. MONTAJE DE LAS TAPAS MOVIMIENTO Y LATERALES EJE GIRO DE ALMACENADO.- BRAZOS.- La unidad está equipada con ruedas (47) como muestra la Fig.12 lo que Coja las tapas (11L y 11R) marcadas hace más sencillo su movimiento. Las en el interior con la letra (R), y ruedas que se encuentran en la parte posiciónelas en el extremo del eje con delantera de su unidad, le facilitarán la...
-
Page 13: Safety Instructions
English SAFETY INSTRUCTIONS.- Do not throw the cardboard away until the elliptical trainer is fully assembled. Consult your doctor before starting Always appliance any exercise program. It is advisable accordance with the instructions. If undergo complete physical you discover any defective compo- examination. -
Page 14: General Instructions
The rhythm of the exercise should be order to keep your heart rate within fast enough to bring the heart rate into the target area the target area, as shown on the Weight loss following graph: In this case the important factor is the effort made. - Page 15 Fig.1 Parts list. washer (9), and tighten securely. (51) Main body. Carry out the same operation to attach (36) Rear stabiliser with the rear stabiliser bar. Lift the rear of adjustable feet. the machine slightly and rest it on a (38) Front stabiliser bar with wheels.
-
Page 16: Fitting The Footrests
Next, position it on the “U” at the 7 FITTING THE UPPER bottom of the left focus bar (13L), FOCUS BARS.- Fig.6B. Take the top left bar (3L) (marked with Insert screw (15), as shown in Fig.6B, the letter “L”). then fit the flat washer (8) and the self Insert the top bar onto the bottom left locking nut (16), and tighten securely. -
Page 17: Mains Connection
This can be achieved by screwing the main body (bottom, rear of the adjustable feet (32) up or down, as machine) then plug shown in Fig.11. transformer (96) into a 220 V mains supply, Fig.13. MOVEMENT & STORAGE.- BH RESERVES THE RIGHT TO The unit is equipped with wheels (47), MODIFY THE SPECIFICATIONS OF as shown in Fig.12, which make it... -
Page 18: Consignes De Sécurité
Français CONSIGNES DE SÉCURITÉ.- l’emballage en carton et vérifi ez sur la liste qu’il ne manque aucun élément. Avant de commencer tout exercice, Ne pas jeter l’emballage avant d’avoir demandez l’avis de votre médecin. Il monté com plètement la machine. est conseillé... -
Page 19: Indications Générales
2. Phase de l’exercice une tension plus élevée également sur Il s’agit de la phase dans laquelle est la musculature des jambes et il faudra réalisé l’exercice le plus important. peut être aussi réduire la durée de Après l’exercice réalisé régulièrement, l’exercice. -
Page 20: Montage
4 Il incombe au propriétaire de Fig.2 Visserie l’appareil de s’assurer que tous les Écrous de sûreté M-8. utilisateurs de la machine peuvent Rondelles plates de M-8 Ø19. l’utiliser et qu’ils ont été dûment Rondelle ressort de M-8. informés à propos des précautions à (35) Vis de M-8x25. - Page 21 Connecter le connecteur (78) Fig.5 au 5. MONTAGE DES REPOSE- (80) Fig.5. PIED.- Introduire le tube rameur (72) dans le Placez le repose-pied gauche (23L, tube qui dépasse (H) du corps central signalé par la lettre L) sur le pied (51) dans le sens de la flèche, Fig.5 gauche (21) de l’unité, Fig.7, (la en veillant à...
-
Page 22: Déplacement Et Rangement
8. MONTAGE DES CACHES DÉPLACEMENT ET LATÉRAUX DE L’AXE DE RANGEMENT.- ROTATION DES BRAS.- Comme indiqué dans la Fig.12, cet appareil dispose de roulettes (47) qui Prendre les caches (11L y 11R) permettent un déplacement facile. Ces portant à l’intérieur la lettre (R), roulettes sont posées sur la partie placez-les à... - Page 23 Deutsch SICHERHEITSHINWEISE.- alle Teile Verpackungskarton und überprüfen Bevor einem Sie sie anhand der entsprechenden Trainingsprogramme beginnen, Liste, um sicherzustellen, dass kein konsultieren Sie bitte Ihren Arzt. Wir Teil fehlt. empfehlen dabei eine komplette Entsorgen Sie den Karton erst, wenn Untersuchung. Sie den Ellipsentrainer vollständig Arbeiten Sie mit dem empfohlenen montiert haben.
-
Page 24: Allgemeine Hinweise
stärkere Intensität Übungen benötigen. wird empfohlen, mindestens drei Tage wöchentlich, ein über den anderen Tag zu trainieren. Stärkung der Muskeln Um die Muskeln bei den Übungen zu stärken, muss ein hoher Widerstand eingestellt werden. Dies hat eine 2. Trainingsphase höhere Spannung der Beinmuskulatur dieser Phase wird... - Page 25 1 Dieses Gerät ist für den häuslichen Stangen. Gebrauch vorgesehen. Das Gewicht (63) Elektronischer Monitor. Benutzers darf 115Kg nicht (11L) 2 Verschlussdeckel Drehachse überschreiten. Griffstangen (L-R). 2 Achten Sie darauf, mit den Händen (11R) 2 Verschlussdeckel Drehachse nicht an die beweglichen Teile des Griffstangen (L-R).
- Page 26 Nehmen Sie das hintere Rohr des Nehmen Sie den linken Fuß (21) und Ständers mit den Nivellierschrauben setzen Hülse (18) (36). Achten Sie darauf, dass die Pfeilrichtung auf Fig.6A. Zentrieren Punkte übereinstimmen Fig.4 und Sie die Hülse. setzen Sie die Schrauben (35), die Positionieren Sie ihn dann in dem “U”...
- Page 27 Stecken Sie die Lenkerstange (64) in 9. ANBRINGEN DES Pfeilrichtung Fig.8 auf das aus dem ELEKTRONISCHEN Hauptrahmen herausste- hende MONITORS.- Rohrstück (72). Achten Sie dabei ANBRINGEN DES MONITORS. darauf, dass Kabel nicht Lösen Sie die Schrauben (69) Fig.10 eingeklemmt werden. auf der Rückseite des Monitors.
- Page 28 TRANSPORT UND schließen dann Stromtransformator (96) an das 220 V AUFBEWAHREN.- Netz Fig.13. Dieses Gerät ist mit Rädern (47) ausgestattet Fig.12, die den Transport BH BEHÄLT SICH DAS RECHT ZU wesentlich erleichtern. Räder ÄNDERUNGEN SEINER befinden sich auf der Vorderseite des PRODUKTSPEZIFI-ZIERUNGEN Geräts.
-
Page 29: Instruções De Segurança
Português INSTRUÇÕES DE cartão da embalagem e identifi que-as em relação à lista, para assim poder SEGURANÇA.- comprovar que não falta nenhuma. Antes de começar qualquer programa Não deite fora o cartão até ter de exercício, consulte o seu médico. montado completamente a elíptica. - Page 30 2. A fase do exercício maior tensão sobre Nesta fase realizase o esforço mais musculatura das pernas e talvez seja importante.Depois exercício necessário reduzir tempo regular, os músculos das pernas exercício. tam- bém deseja aumentaram a sua flexibilidade. É melhorar a sua forma física geral, muito importante manter um ritmo deverá...
-
Page 31: Instruções De Montagem
É responsabilidade Arandelas planas de M-8 Ø19. proprietário comprovar se todos os Arandela mola de M-8. usuários máquina estão (35) Parafusos de M-8x25. adequadamente informados sobre (71) Parafusos de M-8x20. todas as precauções necessárias. (22) Parafusos DIN 603 M-8x60. 5 A sua unidade só poderá ser usada Chaves de tubo combinadas por uma pessoa de cada vez. - Page 32 Ligue os terminais (78) Fig.5 com o 5. MONTAGEM DOS APOIOS (80) Fig.5. DE PÉS.- Introduza o tubo de remo (72) no tubo Posicione o apoio de pés esquerdo que sai (H) do corpo central (51), em (23L, marcado com a letra L) sobre o direcção à...
-
Page 33: Ligação À Rede
8. MONTAGEM DAS TAMPAS enroscando mais ou menos os pés reguláveis (32) como mostra a Fig.11. LATERAIS EIXO VOLTA DE BRAÇOS.- MOVIMENTO E Pegue nas tampas (11L e 11R) ARMAZENAGEM.- marcadas no interior com a letra (R) e A unidade está equipada com rodas posicione-as no extremo do eixo com (47) como mostra a Fig.12, o que os braços na parte direita, como... -
Page 34: Istruzioni Di Sicurezza
Italiano ISTRUZIONI DI SICUREZZA.- Ritiri tutte le parti del cartone dell’ imballaggio e le identifichi rispetto all’ Prima cominciare qualsiasi elenco per assicurarsi che non manchi programma d’ allenamento, chieda nessun pezzo. consulenza medica. Si consiglia di Non elimini il cartone fino alla fine del realizzare un controllo fisico completo. -
Page 35: Indicazioni Generali
2. La fase dell’ allenamento. delle gambe e forse dovrà ridurre il In questa fase si realizza lo sforzo più tempo dell’ allenamento. Se desidera importante. Dopo l’ allenamento anche migliorare il suo stato di forma regolare, muscoli delle gambe fisica dovrà... -
Page 36: Istruzioni Di Montaggio
5 È responsabilità del propietario l’ (35) Viti di M-8x25. assicurarsi che tutti gli utenti della (71) Viti di M-8x20. macchina siano adatti ed informati su (22) Viti DIN 603 M-8x60. tutte le precauzioni necessarie da Chiavi a tubo combinate. prendere. - Page 37 Successivamente avvicinare il tubo posizione sinistra e destra dell’unità è del remo (72) al tubo uscente (H) dal sempre posizione pronta corpo centrale (51), Fig.5 eseguire un esercizio) prendere le viti Collegare i terminali (78) Fig.5 con il (22), le rondelle (8) ed i dadi (4), e (80) Fig.5.
-
Page 38: Collegamento Alla Rete Elettrica
8. MONTAGGIO DEI SPOSTAMENTO ED COPERCHI LATERALI IMMAGAZZINAGGIO.- DELL’ASSE DI GIRO DELLE L’ apparecchio è munito di ruote (47) che rendono più semplice il suo BRACCIA.- spostamento. Le ruote che si trovano Prendere i coperchi (11L e 11R) nella parte anteriore segnati all’interno con la lettera (R) e apparecchio, le faciliteran- no la... - Page 39 Nederlands VEILIGHEIDSAANWIJZINGEN enkel stuk ontbreekt. Gooi het karton niet weg vooraleer u de Raadpleeg uw geneesheer alvorens u ellips volledig heeft gemonteerd. oefeningenprogramma Gebruik het toestel enkel zoals in de begint. Het wordt aangeraden om een handleiding beschreven. Als u tijdens het volledig onderzoek te laten doen.
-
Page 40: Algemene Aanwijzingen
Het ritme van de oefening dient zoals gewo- onlijk, maar wanneer u aan voldoende hoog te liggen om de het einde van de oefening komt, polsslag in de zone te krijgen die in de vermeerdert u de weerstand om zo een onderstaande grafiek is aangegeven. -
Page 41: Montage Instructies
MONTAGE INSTRUCTIES.- 2. DE DRIEHOEKSTANGEN MONTEREN 1 Haal het apparaat uit de verpakking controleer alle onderdelen N.B: De hulp van een tweede persoon vereist voor deze aanwezig zijn. N.B.: De hulp van een tweede montagefase. persoon wordt aanbevolen bij het Til eerst de voorkant van het toestel monteren van dit toestel op en laat het rusten op een stut,... - Page 42 Bevestig nu opnieuw de schroeven de positie van de gebruiker tijdens het (71), sluitringen (8) en veerringen (9) doen oefeningen), monteer die u eerder verwijderd heeft, Fig.5, en opnieuw schroeven (22), maak ze goed vast. sluitringen (8) en de moeren (4) en Laat de onderkantbedekking voor de maak alles goed vast.
-
Page 43: Aansluiting Op Het Elektriciteitsnet
8. DE ZIJKANTBEDEKKINGEN minder uit te schroeven, zoals wordt getoond in Fi g.11. -VAN DE FOCUSSTANGEN MONTEREN.- VERPLAATSING & OPSLAG.- Neem bedekkingen (11L en 11R), aan Het toestel is uitgerust met wieltjes de binnenkant gemarkeerd met de (47), zoals weergegeven in Fig.12, om letter “R”, en plaats ze aan het einde het verplaatsen ervan gemakkelijker te van de as met de stangen aan de... - Page 44 G2374...
- Page 45 G2376...
- Page 46 Indicare il modello della macchina Nº che corrisponde al pezzo Quantità Bestellen van vervangingsonderdelen: Geef het model van het toestel op Nummer van het onderdeel Hoeveelheid Ejemplo / E.g. / Exemple / Beispiel / Exemplo /Esempio / Bijvoorbeeld: G2374 G2376...
- Page 47 Español Por medio de la presente Exercycle S.L. declara que este producto cumple con los requisitos esenciales y cualesquiera otras disposiciones aplicables o exigibles de las Directivas 2004/108/CE y 2006/95/CE. English Hereby, Exercycle S.L, declares that this product is in compliance with the essential requirements and other relevant provisions of Directives 2004/108/EC and 2006/95/EC.
- Page 48 3750-325 Agueda (PORTUGAL ) e-mail: bh.fitness@wanadoo.fr Tel.: +351 234 729 510 Fax: +351 234 729 519 BH FITNESS MEXICO BH FITNESS NORTH AMERICA BH Exercycle de México S.A. de CV 20155 Ellipse Eje 132 / 136 Foothill Ranch Zona Industrial, 2A Secc.
Need help?
Do you have a question about the G2376 and is the answer not in the manual?
Questions and answers