Table of Contents

Related Manuals for SNOWJOE SJ626E-RM


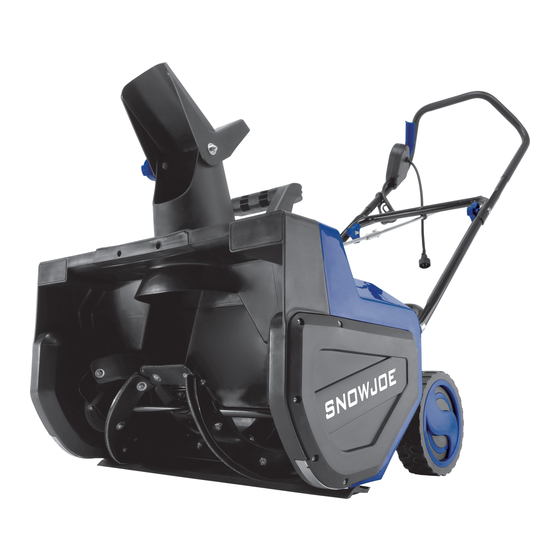
Summary of Contents for SNOWJOE SJ626E-RM
- Page 1 ELECTRIC SNOW THROWER 22-INCH | 14.5-AMP OPERATOR’S MANUAL Model SJ626E-RM A Division of Snow Joe , LLC ® Form No. SJ-SJ626E-RM-880E-M-V1 © 2021 by Snow Joe , LLC ® SAVE THESE INSTRUCTIONS All rights reserved. Original instructions.
-
Page 2: General Safety Warnings
OPERATOR’S MANUAL Model SJ626E-RM A Division of Snow Joe , LLC ® Form No. SJ-SJ626E-RM-880E-M-V1 IMPORTANT! 5. Avoid body contact with earthed or grounded surfaces (i.e. upper and lower water pipes, radiators, ranges, Safety Instructions refrigerators, microwave ovens, and outer frames of heating equipment). -
Page 3: Electrical Safety
SW-A, SOW-A, STW-A, with lighted end (Model PJEXT50-B). Visit STOW-A, SJW-A, SJOW-A, SJTW-A, or SJTOW-A. snowjoe.com to purchase this extension cord online Before use, check that the extension cord is in good or, to order by phone, call 1-866-SNOWJOE condition. -
Page 4: Personal Safety
+ Sun Joe customer service ® ® Safety Instructions for Walk-Behind center at 1-866-SNOWJOE (1-866-766-9563). Snow Throwers • Noise control – When using the snow thrower, you must respect local laws and regulations regarding noise control • Read the operator’s manual carefully – Learn your and environmental protection. To avoid noise disturbance, snow thrower’s applications and limitations as well as the... - Page 5 • Store safely – Store the snow thrower indoors in a dry area between uses. Keep it in a locked area, where children and unauthorized users cannot gain access. Do not store the machine while it is still connected to the power source as this may result in damage and injury.
-
Page 6: Safety Symbols
Safety Symbols The following table describes safety symbols that may appear on this product. Read, understand, and follow all instructions on the machine before attempting to assemble and operate. Symbols Descriptions Symbols Descriptions READ THE OPERATOR'S Disconnect the plug before MANUAL(S) –... -
Page 7: Technical Data
Know Your Electric Snow Thrower Read the owner’s manual and safety rules carefully before operating your electric snow thrower. Compare the illustration below to the actual unit in order to familiarize yourself with the location of the various controls and adjustments. Save this manual for future reference. -
Page 8: Carton Contents
+ Sun Joe customer service ® ® center at 1-866-SNOWJOE (1-866-766-9563) for assistance. Handle with care during assembly so that electrical wiring does not become damaged. 3. Before securing the upper frame, slide the extension cord restraint hook up the upper frame (Fig. 3). - Page 9 Chute Crank Assembly Fig. 3 1. Remove the cotter pin from the lower chute crank (Fig. 6). Fig. 6 Cotter Pin Lower chute crank Extension cord restraint hook Upper frame 4. Secure the connection of the upper frame to the middle frame by fastening the second set of knob and bolt on 2.
-
Page 10: Operation
Fig. 9 Fig. 12 Crank Thumbscrew connector Thumbscrew Lower chute crank 5. Slide the upper chute crank through the rubber ring located on the middle frame (Fig. 10). Operation Fig. 10 NOTE: Before using this machine, make sure that the power source you will use complies with the specifications detailed Upper chute crank in this manual. -
Page 11: Powering On/Off
® ® ® 3. When moving the snow thrower, use the wheels on one service center at 1-866-SNOWJOE (1-866-766-9563). side as the pivot point. Slightly tilt the snow thrower on Powering On + Off this pivot point to move it forward or backward. - Page 12 Pattern A: Throw the snow to the right or left side where it is possible. For areas such as a long driveway, it is Fig. 17 advantageous to start in the middle. Plow from one end to Chute the other, throwing snow to both sides. crank Pattern B: If the snow can only be thrown to one side of the area to be cleared, start on the opposite side.
-
Page 13: General Maintenance Tips
5. Do not use detergent or solvents as these could cause Fig. 19 irreparable damage to the snow thrower. Chemicals can destroy the plastic parts. 6. To protect the snow thrower from corrosion when storing for long periods, lightly oil the metal parts. Deflector 7. - Page 14 Replacing the Belt + Pulley Fig. 22 NOTE: Determine the left and right hand side of the snow thrower by standing behind the unit in the normal operating position. 1. Remove the screws from the left panel of the snow thrower and remove the left panel (Fig.
-
Page 15: Automatic Reset
Snow Joe universal 24-inch electric snow ® Belt tension thrower cover (Model SJCVR-24) for added protection. pulley Visit snowjoe.com to purchase the cover online. Belt Service + Support If your Snow Joe SJ626E-RM electric snow thrower requires ®... - Page 16 NOTE: Accessories are subject to change without any obligation on the part of Snow Joe + Sun Joe to provide notice of such ® ® changes. Accessories can be ordered online at snowjoe.com or via phone by contacting the Snow Joe + Sun Joe customer ® ®...
- Page 17 NOTES...
- Page 18 NOTES...
- Page 19 To obtain a replacement part or product, please visit Some states do not allow exclusions of incidental or consequential snowjoe.com/help or email us at help@snowjoe.com for damages so the above exclusions may not apply in all states. This instructions. Please be sure to register your unit beforehand warranty may give you specific legal rights in your state.
- Page 20 snowjoe.com...
Need help?
Do you have a question about the SJ626E-RM and is the answer not in the manual?
Questions and answers