Advertisement
Quick Links
Advertisement

Related Manuals for PREMIUM STRINGER 9200

Summary of Contents for PREMIUM STRINGER 9200
- Page 1 9200 TRINGING ACHINE ’ ANUAL...
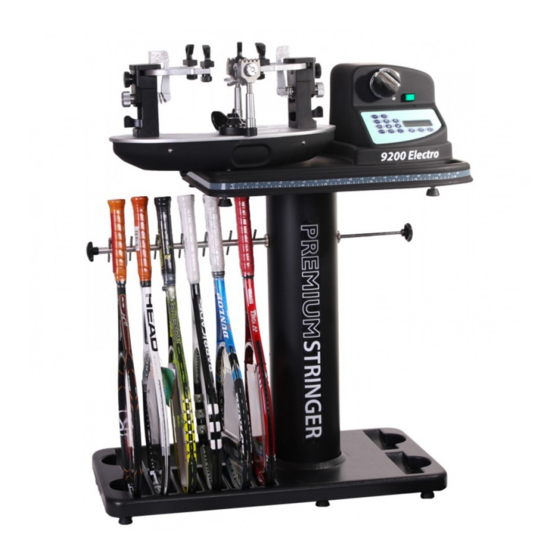
- Page 2 ANATOMY The 9200 is shipped to you in two cartons. Here is what the two cartons contain: 1). Electronic Tension Head 2). Racquet Mount Side Support (V type or K type) Center Support Rubber Cover Center Support Adjustment Knob Side Support Arm Adjustment Knob...
-
Page 3: Installation
INSTALLATION The machine is shipped in two cartons, a carton for the tension head and a carton for the racquet mount and accessories. Step 1: Open the carton of the tension head. Carefully lift the tension head assembly out of carton and place it on a hard surface or table. - Page 4 MOUNTING THE RACQUET FRAME Inserting the Side Supports Insert the four side supports in the holes of the side support arms and have them tighten by turning the knobs along with the washers beneath the side supports. Note the big jaw of the side support is for tennis racquet frame and small jaw is for the badminton racquet frame.
- Page 5 Center Support Adjustment Select the suitable adapter and mount on it on the center support. Place the racquet frame properly on both mounting stocks. Turn the knobs at the upper of each mounting stock clockwise until snug against the racquet frame and slight resistance is felt.
- Page 6 POWERING To install the power cord, insert the female end of the power cord into the Power Cord Socket located on the side panel and plug the male end into a grounded power outlet. The main power switch is located on the right of the machine next to the receptacle for the power cord.
-
Page 7: Control Panel
CONTROL PANEL H 0 Main 4.5 KG Screen : Hi / Mid / Low Speed 10%/20% / 0% Pre-Stretch Main/Cross/Knot String Tension KGS/LBS KG/LB Conversion Key : KG/LB To change the tension display from Lbs to Kgs, press the “KG/LB” key and then “KG”... - Page 8 PRE-STRETCH Selection Key : To select the desired pre-stretch pulling over tension setting and releasing the string to the tension setting, press “PRE-STRETCH” key and screen will be changed into pre-stretch mode. Each press of the key toggles between 0%, 10% & 20%. To get back to the main screen mode, press one of the “KNOT”, “MAIN”...
- Page 9 9. Tension Setting : KNOT Tension Setting KNOT Press “KNOT” key and machine will increase pulling tension by 10% over the selected MAIN or CROSS tension for one pull. For example: Set 60.0 pounds at MAIN tension.. 1). Press “KNOT” key and screen will display “KNOT 66.0 lbs”...
- Page 10 TENSIONER OPERATION 1. Setting the control panel : a). Set the tension display in KG or LB by pressing the KG/LB key. b). Select pre-stretch value – 0%, 10% or 20% by pressing PRE-STRETCH key. c). Select speed– high, medium or low by pressing SPEED ke y. d).
- Page 11 SWIVEL CLAMP OPERATION Different strings and different gauges require different adjustments. Adjustment can usually be done by finger tips. Note that the handle of the swivel clamp should be lifted before adjustment. SWIVEL CLAMP BASE OPERATION The lever on the swivel clamp base is turned clockwise to lock the base. To unlock, the lever is turned counterclockwise.
Need help?
Do you have a question about the 9200 and is the answer not in the manual?
Questions and answers