Advertisement
Quick Links
Advertisement

Related Manuals for PREMIUM STRINGER 8900 Electro

Summary of Contents for PREMIUM STRINGER 8900 Electro
- Page 1 ’ ANUAL FOR 8900 TRINGING ACHINE...
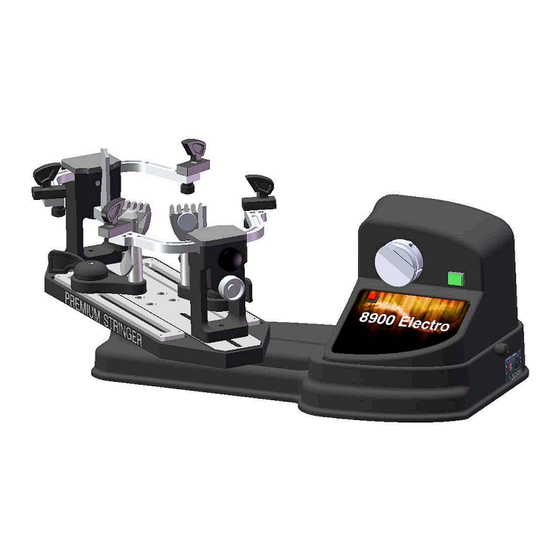
- Page 2 1. ANATOMY き き Machine Body Electronic Parts Side Support String Gripper Side Support Arm Indicator Lights Side Support Arm Adjustment Knob Tension Switch I-Adpater Center Support L.E.D. Tension Display Center Support Adjustment Knob KG/LB Select Switch Mounting Stock Tension Adjustment Knob Mounting Stock Locking Knob Gripper Reversing Switch Turntable...
-
Page 3: Installation Procedure
2. INSTALLATION PROCEDURE The 8900 is shipped to you in two cartons. Here is what the two cartons contain: 1). Electronic Tension Head 2). Racquet Mount Open the carton of the tension head. Carefully lift the tension head assembly out of carton and place it on a hard surface. Remove the 4 Allen bolts from the bearing pivot of the tension head assembly by a 6 mm wrench... - Page 4 Open the carton of the racquet mount. Carefully lift the racquet mount assembly out of carton and place its turntable in the bearing pivot of the tension head assembly. Next insert the 4 Allen bolts in the 4 holes of the turntable and then tighten them evenly with a 5 mm wrench.
- Page 5 4. MOUNTING THE RACQUET FRAME Begin by turning the black (side support adjustment) and chromed (center support adjustment) knobs on the two mounting stocks counterclockwise to open the side support arms and reduce the spread of the vertical supports. Spread the mounting stocks so that the vertical centers supports fit within the racquet head without touching it.
-
Page 6: Tension Control
5. TENSION CONTROL : Front Panel Features : A. Rotary String Gripper B. Indicator Lights C. Tension Switch D. L.E.D. Tension Display E. KG/LB Select Switch F. Tension Adjustment Switch G. Gripper Reversing Switch H. PRE-STRETCH... - Page 7 Step 1: Step 2: To install the power cord, insert the female end of Turn the main power switch on by pressing it in the power cord into the Power Cord Socket I direction. (O direction is to turn the tensioner located on the rear of the tensioner and plug the off.) and the red power indicator light will light male end into a grounded power outlet.
- Page 8 Step 5: Factory has pre-set the Pre-Stretch before shipment so while switching on the machine by pressing the Power Switch on the side panel, the LED will display “F12”. If the LED doesn’t display “F12”, to attain the Pre-Stretch function, switch off the machine by pressing the Power Switch on the side panel first.
- Page 9 Step 6: Step 7: Set the desired tension (such as 20 lbs) by To pull insert the string in the string gripper, rotating the tension adjustment knob – wrap the free end of the string clockwise around clockwise to decrease the tension and the string gripper and insert the string between counterclockwise to increase the tension.
-
Page 10: Tension Calibration
6. Tension Calibration: Step 1: Use a calibrator (an electronic calibrator is highly recommended), apply tension as if stringing a tennis racquet. Note: The calibrator and pulled string must avoid contacting any parts on the machine as it may cause the friction and get the wrong tension. (electronic calibrator) (manual calibrator) - Page 11 Step 2: Set the tension at 5 KG (or 11 LB). Press the tension switch to pull the string and write the machine’s tension on a paper first. Then, release the string by pressing the tension switch again and go for next tension checking. Step 3: Set the tension at 10 KG (or 22 LB).
- Page 12 Step 5: Set the tension at 20 KG (or 44 LB). Press the tension switch to pull the string and write the machine’s tension on a paper first. Then, release the string by pressing the tension switch again and go for next tension checking. Step 6: Set the tension at 25 KG (or 55 LB).
- Page 13 Simple Tension Calibration: Read the tensions you have written on the paper, if your electronic tensioner is pulling tension inaccurately - all over or lower than the tension setting, it may need to be adjusted by rotating the Calibration Screw located on the side of the tensioner. Step 1: Set the tension at 5 KG (or 11 LB) and use a calibrator and press the tension switch to pull its string.
- Page 14 Professional Tension Calibration : If your electronic tensioner is pulling tension inaccurately – sometimes over or sometimes lower than the tension setting, it may need to be adjusted by rotating the blue Calibrator Screw on the front of the circuit board inside of the tensioner. Step 1: Use a calibrator, apply tension as if stringing a racquet.
- Page 15 Remove the rotary string gripper away from the machine by a 5 mm wrench. Loosen the small screw which fixes the upper cover to the machine by a 3 mm wrench. Adjust the two blue calibrator calibrator Screws marked “Hi” and “Lo” on the front of circuit board.
- Page 16 APPENDIX A ADJUST STRING CLAMP TO THE CORRECT HOLDING PRESSURE * If gripper of the string clamp is over tension, lift the clamp handle up and turn the round adjustment of the string clamp counterclockwise to the correct tension by needle nose pliers or fingers adjusting directly. *If gripper of the string clamp doesn’t hold string well, lift the clamp handle up and turn the round adjustment of the string clamp clockwise to the correct tension by needle nose pliers or fingers adjusting directly.
- Page 17 APPENDIX B ADJUST STRING CLAMP TO THE CORRECT HOLDING PRESSURE *Lift up the base handle and turn it counterclockwise. Lower the handle and turn it clockwise. Repeat the process until the base is locked in place. *The handle position could be at any desired position. To adjust it, lift up the base handle, turn it to the desired position, then lower the handle.
Need help?
Do you have a question about the 8900 Electro and is the answer not in the manual?
Questions and answers