Table of Contents
Advertisement
Quick Links
15
14
Part F
B8
A18
B9
B28
A8
Wheat bulb wire
16
2 × 4mm Screws
B1
From Battery Box
From wheat bulb
Wiring Diagram
Terminal A
Wheat bulb
B1
Terminal B
Connect
Wire from wheat bulb
To Terminal B
Switch
Battery
To Terminal A
Terminal A
Terminal B
Connect
17
18
Insert Missiles
(Take care with sharp points).
2×10
Screws
2×6 Screws
C13
Missile Launcher
14
20
AA/UM3
Battery
(not included)
Pull back and lift.
Front
Lowering the headlights
will reveal the missiles / tools.
Handling batteries
+
Incorrect use of dry cell batteries may result in fire, battery rupture, or leakage. Take care of the following points:
• Batteries contain inflammable substances such as lithum and organic solvents. Do not attempt to recharge, short,
disassemble, modify, heat, or place batteries in a fire.
• When disposing of batteries or storing them, isolate the terminals by covering them with tape.
Box
• Be sure to correctly match the battery plus and minus polarities.
• When storing batteries, avoid locations that are subject to direct sunlight, high temperature and/or high humidity.
• If liquid has leaked from a battery and gets into your eye, immediately wash your eye with copious amounts of
water and seek medical advice. If battery liquid gets on your skin or clothes, wash it off with water.
• Store batteries out of reach of children.
-
• Dispose of used batteries safely at your local recycling centre.
19
Decal placement and painting suggestion
B27
C16
Main body colour
154
B26
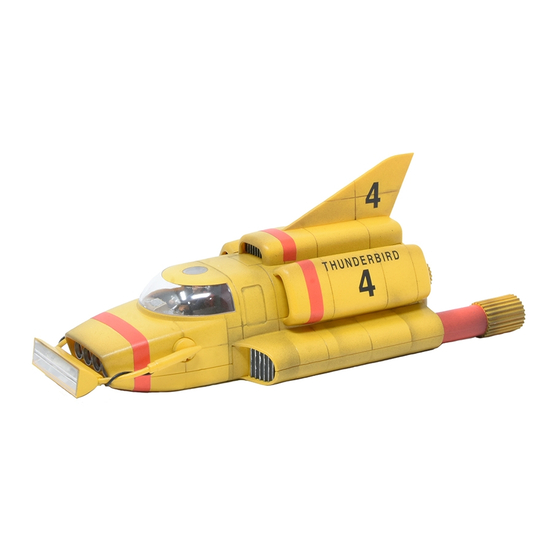
The stripes on the nose of Thunderbird 4
C17
differed between episodes.
Decals
Base:
27003
C15
Ribs:
Both sides
1
Insert choice of tools.
27003
Base:
Ribs:
2
9
Switch operates headlights.
Cockpit interior decals:
Right inner wall
11
10
Cockpit inner
64
5, 4, 3, 2, 1... check out the rest of the range!
www.bachmann.co.uk
AiP10004
THUNDERBIRD 4
1
or
3
and
4
give you the options.
5
9
3
8
9
154
4
6
60
9
8
6
9
Paint colour references:
We recommend using the following Humbrol paint colours:
(Paints not included)
SILVER
MATT BLACK
60
MATT SCARLET
61
Left inner wall
Inner bulkhead
MATT FLESH
16
17
64
MATT LIGHT GREY
15
82
60
MATT ORANGE LINING
64
154
MATT INSIGNIA YELLOW
157
MATT AZURE BLUE
27003
POLISHED STEEL
The original Thunderbirds television series was produced in a time before
CGI and computers. Skilled model makers and technicians created several
models in varying scales depending on the shot required in the storyline.
This coupled with camera lighting from different angles means the various
craft do appear to be different colours in certain scenes. The paint codes
provided are a basic guide and we would suggest watching the episodes
and referring to the box photo for further detailed information.
You will also need: (not included)
Plastic
Cement
How to apply decals:
Waterslide decals are supplied with this model kit.
Please follow these instructions when applying.
• Cut out the decal to the
required shape using
scissors or a craft blade.
• Dip the decal in water
for 10 to 20 seconds.
(alternatively use HUMBROL 89 MID BLUE)
• Place decal in the desired
position and slide it gently
from the backing sheet
using tweezers
• Adjust position if required
and dry excess water with
a soft cloth.
Symbol guide:
Glue here
Sprue
Craft
1 x
Tweezers
Nipper
Knife
AA Battery
No glue required
ADVENTURES IN PLASTIC
13 Moat Way, Barwell, Leicestershire, LE9 8EY
A Bachmann Europe Production
01455 841756 • www.bachmann-europe.co.uk
Thunderbirds™ and © ITC Entertainment Group Limited 1964, 1999 and 2020. Licensed by ITV Ventures Limited. All rights reserved. © Bachmann Europe Plc 2019.
Advertisement
Table of Contents

Related Manuals for Bachmann ADVENTURES IN PLASTIC THUNDERBIRD 4


Summary of Contents for Bachmann ADVENTURES IN PLASTIC THUNDERBIRD 4
- Page 1 01455 841756 • www.bachmann-europe.co.uk Connect • Dispose of used batteries safely at your local recycling centre. Thunderbirds™ and © ITC Entertainment Group Limited 1964, 1999 and 2020. Licensed by ITV Ventures Limited. All rights reserved. © Bachmann Europe Plc 2019.
- Page 2 Two sets required (one left and one right). Carefully check the contents of the kit, including parts and decals, before assembly. Spring Right Parts not required This kit does not include paints or glue. Please purchase them seperately. Feed wheat bulb wire into body.
Need help?
Do you have a question about the ADVENTURES IN PLASTIC THUNDERBIRD 4 and is the answer not in the manual?
Questions and answers