Table of Contents
Advertisement
Quick Links
Assembly Instructions • Instructions Pour L'assemblage • Instrucciones De Ensamblaje
Caution-electrically operated product
Not recommended for children under 3+ years of age. As with all electric
products, precautions should be observed during handling and use to
prevent electric shock.
Input: 230 VAC 50Hz. Output: DC 16V 1000mA
Attention – produit fonctionnant à l'électricité
Non recommandé pour les enfants de moins de 3+ ans. Comme pour tous les
produits électriques, manipuler et utiliser avec précaution afin d'éviter tout
risque de choc électrique.
Entreé: 230 VCA 50 Hz. Sortie: 16 VCC 1000 mA
Precaución-producto que funciona con electricidad
No recomendado para niños menores de 3+ años de edad; Al igual que con
todo producto eléctrico, se deben tomar precauciones mientras se maneja
y usa para evitar una descarga eléctrica.
Entrada: 230 VCA, 50 Hz. Salida: 16 VCC, 1000 mA
Advertisement
Table of Contents

Summary of Contents for Bachmann E-Z TRACK
- Page 1 Assembly Instructions • Instructions Pour L’assemblage • Instrucciones De Ensamblaje Caution-electrically operated product Not recommended for children under 3+ years of age. As with all electric products, precautions should be observed during handling and use to prevent electric shock. Input: 230 VAC 50Hz. Output: DC 16V 1000mA Attention –...
- Page 2 POUR UNE INSTALLATION RAPIDE ET UNE PERFORMANCE OPTIMALE, VEUILLEZ LIRE CES INSTRUCTIONS AVANT DE METTRE LE TRAIN EN MARCHE (Il est possible que toutes les sections ne s’appliquent pas á votre produit Bachmann.) INSTRUCCIONES GENERALES DE ENSAMBLAJE DEL E-Z TRACK DE BACHMANN ®...
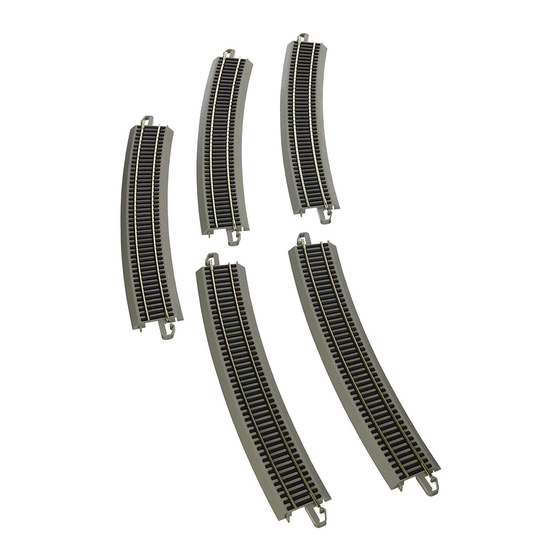
- Page 3 TRAIN SET ASSEMBLY Your Bachmann train set comes with a list of contents. Check this to make sure you have all the parts you need before starting assembly. Choose a firm and flat surface for assembly such as a floor, carpet, or tabletop. To make sure you have enough working room, it’s a good idea to first make a rough track layout by loosely placing sections of E-Z Track ®...
- Page 4 Note: If assembled track must be moved, care should be taken to avoid bending the track where sections connect. It is always best to assemble the track where it is to be displayed. ASSEMBLAGE CORRECT DU CIRCUIT E-Z TRACK Il faut assembler les sections de voie avec grand soin! Un assemblage incorrect causera des déraillements, une interruption du contact électrique, ou les deux.
- Page 5 Be sure rail joiners do not slip under the rails without properly connecting. Assurez-vous que les raccords ne glissent pas sous les rails sans les relier correctement. Asegúrese que las juntas del riel no se deslicen debajo de los rieles sin conectarse correctamente.
- Page 6 CONNECTING TRACK POWER Do not plug in the speed controller yet. Turn the speed controller knob counterclockwise until it stops (all the way to the left; figure 4). Plug the red terminal wire into the “TO TRACK ” jack of the speed controller as shown in figure 5. Connect the other end of the red terminal wire to the TERMINAL/RERAILER track by simply plugging it in as shown in figure 6.
-
Page 7: Operation
OPERATION Plug power pack into wall outlet (figure 9). Begin feeding power to the track by slowly turning the control knob clockwise (figure 10). The direction in which the locomotive travels is determined by the direction switch located at the top of the controller (figure 11). To change your locomotive’s direction, turn the speed controller counterclockwise to stop the locomotive and then slide the direction switch to the left or right as needed. - Page 8 ACTION CHECKLIST IF YOUR TRAIN DOESN’T RUN OR STOPS RUNNING IF YOUR TRAIN DOESN’T RUN, CHECK THE FOLLOWING: 1. MAKE SURE THE POWER PACK IS PLUGGED INTO A LIVE WALL RECEPTACLE. 2. MAKE SURE ALL LOCOMOTIVE AND CAR WHEELS ARE ON THE TRACK. 3.
-
Page 9: Short Circuits
SHORT CIRCUITS If your train stops or fails to start, a short circuit may be indicated. . Derailed wheels may cause UNPLUG THE POWER PACK AT ONCE a short, so check to make sure all wheels are properly on the track. Check all connections and be sure that no metal of any sort is across the rails (figure 13), including metal-coated tinsel or holiday ornament hooks. - Page 10 NO USE LUBRICANTES DOMÉSTICOS COMUNES, PORQUE PUEDEN DAÑAR EL TREN. Se recomienda el E-Z Lube ® de Bachmann. Comuníquese con la tienda de hobby de su ciudad para obtener los productos y los procedimientos de lubricación adecuados. Bachmann’s E-Z Track ®...
-
Page 11: Cleaning And Maintenance
RANGEMENT Conservez la boîte de votre train Bachmann afin de pouvoir l’y ranger. Pour obtenir un résultat optimal l’an prochain, inversez la procédure d’assemblage décrite plus haut et nettoyez chaque pièce avant de la ranger. ALMACENAMIENTO Guarde la caja del juego de trenes Bachmann para almacenarlo. - Page 12 8/2020 TRAIN-IS176 Printed in China...


Need help?
Do you have a question about the E-Z TRACK and is the answer not in the manual?
Questions and answers