Table of Contents
Advertisement
Quick Links
Digitrax Super Throttle
IR Operation with UR90, &
Radio Operation with UR91
Norcross, GA 30071 USA
(770) 441-7992 Fax (770)441-0759
Digitrax Manuals & Instructions are updated periodically.
Please visit www.digitrax.com for the latest version of all manuals.
This manual was updated 11/03.
DT400
Series
Users Manual
Includes:
DT400 Series Throttles,
Digitrax, Inc.
450 Cemetery ST #206
www.digitrax.com
D
R
igitrax
C
ommand
C
ontrol
Advertisement
Table of Contents

Subscribe to Our Youtube Channel
Related Manuals for Digitax DT400 Series

Summary of Contents for Digitax DT400 Series
- Page 1 DT400 Series Digitrax Super Throttle Users Manual Includes: DT400 Series Throttles, IR Operation with UR90, & Radio Operation with UR91 Digitrax, Inc. 450 Cemetery ST #206 Norcross, GA 30071 USA (770) 441-7992 Fax (770)441-0759 www.digitrax.com Digitrax Manuals & Instructions are updated periodically.
-
Page 2: Table Of Contents
Digitrax DT400 Series Throttle Users Manual Includes DT400 Series Throttles, IR Operation with UR90 & Radio Operation with UR91 Table of Contents 1.0 Introduction 2.0 DT400 Features and Specifications 3.0 Plug N’ Play with your DT400 Turn track power on and off DT400 Display Basics Select &... - Page 3 4.21 Full Numeric Keypad 4.22 Infrared Emitters 5.0 Track Power On/Off Track Power On Track Power Off 6.0 How To Select and Run Trains The SEL Message DCC Address Ranges & Display Selecting An Address On A Throttle Recall a Loco Stealing: Forcing An Address Selection 6.5.1 Slot Following...
- Page 4 16.0 Sw (Switch) Mode 17.0 Edit Fast Clock, Routes, etc. 17.1 Fast Clock Basics 17.2 Stop the Fast Clock 17.3 Edit Fast Clock Time, Rate & Alarm 17.4 Route Basics 17.4.1 Enabling Routes 17.4.2 DS54 Cascaded Routes 17.5 Edit Routes 18.0 FIND Key &...
-
Page 5: Introduction
1.0 Introduction Congratulations on your purchase of a Digitrax DT400 Series Super Throttle! The design of the Digitrax Command Control system lets you operate your lay- out your way. With LocoNet you simply connect system components to build the layout control system you’ve always wanted! The DT400 Series Super Throttle is just one of many different Digitrax Command Control components available. -
Page 6: Dt400 Features And Specifications
Your success with and enjoyment of our products are very important to us. After all, this is a hobby and it is FUN!!! Please read this manual carefully before you install your system. We have included lots of hints and operating ideas based on our experience with the Digitrax system. - Page 7 Diagram 1: DT400 Hook Up Power District (Double Gapped) D C S 1 0 0 L O C O N E T S C A L E M O D E O / G R U N Transformer S L E E P POWER T R A C K S T A T U S...
-
Page 8: Plug N' Play With Your Dt400
3.0 Plug N’ Play with your DT400 1. Plug the DT400 series throttle into any functioning Digitrax LocoNet System or other LocoNet compatible system and you are ready to go! You can use any LocoNet jack on your system. 2. First, you will see the DT400 version number screen: This screen shows the DT400’s... -
Page 9: Turn Track Power On And Off
6. If you unplug the DT400 from LocoNet the LCD will go off while it is unplugged. It will come on again when you plug in to LocoNet again. 3.1 Turn track power on and off The track power indicator on your DT400 shows whether track power is on or off. -
Page 10: Dt400 Display Basics
3.2 DT400 Display Basics R Throttle L Throttle Speed Speed Address Address Direction Direction Blinking Smoke Icon indicates that the R Throttle is active. Functions displayed correspond to the active throttle 1. The DT400 handheld has two throttles called the left throttle (L) and the right throttle (R). -
Page 11: Select & Run An Analog Loco On Address "00
For example, in Fn mode, to increase speed you can either turn the throt- tle knob clockwise or press the Y + Key. To change the loco’s direction you can either double click the throttle knob or you can press the reverse key associated with the throttle you are using. To access functions on the active address you are controlling, simply press the numeric key that corresponds to the function you want to activate or deactivate. - Page 12 selection mode by pressing another key to begin another throttle task. The EXIT Key can be used at any time to return to Fn mode for normal loco operation. This illustration shows what will be on your LCD when you press the LOCO Key to select an address on the R Throttle if address “00”...
-
Page 13: Decoder Address Basics
3.4 Decoder Address Basics Each DCC decoder has an address that is used by the system to send com- mands to that decoder. To select a DCC locomotive and run it on either throt- tle, you must know its address. Digitrax decoders are set up at the factory with the “default”... - Page 14 4. Press the LOCO Key to select address 03 on the L throttle. LOCO 5. The left loco icon will appear in the display with a direction arrow and “blinking smoke” . The “blinking smoke” indicates which side of the throttle is displaying function information on the top line of the LCD.
- Page 15 Throttle in normal operations mode indicated by Fn. In Function (Fn) Mode Throttle knobs control Loco's Speed & Direction Track Power Keypad entries control functions Indicator ON 2 digit address 03 An analog loco address 00 Selected on the Selected on the L Throttle R Throttle Running at 20% speed...
- Page 16 Diagram 2: DT400 Throttle Controls Infrared Flashlight LCD Display LEDs L Throttle R Throttle Knob Knob FUNC Key LOCO Key Press once to change Press to enter to Fn (function) mode D T 4 0 0 address selection mode. MU Key Press again to Press to enter select address.
-
Page 17: Dt400 Series Throttle Control Panel
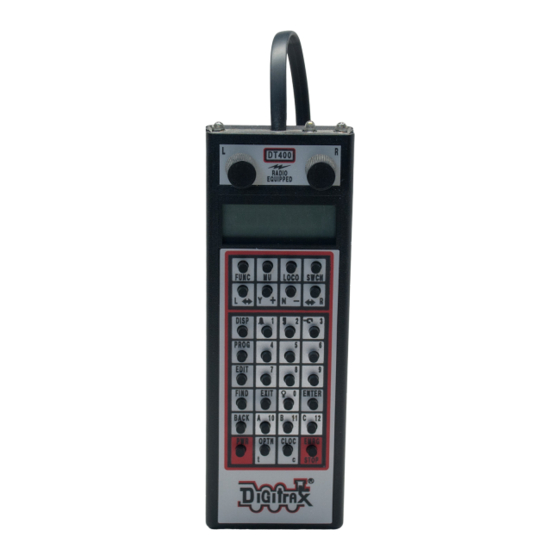
4.0 DT400 Series Throttle Control Panel 4.1 General Information The DT400 and DT400R are full function hand held throttles that include 2 independent throttles and a common keypad to control, up to 13 functions (0-12), turnouts and programming. The DT400 does not require a battery in normal walkaround operation. -
Page 18: Liquid Crystal Display (Lcd)
The throttle knobs on the DT400 can also be used to access the recall stack and select a locomotive to run on a throttle or to reverse the direction of the locomotive currently selected on that throttle. When dialing up numbers with the throttle knobs, the R Throttle knob changes 1s and 10s and the L Throttle knob changes 100s and 1000s. -
Page 19: Smoke Icon
points to the back of the loco, then the throttle is in the reverse direction. If there is not a locomotive selected on a throttle the loco icon will not appear. = Forward Direction = Reverse Direction Note: These direction indicators are for DCC equipped locos only. They will indicate direction based on the normal direction of travel that you set up for your DCC equipped loco. -
Page 20: Mode Indicator
4.3.4 Mode Indicator The mode indicator, located at the bottom center of the LCD, shows the DT400’s current mode of operations. Table I: DT400 Mode Indicator Display Display Mode Used For Function Normal locomotive operation functions available on keypad Loco Selection Locomotive Address Selection Mode Multiple unit (consist) operation set... -
Page 21: L (Left) & R (Right) Throttle Display
The DT400 automatically defaults to the Fn mode & returns to this mode when ever the EXIT Key is pressed. The Mode indicator usually shows what the numeric keys are associated with. For example, in Fn mode, any entry on the numeric keypad will affect functions. In Sw mode, keypad entries will change turnouts and in Lo mode, entries on the keypad will enter loco address numbers, etc. -
Page 22: Function Display
This is useful when the text area is showing information other than speed. Bar Graph showing 0% speed on R Throttle 100% Bar Graph Speed Mark Bar Graph showing 50% speed on R Throttle Bar Graph showing full speed on R Throttle 4.3.8 Function Display Whether functions 0-12 are on or off for the currently active loco address they are displayed on the top line of the LCD. -
Page 23: Track Power Indicator
4.3.9 Track Power Indicator This very small star shaped dot (shown larger than life above) located in the top line of the LCD on the right side indicates the status of the track power. No indicator = System track power is OFF (Press PWR followed by N-) Indicator On Steady = System track power is ON(Press PWR followed by Y+) Blinking Indicator = System is in “STOP”... -
Page 24: Func Key
4.4 FUNC Key The FUNC Key is used to enter function control mode. Function control FUNC mode is the default mode for normal locomotive operation with the DT400. Press this key during any throttle task to return to normal loco operation mode with function controls active on the numeric keypad. -
Page 25: Disp Key
These keys can be set up to act in two different ways: Repeating (also called typematic) so that if you hold a key down it will continue to increase or decrease step by step until you release the key. This option is active when your throttle is set up for ballistic tracking. -
Page 26: Optn T Key
The PWR Key is also used to turn on and off the flashlight feature. The flash- light LED will be on as long as you hold down the PWR Key. 4.16 OPTN t Key OPTN The OPTN t Key is used to enter the Option Mode to set throttle and sys- tem options. -
Page 27: Full Numeric Keypad
You can use the OPTN t Key to change the EMRG STOP to “Global” Stop. See Section 23.1.3 for instructions. EMRG With global stop option enabled, pressing the EMRG STOP Key will STOP stop all locos on the layout and you will see the DT400’s track power indicator blinking on and off. -
Page 28: Infrared Emitters
Note: DT400 can access F0-F12 when used with DCS50 or DCS100 Command Stations. DT400 can access F0-F8 when used with DB150 Command Station. 4.22 Infrared Emitters Your DT400 has two infrared LEDs in the cable end of the throttle. These emitters send infrared signals that can be used by LocoNet compatible Infrared receivers to give you tetherless operation. -
Page 29: Track Power Off
5.2 Track Power Off When track power is off: DT400 Track Power Indicator is off (track power indicator is a small dot in the top line on the right side of the LCD) Command Station TRACK STATUS indicator is off and Command Station OFF LINE indicator is on. -
Page 30: Selecting An Address On A Throttle
Address 00: The analog address used to run locomotives without decoders. All analog locos on the layout will respond to the speed and direction commands issued to address 00. 2 digit addressing: Addresses in the range of 01 through 127. Also called short addressing. - Page 31 NOTE: When you enter a four digit address from the key pad, the display will show the address as a two digit address and then a four digit address as you enter the numbers. For example, when you enter address 5786, you will see the following sequence of displays: Use the DT400 key pad to enter address 5786 and you will see the following sequence of displays.
-
Page 32: Recall A Loco
5. As you browse through addresses, the LCD will display current information for each address including current speed on the bar graph, current status in the Text Area, active functions on the top line of the LCD. The Loco icon will blink if the loco address is selectable and will be steady if the loco is selected on another throttle. -
Page 33: Stealing: Forcing An Address Selection
To Recall the last 4, 8, or 16 addresses on the R Throttle 1. Press and hold the R Throttle knob. The word “Recall” will appear in the text line. 2. When “Recall” appears in the display, release the knob. “RE” will appear in the mode indicator in the center of the bottom line on the LCD. -
Page 34: Slot Following
active and both throttles will update speed and direction information for the loco address. This can result in strange locomotive behavior especially if one throttle is trying to to stop the loco and the other is trying to speed it up at the same time. -
Page 35: Locomotive Speed Control
7.0 Locomotive Speed Control To control the speed of a locomotive: 1. Select the loco address on either throttle 2. Turn the throttle knob clockwise to increase speed and counterclock- wise to decrease speed or 3. Use the Y + &... - Page 36 Local Stop EMRG Press the EMRG STOP Key to stop the loco that is active in the STOP DT400’s display. To resume operation, use the throttle knob associ- ated with that address to increase the loco’s speed. EMRG Press the EMRG STOP Key again to stop the loco that is associated STOP with the other throttle on the DT400.
-
Page 37: Locomotive Direction Control
9.0 Locomotive Direction Control Double click the Throttle Knob to reverse the direction of a locomotive running on that throttle: 1. Double click the Throttle knob that is controlling the locomotive. Press down on the knob quickly two times (2 distinct key presses within 1/2 second). -
Page 38: Function 0 (F0)
3. If the Mode indicator does not show Fn, press the FUNC Key FUNC once to enter the function mode for the active throttle. The Mode Indicator in the center of the lower line on the LCD will show Fn (function mode). -
Page 39: Controlling Functions On Consisted Locomotives
To latch F2 on: While holding the Horn 2 Key down press the PWR Key then release both keys simultaneously. The display will show the follow- ing: Function 2 is latched on for address 03 running on the R Throttle, the loco is running at 25% speed. -
Page 40: Multiple Unit Operations
11.0 Multiple Unit Operations Digitrax command stations offers three methods of consist control: 1. Basic Consisting 2. Advanced Consisting 3. UniVersal Consisting (the Digitrax preferred method) For complete information about these methods, please consult your Digitrax Starter Set Manual. By definition, Digitrax always adds loco addresses to the “TOP” loco address in a consist. - Page 41 train or one unit can be the mid train helper or a pusher on the end of the train. 4. Before consisting the locos, make sure that both are traveling in the SAME PHYSICAL DIRECTION ON THE TRACK. (The direc- tion indicators may or may not match, the important thing is that the locomotives are set up to move in the same direction and are not pulling against each other.)
-
Page 42: Removing A Loco From A Consist
10.2. You will not be able to change the speed or direction of any loco that is part of a consist but, is not the TOP loco, while it is consisted. Once a consist is set up & linked to the TOP locomotive, this TOP loco can be released &... -
Page 43: Releasing An Address From A Throttle
12.0 Releasing An Address From A Throttle When you are finished running a locomotive address, release if from your throttle so that it is available for other throttles to select and run. Radio & Infrared Throttles must be plugged in to LocoNet to release an addresses from your throttle. -
Page 44: Programming And Configuration
1. Press the LOCO Key to enter address selection, browse to the LOCO address you want to dispatch. DISP 2. Press to the DISP Key to dispatch it to your LocoNet system, that’s all there is to it! The dispatched address can be a single locomotive address, either two digit or four digit, or a consist that was set up by the DT400. -
Page 45: Using The Dt400'S Key Pad In Progamming Mode
13.1 Using the DT400’s key pad in Progamming Mode Before we discuss how to program decoders it is useful to explain how the DT400 behaves when you enter CV numbers and data values. CV #s 000-255 can be directly entered from the key pad when the throttle is in program mode and the indicator is displayed on the Left side of the LCD. -
Page 46: Programming Mobile Decoder Addresses
The following example shows how key pad entry works when you are entering CV Values: Use the DT400 key pad to enter CV Values while in Programming Mode Example: Key in a CV Value of 25 Press the "2 Key" CV Value of 002 is displayed Press the "5 Key"... - Page 47 Program in the text area announces that you are in programming mode. “CVNo” on the left side indicates that configuration variable numbers will show on the left. and “dAt” on the right side indicates that CV values or data will show on the right side of the display. The mode indicator in the center of the bottom line of the LCD shows which programming mode the throttle was using the last time it was in programming mode.
-
Page 48: How To Program Other Configuration Variables
6. To program a 2 digit address, use the R Throttle knob to dial in the address or use the keypad to enter the address and press the ENTER ENTER to program the decoder. Note, when programming a 2 digit address, the decoder automatically enables 2 digit addressing. 7. -
Page 49: Programming Cvs Other Than Addresses
displays the CV values as decimal numbers 000-255 (nnn). To view the num- bers as hexadecimal simply press the R throttle knob and you will see the CV value change to the hex equivalent of the decimal. Hex numbers are displayed as xnn. - Page 50 Use Paged Mode (P ) to Program CV02-Start Voltage To a CV value (dAt) of 045 (decimal) The symbol indicates that values entered by turning the R throttle knob or entering numbers from the keypad will appear in this side of the DT400's display. Remember that you can click the R Throttle to toggle the CV value display between decimal and hex as shown below.
-
Page 51: Operations Mode Programming
13.4 Operations Mode Programming Operations mode programming lets you program CVs in DCC locomotives equipped with Extended Packet Format decoders while they are on the main- line. A typical use for Ops mode programming would be to change the accel- eration rate (CV03) or the deceleration rate (CV04) of your locomotives to simulate the weight and braking capability of the train to compensate for changing the number of cars or power units on a train. -
Page 52: Busy Or Fail Message
This display shows a typical operations mode programming screen: 1. Po in the Mode Indicator Area shows that we are in Operations Mode Programming 2. 0597, the address being programmed appears in the lower right corner. 3. CV Number 004 (deceleration) 4. -
Page 53: Reading Back Cv Values Programmed
13.5 Reading Back CV Values Programmed Your DCS100 and DT400 together can read back the configuration variable values programmed into your decoders. Since you must use the programming track for this, infrared and radio throttles must be plugged in to LocoNet to read back CV &... -
Page 54: How Your Command Station Manages Addresses
text area of the display will show Ad4=???? (disregard any value DISP that appears at this time). Press the DISP Key and the display will change to Ad4=8rd followed by the flashing box. When the read back is finished the 4 digit address will be displayed on the right side of the text area. -
Page 55: Decoder Status
Please check your starter set manual for a complete discussion of the purging strategy used by your command station. 15.0 Decoder Status The command station assigns status codes to each locomotive address in the system. Addresses are either selectable or not selectable. Decoders are not selectable if they are in-use on another throttle or if they are part of a consist. -
Page 56: Note For Non-Digitrax Decoder Users
that is flashing in the display when you enter selection mode, just turn the throttle knob up one address and then back to the original address and the status code will display on the LCD. EDIT 3. To change the status of the decoder simply press the EDIT Key the flashing Lo will change to S and the current status code of the address will be displayed on the LCD. - Page 57 To change the position of a switch or turnout 1. Press the SWCH key to enter switch mode. When you enter SWCH SWCH Switch mode, the throttle knobs & direction keys will continue to control the loco addresses running on the throttle. Loco speed will be displayed on the bar graph and loco direction will be displayed on the direction indicators for each throttle.
-
Page 58: Edit Fast Clock, Routes, Etc
OPTN OPTN know the position for this turnout. Press the OPTN t Key move the switch to the “thrown” position OR the CLOC c Key CLOC CLOC to move it to the “closed” position. 6. If the switch you selected is a turnout connected to an accessory decoder, it will change position from closed to thrown or vice-versa. -
Page 59: Stop The Fast Clock
CLOC CLOC c Key again. This is the display you will see when the fast clock option is set to display. Display with FastClock showing 12:00am 1. Address 6104 running at 25% speed on the Left throttle in the reverse direction. 2. -
Page 60: Route Basics
EDIT 2. Press the EDIT Key to scroll through the different things you can edit. 3. The first time you press the EDIT Key, the mode indicator in the cen- ter of the bottom row of the display will show E (Edit Clock Mode) and the text area will show a 12 or 24 hour time. -
Page 61: Enabling Routes
The DCS100 supports up to 32 routes. Each route consists of a list that con- tains a TOP turnout address and its position (c or t) and up to 7 other turnout addresses and their positions. Routes are stored in the DCS100’s memory and can be operated by any throttle in the system that can send switch commands. -
Page 62: Edit Routes
17.5 Edit Routes To go to the Edit Routes (Er) mode you must pass through the clock editor: EDIT 1. Start in Fn mode. Press the EDIT Key to enter Edit Mode. Press the EDIT Key again to enter Ec (Edit Clock) mode. Press the EDIT Key again to enter E (Edit Fast Rate) mode. - Page 63 This display shows Entry 01, Route 11as empty. ENTER 4. Press the ENTER Key and “Sw” in the text area will begin to flash, use the Throttle knobs to dial up the turnout address you want to add to the route. Use the L Throttle for 100s and the R Throttle Knob for 10s &...
-
Page 64: Find Key & Digitrax Transponding
EXIT 9. Once you have finished editing routes, press the EXIT Key exit the Er (Edit Routes) mode and return to Fn (Normal Operating) mode. 10. To operate the routes that you have set up, simply press the SWCH , key in or dial up the TOP turnout address for the route SWCH OPTN OPTN... -
Page 65: Shut Down And Resume Procedures
This example shows a DT400 in FIND mode for address 03 selected on the L Throttle. The system is not able to find address 03 so there is no display after the <Zn. Either the loco or rolling stock with address 03 is not present on the layout or it does not have a transponder or it is located in a zone that does not have a transponder receiver. -
Page 66: Troubleshooting Throttle Problems
The power to the command station can be left on all the time if desired. In “sleep” mode, the command station consumes very little energy. In this state the command station provides keep alive power to all throttles that are connect- ed to LocoNet. -
Page 67: Strange" Locomotive Lights
Have you reset any CVs since the last time you ran the loco? If so, go back and change them to their default CV values and then try to run the loco. It is possible to set acceleration so high that it will take 10 minutes for the loco to start moving. - Page 68 optimal performance in your layout room. See your starter set man- ual for more information about installing UR90 and/or UR91s on your layout. 2. For Radio operation, plug in at least one Digitrax Radio receiver UR91 to your working LocoNet. Most layouts only need one UR91. 3.
-
Page 69: Loconet Id Change
The throttle may flash the normal Fn Mode screen about every 60 seconds. This happens when the throttle “pings” the system to let the command station know that it is still part of the system. This keeps the system from releasing that locomotive back to the system and making it available to be selected by another throttle. -
Page 70: Tetherless Operation
This display shows a DT400 that has found an Infrared receiver on LocoNet with a current LocoNet ID of 03. The DT400 is ready to Edit the LocoNet ID. Other characters may be displayed on the screen at this time depending on the current throttle state. - Page 71 mands to the same address can result in serious problems in an operating ses- sion because locos can appear to be out of control. Releasing a Locomotive Two options are available for tetherless release. These options are set by DT400 Option #3, see Section 23.2.2 for instructions. No tetherless release allowed: if the LOCO Key is pressed while LOCO...
-
Page 72: Control Lock
Fast Clock When using the fast clock option, the DT400/R will keep track of and display fast time based on the last synchronized system fast time when the DT400/R was connected to LocoNet. If the fast time is edited by another throttle con- nected to LocoNet, the DT400/R will not see this change until it is plugged into LocoNet at which time its display will be updated. -
Page 73: Low Power Indicator
putting it back in the battery compartment with the polarity reversed. 22.2 Low Power Indicator While it is running as a tetherless throttle, the DT400/R automatically checks the power available to the throttle each time a battery is inserted and each time it is plugged into or unplugged from LocoNet. -
Page 74: Battery Replacement
Diagram 4: DT400/R Battery Installation Back of Remove Throttle battery cover by pressing here Battery Battery Compartment Cover and then sliding Correct installation the cover toward 9 Volt orientation for the bottom of Battery+ powering the throttle the case. Storage orientation 9 Volt (Polarity Reversed) Battery... - Page 75 format, the depth of the recall stack, the throttle ID#, and which radio frequen- cy the throttle will use. To make these changes, consult the following tables to determine which option values to set up in Option #1, Option #2, Option #3, Option #4, Option #F & Option #6.
-
Page 76: Dt400 Option #1
23.1 DT400 Option #1 23.1.1 Ballistic or Straight Line Tracking With ballistic tracking, the faster you increase or decrease the the throttle knob, the faster the data changes in the throttle. When ballistic tracking is enabled, so are typematic keys. With typematic keys, when you press and hold the Y + or N - Keys, the values will continue to increase or decrease without having to do a separate key press for each increment. -
Page 77: Dt400 Option #2
Table IV: DT400 Throttle Option #1 Choices Op#1 Value (hex) Ballistic Key & Run/Stop Tracking & Knob Local/Global Typematic Clicks Keys Local x01 (Default) Local Local Local Global Global Global Global 23.2 DT400 Option #2 23.2.1 Throttle Default Decoder Operation Each DT400 can be set up to operate new decoders selected by that DT400as any decoder status code you choose. - Page 78 Table V: DT400 Throttle Option #2 Choices Op#2 Throttle Default For Tetherless Value Decoder Operation Operation (hex) Mode 28 step decoder Radio & IR 14 step decoder Radio & IR 128 step decoder Radio & IR (DT300R) 28 step decoder IR Only Enabled 14 step decoder IR Only Enabled...
-
Page 79: Dt400 Option #3
23.3 DT400 Option #3 23.3.1 LCD Backlight Brightness Setting The backlight intensity can be set for off, low, medium or high intensity. The brightness of the backlight affects battery life, the brighter the LCD, the shorter the battery life. When your DT400 is untethered from LocoNet, the back- light automatically reduces brightness by one setting to conserve battery power. - Page 80 Table VI: DT400 Throttle Option #3 Set Up Choices Op#3 Backlight Clock Recall Tether- Value Brightness Format Stack less (hex) Depth Release 12 hour format Low intensity 12 hour fomat Medium intensity 12 hour format High intensity 12 hour format 24 hour format Low intensity 24 hour format...
-
Page 81: Dt400 Option #4
Table VI: DT400 Throttle Option #3 Set Up Choices (Continued) Op#3 Backlight Clock Recall Tether- Value Brightness Format Stack less Depth Release 12 hour format Low intensity 12 hour format Medium intensity 12 hour format High intensity 12 hour format 24 hour format Low intensity 24 hour format... -
Page 82: Fcc Information
24.0 FCC Information Radio or TV Interference: (this information is MANDATED by the FCC) This equipment has been tested and found to comply with the limits for a Class B digital device, pursuant to part 15 of the FCC rules. These limits are designed to provide reasonable protection against harmful interference in a res- idential environment. -
Page 83: Warranty And Repair Information
25.0 Warranty and Repair Information Digitrax gives a one year guarantee against manufacturing defects on the DT400 and DT400R. These units are not user serviceable (opening the case voids your warranty). If a defect occurs, return the unit to us for service. We will repair or replace these units at our discretion at no charge to you for one year from purchase date. - Page 84 Index 2 digit addressing 29, 47 4 digit addressing 29, 47 EDIT Key 24, 55, 58, 59, 61, 68 EMRG STOP Key 25, 35, 75 ENTER Key 25, 31, 47, 49, 51, 53, 55, acceleration 36, 50, 66 62, 69, 74 Analog Operation 9, 10, 11, 13, 18, 29, EXIT Key 20, 25, 33, 35, 47, 49, 51, 53, 57, 59, 63, 65...
- Page 85 42, 43, 54, 70, 78 routes 59 LocoNet 4, 22, 27, 33, 39, 41, 42, 45, 50, 55, 58, 60, 65, 66, 69, 73, 80 LocoNet ID 67, 68 Safety Selection 69 SEL Message 5, 7, 9, 10, 12, 28 select a loco to run 12, 28, 29 Mode Indicator 19, 20, 26, 29, 32, 36, semaphores 22...
- Page 86 Warranty and Repair 82 Y + Key 23, 24, 26, 28, 35, 47, 49, 53, 65, 71, 75 zero Speed 34...
Need help?
Do you have a question about the DT400 Series and is the answer not in the manual?
Questions and answers