
Related Manuals for Emax Tinyhawk III


Summary of Contents for Emax Tinyhawk III
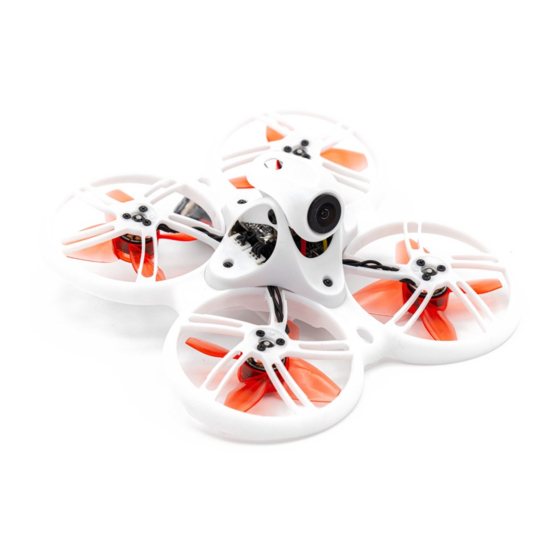
- Page 1 Thanks for purchasing the Tinyhawk III. Please follow the instruction manual to assemble and configure your Tinyhawk. Design in California, Made in China...
- Page 2 Please fly in a safe area away from people Do not modify or use other parts and accessories not approved for the use of EMAX. Do not use this product in harsh environments (such as winds, rain, lightning, snow, etc.).
-
Page 3: Product Specification
Weight(Without battery) ~32g Motor TH0802 II 15000KV Propeller Avan TH Turnlemode-3 F4( STM32F411 firmware ) Main board 4in1 /5A ESC EMAX Tiny Receiver( SPI/Frsky_D8 ) Camera RunCam Nano 4 Camera 200-100-25mW 37CH (Adjustable frequency) Support SmartAudio Battrey 1S HV 450mAh Frequency 5.8GHz(5658MHz-5945MHz)-TX... -
Page 4: Product List
Product list Tinyhawk III .......... ×1 EMAX E8 Transmitter ......×1 EMAX Transporter 2 ......×1 Emax 1s HV 450 mAh ......×1 Charger ..........×1 Propeller ..........(2XCW, 2XCCW) Accessory package ........ 1... - Page 5 E8 Transmitter 1.1 E8 Transmitter...
-
Page 6: Mode Switching
1.3 Binding & Unbinding The E8 Transmitter has been bound with Tinyhawk III in the RTF kit. If it is necessary to bind, please follow the steps below: 1. Enabling Bind Mode: Turn on the power and after the Tinyhawk III starts, press and hold the bind button to make the Tinyhawk III enter Bind Mode. - Page 7 Left-handed mode: E8 Transmitter left stick, controls the throttle and yaw direction of Tinyhawk III; E8 Transmitter right stick, controls Tinyhawk III's pitch and roll. Right-handed mode: E8 Transmitter left stick controls the pitch and roll of Tinyhawk III; E8 Transmitter right stick controls the throttle and yaw direction of Tinyhawk III.
- Page 8 1.8 Trainer Port for Simulators Insert one end of 3.5mm male to male into the trainer port (3.5mm audio interface), and plug the other end into the simulator (sold separately) to output the corresponding channel value. Plug the micro USB cable into the remote control to output the corresponding channel value.
- Page 9 When the indicator light is solid red: charging Solid green indicator light: charging is full Note: Use 5V-1A adapter for charging and micro USB cable for charging. When the voltage is low (3.3V), it will alarm. Please charge when battery is low.
- Page 10 Transporter 2(with DVR) Transporter 2 1. Eye Adjustment Slots 2. Frequency band switch button 3. Channel switch button 4. Video button 5. Audio interface...
- Page 11 6. Micro USB 7. Recording indicator 8. Charging indicator 9. Antenna 10. Auto Channel Search Button 11. Turn on/off (long press) & menu button (short press) 12. Reset switch 13. Micro SD card slot 14. Eye Distance Adjustment 15. Sponge pad 16.
- Page 12 1. Before adjusting the parameters, you must press and hold the CH button or FR button for 3 seconds. 2. Make sure that the power of Tinyhawk III is turned on. When changing channels, it will be easier to find the correct channel through the video information of Tinyhawk III.
-
Page 13: Battery And Charging
There is an automatic search function "A" on Transporter 2 to help find which channel the Tinyhawk III is on. Power on the Tinyhawk III first, then press the "A" button on the Transporter 2 to start the auto search mode. This mode will search all channels and select the channel with the best video reception. - Page 14 Tinyhawk III Propeller installation & removal The Tinyhawk III propeller has two directions of rotation: clockwise (CW) and counterclockwise (CCW). When purchasing a set of propellers, please purchase 2 clockwise blades and 2 counterclockwise blades. The blade rotates along the blunt edge of the blade.
- Page 15 Use a small tool (such as a 1.5mm hex wrench or a small screwdriver) to press on the metal at the bottom of the motor and Tinyhawk III. Grasp the blade of the propeller with your fingers until the propeller pops out of the motor.
- Page 16 Tinyhawk III VTX Changing VTX setting via Betaflight OSD Tinyhawk III is equipped with SmartAudio and is already configured with stock settings. The SmartAudio line is operated on UART 2 TX. Follow the prompts on the screen to enter the main setting menu. The throttle is in the middle, the direction is to the left, and the pitch is up (THROTTLE MID+ YAW LEFT+ PITCH UP) to enter the OSD parameter adjustment menu, as shown in Figure 1.
- Page 17 Press the key to set the VTX channel Note: You must "disable" the VTX Smart Audio on UART 2 in order for the push- button VTX adjustment to work as described below.
- Page 18 Other The receiver can be instructed to enter the binding mode through the Betaflight configurator. Type the following command in the CLI tab: bind_rx Click the Enter key, your receiver will enter the binding mode, and then follow the binding steps 2 and 3 to complete the binding process.
- Page 19 E8 Transmitter is used in the example below: AUX 1 is a 3-level switch to select the flight mode; Acro, Horizon and Angle are activated in increasing order. The unlock switch of Tinyhawk III is set on AUX 1, and the highest value.
-
Page 20: Adjusting Software Settings (Betaflight Configurator)
PID profile 1 is tuned and optimized for Tinyhawk III and Emax 1S HV 450 mAH for proper flight indoors and outdoors. Please do not change these values. This configuration has been professionally adjusted by many parties, and EMAX strongly recommends not to change these values arbitrarily. - Page 21 (Take EMAX's E8 Transmitter and Transporter 2 Goggles as examples) First turn on the power of E8 Transmitter and Transporter 2. Tinyhawk III has been bound to E8 Transmitter and matched with your Transporter 2 on the correct video channel. Turn on your Tinyhawk III by sliding the battery into the battery tray and plugging in the power source.
-
Page 22: Lock&Unlock
Calibration takes a few seconds, and then Tinyhawk III can fly. Tinyhawk III can fly for up to 4 minutes when the battery is fully charged. When the battery power reaches 3.2v, please land the Tinyhawk III; flying longer will seriously damage your battery and is not recommended. -
Page 23: Flight Mode
Tinyhawk III will be in Angle Mode and stabilize the aircraft. When the switch is in the middle 2nd position, Tinyhawk III will be in Horizon Mode, allowing the drone to perform acrobatics by tilting roll or pitch all the way to the end. The third position is Rate Mode which will turn off Gyro Stablization which is recommended for experienced pilots who wish to perform acrobatics and professional maneuvers. - Page 24 To learn how to fly Tinyhawk III, you must first fly within sight (without wearing Transporter 2 Goggles). Turn on the power of Tinyhawk III and place it in a safe and empty room. Start Tinyhawk III, then use the left stick to raise the throttle to the hovering position.
- Page 25 This device complies with Part 15 of the FCC Rules. Operation is subject to the following two conditions: (1) this device may not cause harmful interference, and (2) this device must accept any interference received, including interference that may cause undesired operation. Changes or modifications to this unit not expressly approved by the party responsible for compliance could void the user’s authority to operate the equipment.
Need help?
Do you have a question about the Tinyhawk III and is the answer not in the manual?
Questions and answers