Table of Contents
Advertisement
Advertisement
Table of Contents

Subscribe to Our Youtube Channel
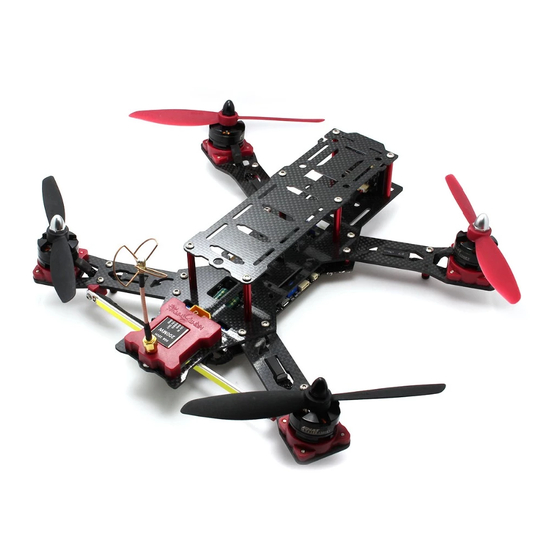
Summary of Contents for Emax Nighthawk Pro
- Page 1 Nighthawk Pro www.emaxmodel.com Instruction Manual V1.1 1...
-
Page 2: Table Of Contents
Nighthawk Pro www.emaxmodel.com Thanks for purchased Nighthawk Pro. Please follow the instruction manual to install and configure your Nighthawk Pro. This instruction manual needs to complement with configuration software user instruction to configure Nighthawk Pro. Please refer to this link to learn more. “http://www.yinyanmodel.com/en/DownList.asp”... -
Page 3: Warnings
Warnings 1、Please following the instruction manual to install and operate Nighthawk Pro 2、 Do NOT use Nighthawk Pro while drunk, taking drugs, dizziness, fatigues, nausea and any other conditions no matter physically or mentally that could impair your ability. 3、Must fly in safe zone (Area larger than 2500 square meter) 4、Do NOT modify or overload the system with inappropriate parts or accessories. -
Page 4: Specifications
Outer packing box: 295g, Inner Outer packing box: 445g, inner Weight(g) holder: 180g holder: 240g Flight weight (g) 440g (Not included Battery) 450g(Not included Battery) In the Box 1. User Manual 2. Nighthawk Pro RTF Assembly drawing ARF Assembly drawing 4... - Page 5 Nighthawk Pro www.emaxmodel.com 3. Accessories Accessories ARF and RTF both included Accessories Type Accessories Name CW Propellers 2PCS A、Propeller CCW Propellers 2PCS Battery Strap Battery B、Battery & accessories Velcro wire Receiver wire Receiver wire mesh (ARF accessories accessories preassembled) 8Pin PVC Connector (ARF...
-
Page 6: Required Tools And Equipments
Nighthawk Pro www.emaxmodel.com Required Tools and Equipments 1、Battery with XT60 connector (Suggested battery size: 3-4S 1300-1800mah 35C) For fly safety and main board power range, suggest propellers 5-6inches under 3S and propellers 5inches under 4S. 2、1.5MM, 2.0MM, 2.5MM hex driver, tweezers, needle nose pliers, scissors, etc... -
Page 7: Step 3 Receiver Connection
Nighthawk Pro www.emaxmodel.com Step 3 Receiver Connection Receiver and Flight Controller Connection (ARF model ONLY) Receiver 8Pin Cable RC Input Connector Step 4 How to use Baseflight Configurator Only Baseflight Configurator will be discuss below. If customers use Cleanflight components, please download cleanflight configurator to configure you Cleanflight controller. - Page 8 Nighthawk Pro www.emaxmodel.com Please select "SETUP" ①Calibrate Accelerometer ②Calibrate Magnetometer (1) Calibrate Accelerometer: Place board or frame on leveled surface, then select "Calibrate Accelerometer", once the accelerometer calibration is complete, date will be save automatically. Note: Starting or ending accelerometer calibration will be shown in the message display.
- Page 9 Nighthawk Pro www.emaxmodel.com Mode Selections (1)Please select "Mode Selection ①Modes: ARM, ANGLE, HORIZON, MAG, HEADFREE, HEADADJ, BEEPER, OSD SW, etc... Some modes will not appear unless sensor is connected. Ex: If barometer is not connected to the flight controller, the altitude mode will not display in the list.
-
Page 10: Step 5 Installation
Nighthawk Pro www.emaxmodel.com (8)Move throttle stick up (9)Use transmitter stick to control pitch, roll and yaw, observe the motor power bar under "Motor Testing". Make sure the motor power bar is change according to transmitter stick. (10) Test motor direction: Use a piece of paper to touch the motor to check the motor direction (Motor direction should be the same as figure shown below) Please be careful and only move the motor little by little while checking motor direction. -
Page 11: Video Transmitter Channel
Nighthawk Pro www.emaxmodel.com Fig 1 Fig 2 Fig 3 Fig 4 Fig 5 Video Transmitter Channel Video transmitter channel switches are located at the bottom and rear of the copter, channel can be change to corresponding channel to monitor and/or goggle. 20mw/200mw power switch is located at the side of FPV. Switching to copter head is 20mw and to tail is 200mw. -
Page 12: Step 7 Upgrade Accessories Installation
Nighthawk Pro www.emaxmodel.com motors. (Please refer to Appendix - Self checking light status) Note: Please test the distance between radio and video transmitter before testing to make sure the actual distance between radio and video transmitter in your flight aera, for the electromagnetism will influence the distance between radio and video transmitter. - Page 13 Nighthawk Pro www.emaxmodel.com Inclined Motor Mounting Base (1)Install motor to inclined motor mounting base. (Please install the M1-M4 motor to the corresponding position, M1-M4 is indicated at the motor base) (2)Use M3x7mm steel screws to secure the motors (3)Install inclined motor mounting plate to the motor arm plate.
-
Page 14: Nighthawk Pro
Nighthawk Pro www.emaxmodel.com Nighthawk Pro Main Control Board 14... -
Page 15: Esc Instruction
Note: To calibrate single ESC, make sure to switch ESC SWITCH to OFF (Please refer to Appendix - ESC Calibration) Flight Controller Instruction Nighthawk Pro flight controller is based on NAZE Skyline32 hardware. For more info, please visit "http://www.yinyanmodel.com/en/DownList.asp" to download manual or search NAZE flight controller on the web. -
Page 16: Frequently Asked Questions
Nighthawk Pro www.emaxmodel.com Frequently Asked Questions ①After power, flight controller indictor not lit on, but ESC indicator lit, please check if ESC switch is switch to ON ② After connected micro USB to computer and flight controller, if the flight controller LED light are not on, please check if the computer has installed the driver, check ESC SWITCH is switched to ON position and check if micro USB connection. - Page 17 Nighthawk Pro www.emaxmodel.com ③Calibrate M2 ESC: Since M2 connector have no BEC, connect M2 connector directly into THR on receiver and connect M1 connector into other channels to supply power for receiver. Connector and Receiver connection see below: 6Pin cable...


Need help?
Do you have a question about the Nighthawk Pro and is the answer not in the manual?
Questions and answers