Advertisement
SOLERA
Purpose
This document provides the steps to replace the awning gas strut assembly.
Resources Required
• 1-2 people, depending on task
• Pliers
• Flat head screwdriver
7/16
•
" deep well socket
• Tin snips
Installation
Removing the Pitch Arm and Gas Strut
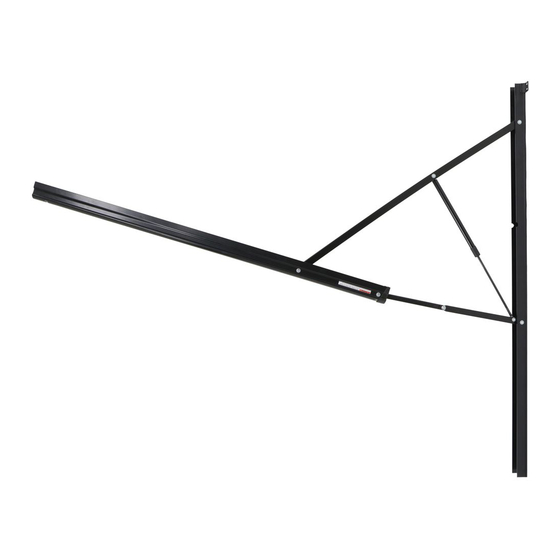
Note: Figure 1 shows one type of pitch arm with its support arm assembly. The removal and replacement
of any pitch arm and gas strut will be the same.
Roll tube
Rev: 01.19.21
AWNING GAS STRUT REPLACEMENT
®
Moving parts can pinch, crush or cut. Keep clear and use caution.
outer Arm
AWNINGS
• Hammer
3/8
•
" push nuts (four)
• C-clamp (Optional)
• Rubber or felt pad to prevent clamp marring
(Optional)
Fig. 1
Pitch Arm Assembly
Page 1
Mount Arm
Inner Arm
Gas Strut
CCD-0002262
Advertisement
Table of Contents

Subscribe to Our Youtube Channel
Summary of Contents for Lippert Components SOLERA AWNING
- Page 1 SOLERA AWNING GAS STRUT REPLACEMENT ® AWNINGS Purpose This document provides the steps to replace the awning gas strut assembly. Moving parts can pinch, crush or cut. Keep clear and use caution. Resources Required • 1-2 people, depending on task •...
- Page 2 SOLERA AWNING GAS STRUT REPLACEMENT ® AWNINGS Make sure to adequately support the roll tube during this process. Failure to support the roll tube may result in personal injury or property damage. Extend the awning to the fully-open position. With a flat head screwdriver, carefully remove the black spacers that are placed between the pitch arm and the outer arm (Fig.
- Page 3 SOLERA AWNING GAS STRUT REPLACEMENT ® AWNINGS Be careful! While removing push nuts, do not allow the pins to fall out. Pins must remain in place until all push nuts are removed. Remove the push nuts (Fig. 5) using tin snips. Note: Push nuts are a one-time use only part.
- Page 4 SOLERA AWNING GAS STRUT REPLACEMENT ® AWNINGS B. Remove the push nut where the pitch arm meets the mount arm (Fig. 6B). C. Remove the push nut where the top of the gas strut meets the inner arm (Fig. 6C). D.
- Page 5 SOLERA AWNING GAS STRUT REPLACEMENT ® AWNINGS Replacing the Gas Strut and Attaching the Pitch Arm Install the new gas strut. Note: Always use new push nuts when replacing the pins. New push nuts can only be installed in one 7/16 direction—with the points facing outward.


Need help?
Do you have a question about the SOLERA AWNING and is the answer not in the manual?
Questions and answers