
Related Manuals for TypeS BT530034


Summary of Contents for TypeS BT530034
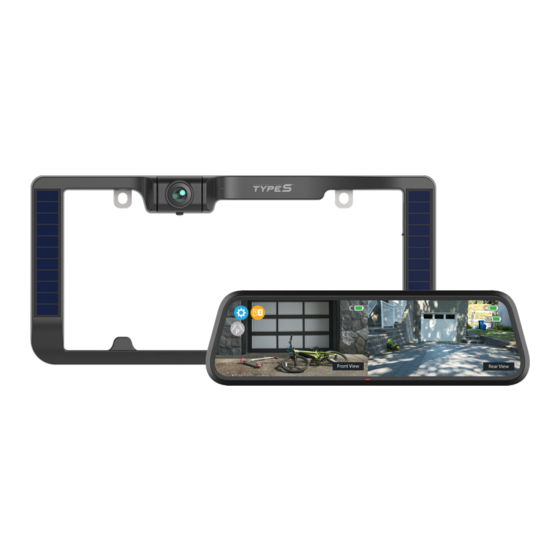
- Page 1 720P SOLAR POWERED MIRROR BACKUP CAMERA and Smart Button WP ITM. BT530034 Care & Use Instructions Important, retain for future reference: Read carefully...
-
Page 2: Table Of Contents
TABLE OF CONTENTS 1. Introduction ..........................3 2. Package Contents ........................4 3. Product Specifications ......................5 4. Product Overview ........................5 5. Before You Install ........................7 6. Installation Guide ........................8 7. Smart Button Control Scheme ....................14 8. -
Page 3: Introduction
The installation instructions do not apply to all types of vehicles, and are written as guidelines to assist in installing the system. Consult an experienced technician if you are not comfortable installing the product. You can also contact TYPE S at 866.294.9244 to speak to one of our installation specialists if you have... -
Page 4: Package Contents
2. PACKAGE CONTENTS 9.35” Touch Panel Mirror Monitor Solar Powered Wireless Backup Camera 250V 2A Spare Fuse 33” MicroUSB Charging / 12V / 24V Power Adapter 1 x Mounting Kit Data Cable 2 x License Plate Machine Screw 2 x License Plate 2 x Two Way Mounting Tab 2 x Mounting Screw &... -
Page 5: Product Specifications
3. PRODUCT SPECIFICATIONS Frequency: 2.4GHz Operating Voltage: Backup Camera - DC 5V Touch Panel Mirror Monitor - DC 12V/24V Smart Button - DC 3V (Operates with 1 pc CR2032 coin cell) Operating Temperature: º º º º F~122 F (-10 C~50 Camera Water Resistance: IP65 Rating Rechargeable... - Page 6 9.35” Touch Panel Mirror Monitor 12 13 11. Power Jack for Portable Solar Panel 9.35” Touch Panel (Portable Solar Panel not Included) LED Indicator * Sold Separately MicroUSB input 12. Power Reset Hole (not for power input) 13. Power Button 10.
-
Page 7: Before You Install
Smart Button 15. CR2032 Lithium Coin Cell Battery (included) 16. Smart Button 17. 3M™ Adhesive Tape CR2032 NOTE: Make sure the battery is inserted with the correct polarity (+ side away from the curcuit board). Please dispose of the used battery properly according to local laws and regularions regarding the disposal... -
Page 8: Installation Guide
6. INSTALLATION GUIDE MOUNTING THE TOUCH PANEL MIRROR MONITOR Place the Touch Panel Mirror Monitor in front of your existing rear view mirror and attach the rubber mounting straps to the top anchors of the Monitor. Reattach the rubber mounting straps to the bottom anchors to secure the Monitor in place. - Page 9 SOLAR DC12-24V Plug the power cable into the DC 12/24V power port of the Mirror Monitor. Route and hide the power cable in the headliner and pillars in your vehicle. Plug the power adapter into your vehicle’s 12/24V DC outlet.
- Page 10 MOUNTING THE SMART BUTTON Peel off the tape backing from the back of the Smart Button and stick it to any flat surface of your dashboard that is easy to reach. CHARGING THE WIRELESS BACKUP CAMERA WARNING: Many vehicles provide constant power to the 12V outlet.
- Page 11 INSTALLING THE SOLAR POWERED WIRELESS BACKUP CAMERA A) STANDARD INSTALLATION: 1. Unscrew your license plate. 2. Secure the Solar Powered Wireless Backup Camera and license plate with screws back onto the rear of your vehicle. Blue LED light 3. Push and hold the power button of the Solar Powered Wireless Backup Camera for 1 second, the blue LED light will flash 2 times.
- Page 12 B) LOWERING INSTALLATION – FOR VEHICLES WITH TRUNK OR HATCH DOOR RELEASE (This allows more clearance for finger tips to release door latch) 3. Install the license plate onto the Wireless 1. Unscrew and remove your license plate. Backup Camera with the Mounting Screws & Nuts.
- Page 13 C) RAISED INSTALLATION – FOR TRUCKS & SUV WITH STEP BUMPERS (This will raise the camera frame out of the cavity of the step bumper) 1. Unscrew and remove your license plate. 2. Install the Two Way Mounting Tabs using original Plates Screws and Mounting Screws.
-
Page 14: Smart Button Control Scheme
ADJUSTING CAMERA LENS ANGLE The camera’s viewing angle can be adjusted to provide improved visibility, especially for large SUVs, or lifted trucks. Tilt the camera up or down for preferred viewing angle. 20 º 40 º 7. SMART BUTTON CONTROL SCHEME VARIETY OF CONTROLS OF THE SMART BUTTON Operation Function... -
Page 15: Settings And Operation
Mirror Monitor. NOTE: Other than BT530034, BT532629, BT530033, BT57132 and BT56780, DO NOT pair this monitor with other TYPE S backup cameras. BATTERY INDICATOR The battery indicator shows the battery level of the Wireless Backup Camera. - Page 16 PAIRING CAMERA The Solar Powered Wireless Backup Camera is pre-paired with the Touch Panel Mirror Monitor, and it is set as rear camera as default. You should see the following screen that shows the rear view if the Touch Panel Mirror Monitor is powered and the Solar Powered Wireless Backup Camera is fully charged.
- Page 17 The camera should be paired within 60 seconds. If the pairing is successful, the display will show “Pair OK”. If no camera is found, then the display will show “Pair Fail”. In this case, cut off power and reboot the Monitor. If you keep receiving the “Pair Fail”...
- Page 18 ROTATE CAMERA Tap on the setting to reverse the camera view. BRIGHTNESS Swipe to adjust screen brightness. CONTRAST Swipe to adjust screen contrast. OPERATION TIME Tap to choose different operation time. The Monitor’s parking view operation time will start to count down when you press the Smart Button.
- Page 19 ADJUST CAMERA VIEW Swipe up and down to adjust view. NOTE: You cannot adjust the parking aid line and camera view in the split screen mode. BACKUP CAMERA POWER, MODES & LED INDICATORS Power / Mode Status LED Indicators Power On Blue LED light flashes 2 times when Camera is powered on.
-
Page 20: Safety Information
IMPORTANT SAFETY INSTRUCTIONS 1. SAVE THESE INSTRUCTIONS– This manual contains important safety and operating instructions of car charger for Model BT530034. 2. Before using the product, read all instructions and cautionary markings. 3. Do not expose car charger to rain, moisture, or snow. - Page 21 WARNING: A failure to read and follow these warnings and instructions may result in a serious accident, including damaged property or a serious injury, including loss of life. • The Solar Powered Wireless Backup Camera is designed as an aid to the driver in detecting large stationary objects to help avoid damaging the vehicle.
- Page 22 • When washing the vehicle with high pressure water, be sure not to spray it around the Solar Powered Wireless Backup Camera. Otherwise, water may enter the Camera unit causing water condensation on the lens, a malfunction, fire or an electric shock. •...
-
Page 23: Maintenance & Warranty
the Camera, wipe with a clean cloth dampened with mild cleaner diluted with water and then wipe with a dry cloth. • Will work up to 33 feet. • ALWAYS engage Parking/Emergency/Hand Brakes of the vehicle when testing the system. SAFETY AROUND AND BEHIND OTHER VEHICLES Using a Solar Powered Wireless Backup Camera is not enough to completely overcome a vehicle’s blind spot. - Page 24 material and workmanship for 1 year from the date of original purchase. Where permitted by law, TYPE S’s liability shall be limited to that set forth in this limited express warranty. This limited express warranty shall be the exclusive remedy of the purchaser and TYPE S makes no other warranty of any kind aside from the limited express warranty stated above.
- Page 25 NOTE: Toll Free # is for North America Customers ONLY. See Customer service section for customer contact numbers for other regions/offices. For customer service and technical support, please call us at 1.866.294.9244. If at that time it is determined that a replacement unit is needed, the support representative will issue a Return Authorization and instruct on how to get a new unit.
-
Page 26: General Information
TYPE S and/or its affiliates are not responsible for a user’s intended or actual use of the Solar Powered Wireless Backup Camera. In no event shall TYPE S and/or its affiliates have any liability for any losses (whether direct or indirect, in contract, tort or otherwise) incurred in connection with the Solar Powered Wireless Backup Camera, including but not limited to damaged property, personal injury and/or loss of life. - Page 27 This equipment complies with FCC RF radiation exposure limits set forth for an uncontrolled environment. CAN ICES-3 (B)/NMB-3(B) 720P Solar Powered Mirror Backup Camera with Smart Button BT530034 Responsible Party: TYPE S 2975 Red Hill Ave., Ste. 100, Costa Mesa, CA 92626, U.S.A. Tel: 866-294-9244...
- Page 28 A Horizon Brands Company 2975 Red Hill Ave., Ste. 100, Costa Mesa, CA 92626, U.S.A. 1.866.294.9244 | info@typesauto.com ©2021 TYPE S. All rights reserved. www.typesauto.com ML-530034_V1...
- Page 29 Le fabricant n'est pas responsable des toutes interférences radio ou télévision causées par des modifications non autorisées apportées à cet appareil. De telles modifications peuvent empêcher l’utilisateur d’utiliser l'appareil. Le présent émetteur radio (identifier le dispositif par son numéro de certification ou son numéro de modèle s'il fait partie du matériel de catégorie II) a été approuvé par Industrie Canada pour fonctionner avec les types d'antenne énumérés ci‑dessous et ayant un gain admissible maximal. Les types d'antenne non inclus dans cette liste, et dont le gain est supérieur au gain maximal indiqué, sont strictement interdits pour l'exploitation de l'émetteur. Antenna Type Max. Antenna Gain(dBi) internal permanent antenna ‐3 ...
- Page 30 ‐‐ Connect the equipment into an outlet on a circuit different from that to which the receiver is connected. ‐‐ Consult the dealer or an experienced radio/TV technician for help. The device has been evaluated to meet general RF exposure requirement. To maintain compliance with FCC’s RF exposure guidelines, this equipment should be installed and operated with a minimum distance of 20cm between the radiator and your body. ...
Need help?
Do you have a question about the BT530034 and is the answer not in the manual?
Questions and answers