Table of Contents
Advertisement
Quick Links
Advertisement
Table of Contents

Related Manuals for Smartbox GridPad 10S


Summary of Contents for Smartbox GridPad 10S
- Page 1 Your guide Created by...
- Page 2 Grid Pad 10s please read the Safety and compliance guide provided with your device. Created by thinksmartbox.com Document: Grid Pad 10s - Guide - UK - B Language: English Date of issue: July 2021 Copyright © 2021 Smartbox Assistive Technology...
- Page 3 Useful information Your Smartbox Account is... A reminder of your Smartbox Account password... Your Grid Pad’s model number is... Your Grid Pad’s serial number is... Who is responsible for your Grid Pad? Who to call for help and support...
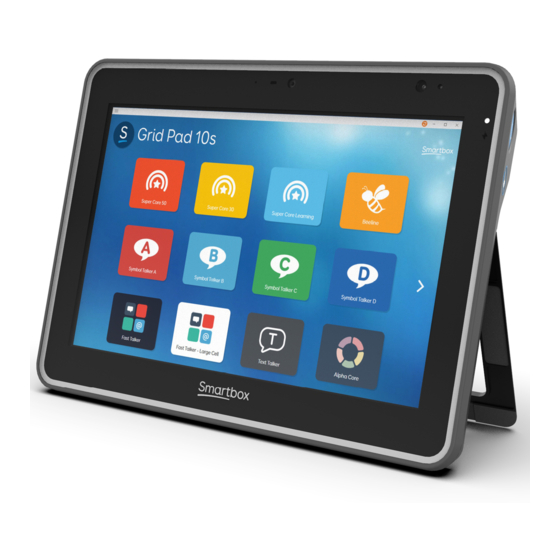
- Page 4 What is Grid Pad 10s? Your Grid Pad 10s is a multi access device that has been purpose built for communication. Interact with the screen by tapping with your fingers. You can communicate using the touch screen, or by configuring other access methods such as switches or pointing devices that can move an on screen cursor.
- Page 5 Your Grid Pad is powered by Grid 3, a complete AAC app that includes instant access to a huge library of grid sets. There is content for everyone - from powerful communication tools for text users to grid sets for communicating with symbols and developing literacy.
- Page 6 Introducing your device Grid Pad Windows Your Grid Pad Windows is communication the operating aid has numerous system of your features to help you communication aid. speak. Controls basic settings such as volume, Wi-Fi, Connect your access screen brightness. method to your Grid Pad or use the touch screen.
- Page 7 Grid Grid set Grid is your Grid sets are pre- communication app made resources for that lets you do so Grid that are built to much! meet your needs. Create a unique user, They can be a complete connect to your email, symbol vocabulary smartphone, personalise like Super Core or an...
- Page 8 Who is Grid Pad 10s for? An AAC user • Communication • Accessible apps • Alternative access to other software • Controlling other devices in your home Supporting an AAC user • Changing settings • Making Grid user profiles • Adding grid sets •...
- Page 9 What is included Your Grid Pad 10s communication aid Documentation Care guide, Grid 3 Getting Started & Safety and compliance Accessories Remote Power Button 2 Power lead Strap Port labels Dual mounting plate and screws Screwdriver...
- Page 10 Quick setup Turn on your Grid Pad You can use the button on the side of the device or the Remote Power Button Windows will start, then Grid will open automatically Connect to the internet This means you can access more grid sets, more voices, apps and get updates...
- Page 11 Create your Grid user and log in or create your Smartbox Account Set up your access method and voice Choose your grid sets Grid has lots of content to get you started from symbol and text communication, apps and more...
- Page 12 The Grid Pad 10s Front camera Infrared receiver Touch screen Power button Volume buttons Charging port...
- Page 13 Port cover Port cover Rear camera Strap ring Stand Strap ring Mounting plate location Second screen Infrared transmitter Infrared transmitter Speaker Speaker...
- Page 14 Ports Your Grid Pad has a number of ports to connect extra devices and access methods to. These are located under the port covers. USB 3.0 port USB 3.0 port Headphone port Switch ports...
- Page 15 3.5mm Switch connector 3.5mm Headphone connector USB Type A connector Port labels You can place the port labels on the back of the Grid Pad to make identification easier.
- Page 16 Learning more This guide provides the basics for getting started with your Grid Pad. To learn more visit our website at thinksmartbox.com Learn how to edit and personalise your content Advanced editing and features Customising your alternative access and other settings thinksmartbox.com/learn-at-home...
- Page 17 Grid set guides and resources We have a range of guides and Super Core Getting started resources to help you learn and Spotify Getting started explore our grid sets. Fast Talker Getting started thinksmartbox.com/learning-resources Webinars and tutorials We share regular webinars throughout the year.
-
Page 18: Table Of Contents
Contents Your Grid Pad 10s Turning on your Grid Pad Power states Putting the Grid Pad to sleep Turning off your Grid Pad Charging your Grid Pad How long will the battery last? Positioning your Grid Pad Mounting your device Attaching the strap Tough case Getting started with Windows... - Page 19 Keyguards Touch access case study Pointer access Pointer access case study Switch access Switch access case study Voice activation Grid Pad 10s features Remote Power Button Using the Remote Power Button switch ports Changing the Remote Power Button batteries Pairing the Remote Power Button Daylight screen Using the second screen Using infrared...
-
Page 20: Your Grid Pad 10S
Your Grid Pad 10s This section covers everything you need to know about the Grid Pad hardware. Use this to get to know your way around the ports and buttons as well as other features of the device including its mounting plate, strap rings and how to position the device. - Page 21 Turning on your Grid Pad Power states Putting the Grid Pad to sleep Turning off your Grid Pad Charging your Grid Pad How long will the battery last? Positioning your Grid Pad Mounting your device Attaching the strap Tough case...
-
Page 22: Turning On Your Grid Pad
Turning on your Grid Pad To power on your Grid Pad press the power button on the side of the device for just under a second. A white light on the front of the device will come on and the system will start up. If the device is in sleep mode it will wake up. -
Page 23: Power States
Power states Your Grid Pad is ready to use. Sleep The screen is off and the Grid Pad will not consume much power. The Grid Pad is off and will not consume any power. -
Page 24: Putting The Grid Pad To Sleep
Putting the Grid Pad to sleep Sleep mode is when your Grid Pad’s screen is off, but the device is still on, so it can wake up quickly when needed. While in this mode the device will still use up battery life, but a lot less than when it is in use. - Page 25 Sleep screen Many grid sets include a Sleep screen option. When activated Sleep screen turns off your Grid Pad’s screen to save battery life when it’s not in use. You can turn it back on using your enabled access method. Waking your device Waking your Grid Pad from sleep depends on how you put it to sleep.
-
Page 26: Turning Off Your Grid Pad
Turning off your Grid Pad You can power off your Grid Pad in several ways. Windows shut down Close any apps you have open and make sure you have saved any work. Tap the Start menu Select the Power icon Select Shut down The Grid Pad will shut down and any pending Windows updates will be installed. - Page 27 a Settings or Options grid. If the grid set does not have a shut down cell, you can add one in edit mode. Emergency shut down If you are having trouble with your Grid Pad and you need to force the device to restart, you can perform an emergency shut down.
-
Page 28: Charging Your Grid Pad
Charging your Grid Pad You will need to charge your Grid Pad’s battery after use. Connect your Grid Pad charging port to the power adapter, the adapter is clearly labelled. Connect the power adapter to the mains socket to charge. - Page 29 When to charge your Grid Pad When your Grid Pad’s battery drops to 10% you will see the orange LED light up. This means you should charge your device as soon as you can. While charging you will see a white LED. When the battery is full, the LED will light up green.
-
Page 30: How Long Will The Battery Last
How long will the battery last? Your Grid Pad’s battery has been tested in different situations. AAC usage Speaking with Grid. Navigating grid sets. You will get approximately 7 hours of battery use. Media usage Watching videos and listening to music. Playing games. - Page 31 Battery saving tips The Grid Pad has a daylight bright screen which should be set around 30% brightness for indoor use. Above this and the screen will consume more power. Sleep the device when not in use, and shut down if it is being stored. Turn off the second screen.
-
Page 32: Positioning Your Grid Pad
Positioning your Grid Pad Your Grid Pad can be used in a number of positions and places. On a desk or tray Place your Grid Pad on a flat surface. The rubber feet will prevent the device slipping. Using the stand The stand will fold out to allow you to raise the Grid Pad to a comfortable position. - Page 33 You can fold out the stand to a maximum of 100 degrees. The stand also has rubber feet to prevent slipping. Do not rest the device with the speakers and second screen facing down as this can damage the device.
-
Page 34: Mounting Your Device
Mounting your device Your Grid Pad has a mounting plate port on the rear of the device. You can use this to attach your Grid Pad to desk, floor and wheelchair mounts securely and safely. The Grid Pad mounting kit is compatible with Daessy and ReHadapt mounts. - Page 35 Use a screwdriver to firmly attach the mounting plate to your Grid Pad. Ensure all three screws are secure.
- Page 36 Follow the instructions included with your mounting to securely attach your Grid Pad.
- Page 37 Adjust your mount to position your Grid Pad. Remember to loosen any locking screws or levers before adjusting, and tighten them once the Grid Pad is in the correct position.
-
Page 38: Attaching The Strap
Attaching the strap You can attach the Grid Pad strap to the built in strap rings on the bottom of the device. Thread the clip strings through the rings, then pull the plastic clip through the string. Attach the strap to the clips. -
Page 39: Tough Case
Tough case The Grid Pad 10s can be fitted into a tough case for extra protection and extra portability. The case allows access to all the ports and buttons of the Grid Pad and also adds a handle to make carrying and positioning your device easier. -
Page 40: Getting Started With Windows
Getting started with Windows Your Grid Pad is powered by the Windows operating system. This section will help you get started if you are new to Windows and touch devices. - Page 41 Using the touch screen Your Grid Pad desktop Opening and closing apps Where do files go? Settings Connecting to the internet Connecting Bluetooth devices...
-
Page 42: Using The Touch Screen
Using the touch screen Your Grid Pad has a touch screen which lets you use gestures on the screen to interact and perform tasks. Like most touch screens, it is generally assumed you will be using a finger to tap and navigate, but you can also use a stylus. - Page 43 Double tap Two taps in quick succession will open a file or folder. It will also open shortcut from the Desktop. Hold If you hold down on a file or folder, this is counted as a secondary click. This will bring up a menu of extra actions you can perform.
- Page 44 Moving a file Tap an item, hold, then drag across the screen to move an item. To place a file into a folder, move it over the folder and release. Making a multiple selection If you tap and hold in a blank space between files and folders, you can drag across multiple...
- Page 45 You can connect these to the USB ports on the rear of the Grid Pad. You can also use Bluetooth to connect a wireless mouse and keyboard. When a mouse is connected, you will see a cursor on-screen.
-
Page 46: Your Grid Pad Desktop
Your Grid Pad desktop The desktop is the main screen you will see if your Grid Pad does not open Grid upon starting. If you minimise or close Grid, you will see the desktop. From the desktop you can open and close apps, change the settings of your Grid Pad and access and arrange your files. - Page 47 Along the bottom of the screen is the Taskbar. Start menu Start menu icon Tapping the Start menu will open a list of installed applications and additional buttons for Power, Settings and your Documents. You can also see a number of tiles which are shortcuts to various apps and folders.
- Page 48 Pinned apps Apps pinned to the Taskbar These are quick shortcuts to open apps. Open apps Apps with Grid 3 open If you have an app open on your device it will appear alongside your pinned apps. Open apps are underlined blue. Notification area The notification area...
- Page 49 The right side of the Taskbar is taken up with notifications and status icons. Here you can check your battery levels, your Wi-Fi connection, volume and more. Quick settings You can quickly access your Grid Pad’s settings by tapping the notification icon in the right corner of the Taskbar.
-
Page 50: Opening And Closing Apps
Opening and closing apps To open an app from the desktop, double tap on it. Grid 3 If you are opening the app from the taskbar or Start menu, you only need to tap once. Most apps, including Grid, have controls in the top right of the window. - Page 51 Maximise This will make the app fill the whole screen of your device. Tapping again will go back to its original size. Close This will exit the app.
-
Page 52: Where Do Files Go
Where do files go? Files including documents, grid sets, music and images are stored in folders on your Grid Pad. Your files are stored in Folders. Selecting Documents from the Start menu will open your Documents folder in File Explorer. You can see other locations on your Grid Pad such as Desktop, Downloads and Pictures. -
Page 53: Settings
Settings You may want to explore the settings of your device. Windows settings are found under the Start menu by selecting the Settings cog icon. Here you’ll find lots of options, from System, where you can select how your device acts and behaves, to Ease of Access, where you can configure the Windows accessibility options. -
Page 54: Connecting To The Internet
Connecting to the internet You can connect to the internet by selecting the Wi Fi button in your notification area. The Grid Pad will look for nearby Wi-Fi networks. Select the network you wish to connect to and select Connect. You will need to enter the networks password. - Page 55 Once connected, you will be able to access online services, updates, browse the web and more. Grid requires an internet connection for the following features: • Linking to your Smartbox Account • Online Grids • Connecting to Dropbox • Streaming media • Updates •...
-
Page 56: Connecting Bluetooth Devices
Connecting Bluetooth devices Bluetooth is a way to connect devices to your Grid Pad wirelessly. Bluetooth devices can include access methods like switches and pointers as well as keyboards, headphones and more. To connect a Bluetooth device open Settings and select Devices. Select Add Bluetooth or other device. - Page 57 Follow the on screen instructions, which may include confirming a passcode to ensure the connection is secure. Note that while connecting a phone to Grid uses Bluetooth, the settings and connection process are carried out in Grid.
-
Page 58: Getting Started With Grid
Getting started with Grid 3 Grid 3 is the communication and access software that is provided with your Grid Pad. With Grid 3, your Grid Pad becomes a fully featured suite of accessibility tools, where you set up your voice, access method, vocabulary packages and much more. - Page 59 Getting to know Grid Grid Explorer Choosing your grid sets Choosing your voice Learning more about Grid...
-
Page 60: Getting To Know Grid
Getting to know Grid User profile Your user profile stores all your grid sets, preferences and access settings. Grid Explorer Grid Explorer is your home screen and is where you will find your grid sets. - Page 61 Grid sets A grid set is an app within Grid. These are your resources for communicating and more. Edit mode Every grid set can be personalised and edited or you can make a grid set from scratch.
-
Page 62: Grid Explorer
Grid Explorer Grid Explorer displays all of your grid sets. Selecting one will open it. Grid Explorer is fully accessible. You can use your access method to select grid sets, or navigate between pages. The menu can be opened for more options. - Page 63 To return to Grid Explorer from a grid set select Menu - Grid Explorer. You can hide the Grid Explorer menu in Settings - Computer, great for if you are using Touch access with a keyguard. If you want to return to Grid Explorer, look for the Grid Explorer icon.
-
Page 64: Choosing Your Grid Sets
Choosing your grid sets Grid comes ready with many different grid sets to choose from. You add your grid sets from Menu - Add Grid set. Grid sets are arranged into categories. You can also create a New grid set or browse Online Grids for other Grid users creations. - Page 65 Some grid sets have multiple versions, such as Super Core, which has both 30 cell and 50 cell versions. Choose the grid set you want to add. You will see more information about the grid set, its features and if any alternative versions are available in other symbol sets or for different access methods.
- Page 66 Grid set categories Symbol communication Vocabularies and communication grids that combine words with symbols. Examples include Super Core, WordPower and Symbol Talker. Text communication Keyboards with a focus on accessibility and additional features to help you build sentences quickly, recall messages and more. Examples include Fast Talker, Text Talker and Alpha Core.
- Page 67 Computer control Use Grid to access other apps on your Grid Pad such as word processors and creative tools. You can also control other Smartbox software like Look to Learn. Environment control These grid sets are setup to work alongside the infrared transmitter in your Grid Pad to control external devices.
-
Page 68: Choosing Your Voice
Choosing your voice Your voice in Grid is projected from your Grid Pad into the world. Hello! Hello! Hola! Bonjour! Olá! You can choose from hundreds of voices and you can control how you want your voice to sound. You can find your voice settings in Menu - Settings - Speech. - Page 69 Under the Speaking heading you can choose Voices to browse the voice library. Some voices will need to be downloaded before you can use them. Select the country menu to browse the range of accents and languages there are available. Configuring your voice You can select Configure to find more options to control your voice.
- Page 70 Pitch - How high or low your voice sounds. Volume - Change how loud your voice is. Note that this is not adjusting your Grid Pad’s volume. Speak as you type Under the Speak as you type heading, you can configure when Grid will speak.
- Page 71 Message Banking You can also replace the computer voice of Grid with clips of your own voice with Message Banking. For example, if you have a clip of you saying a friends name, the recording will play when you use it. Audio feedback Grid can also speak to help you navigate and compose your messages.
- Page 72 Your Grid Pad comes with a Get started with Grid 3 guide. You can also download this guide from the Smartbox website thinksmartbox.com. You will also find more guides and videos on editing, access and more. You can also download resources to support using grid sets, like communication boards and posters.
- Page 73 Grid Guide If you want to find out more about the grid set you are using, you can also access its guide. This is found under Menu - Grid Guide when you are in a grid set. The Grid Guide will let you keep exploring the grid set, whilst showing you how to use and implement the grid set.
-
Page 74: Access
Access Your Grid Pad 10s is a multi-access device. This means you have many ways you can interact and use it to speak. In this section find out how to configure your access method in Grid and explore a range of example user setups. - Page 75 Introduction to access Touch access Keyguards Touch access case study Pointer access Pointer access case study Switch access Switch access case study Voice activation...
-
Page 76: Introduction To Access
Introduction to access Your access method describes the accessories, settings and interactions that you use to perform tasks on your Grid Pad. Your Grid Pad 10s supports three main access methods within Grid. Touch, Pointer and Switch. Each method has a number of settings that you can adjust to make each method work for you. - Page 77 You will find descriptions of these settings in this section and how they work. You will also find case studies that describe a particular users setup to help bring everything together into a complete user setup.
-
Page 78: Touch Access
Touch access Touch access is when you interact with the Grid Pad using its touch screen. When using Grid 3, you will be touching the cells on screen to activate them. You can configure how touch access works on your Grid Pad using Grid 3. You can use touch access alongside other access methods so you can still navigate a grid set by touch, even if you have also setup... - Page 79 You can find the Touch access settings in Menu - Settings - Access - Touch. Note that your touch access settings only control how your grid sets respond to touch. The Grid 3 menu bar and settings windows will always use your Windows settings. Changing your touch settings Under the Activate heading of the Touch settings windows, you can choose how you...
- Page 80 Activate last item touched The default setting for touch access is Activate last item touched. This option means if you touch the screen on one cell, and drag to another, the last cell you rest on before releasing will be activated. Activate first item touched The second option available is Activate first item touched.
- Page 81 drag to another cell. Touch and hold to activate The Touch and hold to activate option allows you to adjust the length of time you need to hold, or dwell, on a cell before it activates.
- Page 82 You can adjust how the dwell is represented and also toggle fast typing. Fast typing will reduce the dwell time by half on letter cells to make spelling out words faster. For example, if your dwell time is set to 4 seconds, letters will have a 2 second dwell.
- Page 83 Preventing repeat activations If you are finding cells are being activated repeatedly, you can adjust how quickly Grid will wait before accepting the next activation. Adjust the Prevent repeat activations slider to help filter multiple presses. You can also toggle if you want to allow for repeated activations of the same cell.
-
Page 84: Keyguards
Keyguards A keyguard is an overlay for the Grid Pad’s screen, typically made of firm plastic. You may want to add a keyguard to your Grid Pad to prevent accidental activations. Keyguards are cut to size, specific for your device and grid set. Grid Pad keyguards attach to your device with clean grip tape. - Page 85 Applying a keyguard Make sure the screen is clean, and you have removed any protective film from the back of the keyguard. Make sure Grid is open to the correct grid set and align the keyguard over the top. Press the edges of the keyguard firmly against the screen.
-
Page 86: Touch Access Case Study
Touch access case study Pria is a young user who accesses her device through touch. She has emerging literacy and uses auditory prompts to help her select the correct cells. Pria uses Touch and hold to activate in her Grid settings. This means she has a bright circular progress bar so she can see how long... - Page 87 Pria has cell highlighting turned off because she is using the dwell circle to show which cell is active instead. She has Grid set to Speak description when highlighting, which reads the label or description when she presses a cell. Pria has chosen a female voice for her communication.
-
Page 88: Pointer Access
Pointer access Pointer access is when you interact with your device by moving an on screen pointer, sometimes called the mouse cursor. When using Grid 3, you will be using the pointer to locate your cells, then activate them by clicking, dwelling or activating a switch. - Page 89 computer mouse or track pads found on many laptops. Head trackers, motion trackers, joysticks and roller ball mice can all be used to move your on screen pointer. Connecting a pointing device Pointing devices are either connected by USB or via Bluetooth.
- Page 90 If you are connecting a Bluetooth device, you will need to ensure Bluetooth is on in your Windows settings and follow the instructions provided with your device. More advanced pointing methods such as head pointers may require additional software to be installed to work correctly. Follow the instructions provided with your device.
- Page 91 Changing your pointer settings in Grid You can find the pointer settings in Menu - Settings - Access - Pointer. You can adjust the activation options, highlighting and how the pointer acts when being using for computer control. Click to activate If your pointer has a button, like a mouse or joystick, the click to activate option allows you to tap or click the button to activate a cell.
- Page 92 Hold to activate You can use hold to activate to adjust the length of time you press a button down before a cell activates. With this option selected you can adjust how the progress bar appears, and if you want to toggle fast typing on or off.
- Page 93 Dwell to activate When you select the dwell to activate option, holding the pointer over a cell and holding it in place for a set time will activate the cell. You can adjust the dwell time, the look and feel of the dwell and if you want to toggle fast typing on or off.
- Page 94 switch to your Grid Pad. Preventing repeat activations Each of the activation settings have the option to filter out repeated clicks and presses within a set time. Highlighting The highlighting section allows you to adjust the visual feedback when activating. You can choose from four styles and a range of colours.
- Page 95 activating and highlighting cells. Computer control You have a number of options to adjust how the pointer acts when you are using Grid to access other applications. Most Windows applications respond to clicks, double clicks and a combination of drags and holds to perform actions.
- Page 96 Zoom to click The zoom to click option allows you to focus in on the area of the screen you want to interact with. You can adjust the amount of magnification and the time the zoom takes. Dwell to click The dwell to click option allows you to hold the pointer of the area you want to activate.
- Page 97 activate your chosen click. You can adjust the time it takes the dwell to complete and the colour of the highlight. Press switch to click If you have a switch connected to your Grid Pad, you can use this to activate your selected computer control click.
- Page 98 Changing your pointer settings in Windows Windows has additional settings you can use to make your pointer more visible and adjust the speed it moves on screen. You can find these settings under Start menu - Settings - Devices - Mouse. Here you can adjust which button of your device is the primary button.
- Page 99 Selecting Adjust mouse & cursor size allows you to make the cursor more visible by adjusting its size and colour.
-
Page 100: Pointer Access Case Study
Pointer access case study Ezra is in their early 20s and accesses their device using a Joystick. A T-bar handle on their joystick helps them maintain a stable grasp and better control of the pointer movement on their device. Ezra’s Grid Pad is mounted on their wheelchair, and the joystick is on the wheelchair tray. - Page 101 friends and family, and access social media. They also use their device to control doors to their room and some areas of college as well as things like their TV. Ezra uses a grid set called WordPower 100. Recently their college tutors have added a cell that takes Ezra between their WordPower grids and Computer Control grids.
-
Page 102: Switch Access
Switch access Switch access is when you interact with your Grid Pad using external switch devices. Switches are available in many shapes and forms, from simple buttons to complex devices that are activated by facial expressions or muscle movements. You can connect two switches to your Grid Pad. These use the 3.5mm switch ports on the back of the device, underneath the port cover. - Page 103 Connecting switches Remove the port cover and insert your switch plug into the port. If you are using one switch, it is best to connect to the port labelled S2. Once connected, your switch will need to be set up in Grid 3.
- Page 104 Adding a switch in Grid Switch setup can vary in complexity. You will find that you have many options to make using one, or more switches together, suit you. This guide will show you the basic concepts that will help you get started. You can find switch settings in Menu - Access - Switches.
- Page 105 Under the drop down box, select Grid Pad switches. You can toggle your switch and the switch icon will turn green to show it is activated. Tap the back button to return to the Switches window. Your switch is now connected in Grid, however you will need to choose how it works when it is activated.
- Page 106 choose what happens on your grid set when a switch is activated. You can choose from Switch scanning, Switch joystick or Switch elimination. You can configure how your chosen activation method works with the Activation button. Switch scanning Switch scanning allows you to locate the cell in Grid that you wish to activate, by following a highlight moving through the grid set.
- Page 107 Selecting Activation will show your Switch scanning options. Under the Advance heading, you can use the drop down menu to choose how you would like to scan across your grid sets. “Hi” An example of a column then row scan You can also select if you would like the scan to automatically advance, or if you want to use another switch manually control the scan with...
- Page 108 You also have a number of visual options to change how scanning looks. These are found under the Highlighting heading. Examples of cell highlighting when switch scanning You can adjust the colour and type of highlight as well as any magnification. You can also add a spoken description or sound that follows the highlight.
- Page 109 adapter or Bluetooth. Selecting Activation will let you choose how the joystick or set of switches will act. Under the Move heading you can choose how the joystick or switches respond with either holds or taps. You can add an additional switch to activate cells, or choose dwell to activate the last highlighted cell.
- Page 110 With switch elimination, your grid is split into sections that are activated by an assigned switch. In the example below Switch 1 triggers cells with a red background and Switch 2 triggers cells with a blue background. “Hi” Under the Activation button, you can configure switch elimination to use 2 or 4 switches.
- Page 111 Switch commands You can assign specific Grid commands to a switch. These commands will be activated when the switch is pressed. You can add multiple commands to a switch if needed. You can set a switch to trigger a sound, go to the home page of your grid set or turn on the TV.
- Page 112 To add a new switch, select the Add switch button. Choose a connected Switch. A switch that is being used for access can also have commands assigned to them. Select Add command and find the command you wish to trigger. If the command has additional options, such as specifying which grid to open, or what sound to make, selecting Next lets you customise the...
- Page 113 Repeating this process will add additional commands, and you can drag and drop each command to change the order in which they will be triggered. Switch presses You can filter and adjust how your switches respond to accidental presses under the Switch presses button.
- Page 114 Alternative switch methods You can use other input devices as a switch, such as a mouse, keyboard, game controller or the Grid Pad touch screen. Select the Connection button from Menu - Settings - Access - Switches. Under the drop down list you can select from a number of other devices that can be used as a switch.
- Page 115 Each button on the device can be configured as a separate switch. If you are using a switch interface, this may also be configured under the Joystick options. Keyboard If you attach a keyboard to your Grid Pad either with USB or Bluetooth, you can use any key to act as a switch.
- Page 116 switch, you will no longer be able to use that key normally while Grid is open. Mouse You can configure the buttons of a connected mouse to act as a switch. As with assigning a keyboard key, you will not be able to use the button to navigate your Grid Pad once it is assigned as a switch in Grid.
- Page 117 Be aware, to continue to edit or access your Grid Pad outside of Grid, you will need to connect a mouse and keyboard. Other devices Most switches connect either to your switch ports, or to the USB ports and are shown under the Joystick heading.
-
Page 118: Switch Access Case Study
Switch access case study Diego is learning how to use Grid with a switch. Previously, his switch scanning was set to move forward automatically, which meant he made a lot of mistakes and quickly lost confidence. His communication partner has decided to try partner assisted scanning. - Page 119 his switch to select the cell he wants. In Grid settings this is called Tap to advance. “Yes!” This method allows the communication partner to set the pace to a speed that works well for Diego. If they can see Diego reaching for his switch, they can pause to give Diego time to hit The communication partner can also turn on Speak description when Highlighting, to give...
-
Page 120: Voice Activation
Voice activation Voice activation allows you to trigger cells in Grid with voice commands. “Hey Grid, TV! On! Channel Two!” This can be a great tool for using Grid to control other devices like TVs and stereos. To use this activation method, you will need to use either the microphone built into your Grid Pad, or attach a headset using the USB ports or Bluetooth. - Page 121 use the Wake up phrase again. Improving voice accuracy You have a number of options to improve how Grid responds to your voice. The Configure and Improve accuracy options are tools that will help tweak your settings to ensure your voice is being picked up correctly.
- Page 122 If you are using your Grid Pad for voice access, you may also want to consider a dedicated USB microphone which can improve accuracy. You can also use Bluetooth headsets and microphones.
-
Page 124: Grid Pad 10S Features
Grid Pad 10s features Your Grid Pad 10s has many extra features for you to take advantage of. This section explains these features so you can turn your device on and off remotely, connect a smartphone and send your speech and more to the second screen. - Page 125 Remote Power Button Using the Remote Power Button switch ports Changing the Remote Power Button batteries Pairing the Remote Power Button Daylight screen Using the second screen Using infrared Setting up and infrared remote Setting up and infrared remote manually Connecting a phone Programming buttons...
-
Page 126: Remote Power Button
Remote Power Button Your Grid Pad has a Remote Power Button included. The Remote Power Button allows you to turn your Grid Pad on and off. It can also be used to setup switches away from the device. The Remote Power Button comes paired with your Grid Pad out of the box. - Page 127 You can configure how your Remote Power Button behaves using Grid. You can find the settings in Menu - Settings - Computer. From this screen you can toggle if you want your Remote Power Button to Turn on with remote and Turn off with remote.
-
Page 128: Using The Remote Power Button Switch Ports
Using the Remote Power Button switch ports The two ports on the top of your remote power button allow you to connect one or two switches with a standard 3.5mm plug. Switch port 1 can also act as a power button, allowing you to use a connected switch to turn your device on and off. - Page 129 A switch attached to Port 1 of the Remote Power Button will do the same thing as a switch plugged in to Port 1 on your Grid Pad, so you can use it to activate cells in Grid and toggle the device to power off with a long hold.
-
Page 130: Changing The Remote Power Button Batteries
Changing the batteries The Remote Power Button uses two AAA batteries. To change the batteries of your remote power button you need to use a screwdriver to remove the four screws from the rear of the device. Remove the battery cover, and the spent batteries and replace with new ones. -
Page 131: Pairing The Remote Power Button
Pairing the Remote Power Button The Remote Power Button is paired with your Grid Pad out of the box. You may need to pair it again after changing the batteries. Press and hold both volume buttons on your Grid Pad for 10 seconds. The LED on the front of the Grid Pad will flash. -
Page 132: Daylight Screen
Daylight screen The screen on you Grid Pad is a daylight bright screen. This means it can be seen clearly in bright sunlight when it is set to its maximum brightness. Note that the brighter the screen is set, the more battery it will use. - Page 133 Grid 3 You can control the brightness of the screen from the settings or options grids of many grid sets. Look for the brightness commands. These sometimes are single cells that increase the brightness when selected.
-
Page 134: Using The Second Screen
Using the second screen The second screen on your Grid Pad will display your sentences as you speak from Grid 3. You can change how it acts with settings found within your grid sets. You can also turn the screen on or off from within a grid set. - Page 135 Grid commands that effect the second screen Speak as you type If you set Grid to Speak as you type, the second screen will display each word as it is entered. If you toggle Speak as you type to off, the second screen will show three animated dots, to show that you are currently writing.
- Page 136 You can find additional options for Speak as you type in the Grid Settings. You can find these under Menu - Settings - Speech. Here you can toggle between Sentences, Words, Characters and if speaking should be enabled whilst using Computer Control. Second screen Toggling the Second screen cell will turn the screen On or Off.
- Page 137 Mute The second screen will continue to display your messages, even if the volume of the Grid Pad is muted. This means you can share a quiet message, without broadcasting loud speech. Adding these cells to your grid sets You can find the Second screen, Speak as you type and Mute cells in the settings or tools of many grid sets.
-
Page 138: Using Infrared
Using infrared Your Grid Pad has both an infrared (IR) receiver and transmitter. The IR receiver is used to learn controls from IR remotes. The IR transmitters are used to send IR commands from Grid, to devices such as TVs and stereos. -
Page 139: Setting Up And Infrared Remote
Using Infrared remote files Smartbox keep a list of different IR remote codes for many home entertainment devices. Before you start setting up your devices, check the list to see if we have the relevant codes pre- programmed to save you time. -
Page 140: Setting Up And Infrared Remote Manually
To install a .remote file, download the file you need from our website, close down Grid 3 and open your File Explorer. Navigate to: Users\Public\Documents\ Smartbox\Grid 3\Environment control Accessories Copy the .remote file into this folder and open Grid 3. -
Page 141: Setting Up And Infrared Remote Manually
Setting up an infrared remote manually To set up a remote manually, open Grid 3 and go to Settings – Environment control. Under Accessories select Add. You will see a list of accessories. Select the type you would like to configure, and you will be taken to the learning screen. - Page 142 Here you can name your device, change the icon and learn remote actions. Select the action you wish to learn, for example Power, then tap the Learn button on the right side of the window. The Learn infrared window will appear and you will be asked to follow the instructions on the screen.
- Page 143 When the IR code is received, this LED will blink once. Once complete, the action will turn green and you can test it by tapping Transmit now. Follow these steps for each corresponding action that appears on your remote, then click OK to save and go back to the Environment control window.
- Page 144 type of accessory, you can use auto content cells in your Environment control grid sets. If you have a TV in the bedroom and in the living room for example, you can create two Television auto content cells to choose which TV you are sending commands to.
- Page 145 instructions on the screen and click OK to add the command to a cell.
-
Page 146: Connecting A Phone
Connecting a phone You can connect an Android or Apple iPhone to your Grid Pad so that you can read and send SMS messages and make and receive phone calls. This uses Bluetooth, so you will need to have your phone on and near your Grid Pad. You can connect Android devices running Android 6 and above or iPhone 6 and above running the most recent OS (iOS13 at time of... - Page 147 Discoverable phones will appear on the Phone screen. Tap Connect next to your phone to begin pairing. Your phone will display a notification to confirm, often with a pin code. Select ‘Confirm’ or ‘Yes’ on this to continue pairing. You may also get a couple of additional prompts on your phone while it pairs.
-
Page 148: Programming Buttons
Programming buttons The volume buttons can be programmed in Grid to act as switches. They can be assigned a number of commands, so you can use them to close a grid set, open a specific grid, adjust brightness and more. Open Settings - Access - Switches. - Page 149 Tap back. You can now assign commands to your button by selecting the switch.
-
Page 150: Looking After Your Device
Looking after your Grid Pad Your Grid Pad is a tough device, but to keep things running smoothly you need to keep your device up to date, backed up and clean. If you do have any problems, you can also find out where to get support. - Page 151 Updating Grid 3 Updating Windows Backup your grid sets using Dropbox Backup your Grid user Cleaning and storing your Grid Pad Antimicrobial properties Support Finding your model and serial number...
-
Page 152: Updating Grid
Tap the icon and follow the on screen instructions. Grid will restart as part of this process. Checking for updates manually Open the Start menu. Browse to the Smartbox folder. Select Smartbox Update. - Page 153 This will update all Smartbox software on your Grid Pad, including Grid, Look to Learn and more. Early Access Before an official release, Grid enters a phase called Early Access. This is a preview release that demonstrates new features, and is the final stage of testing.
-
Page 154: Updating Windows
Updating Windows Your Grid Pad’s operating system, Windows, receives frequent updates from Microsoft. These keep your device secure and bug free as well as introduce new features. These will normally download while your Grid Pad is connected to the internet. These are then installed when your device is shut down or restarted. -
Page 155: Backup Your Grid Sets Using Dropbox
Dropbox It is important to keep a backup of your grid sets and user profile. You can link your Smartbox Account to a Dropbox account under Settings - Accounts. Select Dropbox then log in to link your accounts. When your Smartbox Account is linked to Dropbox, your grid sets and message banked files will be uploaded automatically. -
Page 156: Backup Your Grid User
Backup your Grid user You can take a complete copy of your Grid user from the Grid 3 User screen. Go to Menu - Settings and select your user name. At the bottom of the Settings window you will see the Backup User button. Tap this and you can choose where to save your backup. - Page 157 What information gets backed up? Settings Grid sets Message banked files Your Grid Explorer layout Predictions Dictionary Contacts Notes Email and text messages. Restoring a backup You can restore your user backup on the User select screen. If you are already in Grid you can access this by tapping Menu - Users.
-
Page 158: Cleaning And Storing Your Grid Pad
Cleaning and storing your Grid Pad The front glass of your Grid Pad can be cleaned using a microfibre cloth. Your Grid Pad should be cleaned regularly with an antibacterial wipe. You can also use alcohol-based wipes to clean both the screen and the outer case of the Grid Pad. - Page 159 Storing the Remote Power Button When packing away your Grid Pad, we recommend removing the AAA batteries from the Remote Power Button and disconnecting any switches.
-
Page 160: Antimicrobial Properties
Antimicrobial properties Grid Pad communication aids use Sanitized® technology within the case and screen. This technology is clinically proven to slow the growth of bacteria and the spread of viruses by using small particles of silver which prevent microbes from replicating. You can find this finish on: •... -
Page 161: Support
Support Our Support team are here to help you. Online chat thinksmartbox.com Email support@thinksmartbox.com Phone UK: 01684 578868 US: (844) 341-7386 Repairs Our Repairs team can look after your device in case of damage. -
Page 162: Finding Your Model And Serial Number
Finding your model and serial number When you contact our Support team, please have your device model and serial number to hand. This helps us identify the device you are having an issue with! You can find the serial number on the back of your Grid Pad. - Page 164 Supplier support contact Contacting Smartbox Our support team are here to help. You can reach our UK team weekdays on 01684 578868 You can reach our US team weekdays on (844) 341-7386 You can email us at support@thinksmartbox.com Grid Pad 10s - Guide - UK - B...
Need help?
Do you have a question about the GridPad 10S and is the answer not in the manual?
Questions and answers