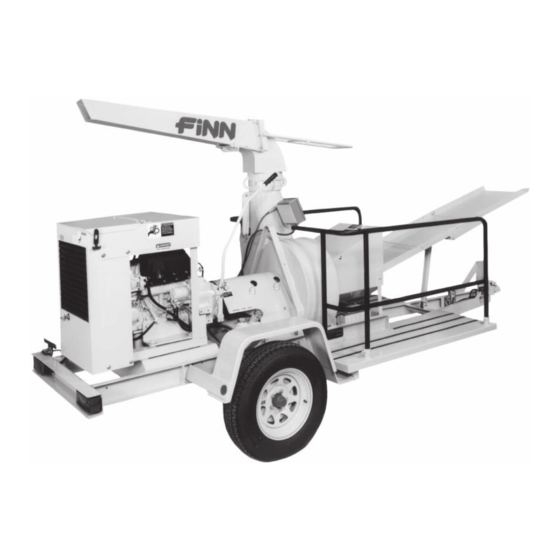
Finn B-70 Parts And Operator's Manual
Straw blower
Hide thumbs
Also See for B-70:
- Operator instructions and parts manual (89 pages) ,
- Parts and operator's manual (39 pages) ,
- Manual (38 pages)
Table of Contents
Advertisement
Advertisement
Table of Contents

Related Manuals for Finn B-70


Summary of Contents for Finn B-70
- Page 1 Activate Activate Your Warranty Your Warranty By Registering By Registering TODAY!!! TODAY!!! 9281 LeSaint Drive • Fairfield, Ohio 45014 Phone (513) 874-2818 • Fax (513) 874-2914 1-800-543-7166 B-70 Straw Blower Parts and Operator’s Manual Model MS Serial No. _____________ LBB70-MS...
- Page 2 IF FINN CORPORATION DOES NOT HAVE YOUR COMPLETED REGISTRATION FORM ON FILE, YOUR WARRANTY CLAIM WILL BE DENIED. Once your FINN equipment has been registered, your FINN Limited Warranty will be activated per the warranty statement on the next page.
- Page 3 Follow the instruction sheet, on property damage sustained by a person claiming to be a third party how to use your Finn Oil Analysis Kit that comes with the Kit. Failure beneficiary of a surviving warranty under the law of any jurisdiction.
-
Page 4: Table Of Contents
Definition Of Mulching ........5 The Finn B-70 Straw Blower And How It Works ....5 Towing Vehicle . -
Page 5: Safety First
SAFETY FIRST With any piece of equipment, new or used, the most important part of its operation is SAFETY! FINN Corporation encourages you and your employ- ees to familiarize yourselves with your new equip- ment and stresses safe operation. The first five pages of this manual are a summary of the main safety aspects associated with this unit. -
Page 6: Straw Blower Safety Summary Section
Practice all other usual and customary safe working precautions. Above all, remember that safety is up to you. The FiNN STRAW BLOWER is intended to be used as an applicator of vegetative hay or straw mulches onto the seedbed. Its use with other products or for other applications must be by approval of the product’s manufacturer. - Page 7 12. Do not attempt to pull any- It is recommended that only authorized, genuine thing out of the feed chute FiNN replacement parts be used on the machine. or shredder box when Make certain that all decals on the machine are machine is in operation.
- Page 8 CURRENT SET OF SAFETY DECALS Both the single and double chains must be crossed under the tongue. They must be oriented in such a manner as to prevent the tongue from dropping to the ground in the event of failure to the hitch, coupler or ball.
-
Page 9: Introduction
TOWING VEHICLE: The truck used to tow the FINN B-70 Straw Blower should have a bed large enough to carry the quantity of mulch needed for economical operation. The truck must be equipped with a ball or pintle type hitch to tow the Straw Blower. -
Page 10: Equipment Check
EQUIPMENT CHECK: WARNING Equipment check should be made with the engine OFF and all rotating parts stopped. Failure to comply could result in death or serious injury. 1. Tool kit - make sure that it contains all prescribed items (see tool kit list, page 31). 2. -
Page 11: Crew Members And Their Duties
BLOWER DISCHARGE: The B-70 Straw Blower should be towed to a point approximately 20 ft (6 m) from the area where the mulch is to be applied. The operator should elevate the discharge spout to about 10 degrees above the plane of the seedbed so that the mulch floats onto the seedbed. -
Page 12: Cleaning And Maintenance
CLEANING AND MAINTENANCE: AFTER FIRST 4 TO 8 HOURS OF OPERATION: 1. Check and adjust clutch. See page 10. 2. Torque wheel lugs. Torque again after 7 days (Trailer option only). DAILY CLEAN-UP MAINTENANCE: Follow this procedure daily to keep the equipment in good operating condition: 1. -
Page 13: Lubrication And Fluids Chart
LUBRICATION AND FLUIDS CHART Ref. No. Location Lubricant Frequency Number Grease drive shaft bearings. Weekly Repack wheel bearings. Annually Check engine oil level. Daily Check air cleaner. Daily Change engine oil and filter. See Eng. Manual Grease clutch shaft bearings. Daily Grease clutch lever bearing. -
Page 14: Clutch Care And Maintenance
CLUTCH CARE AND MAINTENANCE: This is a short, simple outline of the Twin Disk clutch adjustment and lubrication procedure. When performing maintenance beyond this brief outline, refer to the Twin Disk Care and Operations manual. In order to properly identify parts when ordering replacement parts, always refer to the unit and specification number stamped on the nameplate located on the topcenter of the power take-off housing. - Page 15 NOTES...
- Page 16 NOTES...
-
Page 17: Parts Manual Section
B-70 Straw Blower Parts Manual Model MS... - Page 18 WHEN ORDERING PARTS, BE SURE TO STATE SERIAL NUMBER OF MACHINE...
-
Page 19: Discharge Assembly
DISCHARGE ASSEMBLY Ref. No. Part Number Description No. Req’d 031247 Transition Assembly 031018-01 Elbow Bearing 031086 Transition Seal 031109 Seal Banding 32” 031243-08 Elbow Hinge Rod 031239 Elbow Assembly 031241 Elbow Handle 031242-03 Elbow Seal-Upper 031341 Seal Plate Assembly 031338-01 Seal Plate Hinge 031238-04 Bottom Seal Plate... - Page 20 SHREDDER BOX AND FEED CHUTE (STANDARD TRAILER MODEL) Ref. No. Part Number Description No. Req’d 031287 Shredder Box 031284 Shredder Box Cover 031158-10 Feed Chute Hinge Pin w/ Nuts 031157 Feed Chute 031158-05 Feed Chute Stop w/ Nuts 030898 Feed Chute Extension 031184-01 Upper Feed Chute Stand 031184-03...
- Page 21 SHREDDER BOX AND FEED CHUTE (R-H SKID MODEL) Ref. No. Part Number Description No. Req’d 031292 Shredder Box Weldment 031293 Feed Chute Weldment 031289-01 Feed Chute Cover 031294 Feed Chute Extension 031295-01 Door 031096-04 Hinge Pin 031295-04 Left Leg Weldment 031295-05 Right Leg Weldment WHEN ORDERING PARTS, BE SURE TO STATE...
-
Page 22: Blower And Drive
BLOWER AND DRIVE Ref. No. Part Number Description No. Req’d 031273 Coupling Half, Motor 031272 Coupling Half, Blower 031274 Coupling Insert 030712 Bearing 030904 Blower Shaft 031029 Blower Blade w/Hub 030877 Blower Hub 190125-80 Key, Bushing to Shaft - 3/8 x 3/8 x 5 030873 Key, Hub to Bushing - 3/8 x 3/8 x 3 030950... -
Page 23: Trailer Wiring
BROWN BROWN BROWN WHITE STARTER GROUND (WHITE) LEFT TURN RUNNING (YELLOW) BROWN BROWN LIGHTS (BROWN) BRAKES NOT USED (BLACK) RIGHT TURN (GREEN) Female Coupler Looking at Terminal End TRAILER WIRING Ref. No. Part No. Description No. Req'd 031210 Trailer Wiring Harness 075592 Trailer Plug 023424... - Page 24 WHEN ORDERING PARTS, BE SURE TO STATE SERIAL NUMBER OF MACHINE...
-
Page 25: Trailer Assembly
TRAILER ASSEMBLY Ref. No. Part No. Description No. Req’d. 031205 Platform Assembly 031183-01 Guard Rail-Right 031183-02 Guard Rail-Left 031189 Jack 031202 2” Ball Hitch Assembly 030482 2” Ball (Optional) 080043 2-1/2" Lunette Eye (for Pintle Hitch) 031196-01 Fender Assembly - Right 031196-02 Fender Assembly - Left 031167... - Page 26 WHEN ORDERING PARTS, BE SURE TO STATE SERIAL NUMBER OF MACHINE...
-
Page 27: Engine Parts
ENGINE PARTS Ref. No. Part Number Description No. Req'd 031473 Kubota V1505B-86 Engine 031452 Clutch Assembly 031219 Clutch Arm 031219 Clutch Handle 031424 Engine Mount 031376 Center Bushing Mount 055505 Snubbing Washer 031400 Engine Cradle Weldment 031395 Engine Top Cover 031419 Engine Cover Lid 031404-01... - Page 28 Drive Ring sold separately WHEN ORDERING PARTS, BE SURE TO STATE SERIAL NUMBER OF MACHINE...
-
Page 29: Power Take-Off Assembly
POWER TAKE OFF ASSEMBLY Ref. No. Part No. Description No Req'd 204274AM Bell Housing 101687AM Name Plate 206092AM Bolt 260843AM Grease Fitting 206252AM Drive Shaft 207438AM Main Bearing 206425AM Cross Shaft 204536AM Woodruff Key 308371AM Yoke Sub Assy 31219 Shifting Lever Sub Assembly 204475AM Output Key 207464AM... - Page 30 FUEL PUMP GLOW PLUGS WHITE WHITE BLUE SHUT DOWN HORN SYSTEM TEMPERATURE SWITCH SWITCH BROWN ALTERNATOR 16 Ga. Orange Brown Green Blue 12 Ga. Black BROWN ORANGE BLACK BLUE Blue Black Green Yellow 12 Ga. 16 Ga. GROUND STRAP YELLOW BATTERY CABLE STARTER BATTERY...
-
Page 31: Engine Wiring Harness
ENGINE WIRING HARNESS Part No. Description No. Req’d. 031457 Wiring Harness 002256-12 Battery 080096 Battery Cable 031350 Ground Strap 006499 Horn Assembly 007274 Hour Meter 020886 Horn Button 055568 Temperature Switch 022119 Safety Switch KU66711-55131 Ignition Switch 004934 Oil Switch KU15403-64490 Glow Plug Indicator Light 080103... - Page 32 BLACK GROUND GREEN TIMER HORN HOURMETER BUTTON GLOW PLUG INDICATOR LIGHT BLACK SAFETY SWITCH BROWN RED/BLACK BLUE Brown/ Yellow/ Blue Black Black Yellow Black Black/ Orange Brown Orange/ Blue/ Red/ Black Black Black WHEN ORDERING PARTS, BE SURE TO STATE SERIAL NUMBER OF MACHINE...
-
Page 33: Control Box Wiring
CONTROL BOX WIRING Part No. Description No. Req'd 007274 Hour Meter 022119 Safety Switch KU15694-65592 Glow Plug Timer 020886 Horn Button KU15403-64491 Glow Plug Indicator Light 006245 Generator Light KU66706-55120 Ignition Switch 023604 Electrical Housing 023601 Electrical Housing Plug 080304 Liquid Tight Fitting 031426 Control Box Wiring Harness... - Page 34 WHEN ORDERING PARTS, BE SURE TO STATE SERIAL NUMBER OF MACHINE...
-
Page 35: B70 Decals
B70 DECALS Ref. No. Part No. Description No. Req'd 011690 FINN Name Plate 031235 Decal “FINN” 020976 Decal "Patent Infringement" 031168 Decal "Patent Numbers" 022357 Decal "Caution: Turn Off Engine" 031297 Decal "Important: Clutch Adjustment" 020068 Decal "Danger: Do Not Open"... -
Page 36: Tool Kit
TOOL KIT Part No. Description No Req’d. 020057 #13 Twine Knife 020063 #11 Twine Knife Manual, Engine Manual, Parts and Operation WHEN ORDERING PARTS, BE SURE TO STATE SERIAL NUMBER OF MACHINE...
Need help?
Do you have a question about the B-70 and is the answer not in the manual?
Questions and answers